Images

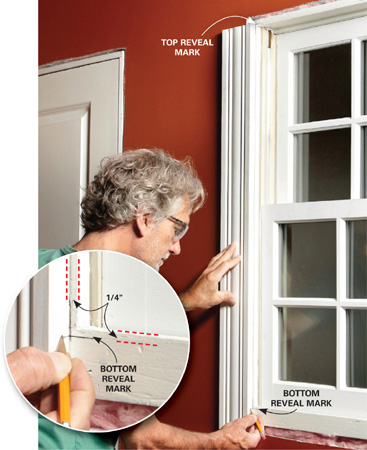
1 Mark the side casing. Cut one end of the casing square. Line up the cut end with the pencil mark indicating the 1/4-in. reveal and mark the opposite end for cutting. Cut and install both side casings, keeping them aligned with the reveal marks.

Images

2 Install the stool. Cut the stool so that it extends an inch past the casing on both ends. Then round the edges with a router or by sanding. Nail the stool to the side casings.
Images

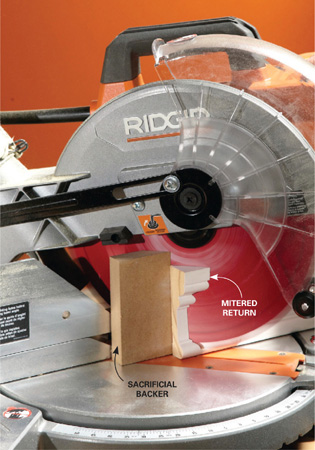
3 Cut the mitered apron returns. Set the miter saw to 45 degrees and cut a return from the apron molding. Use a sacrificial board to prevent the small cutoff from flying through the gap in the fence. Set the miter saw to the opposite angle to cut the other return from the opposite end of the molding.
Images

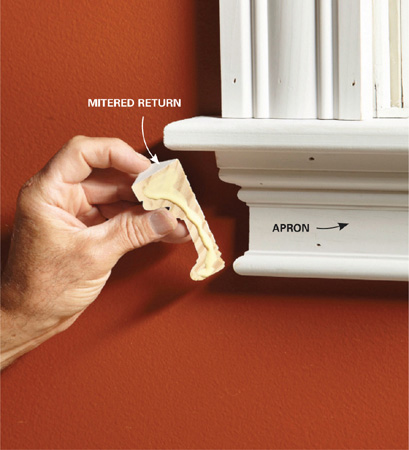
4 Finish the apron. Glue in the returns to complete the apron. Avoid nailing problems by letting the glue do the work. Just hold the return in place for 60 seconds while the glue grabs.
Images

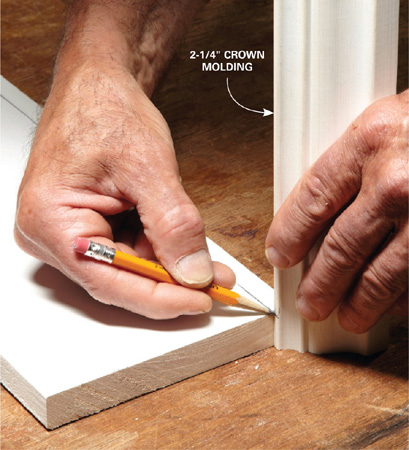
5 Mark the crown molding for the end return. Hold a piece of crown molding against the 1x6 you’ll be using for the head casing and mark it for cutting.
Images

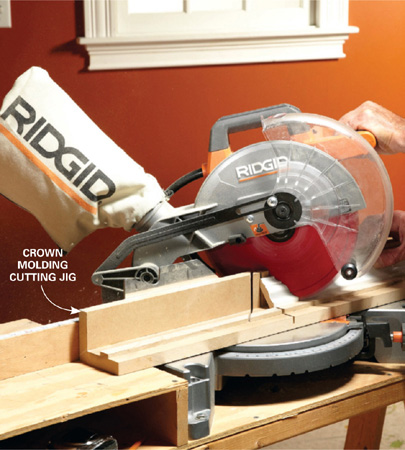
6 Build a crown-molding jig. Build a simple jig to hold the crown molding at the correct angle while you cut it. Position the molding upside down and set the saw to 45 degrees. Avoid cutting all the way through the jig.
Images

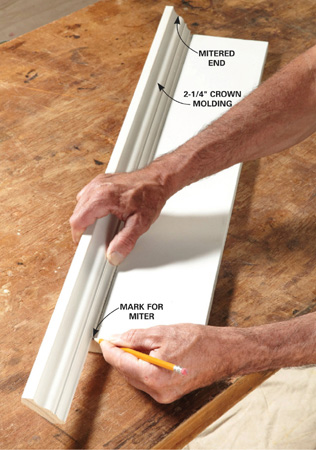
7 Mark the front crown molding. Cut a miter on one end of the front crown molding. Line up the cut with one end of the head casing and mark the opposite end for cutting. Set the molding in your jig and cut the opposite miter.
Images

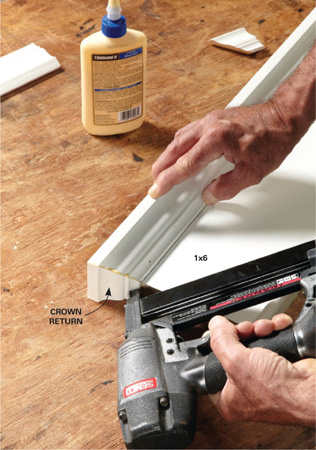
8 Attach the molding to the head casing. Nail the crown molding to the 1x6. Then glue and nail in the end returns. Nail the fillet to the bottom of the 1x6 to complete the head casing assembly.

Images

9 Finish the window trim. Set the head casing on the side casings, making sure the fillet overhangs evenly on both ends. Then nail it to the wall framing.

Doors are similar

Images

Door trim starts with a base block at the bottom

Trimming a door is just like trimming a window, except you start out with base blocks at the floor, as shown above. The base blocks should be about 3/8 in. wider than the casings. Trim them if necessary. The height of the base blocks should be about 1 in. greater than the height of the baseboard you’re planning to install.

Buying nail guns

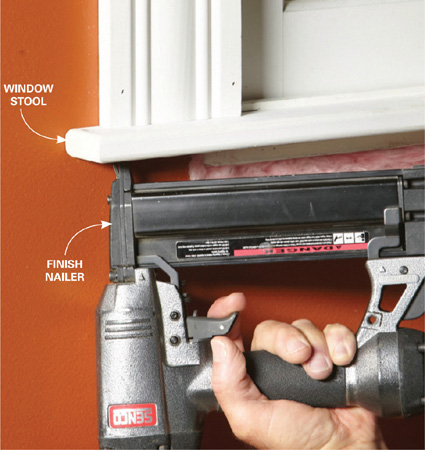
If you can afford it, buy both a 15-gauge finish nailer and an 18-gauge brad nailer. The two guns make a winning combination. The 15-gauge nails, ranging in length from about 1-1/4 in. to 2-1/2 in., are strong enough to secure door jambs and other heavy trim materials. Plus, the angled nose on most 15-gauge nailers allows you to nail in corners and drive toenails more easily.

Fifteen-gauge nails are too thick for many fine nailing tasks. And this is where the 18-gauge brad nailer excels. They shoot very skinny 5/8-in. to 1 1/2-in.-long, 18-gauge brads. These are perfect for nailing miters, nailing the skinny section of door or window casing to the jamb and other nailing jobs where a larger nail would split the wood or protrude through the other side of the material. Good-quality brad nailers are available for less than $100.

Having both guns connected to your compressor with separate hoses means you can nail the inside and outside edge of casings without having to change nails. And you'll always have just the right size nail for the job at hand.

If you don't do enough trim work to justify the expense of two nailers, a 16-gauge nail gun is a good choice. The 16-gauge nails are a bit skinnier and not quite as strong as 15-gauge nails. But they're less likely to split thin pieces of wood. Most 16-gauge nail guns will shoot nails ranging from 1 in. to 2-1/4 in. There are also a few 18-gauge brad nailers that can shoot nails up to 2-1/4 in., but the nails are not strong enough for heavy work like door jambs.

Hide the nail heads

Images

If you want your trim work to have a rustic, distressed look, go ahead and make the nail holes stand out. But if you’re seeking a smooth, furniture-like finish, you have to make those nail holes disappear. Hiding nail holes takes a little more time and patience, but you’ll get the fine, flawless appearance you want.

Begin by staining and sealing the trim before you put it up. Then buy colored putties to closely match the stain colors on the wood (Photo 3). (The other option, filling the holes with stainable filler before staining, is tricky unless you have a lot of experience.) Prestaining also makes the darker grain lines of the wood stand out. Position your nails there for the least visibility.

Buy several putty colors and mix them to match the wood color. Wood tone is rarely uniform, even when the wood is stained, so you can’t rely on only one color to fill every hole (Photo 3). Fine-tune your blends, and set your test piece alongside the trim to check the visibility of the nail holes under real light conditions. Lighting can significantly affect whether the filler blends or stands out.

Keep in mind that you can correct past mistakes or fix a situation where the wood has darkened after a year or two (with cherry, for example). Simply buy wood-tone felt-tip pens and touch up the filler (Photo 2). Or lightly drill out the most unsightly old filler holes with a small drill bit and refill them. Minwax is one common brand of colored putties and touch-up pens available at most hardware stores and home centers.