
WHAT IT TAKES
Time: 1 hour per door
Skill level: Intermediate

WHAT IT TAKES
Time: 1 hour per door
Skill level: Intermediate
Hanging a door correctly is one of the most satisfying jobs in the home improvement world, but it’s often the most challenging. Unless it’s installed correctly, your door can have uneven gaps along the jamb, or it can bind or not even latch.
Here you’ll learn foolproof tips and techniques that’ll give you great results every time. All you need are simple carpentry tools and some basic home improvement skills and tools to easily master the techniques. Allow about an hour and a half for your first door, and once you get the hang of it, your next door will go in twice as fast.
When you buy your door, pick up a package of wood shims and 4d, 6d and 8d finish nails. Also get a straight 7-ft. 2x4 and cut another 2x4 the width of your opening (Photo 1). Make sure that they are both straight as you sight down the edge. Since installing trim is part of the door installation, purchase some matching door trim and be sure you’ve got a miter saw to cut it. You’ll also need to pick up a lockset for the door.
Here the focus is on installing standard prehung doors. These have a door jamb that’s 4-9/16 in. wide and are made to fit into a 2x4 wall that’s 4-1/2 in. thick. This gives just enough of a fudge factor to have the jamb a bit proud of (raised above) the wall surface on each side and to make up for any irregularities in the trimmer studs of the walls. Most openings will be about 82 in. high for standard doors, so that’s what is shown here.
Before you order your door, check the width of your opening. It should be 2 to 2-1/2 in. wider than the door. This extra space gives you room to fit the jambs and the shims into the opening to hang the door. If your rough opening is 32 in., get a 30-in. prehung door. Also check the vertical sides of the rough opening to make sure they’re reasonably plumb. Openings that have a trimmer stud out of plumb more than 3/8 in. from top to bottom will make it nearly impossible to install the door. It would be somewhat like trying to put a rectangle into a parallelogram. Small variations from plumb are quite common, however. Checking both sides and getting familiar with any problems with the opening will give you an idea of how much and where to shim the jambs later.
Most installation problems occur because the floor isn’t level under the doorway. If the floor slopes slightly and the jamb isn’t trimmed to compensate, your latch won’t line up. You must check the floor with an accurate level as shown in Photo 1.
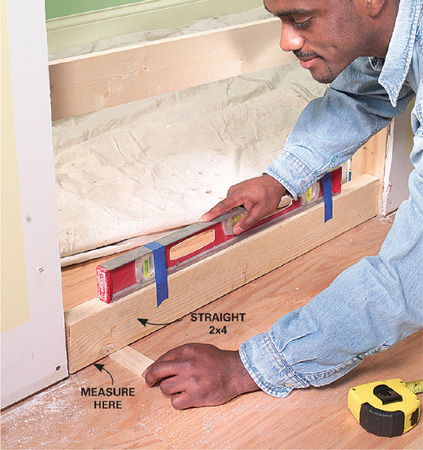
1 Check the floor for level and the jambs for plumb. Measure the exact amount the floor is off level. The opposite jamb must be cut by this much to level the door in the opening.
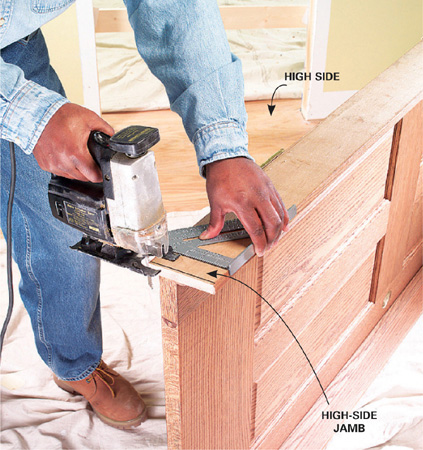
2 Mark and cut the jamb on the high side with your saw (remove any packaging strips at the bottom of the jambs). If you cut more than 1/4 in. from the jamb, you may need to trim the bottom of the door so it conforms to the floor slope.
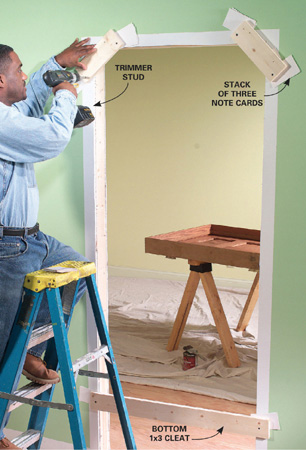
3 Nail temporary cleats to the wall opposite the door opening to act as stops for the door frame. To ensure the jambs are centered in the wall, shim them away from the drywall slightly with a stack of three note cards as shown.
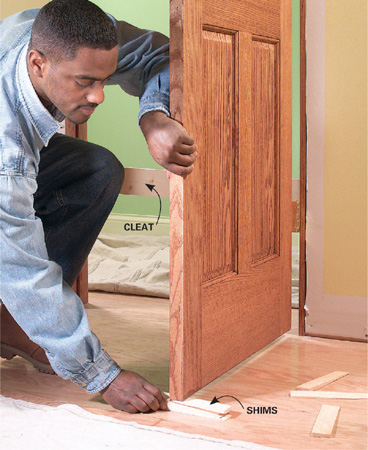
4 Push the door and frame into the opening. Open the door and shim the bottom edge of the open door to keep the frame tight against the stops on the other side.
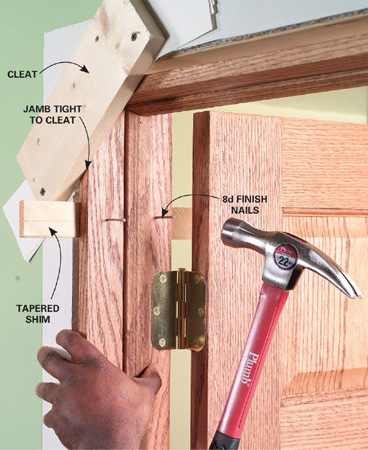
5 Center the frame in the opening. Slip a shim in from each side of the jamb (make sure the frame is pushed against the cleats) and nail the top sides of the door frame into the trimmer studs. The jamb should be perpendicular to your temporary cleats. Be careful not to twist the jamb as you nail it.
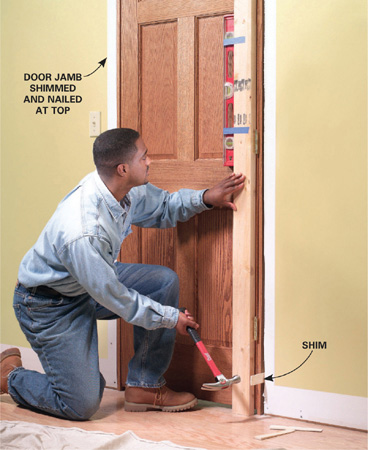
6 Shim the bottom of the door jamb up about 4 in. from the floor on the hinge side, making sure the hinge side is exactly plumb, and then nail it. Tape your level to a straight 2x4 as shown. Next, shim the center area of the jamb to straighten it and then nail it. Check the whole length with your straightedge.
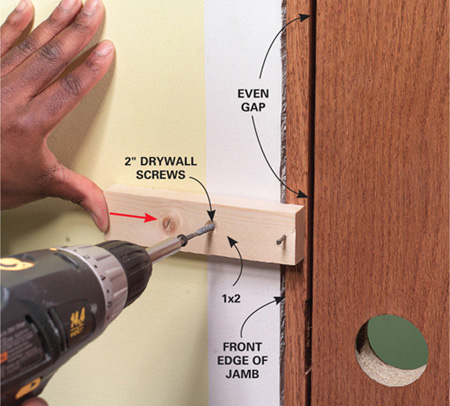
7 Tack a 4-in. 1x2 to the front edge of the jamb with a 4d finish nail. Set up an even 3/16-in. gap between the door and the strike-side jamb. Then screw the block to the studs to hold the jamb in this position.
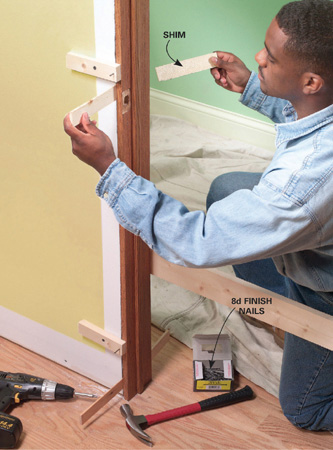
8 Shim and nail the strike side near the strike plate and then near the floor.
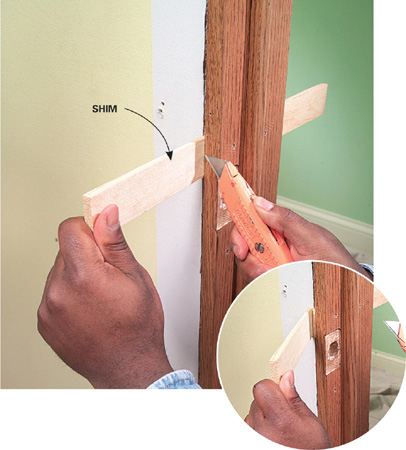
9 Score the shims several times with a sharp blade and then snap them off to make way for the trim.
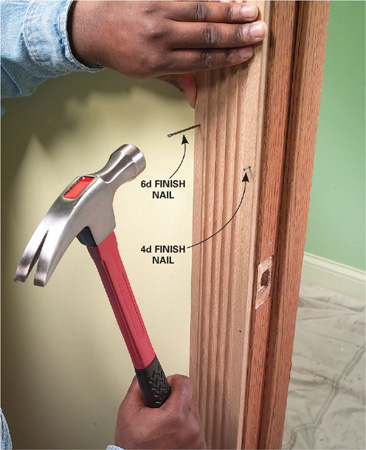
10 Nail the trim to the door frame with No. 4 finish nails. Nail the trim to the framing with No. 6 finish nails.
How do you fit the jamb to floors of different heights?