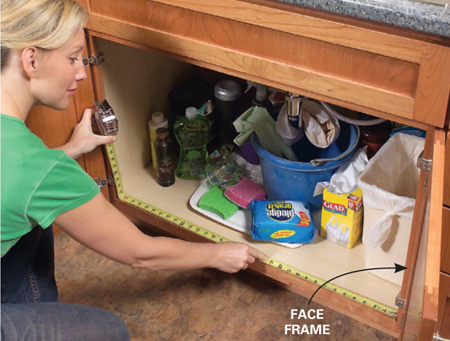
1 Measure the width of your kitchen base cabinet inside the frame. Cut the base (A) 1/4 in. narrower than the opening.
Materials list
ITEM |
QTY. |
3/4" x 4' x 8' hardwood plywood |
1 |
1x4 x16' maple |
1 |
1/2" x 2' x 2' hardwood plywood |
1 |
1x6 x 2' maple |
1 |
20" ball-bearing drawer slides |
4 prs. |
Wood glue |
1 pt. |
Construction adhesive |
1 pt. |
6d finish nails, small box |
1 |
1-5/8" wood screws, small box |
1 |
Cutting list
(This list applies to the rollout trays shown; dimensions may vary.)
KEY |
QTY. |
SIZE & DESCRIPTION |
A |
1 |
3/4" x 32-3/4" x 20" plywood base |
B |
3 |
3/4" x 3-1/2" x 20" base partitions |
C |
2 |
3/4" x 12-3/4" x 18-1/2" plywood tray bottom |
D |
4 |
3/4" x 3-1/2" x 18-1/2" tray sides |
E |
4 |
3/4" x 3-1/2" x 14-1/4" tray fronts and backs |
F |
2 |
1/2" x 5-1/2" x 18-1/2" upper tray bottoms |
G |
2 |
3/4" x 5" x 18-1/2" upper tray (high side) |
H |
2 |
3/4" x 3" x 18-1/2" upper tray (low side) |
J |
4 |
3/4" x 5-1/2" x 5-1/2" upper tray front and back |
K |
4 |
1/2" x 5-1/2" x 20" side cleats (double layer) |

1 Measure the width of your kitchen base cabinet inside the frame. Cut the base (A) 1/4 in. narrower than the opening.
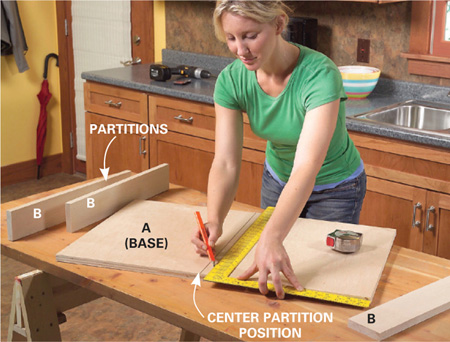
2 Find the center of the base (A) and mark it for the center partition. Cut the 20-in.-long partitions (B) from 1x4.
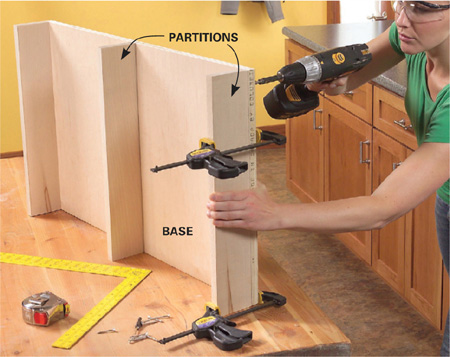
3 Clamp the partitions to the base, drill pilot holes, and glue and screw them to the base with No. 8 x 2-in. screws.
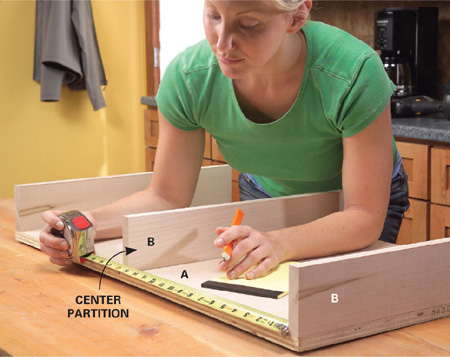
4 Measure the exact distance between the partitions. Make the outer dimension of the tray 1 in. narrower than this measurement to allow for the slides.
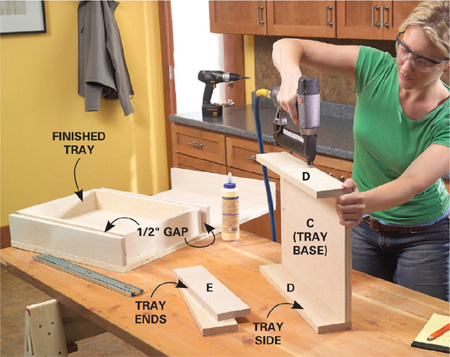
5 Cut the parts for the trays and glue and nail them together. Cut the bases perfectly square to keep the trays square.
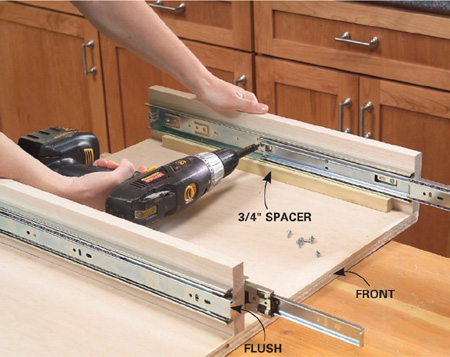
6 Set the drawer slides on 3/4-in. spacers, holding them flush with the front. Open them to expose the mounting holes and screw them to the partitions.
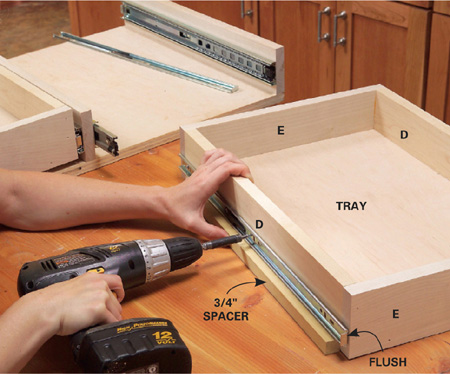
7 Remove the inner sections of the slides and screw them to the sides of the trays. Reassemble the slides and make sure they glide smoothly.
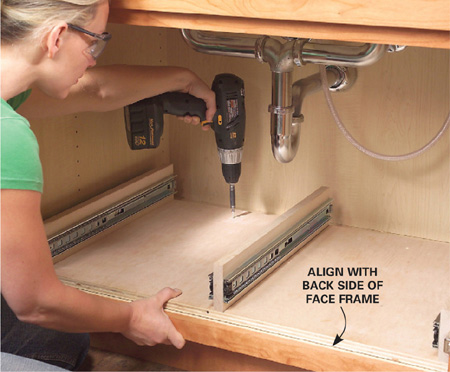
8 Insert the base assembly into the floor of the cabinet. Align the front of the base flush with the back side of the face frame. Screw the base to the floor of the cabinet.
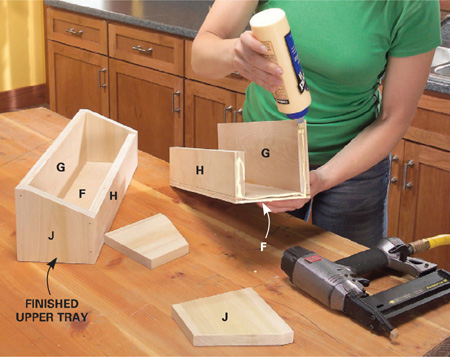
9 Cut the parts for the upper trays, drill pilot holes, and glue and screw them together. Cut two thicknesses of plywood and glue them together to make the 1-in.-thick side cleats (K).
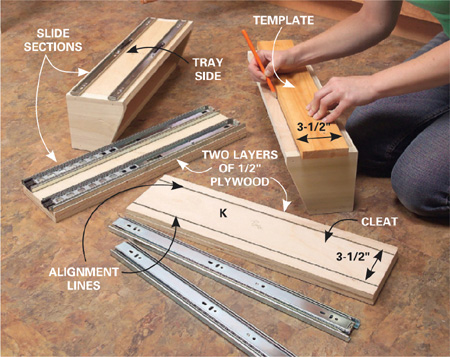
10 Cut a 3-1/2-in.-wide template, center it on the cleats and the tall side of each tray and trace the edges. Center the mounting holes of the slides on these lines and screw them to the cleats (outer sections) and tray sides (inner sections).
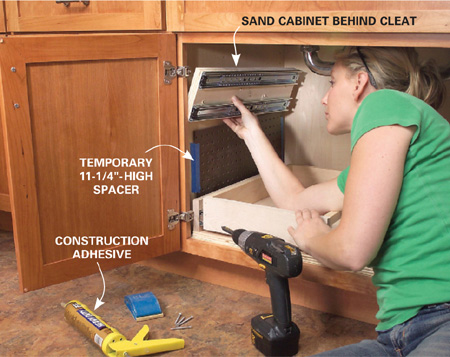
11 Sand the side of the cabinet to increase the adhesion, then glue and screw the cleats to the sides of the cabinet. Cut a plywood spacer to hold the cleat even.
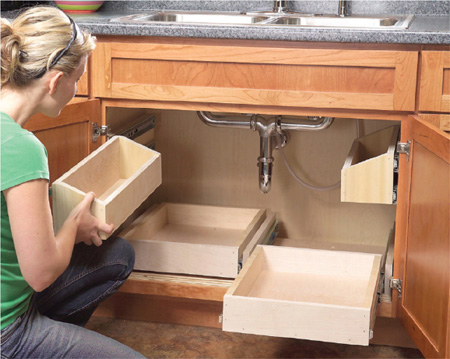
12 Slide the upper trays into position and test the fit. Seal the trays with two coats of polyurethane to make cleaning easier.