WHAT IT TAKES
Time: 2 hours
Skill level: Beginner

WHAT IT TAKES
Time: 2 hours
Skill level: Beginner
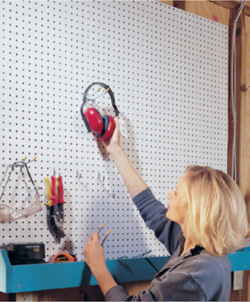
Probably the most essential storage item in any garage is a pegboard system. It puts your most commonly used tools within quick and easy reach. Add a bin to the bottom of the pegboard to catch all those odds and ends that don’t have a home, and you won’t have any excuse for not keeping your workbench or gardening bench clear of clutter.
The construction only takes about two hours. Start by cutting all the parts to size with a circular saw. See Fig. A for sizes.
Caution: Cut the short end caps from the long 1x6s. Don’t try cutting short pieces from short boards.
Build a frame of 2x2s with one running across the center, connecting all joints with a 3-in. drywall screw. Then fasten 1/4-in. pegboard to the frame (Photo 1). One-quarter inch has a little more heft than 1/8-in. and the larger hooks it requires stay put better. Some home centers and lumber yards stock the pegboard prefinished in white. If you can find it, it’s worth it. It’ll brighten up the garage and save you painting time.
The trickiest part is attaching the front edge to the shelf. Using a couple of small bar clamps takes the frustration out of this step (Photo 2). Align the 1x4 front edge so it’s 1/2 in. down from the shelf and clamp it to the pegboard and frame. Set back the shelf with that same 1/2-in. reveal. This 1/2-in. reveal strengthens the shelf. Predrill your screw holes with a 1/8-in. bit.

Next attach the end caps (Photo 3) to secure the shelf to the frame and to keep the front edge from tipping forward.
Finally, mount the pegboard low enough so you can easily reach your tools (Photo 4). If you’re working alone, level and screw a 2x6 to the studs to temporarily support the pegboard while you attach it to the wall. Drive 3-in. screws through each member of the frame into every stud the pegboard covers.