1 Lay a quick foundation with minimal digging by setting concrete blocks on gravel. Level from high to low spots with a string level.
1 Lay a quick foundation with minimal digging by setting concrete blocks on gravel. Level from high to low spots with a string level.
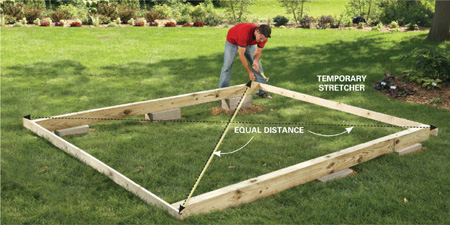
2 Take diagonal measurements and tap one beam forward or back to square the beams. Temporary stretchers hold the beams parallel.
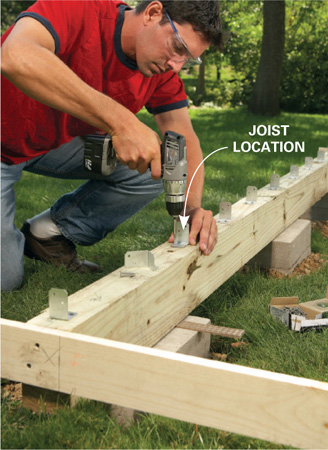
3 Screw on angle brackets at each joist location instead of toenailing, which can split and weaken the joists and knock the beam out of square.

4 Install the middle and end joists, then screw on the rim joists, using clamps (or a helper) to hold them in place.

5 For strong connections at the corners, set corner blocking between the last two joists, then nail the rim joist from both directions.
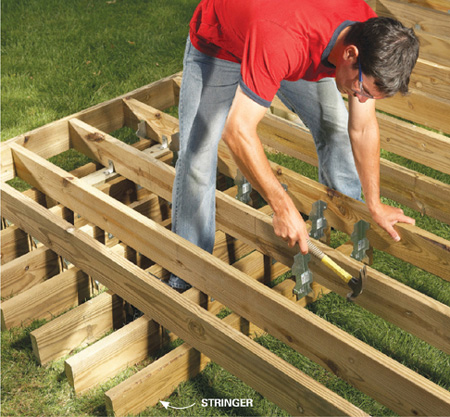
6 Frame the steps next. You can avoid additional footings by hanging stringers from the deck joists with metal angles or 2x4s.

7 Attach the deck boards. Decks look best when you use hidden fasteners, but they make installation slower. Trim the deck boards flush with the rim joist when you’re done.
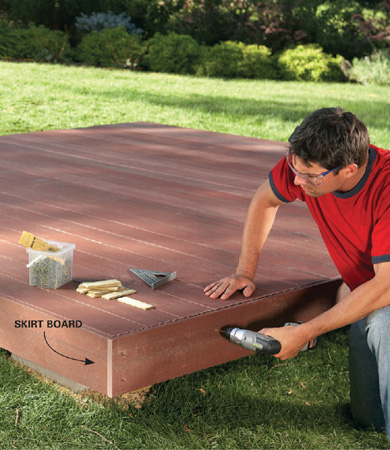
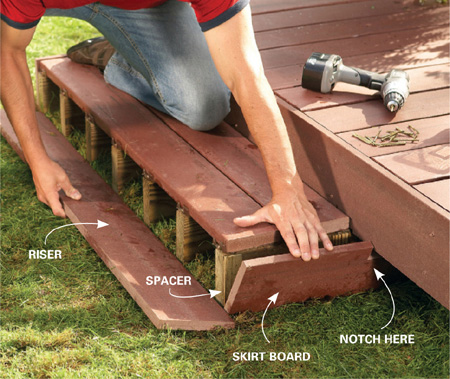
8 Wrap the deck with skirt boards that match the decking, driving trim head screws just below the surface at the spacer locations (see Figure A).