Chapter 11
THE COOKIE BASKET
Peanut Butter Cookies
Ginger & Molasses Cookies
Chocolate & Apricot Cookies
Olivia’s Old-Fashioned Chocolate Chip Cookies
Sour Cherry Shortbread
Roasted Walnut & Anise Biscotti
Almond & Orange Biscotti
Fruit & Oat Bars
Caramel Pecan Brownies
Bittersweet Chocolate Brownies
There’s something special about having a freshly baked cookie with a cold glass of milk. We all know the feeling. It is part cherished memory, part simple sensory satisfaction. For most of us, baking cookies is the first chance we ever have to bake, and the experience can lead to a happy lifetime of cooking. Cookies and brownies are probably the most frequently baked items in a home kitchen. The basic ingredients of flour, sugar, and butter are already in most homes, and the recipes are generally easy to follow. To make sure your cookies are as good as they can be, it helps to follow a few simple rules.
• Cream the butter. If a cookie recipe calls for butter and sugar, it’s important to mix, or cream, the two together. Use a stand mixer to cream the ingredients with the paddle attachment for about five minutes. Start out on low speed for the first minute or so, then increase the speed to medium. This process aerates the butter, creating a light color and creamy texture, and ultimately gives the cookies more height.
• Pay attention to the eggs. As with all perishable ingredients, always use the freshest, highest quality eggs you can find. Add eggs to the cookie dough one at a time, making sure each egg is completely incorporated into the batter before adding another. I recommend scraping the sides and bottom of the mixing bowl frequently with a rubber spatula to make sure every bit of the egg is mixed into the dough.
• Fold in the dry ingredients. Rather than separately adding dry ingredients such as flour, baking soda, and salt to a cookie dough, combine them in one bowl and mix well with a whisk, so that they will be evenly distributed throughout the cookies. Then, when the instructions call for it, fold the dry ingredients into the wet ingredients with a rubber spatula. Add small amounts at a time, folding in each batch until all of the flour has been absorbed into the dough. Folding the dough helps avoid over-mixing, which could result in tough cookies.
• Chill the dough. It’s tempting to form and bake your cookies as soon as you make the dough—waiting can be agony when there are hungry people around—but chilling the finished dough for one hour in the refrigerator will ensure thicker, chewier cookies. If the butter inside the dough is not chilled before baking, it will melt quickly when placed in the oven, resulting in flat cookies that burn around the edges but stay raw in the middle. It’s worth waiting an hour to make the best cookies possible.
Simply put, a tray of fresh cookies or brownies is comfort food at its best. This chapter contains recipes for Macrina’s most popular cookies, biscotti, and bar cookies. We’ve included the sought-after recipe for our Ginger & Molasses Cookies, crisp on the edges, chewy in the center, and filled with freshly grated ginger. It is easy to prepare and kids can help roll the balls of dough in sugar. The Caramel Pecan Brownies are decadent enough to satisfy even the most serious sweet tooth. You’ll also find a recipe for Roasted Walnut & Anise Biscotti, which are light and crisp and which make a beautiful gift when piled in a decorative tin. Whatever your favorite recipes turn out to be, enjoy sharing the results with friends and family, and you can’t go wrong.
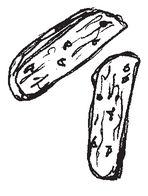
PEANUT BUTTER COOKIES
Coated in sugar and scored with a fork, these dense and moist cookies are the real, old-fashioned favorites. For the best cookies, use the highest quality natural peanut butter you can find.
Makes 16 cookies
2¼ cups unbleached all-purpose flour
1 teaspoon baking powder
2 teaspoons baking soda
¼ teaspoon salt
10 tablespoons (1¼ sticks) unsalted butter, at room temperature
⅓ cup vegetable shortening, at room temperature
1 cup granulated sugar
¾ cup light brown sugar
1½ cups unsweetened chunky peanut butter
2 eggs
1 teaspoon pure vanilla extract
1 cup peanuts, coarsely chopped
• Combine flour, baking powder, baking soda, and salt in a medium bowl. Set aside.
• Combine butter, shortening, ½ cup of the granulated sugar, and brown sugar in the bowl of your stand mixer. Using the paddle attachment, mix briefly on low speed to start bringing the ingredients together. Increase speed to medium and mix for about 5 minutes, until the mixture is smooth and pale in color. Add peanut butter and mix until thoroughly combined, about 1 minute, scraping down the sides of the bowl as needed. Add 1 egg and mix until incorporated. Scrape down the sides, then add vanilla and the remaining egg. Mix until egg is fully absorbed, then remove the bowl from the mixer and scrape down the sides again.
• Using a rubber spatula, fold half of the flour mixture into the dough. After the flour is fully incorporated, fold in the rest of the flour mixture and continue folding until all of the flour has been absorbed.
• Cover your hands with a little flour and remove the cookie dough from the bowl. Place half of the dough on a sheet of parchment paper and form it into a 2-inch-thick log, about 8 inches long. Pour half of the peanuts onto the parchment paper and, using your hands, coat the log with the nuts. Tightly wrap the parchment paper around the log and twist the ends of the paper to seal the package. Repeat with remaining dough. Chill logs in the refrigerator for at least 1 hour. At this point the dough can be cut into cookies or stored in the refrigerator for up to 4 days.
• Preheat oven to 350°F. Line 2 rimmed baking sheets with parchment paper and pour the remaining ½ cup of granulated sugar into a pie pan or shallow bowl.
• Remove the chilled logs of dough from the refrigerator and carefully unwrap. Using a sharp knife, cut each of the logs into 8 (1-inch-thick) cookies. Dip one side of each cookie in sugar and place the cookies, sugar sides up, on the prepared baking sheets. Arrange 8 cookies on each baking sheet, leaving a 2-inch space between each cookie. Using a fork, score a crosshatch design in the center of each cookie. Place 1 sheet of cookies in the refrigerator while baking the other sheet.
• Bake cookies, 1 sheet at a time, on center rack of oven for 20 to 25 minutes each. To help the cookies bake evenly, rotate the baking sheet every 4 minutes or so. The finished cookies will be golden brown, and slightly puffed up. Let cool on the baking sheet for 10 minutes. The cooled cookies can be stored in an airtight container for up to 3 days.
GINGER & MOLASSES COOKIES
I think it’s the fresh ginger that makes these cookies so special. They also have the perfect balance of chewy and crisp.
Makes 16 cookies
2¼ cups unbleached all-purpose flour
1½ teaspoons baking soda
2 teaspoons cinnamon
1½ teaspoons ground cloves
1 teaspoon salt
½ cup vegetable shortening, at room temperature
6 tablespoons unsalted butter, at room temperature
1½ cups light brown sugar
2 eggs
2 teaspoons peeled and grated ginger
⅓ cup dark molasses
1 cup granulated sugar
• Combine flour, baking soda, cinnamon, ground cloves, and salt in a medium bowl. Mix with a whisk until evenly distributed and set aside.
• Combine shortening, butter, and brown sugar in the bowl of your stand mixer. Using the paddle attachment, mix on medium speed for about 5 minutes, until the mixture is smooth and pale in color. Add 1 egg and mix until incorporated. Scrape down the sides of the bowl. Add remaining egg and scrape down the sides of the bowl again. Add ginger and molasses and mix on low speed for 1 minute. The mixture may look as if it’s separating, but have no fear. It will come together once the dry ingredients are added. Remove the bowl from the mixer and scrape down the sides of the bowl again.
• Using a rubber spatula, fold half of the flour mixture into the dough. After the flour is fully incorporated, fold in the rest of the flour mixture and continue folding until all of the flour has been absorbed. Scrape down the sides of the bowl and cover it with plastic wrap. Chill in the refrigerator for at least 1 hour. At this point the dough can be formed into cookies or stored in the refrigerator for up to 4 days.
• Preheat oven to 350°F. Line 2 rimmed baking sheets with parchment paper and pour granulated sugar into a pie pan or shallow bowl.
• Scoop dough out of the bowl (I like to use a medium ice cream scoop) and roll the dough into 2-inch balls. Toss each of the balls in granulated sugar until evenly coated, then place 8 on each baking sheet, leaving 3 inches between each ball. Slightly flatten each ball of dough with the palm of your hand to keep the balls from rolling around.
• Place 1 sheet of cookies in the refrigerator while baking the other sheet.
• Bake cookies, 1 sheet at a time, on center rack of oven for 15 to 18 minutes each. To help the cookies bake evenly, rotate the baking sheet every 4 minutes or so. The finished cookies will be golden brown and slightly puffed up but will collapse while they cool. Let cool on the baking sheet for 15 minutes. The cooled cookies can be stored in an airtight container for up to 3 days.
CHOCOLATE & APRICOT COOKIES
This recipe originally came from Rick Katz, a talented pastry chef I’ve had the honor of working with on several occasions. We bake this cookie every day at the bakery and rarely have leftovers. I doubt you will either.
Makes 16 cookies
2¼ cups unbleached all-purpose flour
1 teaspoon baking soda
¼ teaspoon salt
½ teaspoon finely ground espresso beans
10 ounces bittersweet chocolate, coarsely chopped
¾ cup unsulfured dried apricots, diced
8 ounces (2 sticks) unsalted butter, at room temperature
¾ cup granulated sugar
¾ cup light brown sugar
2 eggs
2 teaspoons pure vanilla extract
• Combine flour, baking soda, salt, and espresso in a medium bowl. Mix with a whisk until evenly distributed. Add chocolate and apricots and mix well with a spoon. Set aside.
• Combine butter, granulated sugar, and brown sugar in the bowl of your stand mixer. Using the paddle attachment, mix on medium speed for about 5 minutes, until the mixture is smooth and pale in color. Add 1 egg and mix until incorporated. Scrape down the sides of the bowl, then add the remaining egg and vanilla extract. Continue mixing until incorporated, about 1 minute. Remove the bowl from the mixer and scrape down the sides of the bowl again.
• Using a rubber spatula, fold half of the dry ingredients into the dough. After the first batch is fully incorporated, fold in the rest of the dry ingredients and continue folding until all of the flour has been absorbed. Scrape down the sides of the bowl and cover it with plastic wrap. Chill in the refrigerator for at least 1 hour. At this point the dough can be formed into cookies or stored in the refrigerator for up to 4 days.
• Preheat oven to 350°F. Line 2 rimmed baking sheets with parchment paper.
• Scoop dough out of the bowl (I like to use a medium ice cream scoop) and roll the dough into 2-inch balls. Place 8 balls on each baking sheet, leaving 2 inches between each ball. Flatten the balls with the palm of your hand, making them all about ½ inch thick. Place 1 baking sheet of cookies in the refrigerator while baking the other sheet.
• Bake cookies, one sheet at a time, on center rack of oven for 15 to 18 minutes each. To help the cookies bake evenly, rotate the baking sheet every 4 minutes or so. The finished cookies will be golden brown around the edges and slightly soft in the center. Let cool on the baking sheet for 15 minutes. The cooled cookies can be stored in an airtight container for up to 3 days.
OLIVIA’S OLD-FASHIONED CHOCOLATE CHIP COOKIES
This recipe, Macrina’s version of the traditional Toll House classic, makes the best chocolate chip cookies I’ve ever tasted. The recipe is actually named after two special Olivias: my daughter and the grandmother of our pastry chef, Karra Wise.
Makes 16 cookies
2¼ cups unbleached all-purpose flour
1 teaspoon baking soda
1 teaspoon salt
3 cups semi-sweet chocolate chips
8 tablespoons (1 stick) unsalted butter, at room temperature
½ cup vegetable shortening, at room temperature
¾ cup granulated sugar
¾ cup light brown sugar
2 eggs
1 teaspoon pure vanilla extract
• Combine flour, baking soda, and salt in a medium bowl. Add chocolate chips and mix well with a spoon. Set aside.
• Combine butter, shortening, granulated sugar, and brown sugar in the bowl of your stand mixer. Using the paddle attachment, mix on medium speed for about 5 minutes, until the mixture is smooth and pale in color. Add 1 egg and mix until incorporated. Scrape down the sides of the bowl, then add the remaining egg and vanilla extract. Continue mixing until incorporated, about 1 minute. Remove the bowl from the mixer and scrape down the sides of the bowl again.
• Using a rubber spatula, fold half of the dry ingredients into the dough. After the first batch is fully incorporated, fold in the rest of the dry ingredients and continue folding until all of the flour has been absorbed. Scrape down the sides of the bowl and cover it with plastic wrap. Chill in the refrigerator for at least 1 hour. At this point the dough can be formed into cookies or stored in the refrigerator for up to 4 days.
• Preheat oven to 350°F. Line 2 rimmed baking sheets with parchment paper.
• Scoop dough out of the bowl (I like to use a medium ice cream scoop) and roll the dough into 2-inch balls. Place 8 balls on each baking sheet, leaving 3 inches between each ball. Flatten the balls with the palm of your hand to about 1 inch thick. Place 1 sheet of cookies in the refrigerator while baking the other sheet.
• Bake cookies, 1 sheet at a time, on center rack of oven for 15 to 18 minutes each. To help the cookies bake evenly, rotate the baking sheet very 4 minutes or so. The finished cookies will be golden brown around the edges, and still light in the center. Let cool on the baking sheet for 15 minutes. The cooled cookies can be stored in an airtight container for up to 3 days.
SOUR CHERRY SHORTBREAD
These flavorful butter cookies are easy to make, and the dough can be cut into all kinds of festive shapes. They make great holiday gifts and will last in an airtight container for up to one month.
Makes 3 dozen cookies
1 cup light brown sugar
½ cup cornstarch
3½ cups unbleached all-purpose flour
1 teaspoon salt
16 ounces (4 sticks) unsalted butter, chilled and cut into ¼-inch pieces
¾ cup dried tart cherries, coarsely chopped
1 tablespoon pure vanilla extract
Powdered sugar
• Combine brown sugar and cornstarch in the bowl of your stand mixer. Using the paddle attachment, mix on low speed for about 30 seconds to break up any clumps.
Creating Olivia’s Cookie
One of the best things about creating a new recipe is naming it. I generally like to keep the names simple and descriptive, but sometimes you just have to have fun with it. A good example is pastry chef Karra Wise’s Chocolate Eros Cake, which we make every Valentine’s Day. The name doesn’t necessarily tell you what the cake tastes like, but it sure gets your attention. A personal favorite of mine is Olivia’s Old-Fashioned Chocolate Chip Cookies, affectionately named after my daughter.
When my daughter was still in her stroller, we would often pass an afternoon by going on an adventure. We toured our neighborhood, looking at flowers, pointing out all the different colors we saw, and observing the other children. Halfway through our strolls we would stop for a juice and a cookie. We had some pretty good cookies together, but I had trouble finding just the right one. I wanted Olivia to know the kind of cookie my mom used to make, still warm, bursting with oozing chocolate chips.
The truth was that at the time we didn’t even make a cookie like that at Macrina. We had plenty of great cookies, but not the simple classic I was craving. So Karra and I got together and using the basic Toll House recipe as our starting point, came up with a winner. The name selection was easy, and the cookie quickly became our biggest seller. As an added bonus, I now have the pleasure of hearing customers say, “I’ll have an Olivia’s.”
Add flour and salt and mix for another 30 seconds. Drop in butter and continue mixing on low speed until the mixture is coarse and crumbly. Stop mixing as soon as the dough starts to come together. Add cherries and vanilla and mix just until the cherries are evenly distributed, 20 to 30 seconds.
• Pull dough from bowl onto a floured work surface and divide it into 2 equal pieces. Place 1 piece of dough on a sheet of parchment paper and roll the dough out ¼ inch thick. Lift parchment paper onto a rimmed baking sheet and cover with plastic wrap. Repeat with remaining piece of dough. Chill both baking sheets in the refrigerator for at least 1 hour.
• Preheat oven to 325°F.
• Remove baking sheets from the refrigerator. Using a sharp knife, cut the dough into 2-inch diamonds. Each sheet of dough should yield about 16 cookies. (You can also use your favorite cookie cutters to create a variety of shapes. Baking time will vary depending on the size of the cookies, so try to keep the sizes consistent.) Remove any excess dough and spread the cookies out on the parchment-lined baking sheets, leaving about 1 inch between the cookies. Place 1 sheet of cookies in the refrigerator while baking the other sheet
• Bake cookies, 1 sheet at a time, on center rack of oven for 20 to 25 minutes each. (Larger cookies will take longer.) To help the cookies bake evenly, rotate the baking sheet every 4 minutes or so. Keep a watchful eye on smaller cookies to make sure they don’t burn. The finished cookies will be golden brown on all sides, including the bottoms. Let cool on the baking sheet for at least 20 minutes, then dust with powdered sugar.
ROASTED WALNUT & ANISE BISCOTTI
We’ve been using this recipe at the bakery since the day we opened. Unlike a lot of traditional, harder biscotti that need to be dunked, these are light and crisp.
Makes 24 cookies
1 cup walnut halves
½ teaspoon anise seeds
1½ cups unbleached all-purpose flour
½ teaspoon baking powder
¼ teaspoon salt
4 tablespoons unsalted butter, at room temperature
¼ cup canola oil
½ cup granulated sugar
2 eggs
1 teaspoon pure vanilla extract
• Preheat oven to 350°F.
• Spread walnuts on a rimmed baking sheet and toast on center rack of oven for 7 to 10 minutes, or until golden brown. Let cool, then chop walnuts into medium pieces. Set aside.
• Toast anise seeds in a small sauté pan over medium heat until seeds are light brown and fragrant. Pour seeds onto a cutting board, let cool, then coarsely chop. (You can also chop the seeds in a clean coffee grinder.)
• Combine chopped walnuts, anise seeds, flour, baking powder, and salt in a medium bowl. Mix with a whisk until evenly distributed. Set aside.
• Combine butter, oil, and sugar in the bowl of your stand mixer. Using the paddle attachment, mix on low speed for 1 minute until the ingredients begin to come together. Increase speed to medium and mix for about 5 minutes, or until the mixture is light in texture and pale in color. Add 1 egg and mix until incorporated. Scrape down the sides of the bowl, then add the remaining egg and vanilla extract. Continue mixing until incorporated, about 1 minute. Remove the bowl from the mixer and scrape down the sides of the bowl again.
• Line 2 baking sheets with parchment paper.
• Using a rubber spatula, fold half of the dry ingredients into the dough. After the first batch is fully incorporated, fold in the rest of the dry ingredients until all of the flour has been absorbed. Coat your hands with flour and pull dough from bowl onto a floured work surface. Pat the dough into a 3 x 12-inch rectangle, about 1 inch thick. Cut the rectangle in half crosswise and place the halves on the prepared baking sheets. Cover with plastic wrap and chill in the refrigerator for 30 minutes.
• Preheat oven to 350°F.
• Bake biscotti logs, 1 sheet at a time, on center rack of oven for 40 minutes each. To help the logs bake evenly, rotate the baking sheet every 10 minutes or so. The finished logs will be golden brown and slightly firm to the touch. Leave oven on.
• Cool logs at least 10 minutes, then transfer them to a cutting board. Using a sharp knife, cut each of the logs crosswise into ½-inch-thick biscotti. Lay biscotti, cut sides down, on the lined baking sheets, about 1½ inches apart. Bake biscotti, one sheet at a time, for 10 minutes, then turn each biscotti over and bake the other side for another 10 minutes. Biscotti should be a deep, golden brown and feel firm and dry. Let cool on the baking sheet for 20 minutes. These biscotti will keep for 1 to 2 weeks in an airtight container.
ALMOND & ORANGE BISCOTTI
These traditional Italian biscotti are nice and crisp, perfect for dipping in coffee or your favorite tea.
Makes 16 cookies
1 cup whole almonds
1¾ cups unbleached all-purpose flour
½ cup semolina flour
1½ teaspoons baking powder
2 tablespoons freshly grated orange zest
8 tablespoons (1 stick) unsalted butter, at room temperature
1 cup granulated sugar
2 eggs
• Preheat oven to 350°F.
• Spread almonds on a rimmed baking sheet and toast on center rack of oven for 10 minutes. The almonds will become fragrant and will darken slightly. Let cool and chop coarsely.
• Combine chopped almonds, flours, baking powder, and orange zest in a medium bowl. Mix with a whisk until evenly distributed. Set aside.
• Combine butter and sugar in the bowl of your stand mixer. Using the paddle attachment, mix on medium speed for 2 to 3 minutes. Add 1 egg and mix until incorporated. Scrape down the sides of the bowl, then add the remaining egg. Continue mixing until incorporated, about 1 minute. Remove the bowl from the mixer and scrape down the sides of the bowl again.
• Line 2 rimmed baking sheets with parchment paper.
• Using a rubber spatula, fold half of the dry ingredients into the dough. After the first batch is fully incorporated, fold in the rest of the dry ingredients until all of the flour has been absorbed, 1 to 2 minutes. Coat your hands with flour and pull dough from bowl onto a floured work surface. Sprinkle a little flour over the dough, then pat it into a 3 x 14-inch rectangle, about 1 inch thick. Cut the rectangle in half crosswise and place the halves on the prepared baking sheets. If the rectangles lose their shape when lifted, lightly flour your hands and pat them back into shape. Cover with plastic wrap and chill in the refrigerator for 30 minutes.
• Preheat oven to 350°F.
• Bake biscotti logs, 1 sheet at a time, on center rack of oven for 35 to 40 minutes each. To help the logs bake evenly, rotate the baking sheet every 10 minutes or so. The finished logs will puff slightly and be golden brown and slightly firm to the touch. Leave oven on.
• Cool logs at least 10 minutes, then transfer them to a cutting board. Using a sharp knife, cut each log crosswise into ¾-inch-thick biscotti. Lay biscotti, cut sides down, on the lined baking sheets, about 1½ inches apart. Bake biscotti, 1 sheet at a time, for 10 minutes, then turn each biscotti over and bake the other side for another 10 minutes. Biscotti should be a deep, golden brown and feel firm and dry. Let cool on the baking sheet for 20 minutes. These biscotti will keep for 1 to 2 weeks in an airtight container.
FRUIT & OAT BARS
The secret to these popular bars is the high quality of the preserves. I recommend using freezer preserves, jams made from fruit that is picked at the height of its season and immediately frozen. These preserves manage to retain their bright, vivid color when cooked, making the oat bars even more enticing. If you can’t find freezer preserves, use the highest quality jarred preserves available.
Makes 12 bars
1 recipe Sweet Almond Dough (page 130), at room temperature
2½ cups raspberry freezer preserves
12 tablespoons (1½ sticks) unsalted butter, chilled
1¼ cups light brown sugar
1¼ cups unbleached all-purpose flour
1¼ cups rolled oats
• Preheat oven to 325°F. Oil a 13 x 9 x 2¼-inch baking pan.
• Using your fingers, press the dough into the prepared pan, covering the bottom and ¾ inch of the sides with a ¼-inch layer of dough. Chill in the refrigerator for 30 minutes.
• Line the chilled crust with a piece of parchment paper and fill it with dried beans or baking weights (see photo, page 127). Bake crust on center rack of oven for 20 to 25 minutes, or until the edges are golden brown. Carefully remove the paper and beans and check to see if the bottom of the shell is dry. If it is still moist, place it back in the oven (without the baking weights) and bake for another 2 or 3 minutes. Let cool. Leave the oven on.
• Using a rubber spatula, cover the crust with raspberry preserves.
• Cut butter into ¼-inch pieces and place them in a medium bowl. Add sugar, flour, and oats. Using your fingers, mix the ingredients, working the butter into the flour until the ingredients are combined and the mixture is coarse and crumbly. Sprinkle the topping evenly over the preserves.
• Bake on center rack of oven for about 30 minutes, or until the topping is golden brown and the preserves are bubbling around the edges. Let cool at least 30 minutes, then cut into 3 x 4-inch bars.
CARAMEL PECAN BROWNIES
These moist brownies are as rich as can be. The dense chocolate-cake base is packed with pecans, then smothered with decadent caramel sauce and chocolate chips. If you have any leftovers (not likely!), they can be stored in the refrigerator for up to four days. It’s best to make the caramel sauce while the brownies are baking.
Makes 12 brownies
½ cup cocoa powder
1 cup unbleached all-purpose flour
2 cups granulated sugar
1 pound (4 sticks) unsalted butter, at room temperature
4 eggs
2 teaspoons pure vanilla extract
1¾ cups coarsely chopped pecans
1 recipe Caramel Sauce (recipe follows)
¼ cup white chocolate chips, coarsely chopped
¼ cup bittersweet chocolate chips, coarsely chopped
• Preheat oven to 325°F. Oil a 13 x 9 x 2¼-inch baking pan.
• Sift cocoa powder and flour into a medium bowl and mix with a whisk until combined. Set aside.
• Combine sugar and butter in the bowl of your stand mixer. Using the paddle attachment, mix on medium speed for about 5 minutes, until the mixture is smooth and pale in color. Add eggs 1 at a time, making sure each egg is fully incorporated before adding another. It’s a good idea to scrape down the sides of the bowl after mixing in each egg. Add vanilla extract with the last egg and continue mixing until incorporated, about 1 minute. Remove the bowl from the mixer and scrape down the sides of the bowl again.
• Using a rubber spatula, fold half of the cocoa powder-flour mixture into the batter. After the first batch is fully incorporated, fold in the rest of the mixture and continue folding until all of the flour has been absorbed.
• Pour the batter into the prepared baking pan and spread it evenly with a rubber spatula. Scatter pecans over the top of the batter. Bake on center rack of oven for 30 to 35 minutes, or until center is just set. The center should still be slightly soft. Let cool 15 minutes. This is a good time to prepare the Caramel Sauce.
• Pour warm Caramel Sauce evenly over the pan of brownies. Sprinkle the chopped white and bittersweet chocolate chips over the top of the caramel. The chocolate will melt into the caramel. To finish the brownies, use a skewer to create a pretty line pattern in the caramel: Drag the skewer through the caramel, creating horizontal lines ½inch apart. Rotate the pan halfway and use the skewer to create vertical lines at ½-inch intervals across the horizontal lines. Chill in the refrigerator for 2 hours to set the caramel, then cut into 12 bars.
CARAMEL SAUCE
Makes approximately 2 cups
2 cups granulated sugar
1 cup water
1 cup heavy cream
4 tablespoons unsalted butter
• Combine sugar and water in a medium heavy-bottomed saucepan. Mix with a whisk to dissolve the sugar, then bring to a simmer over medium heat. While the mixture is heating, brush the sides of the pan with a pastry brush to keep sugar crystals from forming. Repeat this process often, about every 3 minutes, while heating the sauce. After a few minutes the liquid will start turning light brown and then a deep amber color. If one side of the pan darkens quicker than the other, jiggle the pan to mix the liquid. Add cream, taking care to avoid the steam that will rise from the pan. Mix with a whisk until cream is incorporated and the sauce has thickened. Add butter and continue whisking until combined. Let cool slightly, but use while it is still warm.
BITTERSWEET CHOCOLATE BROWNIES
This is my favorite brownie recipe. Unlike the classic dense and chewy brownies that most of us grew up with, these have a light and airy texture. I’ve heard some customers describe them as chocolate cotton candy.
Makes 9 brownies
5 ounces unsweetened chocolate, coarsely chopped
12 tablespoons (1½ sticks) unsalted butter, at room temperature
1½ cups granulated sugar
2 tablespoons unbleached all-purpose flour
6 eggs
Powdered sugar
• Combine chocolate and butter in a medium stainless steel bowl. Place bowl on top of a saucepan filled with 2 inches of simmering water, making sure that the bottom of the bowl does not come in contact with the water. It’s important that the water be just simmering; if it’s too hot it will scorch the chocolate. Stir with a rubber spatula until chocolate and butter have melted and reached a smooth consistency. Remove the bowl from the heat and let cool to room temperature.
• Preheat oven to 325°F. Oil a 9-inch square baking pan.
• Place sugar and flour in the bowl of your stand mixer and mix with the paddle attachment for 30 seconds on low speed. Increase speed to medium and add eggs, one at a time, making sure each egg is fully incorporated before adding another. Scrape down the sides of the bowl frequently.
• With the mixer on low speed, drizzle in the cooled, melted chocolate. Scrape the bowl with a rubber spatula to make sure you get all of the chocolate. Increase speed to medium and mix for about 1 minute, or until the batter is mousse-like in texture.
• Pour the batter into the prepared baking pan and spread it evenly with a rubber spatula. Bake on center rack of oven for 30 to 35 minutes, or until the center is just set. Let cool on a wire rack.
• After the brownies have completely cooled, dust them with powdered sugar. Cut into 3 x 3-inch bars, cleaning the knife between cuts. It’s best to enjoy these brownies the day they are baked, but they can be stored at room temperature for up to 1 day. The brownies will become very dense and fudge-like if kept in the refrigerator.