Step by step, let's see how to install the different Python-based modules that we have learned about so far on Google Colab. We will explore with CUDA and PyCUDA in particular. Please refer to Chapter 6, Working with CUDA and PyCUDA, for easy access to the commands and code. This time, we are going to revisit them, but on the GPU cloud!
Here are the steps for installation:
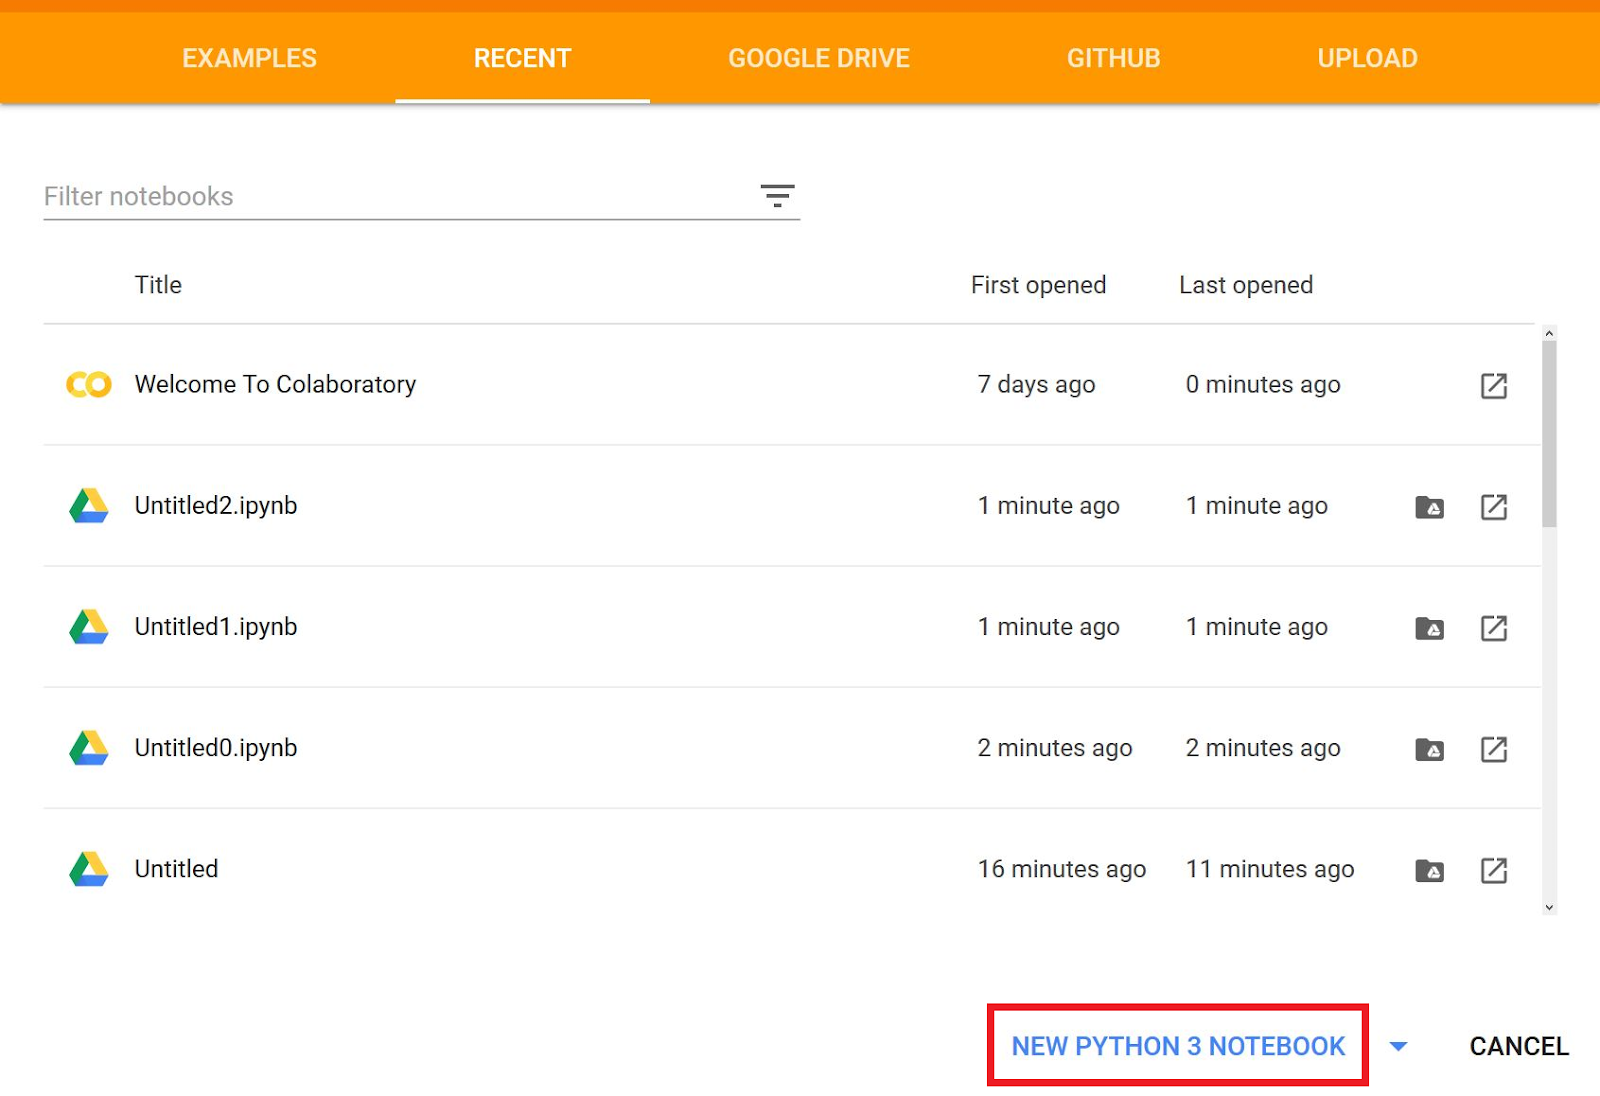
- Assuming you already have a Google account, visit https://colab.research.google.com on your browser (Firefox or Chrome). The following interface will appear:

As marked in red, select NEW PYTHON 3 NOTEBOOK.
- Now, you have access to a pre-configured and readily available Python programming interface:

- At this stage, our environment runtime does not have the GPU enabled by default. So, let's change that setting to enable the GPU:

- As we can see, by default, no hardware accelerator is enabled. So, we change it as follows:

Note that Colab also offers you the option to choose a Tensor Processing Unit (TPU)!
Each cell in the Notebook can be used in two essential ways:
- Python code:

You can execute this line by clicking on the play symbol or using the keyboard shortcut Shift + Enter:

- Terminal commands: To differentiate between Python code and Terminal commands, the latter has to prefixed with an exclamation symbol:

So, we can see the contents of the current directory in the Colab session.
Now let's begin our CUDA (10.1) installation on Google Colab. Use the following commands sequentially, cell by cell:
- Download the official CUDA 10.1 package (a .deb Debian-based file) for Ubuntu 18.04 with the wget tool:
!wget https://developer.nvidia.com/compute/cuda/10.1/Prod/local_installers/cuda-repo-ubuntu1804-10-1-local-10.1.105-418.39_1.0-1_amd64.deb
- dpkg prepares the installation (-i):
!dpkg -i cuda-repo-ubuntu1804-10-1-local-10.1.105-418.39_1.0-1_amd64.deb
- Add the apt-key to configure your local repository:
!apt-key add /var/cuda-repo-10-1-local-10.1.105-418.39/7fa2af80.pub
- Update your Colab's Ubuntu Linux system:
!apt-get update
- Finally, we install the cuda meta-package:
!apt-get install cuda
- Verify your new CUDA installation on the cloud:

- To install PyCUDA, let's use pip:
!pip install pycuda
This command will give the following output:

Now you can start developing and testing your own Python programs. You can use each cell to include the entire source code and then execute it.