Beans of all kinds are easy to grow. They suffer from few pests or diseases and tolerate most weather conditions. They are highly nutritious – either eat the young green pods or leave some varieties on the plant to ripen into beans to be dried for eating in winter.

Dwarf beans produce a smaller crop than their climbing relations. Sow at least twice during the summer to extend the cropping time or pick the beans small and young. A plant must produce seed to propagate itself the following year, and regular picking encourages it to produce more.
Climbing beans ripen from the base upwards and crop for a few weeks from midsummer. Runner beans, in particular, with crimson flowers held high above the leaves as an invitation to bees, have often been grown for decorative purposes. Curiously, climbing French beans are pollinated by the wind and do not need insects.
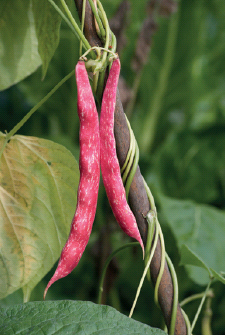
Beans for drying, such as crimson-speckled borlotti, can be left on the withering vine to ripen in late summer sun. Thoroughly dry them before storage to inhibit any mould growth. To encourage drying, lay them on a tray indoors in a warm place for a few days.
Broad beans are hardy, so plant in autumn or early winter for harvesting in early summer the following year. They are quick to germinate – it is one of the most exciting things for a gardener to see the new stem of the bean pushing through the compost. You can plant directly in the soil when this has warmed slightly after the winter, or plant in biodegradable pots that can be transferred into the soil.
Peas are a little more difficult to grow, but worth the effort. Peas need a rich soil and should be well watered, but do not allow them to become over-wet. They also dislike hot dry sun. You may need to throw a net loosely over the crop to protect it from birds.
Known collectively as legumes, beans and peas ‘fix’ nitrogen in the soil by producing small nodules on the roots. At the end of the season, dig the roots into the compost and the nodules will feed the soil. This also works in containers – it’s a natural plant feed.
Dwarf French beans in a round basket
French beans will grow happily in a container as long as the soil is rich and moist. They are prolific croppers and will provide a good harvest over four to six weeks. You can extend the cropping time by sowing more beans four weeks after the first batch; this is known as successional sowing (you will need another container in which to plant this later crop). As the second sowing will take place later in the year, when the air temperature is warmer, the beans can be sown directly into the container. The earlier crop should be sown individually in long pots. When the plants start to flower, feed them weekly with a liquid manure or seaweed extract to ensure a long-lasting crop.
The deep, round basket used here is an ideal size in which to grow five dwarf French beans. It is lined with a garden-refuse sack, which stops water leaking from the basket – but don’t forget to make some drainage holes in the base. Another advantage of using a basket is that it is lightweight – if you are growing crops on a roof terrace, you need to be careful about how much weight you are introducing.
you will need
round cylindrical basket
paper potter
newspaper
heavy-duty plastic garden refuse sack
seed tray
dwarf French green beans
multipurpose compost combined 3:1 with well-rotted manure
seed compost
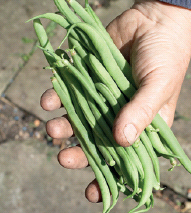
Pick your beans just before you cook them for the best flavour.
Don’t be tempted to include too many plants in your container. Five make a really bushy group and will produce a good crop of lovely crisp stringless green beans.
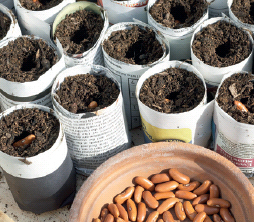
1 Make some newspaper pots using the paper potter (see page 24). Fill each pot with sowing compost. Make a hole in the centre of the compost with a stick and push one bean into each hole. Cover the bean with compost.
2 Water the beans and put the pots in a plastic coldframe or bring inside and place on a cool windowsill to allow the beans to germinate.
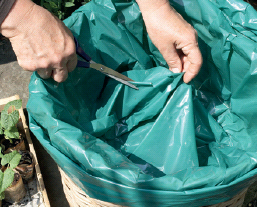
3 Push the plastic sack well into the basket and roll the edge around the top rim. Make a few slits in the bottom for drainage.
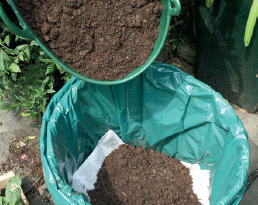
4 Place a few sheets of folded newspaper in the base to aid moisture retention. Add the well-mixed compost and manure and fill the basket to the brim.

5 Remove the plastic sack from the rim of the basket, roll up and tuck inside beneath the compost.
6 Plant the young beans in the basket, still inside their paper pots, when the first two real leaves have emerged. Space them widely – about five will be plenty in this size of basket.

7 Soak the beans with water poured from a watering can fitted with a fine rose, and place in a warm, protected, sunny position.
greencare
Beans go well with summer savory, which resembles thyme. Coincidentally, summer savory can also be grown as a companion plant to beans, warding off aphids with its powerful aroma.
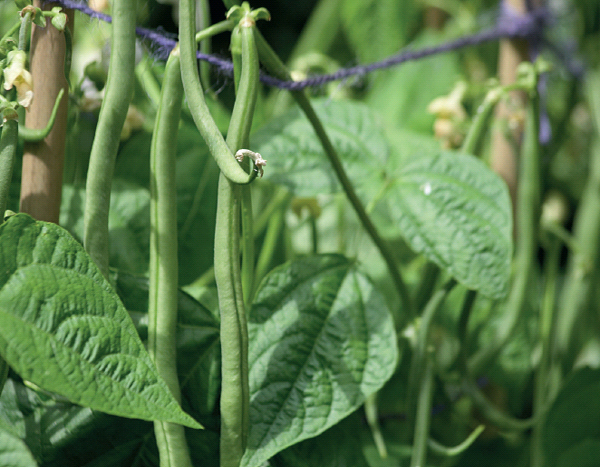
When the flowers appear and the small beans start to form, you may need to give the plants some support. Tying them with string to a few bamboo canes will stop them flopping over the edge of the basket.
Petit pois in galvanized buckets
If you buy peas, it really is only worth buying them frozen – freezing immediately after harvest preserves the natural sugars in the pea, which otherwise quickly turn to starch, destroying the fresh sweet taste. For the same reason, home-grown peas eaten soon after harvest taste far better than so-called fresh peas in the pod bought in a supermarket.
A fairly deep container is needed to grow peas, and you must be careful to water the plants very regularly. Since peas are climbers, they will also need a structure to grow up. Peas love a rich moist soil. If you put newspaper at the base of the container, it will help to preserve moisture, and a layer of the magical comfrey plant will add a wealth of nutrients, promoting healthy growth as the leaves rot down in the soil. Peas are leguminous plants that add nitrogen to the soil through small nodules on their deep roots. At the end of the season, cut down the plants and leave the roots intact; the soil will still be fertile and can be planted with a late-cropping salad.
Pea sticks are traditionally used when peas are grown in a row in a vegetable garden. They are attractive and can be made from a variety of woody stems. These are usually cut in winter from hazel, but beech, lime, hornbeam and birch are also excellent. Choose a twiggy branch.
you will need
biodegradable containers, such as paper pots (see page 24)
galvanized bucket
hammer
long nail
gaffers tape
peat-free compost
well-rotted manure
well-rotted manure
old newspaper
comfrey leaves (if available)
bundle of pea sticks
Pick peas before they swell to fill the pod too tightly or they will taste rather starchy.
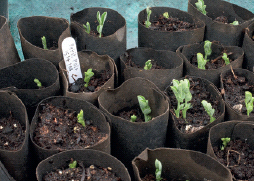
1 Plant two or three pea seeds early in the year in a biodegradable pot. Keep them well watered and frost free, allowing the shoots to grow strongly.

2 Turn the galvanized bucket upside down and stick four short pieces of gaffer tape on to the base, spacing them evenly. Place the nail on each strip of tape in turn and bang firmly with the hammer to make a hole.
3 Turn the bucket right way up. Place some newspaper in the bottom of it and cover with a handful of freshly cut comfrey leaves.
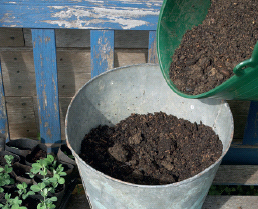
4 Tip in the well-mixed compost and manure until the bucket is almost full to the brim (the level will settle and drop after watering).
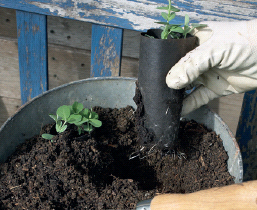
5 Plant the individual pots of peas into the compost. Five pots is about right for this size of container. Firm them in with your hands and, when all are planted, water thoroughly.

6 Finally, push the pea sticks into place around the peas. Try to make the twigs all face inwards. You can weave them together slightly to achieve this.
greencare
Peas can dry out rapidly in containers and they particularly dislike being baked by the sun. Keep them moist by watering in the morning, but do not overwater. As the first peas start to develop, a weekly liquid feed of seaweed is essential. When the peas start to ripen, pick regularly; this will encourage them to continue producing.
petit pois and sweet peas
Sweet peas with their charming frilly, fragrant flowers are traditionally grown alongside vegetables. They can even be grown in the same container as petit pois because they like the same conditions. Fortunately, since they make a lovely cut-flower display, sweet peas need to be picked and deadheaded on a regular basis to prolong their flowering season. There is no danger of mistaking the hairy coarse pods of the sweet pea for the much more appetizing edible variety.
Sweet peas and edible peas make lovely companions; some varieties of edible pea also have colourful flowers, particularly the purple flowering mange tout.
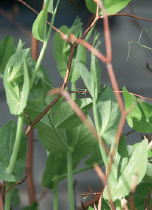
The twining tendrils of the pea vine search out and quickly attach themselves to the twiggy branches of the pea sticks.
Broad beans are a treat. Easy to grow, they are one of the earliest vegetables to crop and they taste delicious. Seed is traditionally planted in early winter for cropping in early summer. This won’t work well in containers since the relatively small volume of soil may mean that the beans freeze during a cold winter, so plant the seeds in early spring in seed compost contained in cardboard tubes, such as those in the middle of lavatory rolls or kitchen rolls. Stand the tubes in a tray and keep them under a cloche until the weather gets warmer.
You can also grow the bean seedlings inside on a cool windowsill. The large seeds germinate quickly if the temperature is not too low. When the young plants are 10cm (4in) high, they can be planted out in their permanent position, still in the cardboard tubes. The roots will happily penetrate the cardboard tubes, which will quickly biodegrade in the moist soil.
Many vegetables are transported in the type of synthetic woven sack used here as a planting container – you could ask your local greengrocer to save some for you. There is no need to put any drainage crocks at the base of the sack because the close weave will allow moisture to escape freely. During hot weather, water the plants every day and take great care never to let the compost dry out.
A synthetic vegetable sack, often used for packing and transporting potatoes and root crops, makes an unusual and practical planter.
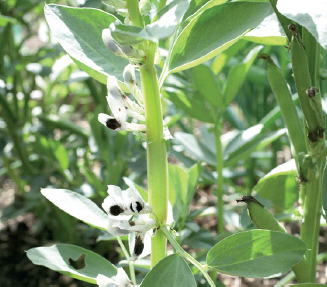
The highly scented black-and-white flowers, which bloom all the way up the stem, are adored by bees; young beans are forming at the base while the tops are still producing flowers.
greencare
The worst pest as far as broad beans are concerned is blackfly, but this can be warded off by pinching out the growing tips at the top of the stems. This will also encourage the pods to form.
Beans are hungry feeders and like rich soil, so incorporate some well-rotted manure into the multipurpose compost in a proportion of 3:1 compost to manure. The manure will also help the compost to retain water.
Borlotti beans in laundry baskets
Perhaps the most decorative vegetables, climbing beans have twining stems studded with flowers of many colours. Runner beans, with their abundant scarlet flowers held on upright stems above lush green leaves, have long been valued for their appearance as well as their taste. Many more types are now available, with flowers ranging from white to pink, apricot and orange. Why not grow a mixture of beans together up a bamboo ‘wigwam’? Look in seed catalogues or garden centres and nurseries for varieties that can be sown at the same time.
The delicious and nutritious borlotti bean, a key ingredient of minestrone soup and other Italian dishes, has fat, cream-coloured pods speckled with red blotches. Although not such a heavy cropper as other beans, its particular qualities mean that no vegetable garden should be without it. Unlike French and runner beans, borlotti beans are harvested from the pods before cooking. They are best eaten fresh, although they can be dried for winter use.
The sturdy cylindrical laundry basket used here is ideal. It has been painted with a shed or fence paint, which will help to prolong its life. Lining the basket with a strong plastic bag, in this case an empty compost bag, is essential to retain moisture. An added advantage, especially if you are growing vegetables on a balcony, is that the basket is much lighter than a conventional pot of a similar size.
you will need
wicker laundry basket at least 70cm (28in) high
empty compost sack to go inside basket
multipurpose loam-based compost
well-rotted manure
borlotti beans (Lingua di Fuoco 2)
sheet of glass with rounded edges, such as a shelf
rods or bamboo canes
garden-shed paint (blue or green)
large-bristled brush
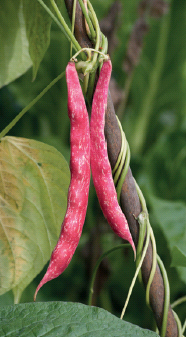
As the beans ripen in late summer, the pods, originally cream speckled with red, turn a fiery crimson. Pick, remove the nutritious beans from the pods and use fresh.
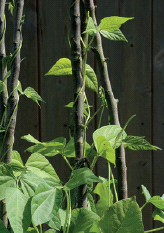
The sturdy bean plants twine tightly round the support rods or canes – they grow quickly at this stage.
greencare
To grow borlotti beans, you will need a fairly deep rich soil that has some well-rotted manure incorporated into the compost. Planting the beans in a deep container allows a lengthy root run and means that the compost will retain moisture. Keep the plants well watered, remembering to water in the evening on hot days. Like other leguminous (pea-like) plants, borlotti beans are thirsty and hungry feeders. They will tolerate some shade but need the warmth of the summer to ripen the pods.
1 Paint the basket following the instructions on the can. You may need to apply two coats to achieve complete coverage. Paint to a depth of 10cm (4in) inside the rim. Allow to dry thoroughly.
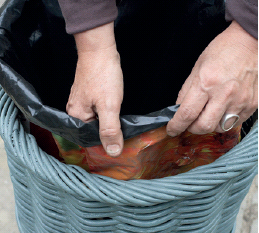
2 Insert the compost sack, having first cut a few slits in the base to allow for drainage. Roll the top edge over so that it fits snugly inside the basket rim.
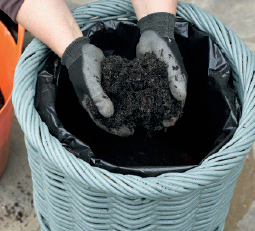
3 Mix the compost and the manure at a ratio of roughly 3:1. Throw a few crocks or stones into the base of the basket to help with drainage before adding the compost. Fill the last 20cm (8in) with multipurpose compost.

4 Make some holes with a dibber about 10cm (4in) apart and sow one or two beans in each hole. You can remove the weaker of the two beans later.
5 Water the basket well, but make sure the water does not expose the planted beans.
6 Cover the beans with glass to raise the temperature of the soil. This will encourage the beans to sprout.

7 When the first true leaves have appeared, push a rod or cane into the earth beside it – the beans will quickly twine around it.
greencare
If you grow runner or climbing French beans, pick them regularly to ensure a continuing crop. Allow borlotti beans to swell in the pod before harvesting. If you want to dry them, allow the pods to shrivel slightly on the vine before picking for storage.