
There are many things to love about working in a perpetually warm and bright kitchen against the cold Alaska winter, but the thing I look forward to most is the view out the windows to the west. The front yard, the lake, the mountains, trees, and sky, are bathed in a powdery blue winter glow when it isn’t snowing and a white curtain of snowfall when it is. In moonlight, the landscape is a startlingly simple but infinitely beautiful Japanese painting. It’s deeply quiet outside and all is enveloped in an anticipatory silence until spring.
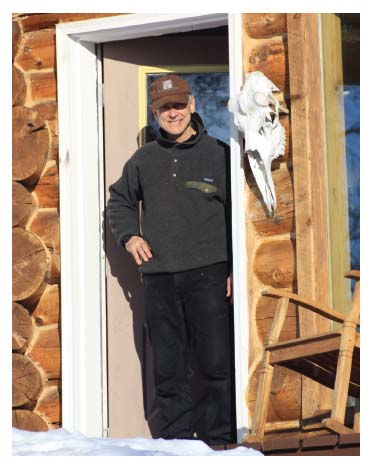
Inside it’s a different story. The kitchen is the heart of activity all winter. My big silver teakettle happily whistles throughout the day, the ovens are yielding endless breads and muffins, and some kind of stew is almost always simmering on top of the stove. It’s the time of year when food really needs to be hearty where we live. Carl spends his day outside cutting firewood, clearing the trails, running the dogs, or shoveling snow off the roofs of our cabins. Guests are often spending as much time outside as Carl is. When they come into the lodge for a meal, it is for warmth and fuel as well as simple repast.
We have three woodstoves for heat in the lodge—one in the main room, one in the wellness room, and another in the bar. We don’t have big stone fireplaces like you see in magazines because they aren’t efficient enough for our cold climate. I have a small oil heater in the corner of the kitchen that operates electronically from our generator or 12-volt batteries with an inverter. It takes the chill off the kitchen in the mornings.
On the coffee bar in the main room, we keep a small jar of our own hot chocolate mix at the ready. Mulled wine, hot cider, or hot-spiced orange juice, and tea are winter drinks often served at the lodge. To make mulled wine, I stir together a bottle of zinfandel, a little sugar, crushed cardamom pods, a stick of cinnamon, and a tangerine pricked with a few cloves. I like to heat this mixture over the woodstove in the main room.
Although we can buy fresh herbs and tender greens from Anchorage during the winter, they rarely arrive undamaged. Even packed and protected, tender vegetables will freeze in the airplane on the way to the lodge. Also, the corners of our pantry and even the inside of our refrigerator, perhaps the most insulated place in the kitchen, get too cold on some nights for delicate greens. We rely, instead, on hearty winter vegetables, just as people in northern climates have been doing for hundreds of years. Beets, all kinds of onions, carrots, parsnips, potatoes, sweet potatoes, and winter squash line the same wicker baskets in the pantry that will hold figs and berries and tender tomatoes in the warmer months of the year. I frequently roast vegetables in the winter. I splash them with a little olive oil, some apple cider or other vinegar, and salt and pepper and pop them in the oven to get tender and brown. Garlic, ginger, apples, oranges, celery, lemons, and eggs all store well, which is an important consideration when we get supplies from Anchorage irregularly in winter.
Having such frigid temperatures just out the door comes in handy for a chef. It’s usually cold enough in winter that we can chill foods quickly outside. There is a small window near the kitchen stove that is nearly always obscured by deep snow in the winter. The main door and windows of the lodge will become completely covered with snow if we don’t shovel it away daily. At the kitchen window, however, we take advantage of the season: Carl builds a long shelf of packed snow surrounded by a small snow cave to create a handy freezer space. We just slide open the window and place what we want on the shelf and it will soon be frozen. It’s convenient for quickly chilling custards when we make ice cream, also. I just take the pot off the stove and stick it onto the snow and the hot custard cools in about twenty minutes, ready for the ice cream maker. It’s certainly easy to chill champagne in the winter—we just stick the bottle in our “walk-out” freezer outside the bar double-doors.
Some Winterlake Lunch Soup Ideas
Cabbage Soup with Onion Dumplings
Curried Winter Squash Soup
French Lentil and Garlic Sausage Soup
Red Onion and Gruyère Soup
Roasted Beef with Barley and Greens
Roasted Tomato and Blue Cheese Soup
Slow-Roasted Vegetable Minestrone
Root Cellar Stew
Russian Beet Soup
Scallop and Crab Chowder
Smoked Halibut Chowder
Smoked Salmon and Cheddar Chowder
Sorrel and Chive Soup
Spicy Black Bean Soup
White Bean and Cornbread Chili
Breakfast is a long meal in the winter. The sun doesn’t come up until about 10:00 A.M., but guests arrive for breakfast about 8:30 A.M. and like to linger over their meal. Carl wakes up the earliest, to capture some quiet time in the morning next to the woodstove when he can savor a cup of coffee and read a month-old newspaper. First, he stokes the woodstove and makes the coffee. After the lodge warms up, I get up and begin to prepare the guests’ breakfast.
I serve big pots of Irish oats, or steel-cut oats, in the winter. They take longer to cook but the taste transcends the breakfast oatmeal we Americans are accustomed to. Irish oatmeal is a hearty, nutty tasting, chewy cereal and will hold the appetite of even the most vigorous outdoorsman until the midmorning break.
I roast a big sheet of onions and potatoes in the evening, and then in the morning, I just quickly fry them up on our griddle for breakfast potatoes. Into the oven go the sweet rolls or croissants, and we stack our plates on the shelf above the stove to warm. During the years that we have chickens (the years that bears have not raided our chicken coop), I retrieve fresh-laid eggs for breakfast from the chicken house. In the winter, we play classical music in the morning. At Winterlake, we serve frosty morning orange juice in large goblets, and Carl makes espresso for those who want it. Although it can still be dark outside, we light the main room brightly, so the atmosphere is cheerful.
As soon as breakfast is served in the dining room, we begin to bake cookies—dozens of them every day, for snacks. We also make some type of coffee cake to have available on the coffee bar with the cookies. In the winter, we usually make a daily luncheon soup and serve it alongside a salad or crusty sandwich.
Our winter guests typically ski with Carl for half a day and dog mush the other half. In the early afternoon, the sun begins to go down about 3:00 P.M. Guests usually wander into the lodge about that time for coffee or tea, or to play games at the table, or read by the fire. We make sure the coffee bar is well stocked with sweets, savories, and other tasty snacks.
We serve appetizers at the bar at 6:30 P.M. in the winter and dinner is served at 7:30 P.M. At Winterlake, dinner is the main winter evening entertainment. Leisurely conversations around the table, over wine, take us into the evening. Warmed by the brisk outdoor activities of the day, a hearty meal, and the crackling fire in the woodstove, we talk about our lives and we get to know each other.
While Carl and our guests discuss an adventure plan for the next day, I finish cleaning up the kitchen and I prepare the food for the morning. When the guests return to their cabins for the night, we make sure they have flashlights or headlamps to find their way down the trail. Carl and I then sit by the fire and finish our day in the same way that we began. If we are lucky, the northern lights will be shimmering in the winter night sky and we’ll look in amazement at the canopy of dazzling reds and greens and yellows dancing overhead.
It was late at night. I had just finished cleaning up the kitchen and mopping the floors. All the chores were done and I was weary. It was time to head upstairs to dive under my fluffy down comforter. Carl was in Anchorage for the week and I was at the lodge alone. There is never a quiet quite so loud as when there is no one else at Winterlake, nor a darkness quite so dark. I flipped off the lights in the kitchen and shut the glass door between the kitchen and the dining room. The woodstove needed to be stoked one last time for the evening, so I headed over to get a log. Carl had stacked plenty of kindling and firewood on our front deck just outside the main door to last during his absence. All week, Sherman the cat had been following me around, and there he was, at my side, as I loaded a final big piece of wood into the stove.
Over the course of the week, Sherman and I had developed a different kind of relationship. I had always talked to him, patted him, and fed him, but lately he had become a close companion. Sherman went with me to feed and water the chickens, and he followed along to the dog lot to tend to our sled dogs. I consulted him on the weather. We did chores together throughout the day. I hadn’t noticed how much personality Sherman had before this week of solitude, and I was enjoying spending time with him.
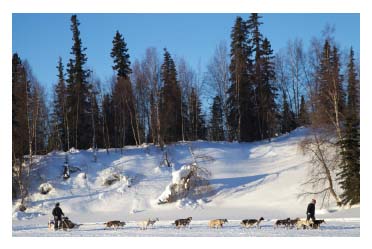
Just as I turned out the living room lights, there was the roar of snowmachines in the yard and a knock on our kitchen door. I headed to the door, and when I opened it, I found two snowy, helmeted figures.
The two men were traveling the Iditarod Trail by snowmachine on their way to Nome. They asked if I could offer them accommodations, and I invited them in. As they took off their helmets and top layer of gear, I could see that there was an older man and one young one. They’d been on the trail all day and had perhaps misjudged their endurance. It was late at night, the weather was cold, and there was no other lodging for at least 30 miles.
I brought the men in by the fire and poured them each a glass of wine. Although I’d been looking forward to a quiet evening, I now enjoyed this turn of events and began cooking my unexpected guests a late night winter meal.
Through the evening, I learned that the older man was in his late eighties. He had met the young man on a motorcycle trip across the United States earlier in the summer and they had enjoyed each other’s company so much they decided to become adventure companions. As we talked more, I became spellbound by the story of the older man’s extraordinary life. The three of us sat by the fire for hours, mostly listening to talk of early years in Alaska, and stories about the country decades ago. The old man had come North in the 1920s. He had flown one of the first aircraft in Alaska. He had seen and done so many exciting things. And here he was, in the middle of the night, in the middle of nowhere, entertaining us with not only his tales of the past, but with his spirit for adventure and life in the present.
The next morning, two identical airplanes landed on the lake ice. Out popped two septuagenarians, a woman and a man, each piloting matching Piper Super Cubs on skis. Dick and Lavelle Betz were flying around the valley and had just dropped in to say hello and ask for a glass of water. “You know, we worked here for a year in 1946,” Lavelle casually said, smiling as she handed her glass back to me.
I took the glass, looked at Sherman, and thought what a sissy I had been last night. Here I was in a room full of people who had lived in backcountry Alaska twice as long as I had been alive, and they had more energy than I did. The two men strapped on their helmets, Dick and Lavelle climbed back into their Super Cubs, and Sherman and I headed out to feed the chickens.
Living on the Iditarod Trail—and I guess I should say living on a strategic part of the trail for food and lodging needs—has been a little like living on a Hobbit trail. All sorts of people appear at our door in the wintertime. We have met a man walking around the world, a man skiing across Alaska, a man walking around the world with his dog. We have met Asian mountain guides, arctic explorers, mountain bikers, buffalo hunters, famous photographers, pilots, and a Russian renaissance man. At my kitchen table, I’ve had people from Britain, Italy, Australia, Russia, Japan, Denmark, and Sweden slide into a seat, look around exhausted, and ask if we were serving food. My kitchen has been headquarters for at least half a dozen rescue missions—either snowmobiles off the trail, dog teams lost, or other dramatic events. My kitchen corner has been the birthing place for at least two litters of sled dogs. We’ve performed minor surgery, mostly on feet, at the table. And we’ve set that table with candles and linens and had many a fine late-night celebration with those who were amazed they had made it this far on the trail. Many people have slept under my kitchen table, for lack of other warm space available, during the hectic days of the annual Iditarod Trail Sled Dog Race in March.
One year I had a remarkable visitor in my kitchen. Anna Bondarenko was the first Russianborn woman to race in the Iditarod. Anna and I had recently been discussing borscht and I was interested in learning more about Russia’s most famous soup. Anna mentioned that her mother, Galena, was visiting from Russia. I cook meals for the Iditarod mushers who pass through our checkpoint, and so we agreed that Galena would help me make borscht and other Russian dishes for the mushers.
When Galena came walking up the snowy trail from the airstrip, she carried along two small grocery bags holding what looked like enough food to lightly feed a family of two for dinner: a piece of beef, some cabbage, potatoes, an onion, and a few other things. Later that day, these simple provisions would magically become, not only the basis for a giant pot of soup that could feed an army, but also a mound of savory pastries that satisfied many a musher and a salad for twenty people that contained cabbage, beets, pickles, and other delicious treats.
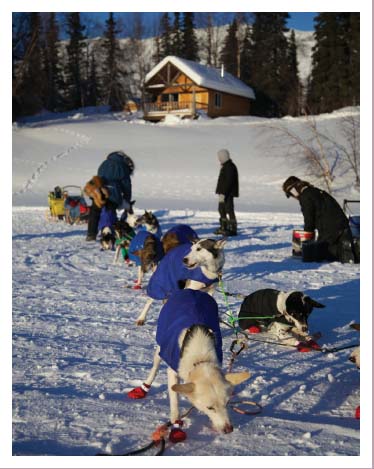
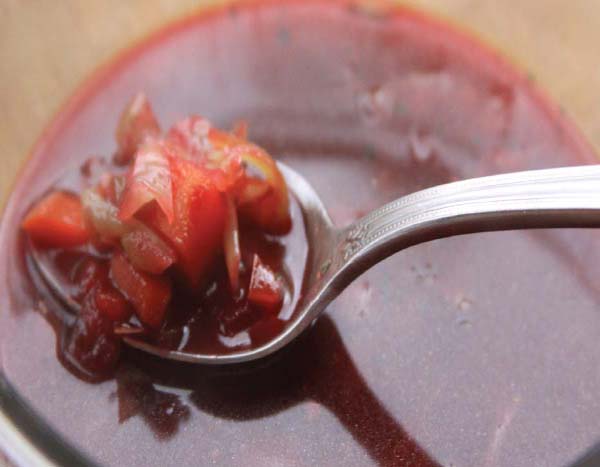
Anna’s Mother’s Soup
Preheat the oven to 375°F. Cube ½ pound of beef into ¼-inch cubes. Place 2 tablespoons of oil into a big sauté pan and heat over a medium-high temperature. Add the beef and season it with salt and pepper. Sauté the beef until browned, being careful not to burn it. Remove the beef and add it to a large stockpot. Discard any remaining fat in the sauté pan and set the pan aside. Cover the beef in the stockpot with a good amount of water. Coarsely chop 2 large onions, 2 large carrots, and 1 stalk of celery. Add these to the stockpot. Bring the pot to a brief boil over high heat and then reduce the heat to simmer. Simmer, partially covered, until the meat is tender, about 1 hour, skimming any foam that might rise to the top.
Meanwhile, wash and dry 2 large beets. Wrap them individually in aluminum foil and bake them for about 1 hour or until tender. Peel the beets, finely dice them, and set them aside.
While the beets are baking, finely dice 4 large potatoes in approximately the same size dice as the beets. Add the potatoes to the stockpot. Reduce the heat and simmer for 10 to 15 minutes.
Meanwhile, place two tablespoons of olive oil into the sauté pan and heat over medium-high. Shred 1 head of cabbage and add to the sauté pan. Stir the cabbage until it is softened, about 10 minutes. Add the cabbage to the soup. Add the beets to the soup. Season the soup liberally with salt and pepper. Simmer for about 5 minutes.
Serves 4 to 6.
Galena got right to work. She chopped and diced and shredded. She peeled and minced, and stirred a big pot of ingredients on the stove with a wooden spoon. She rolled and pressed and peeked into the oven as pastries were baking. I watched, taking notes. Soon, there was a kitchen filled with the enticing aromas of Russian food.
Anna’s mother didn’t speak much English and I don’t speak Russian. We spent the day together in a kind of halting attempt at sounds, purposeful movements, and expressive gestures. I learned that Galena had a PhD in poultry science and that people called her “the chicken doctor.”
I suspected Anna’s mother really came out along the Iditarod not just to give me a cooking lesson but primarily to be a part of her daughter’s new life in Alaska—and to perhaps somehow make sure Anna was safe on the trail. I marveled at Galena’s sense of adventure coming so far. I wondered, under similar circumstances, could I have found my way to her kitchen in Russia?
When Galena left, she gave me a hug and said, “You are like a good Russian woman,” which I took as a huge compliment. Then I sat down at my kitchen table and enjoyed a hot savory bowl of Anna’s mother’s soup.
One day, during our first winter at the lodge, a plane landed on the lake’s ice and an unassuming man came into the kitchen. He introduced himself as a volunteer trailbreaker for the Iditarod Race. Every winter after the myriad of lakes and rivers have frozen and several feet of snow have fallen, the Iditarod trailbreaker crew travel along with shovels and markers and chain saws to clear the way for the Iditarod Race sled dogs. Sometimes the trail is destroyed in spots by snowmachines that get stuck and dig big holes in a struggle to get free. The volunteers repair these treacherous spots, which can break the ankle of a fast-moving dog. The man had flown in to ask whether the trailbreakers could spend the night while they were working on the trail. We said that we would be happy to accommodate them. And so began the annual tradition of trailbreakers staying at Winterlake for the weeks before the start of the Iditarod.
The trailbreakers are a band of jolly volunteers. If I need some work done at the lodge they are happy to lend a hand. They have fixed snowmachines for us, chopped firewood, removed snow and ice off roofs, and provided us with endless entertainment. From the time they arrive at the lodge to the time they leave, they are full of energy and laughter.
During the week before the Iditarod starts, the trailbreakers move up the trail and a new group of about ten volunteers flies out to the lodge— mostly veterinarians, but also communications crew, checkers, and race officials. Volunteers have flown from places as far away as Australia or New Zealand to lend a hand to the race.
For me, the trailbreakers and all the Iditarod volunteers who come to stay at Winterlake each winter, embody the spirit of the Iditarod Trail—one of generosity, teamwork, and adventure.
I had been in Anchorage for a little Christmas shopping, leaving Carl and the girls at the lodge. I flew back on a beautiful winter day when Mount McKinley and Mount Foraker were in crystalclear view across our valley. The Cessna 206 was loaded down with food and gifts and I was happy to be going home. A few days earlier, a pilot had flown six sled dogs out to the lodge—a gift to our daughters from Iditarod founder Joe Reddington.
Our airplane on skis touched down easily onto the snow, bounced along the runway, turned, and came to an abrupt stop at our snowmachine trail that leads to the lodge from the lake. I was wondering where our usual welcoming committee was, when I was startled by the sudden appearance of Mandy, hurtling down the trail, six enthusiastic dogs pulling her forward on a small sled. Down the hill she went, her pigtails flying and her eyes wide as saucers. Carl was running behind Mandy shouting for her to hang on. She held on to the sled for dear life and then she clamped her eyes shut. Barreling down the steep curve of the trail, she collided, dog team, sled, pigtails, and all, right into the airplane. The dogs knew what they were doing. They simply scooted around the new immovable object in front of them but the sled and driver weren’t so agile. The dogs stopped abruptly when Mandy’s sled hooked onto the airplane’s skis.
The pilot kept his calm, more amused than angry, despite damage to the plane’s elevator, an important part of the tail. We untangled the dogs and the twisted lines, unloaded the airplane, and brought the dogs back up to the house.
Welcoming a new team of sled dogs into the family is a little like adopting six new babies all at once. Mandy and Carl were in a flurry to relate dog stories about what had already occurred within the few days since our new family members arrived. We were now the proud owners of Wolf, Pepsi, Bear, Polar, Boomer, and Otter.
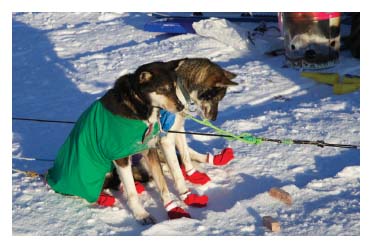
Although all our sled dogs are Alaskan huskies, we discovered that each one has his own personality, quirks, talents, and temperament. A couple of our dogs had been to Nome in earlier Iditarod races, and one was extremely shy and would be for the rest of his life. We have happy dogs, good eaters, leaders, followers, and good runners.
For each dog, we have built a little house filled with straw and with the dog’s name written over the door. The dogs are chained to prevent them from fighting or breeding but they freely move around their house and patrol their own yards. They constantly communicate with each other and they all join together to sing when the moon is out or when an airplane lands on the lake.
Every day we feed each dog about a pound of dry dog food. That means we go through 25 pounds of dog food a day, and now we buy dog food by the ton rather than the small bags we used to purchase at the grocery store. Just imagine the dog food bill for professional mushers who have hundreds of dogs in their lots! I save any leftover fish or meat scraps and add those to the dogs’ “soup” bucket. We soak the dry dog food in plenty of warm water for about half an hour and then haul two 5-gallon buckets of food down to the lot amidst yips and jumps and wags.
Gourmet Dog Biscuits
Save the grease from the breakfast bacon to make dog biscuits, unless you have a vegetarian dog—then you can use vegetable oil instead of bacon grease.
Preheat the oven to 400°F. Grease a baking sheet. Combine 2½ cups of flour, 1 cup shredded Cheddar cheese, and ½ cup of bacon grease that you have been saving.
Mix in two eggs and enough water to form a ball out of the dough. Knead the dough on a lightly floured surface until it is smooth and shiny. Roll out the dough and cut it with a bone-shaped biscuit cutter or by hand into l-by-3-inch rectangles.
Lay the biscuits out onto the baking sheet. Bake the biscuits for 15 minutes. Turn the biscuits over. Bake for an additional 10 minutes, or until they are golden brown.
Set the biscuits on a cooling rack and serve one per day for good behavior.
This makes about 25 large biscuits.
Water seems to be better consumed when it is flavored with dog food, so we combine the two to keep the dogs well hydrated. When the dogs are working hard, they are given extra food and water throughout the day. Besides our homemade dog biscuits (see recipe at left), I also make a special treat for the dogs once a week. I spread large baking sheets with dog food nuggets that I have soaked in beef broth, and I add corn syrup to the mixture and bake it for a few minutes, then cool it and break it into chunks—it’s a kind of cookie for dogs.
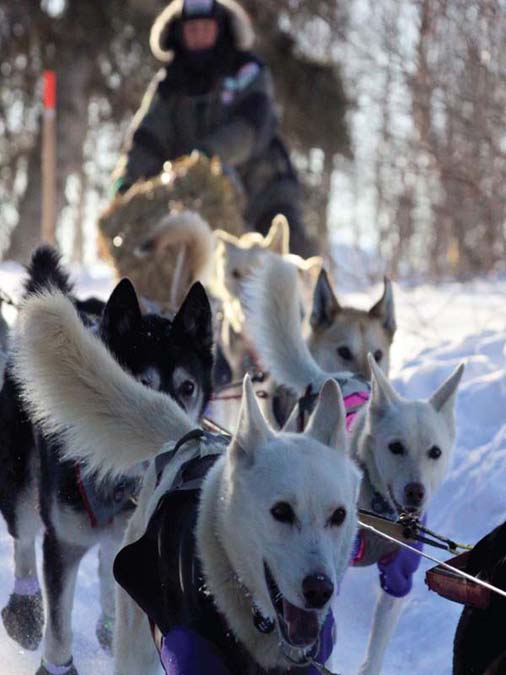
In the winter, Carl uses a snowmachine or his skis to create a trail around the lake in front of the lodge and another trail that is more challenging through the forest behind us. He takes the dogs out on the trail twice a day. They prefer a temperature of about 5°F for running. If the temperature goes above 35°F, it’s too warm to run the dogs and they get overheated.
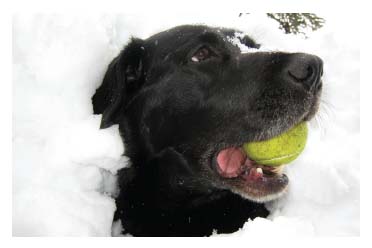
We have an old black Labrador named Willow that now spends most of her time on her dog bed underneath the table in the kitchen. She is our second black Labrador since living at Winterlake Lodge. For many years, our beloved dog, Sam, ran with Carl behind the team. It was a lovely sight, from the porch of the lodge, watching the dog team go by, Carl on the runners of the sled and Sam following behind in the snow.
Most guests who stay at Winterlake in the wintertime want to learn how to drive a dog team or at least ride in the basket of the sled. Carl enjoys teaching techniques of the trail—how to stop, go, and turn, and the language of gee and haw and whoa. Those who show confidence and proficiency with the team can take them down the steep, winding trail behind the lodge, the same trail racers use during the Iditarod.
We can run our dogs right out from the back door, and the Iditarod Trail runs through our yard. Many people who mush dogs in Alaska have to pack up their dogs after work and drive them to a trail system. Just like my commute to the kitchen in the morning, the commute for our dogs is an easy one also.
The Alaskan husky is not a recognized breed according to the American Kennel Club, but a mixture of dogs bred for certain desired traits. Mushers look for qualities such as tolerance to cold, good coats, strong feet, and speed. Most of our guests are surprised at our 40-to-60-pound dogs, expecting to see 120-pound huskies and malamutes like mushers used to freight supplies during the gold rush. My friend, famed musher DeeDee Jonrowe, showed me how to look into a puppy’s eyes. If a puppy shies away, she knows he won’t be a good leader. If he looks straight at her, DeeDee keeps him on the team.
We’ve learned how to care for our dogs over the years with advice from our company veterinarian. Our vet will sometimes hop in his airplane and come out to the lodge just to give our new puppies their shots. We have a big box of supplies filled with joint lotion, antibiotic salve, special elastic “vet” wrap, and all kinds of medicines and drugs.
Bears and wolves frequent the dog lot, traveling along the pathway that connects the lot to the trail or drawn by the smell of dog food. In the summer, bears visit the lot often and we can hear a certain kind of barking coming from the dogs when bears are nearby. In the winter, wolves come down from the mountain behind the lodge. Wild animals rarely disturb the dogs. The problem we have from wild animals is when our dogs are “quilled” by a porcupine.
Our dogs seem to find porcupines easy targets to tackle. Each day we let a few dogs off their chains in a rotating fashion, to socialize them with us, and to give them some entertainment when they can’t run on the trail. Occasionally, however, an unfortunate collision occurs between a fast-moving dog and a slow-moving porcupine and the dog comes back to us with a snout full of quills. This seems to happen about once a year and when it does, we begin the tedious teamwork of quill extraction with our trusty Leatherman tools. If a dog really has a run-in with a porky and his entire head looks like a bristle brush, then it’s time for the unfortunate dog to be flown into Anchorage for a visit to the vet.
I used to think dog mushing people were a little obsessive. Visitors with dog teams would talk, at length, about some dog being depressed or another one being upset. But when we got our sled dogs and were able to get to know them in a personal and intimate way, Carl and I became just like all those other “dog people.” They say that people who have animals in their lives live longer. With all our dogs, cats, bears, chickens, porcupines, wolves, and other sundry creatures, Carl and I should live long lives.
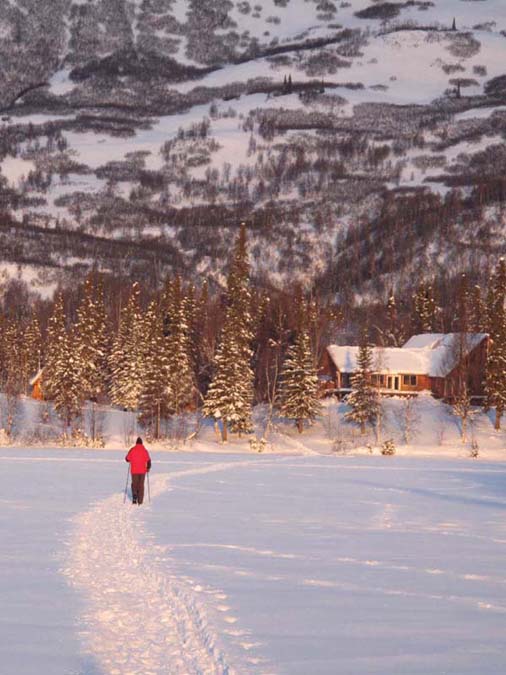
One of the winter pleasures of living in backcountry Alaska is the beauty of the clean, undisturbed snow that surrounds us. During the snow season, we enjoy daily cross-country skiing through the woods behind the lodge. As with dog mushing, the pleasure of cross-country skiing is found in the quietness of gliding through the woods.
The first deep snowfall of the year is a signal that we should leave our chores and retrieve our skis stored in the small log building next to the lodge. We have a collection of skis of all sizes for guests to use. The skis are fiberglass with waxless bottoms, have “easy-in” bindings, and accommodate a variety of skill levels. Carl prefers skis that are suitable both on and off tracked trails. When the first fluffy snow arrives, Carl for many years relied on his old Bonna 2400 skis, now ancient relics to most skiers, and he would warm up an old iron to begin the annual time-consuming ritual of pine-tarring and waxing the bottom of his skis. This activity was not unlike all the other seasonal outdoor rites that unfold at my kitchen table. In the spring, it is tying flies in anticipation of fly-fishing season, and a little bit later, it is poring over maps and making lists for a new float trip. These days, Carl’s original skis are hanging on the wall in our bar and he has finally given in to newer, lighter Karhu ski, like the rest of us.
A joy of cross-country skiing is gliding at your own pace and observing the sights along the way. Frequently, we use our 5-kilometer dog team loop for early season conditioning and as an aerobic workout. We like to enlist our old sled dogs Squeaky and Eyebrows, both now retired from the active mushing line-up, by putting them back into harness and having them pull us around the loop in skijoring style. One can almost sense the pride in our old dogs, as they feel important again running side-by-side leading the “team” (consisting of only one skier) around the lake and through the woods.
Track skiing is fun, but our favorite ski activity is well off the packed track. The forest behind Winterlake holds a wealth of winter tales just waiting to be told. We head high-speed down the Iditarod Trail to its intersection with the Wolverine Ridge trail. At this intersection, we move off the trail, choose a direction, and start exploring. We don’t take dogs with us on these outings, not even our labrador, Willow, because she can obscure the very tracks and events in the snow we are trying to discover.
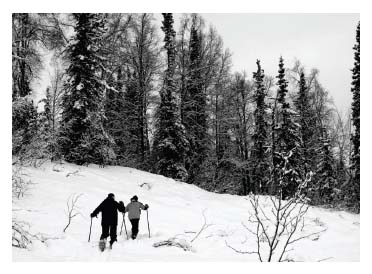
Once away from the groomed trail, the forest begins to reveal its story. We see the tiny tracks of an intrepid vole, emerging from a hole in the snow and traversing 15 feet. It must have seemed like a vast journey for him, sprinting across a dangerously open area. The tracks abruptly and eerily end.
When we reach Red Creek, another forest drama unfolds. A line of canine tracks, much too large to be from one of our sled dogs, weaves through the trees, and we know these are wolf tracks. We follow the creekbed single file, trying to decipher the wolf’s movements. Wolves seem to be single-minded in purpose as they follow the creek downstream, stopping at each track they encounter, whether it is from fox, moose, otter, vole, or ptarmigan. If a beaver lodge is on the trail, wolves will investigate, digging deeply into the snow, hoping that an unwary beaver will step out from its lodge at just that moment.
Tracks of playful river otters are my favorite. Up and out of air holes and onto the creek or lake ice, the otters will run and slide across the untracked fresh snow, then bloop back down into the next ice hole a hundred yards downstream. I’m certain they do their sliding for fun and not just for efficient movement, because some of their trails go uphill and simply turn 180 degrees and come back down again!
As we leave the open creekbed and tour back into the forest, we notice deep punctuations in the snow along a meandering line from one willow tree to the next, so we know that moose can’t be too far away. Moose can be a liability in the winter. Most of the females are pregnant, and they have to plow through the deep snow, working hard for their meager, woody diet. If we are on a packed trail, moose that come along will challenge us for the right-of-way. We always offer it to them without argument.
After a few miles of gliding quietly through the woods, we take a break for snacks and a drink. Out come our trail mix and homemade granola bars, a thermos of hot chocolate, and lots of water. If we examine the snow’s surface near a stand of willows, we can often spot a confusion of tracks scurrying around from bush to bush. These tracks appear as if the maker is wearing little après ski boots, which are the telltale marks of willow ptarmigan. When ptarmigan are disturbed they flush in a startling burst of white and fly off to another patch of cover some yards away. Vigorous skiers go with Carl up to the top of Wolverine Ridge. This trip involves using ski skins that allow the skier to climb up with minimum effort. It is much easier to get to Wolverine Ridge in the winter on skis than it is in the summer hiking our trail. Once above treeline, we are rewarded with a panoramic view of our valley floor, the Hayes River glacier valley, and the jagged Tordrillo peaks to the southwest, including our resident active volcano, Mount Spurr. The volcano last erupted in 1992. We were living at another lodge down-valley at the time, and for days the ash was so thick that airplanes couldn’t fly guests in or out. When we arrive at the top of the ridge, we see the peaks of Mount McKinley and other Alaska Range summits.
The trip back down the mountain is at one’s own pace. Some people are “schuss-boomers” while others traverse slowly, savoring the untracked powder and the scenic views. Sometimes, when we stop to rest on the way down, we wait until our hearts stop pounding. Then, in the quiet, we might hear the howl of a far-off wolf calling to her mate.
Back at the lodge, we enjoy warm mulled wine by the fire. It’s time to pull out our animal track books and talk about what we saw. I’m always amazed at how many kinds of tracks we see and how our trail is nature’s highway. The snow will always tell us stories if we just take time to look.
Imagine that you are a winter guest at the lodge. It’s a quiet, brisk morning and it is snowing heavily. You walk from the cabin to the lodge. A warm cup of coffee and freshly baked oatmeal muffins are waiting for you. These delicious muffins are like enjoying a bowl of hot oatmeal in easy snack form. Add raisins, currants, or nuts if you wish.
FOR THE MUFFINS
1½ CUPS OLD-FASHIONED OATS
l⅓ CUPS BUTTERMILK, SLIGHTLY WARMED
2 EGGS, LIGHTLY BEATEN
⅔ CUP FIRMLY PACKED LIGHT BROWN SUGAR
⅔ CUP UNSALTED BUTTER, MELTED AND COOLED
1⅓ CUPS ALL-PURPOSE FLOUR
1 TEASPOON SALT
1½ TEASPOONS BAKING POWDER
¼ TEASPOON BAKING SODA
STREUSEL TOPPING
¼ CUP FLOUR
¼ CUP UNSALTED BUTTER, AT ROOM TEMPERATURE
2 TABLESPOONS BROWN SUGAR
Preheat the oven to 400°F. Butter a 12-cup muffin tin.
In a large bowl, combine the oats and buttermilk and let stand for about 1 hour. Add the eggs, brown sugar, and butter to the oat mixture, stirring until combined.
Into a medium bowl, sift together the flour, salt, baking powder, and baking soda. Add the flour mixture to the oat mixture, stirring just until blended. Fill each muffin cup ¾ full with the oat batter.
For the streusel topping, in a small bowl combine the flour and butter, mixing together until mealy in texture. Add the brown sugar. Sprinkle some of the topping on each muffin.
Place the muffin tin on the center rack of the oven. Bake the muffins for about 12 minutes, or until golden and a toothpick inserted into the center of a muffin comes out clean.
Makes 12 muffins
These muffins are delicious served with orange butter or orange honey. I prefer to serve them warm, but they disappear rapidly, regardless, whenever we set them out on the coffee bar.
2 CUPS ALL-PURPOSE FLOUR
1 TEASPOON BAKING POWDER
¼ TEASPOON BAKING SODA
¼ TEASPOON SALT
½ CUP UNSALTED BUTTER, AT ROOM TEMPERATURE
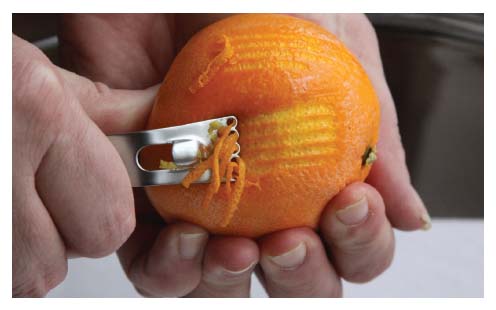
1 TEASPOON FRESHLY GRATED ORANGE PEEL
1 CUP SUGAR
2 EGGS
½ CUP ORANGE JUICE, ROOM TEMPERATURE
½ CUP COARSELY CHOPPED BITTERSWEET CHOCOLATE
½ CUP MILK
Preheat the oven to 375°F. Butter a 12-cup muffin tin.
In a large mixing bowl, sift together the flour, baking powder, baking soda, and salt. In a separate large bowl, cream the butter, orange peel, and sugar until the mixture is light and fluffy. Add the eggs, one at a time, mixing well after each addition. Add the orange juice and chocolate, folding just until blended. Add the butter mixture into the flour mixture, alternating with the milk.
Divide the batter evenly into the muffin cups. Place the muffin tin on the center rack of the oven and bake for about 12 minutes. Remove the muffins from the tin and cool on a baking rack for about 5 minutes.
Makes 12 muffins
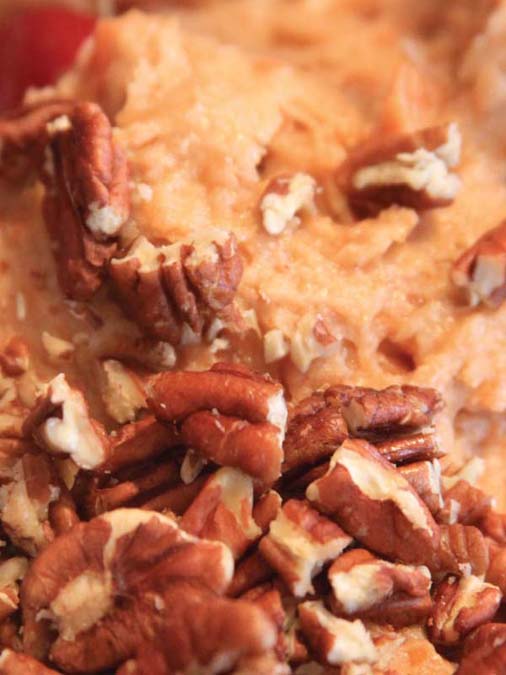
Sweet potatoes store well in the winter in our pantry and we rely on them as well as other root vegetables for the bulk of our winter food supply. This bread is appreciated when the crew comes in from our well-below-zero weather.
1½ CUPS ALL-PURPOSE FLOUR
1 TEASPOON SALT
¼ TEASPOON BAKING SODA
1 TEASPOON BAKING POWDER
1 TEASPOON FRESHLY GROUND NUTMEG
1 CUP COOKED SWEET POTATO FLESH
⅔ CUP GRANULATED SUGAR
⅓ CUP PACKED LIGHT BROWN SUGAR
8 TABLESPOONS UNSALTED BUTTER (I STICK), MELTED
2 LARGE EGGS
1 TEASPOON VANILLA EXTRACT
¼ CUP WHOLE MILK
½ CUP WHOLE PECANS, TOASTED AND CHOPPED
(To bake sweet potatoes, I prick each with a fork in several places, cover them with foil, and bake at 400°F for about an hour.)
Heat the oven to 350°F. Grease a 9-by-5-by-3-inch loaf pan or two mini-loaf pans. In a medium bowl, sift together the flour, salt, baking soda, baking powder, and nutmeg. Set aside.
In the bowl of a stand mixer fitted with a paddle attachment, mix the sweet potato flesh, granulated sugar, and brown sugar on medium speed until well combined. Add in the melted butter and mix on low speed until smooth. Add in the eggs, one at a time. Add in the vanilla.
On low speed, add in some of the flour mixture, then some of the milk. Alternate adding in the remaining flour and milk. Continue to mix for about a minute and add in the nuts. Remove the bowl from the mixer and stir through the batter once or twice with a wide rubber spatula.
Pour the batter into the prepared pan (or pans) and bake in the center of the oven for about an hour (less time for mini-loaf pans). A cake tester (or toothpick) inserted into the center of the loaf should come out clean and dry.
Let the bread cool in the pan for about 10 minutes. Turn the loaf out onto a wire rack to cool completely before slicing. This bread is particularly good served with cinnamon butter.
Makes 1 loaf or 2 mini loaves
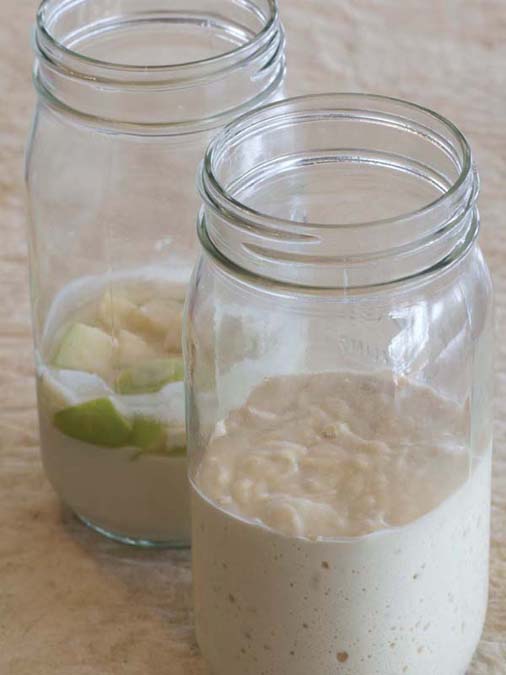
In Alaska, there are many different sourdough starters, and the best ones don’t require yeast. Yeast and true sourdough bacilli actually compete with each other. This sourdough is special to me because I love the fermented apple smell the starter exudes. Although it is best served in applebased recipes such as our sourdough apple bread, it could become your favorite all-purpose sourdough starter.
2 LARGE TART, GREEN APPLES (SUCH AS GRANNY SMITH), WASHED, CORED, UNPEELED
6 TABLESPOONS SUGAR
3 CUPS WATER 21/2 CUPS FLOUR
Cut the apples into 1-inch chunks. In a medium bowl, combine the apples, the sugar, and ½ cup of the water. Cover the bowl with a kitchen towel and store in a warm place for 8 to 10 days. The mixture will ferment and become aromatic, smelling like apple alcohol. Mash the mixture into a paste.
In a plastic 2-quart water pitcher with a lid (preferably a lid with pour slits that allow air to circulate), stir together the remaining water and the flour. Add the apple paste. Cover the pitcher and let the mixture stand at room temperature for 2 to 3 days. The mixture should begin to smell sour. Feed your starter with 1 cup of water and 1 cup of flour each week, to replenish what you have used. I like to have 2 pitchers on hand so that I can move the sourdough from one pitcher to a clean one when I add more water and flour. Store the sourdough starter in your refrigerator. It will last indefinitely with good care. You may freeze it if you go on vacation.
Makes about 4 cups
Sometimes I drizzle melted chocolate into this bread batter and also add other bits of fruit like chopped, dried cranberries. If you don’t have sourdough starter, you may make this recipe substituting buttermilk for the sourdough.
2 CUPS ALL-PURPOSE FLOUR
1 TEASPOON GROUND ALLSPICE
1 TEASPOON BAKING POWDER
½ TEASPOON SALT
½ CUP SUGAR
1 CUP APPLE SOURDOUGH STARTER
¼ CUP UNSALTED BUTTER, MELTED
2 EGGS, SLIGHTLY BEATEN
1 TEASPOON VANILLA EXTRACT
1 MEDIUM TART, GREEN APPLE (SUCH AS GRANNY SMITH), GRATED, UNPEELED
1 MEDIUM CARROT, SHREDDED
½ CUP CHOPPED WALNUTS
½ CUP SHREDDED COCONUT
Preheat oven to 350°F. Butter a 9-by-5-by 3-inch loaf pan.
In a medium bowl, combine the flour, allspice, baking powder, salt, and sugar. Add the Apple Sourdough Starter and the melted butter and blend. Stir in eggs and the vanilla. Next, stir the apple, carrot, walnuts, and coconut just until all the ingredients are well blended.
Pour the mixture into the loaf pan. Place the pan on the center rack of the oven, and bake for 50 to 60 minutes, or until a toothpick inserted in center comes out clean. Remove the loaf from the oven, and let stand in the pan for about 10 minutes. Turn the loaf out onto a rack to cool.
Makes I loaf
At Winterlake, we make lots of use of our Apple Sourdough Starter with this pancake recipe. You could add a little cinnamon to the batter if you like an apple-cinnamon combination. We like to serve these tasty pancakes with New England maple syrup and any berry syrups we might have in house. Sometimes we add bits of toasted pecans to the batter for some crunch.
¾ CUP APPLE SOURDOUGH STARTER
I EGG, SLIGHTLY BEATEN
1 CUP WATER
2 TEASPOONS VEGETABLE OIL
⅓ CUP DRY POWDERED MILK
1 CUP ALL-PURPOSE FLOUR
1 TEASPOON BAKING SODA
1½ TABLESPOONS SUGAR
1 SMALL TART, GREEN APPLE (SUCH AS GRANNY SMITH), CORED, PEELED, AND MINCED
In a large bowl, combine the Apple Sourdough Starter, egg, water, and oil. In a small bowl, combine the powdered milk, flour, baking soda, and sugar and stir to blend. Add the dry ingredients to the sourdough and mix until the batter is smooth. Stir in the apple.
Pour the batter in pancake portions onto a greased, hot nonstick griddle, being careful not to crowd the pancakes together. When the pancake tops are bubbly, about 3 minutes, turn them over and brown briefly. Remove to a warmed plate. Serve hot.
Makes 12 to 16 pancakes
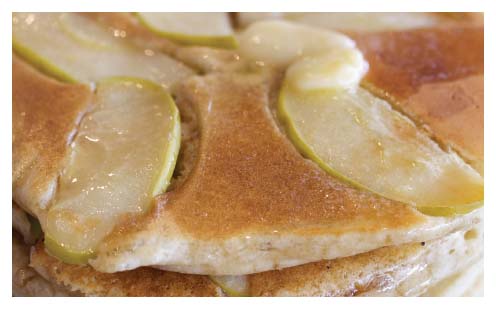
I think we all recall the days when our parents would take us to a pancake house and there was a tray of different syrups on the table—boysenberry, blueberry, red raspberry, and the like, along with the traditional maple syrup. At Winterlake, we serve several kinds of syrups too, using berries available in Alaska. This recipe calls for a mixture of berries, but you may combine the quantities for, say, all-blueberry syrup, another lodge favorite.
½ QUART FRESH CRANBERRIES
½ QUART FRESH RASPBERRIES
1 QUART FRESH STRAWBERRIES
3 CUPS SUGAR
6 CUPS WATER
2 TABLESPOONS FRESH LEMON JUICE
1 TABLESPOON FRESHLY GRATED LEMON PEEL
Line a large fine-meshed strainer with moistened 100-percent cotton cheesecloth or a jelly bag.
In a large heavy saucepan, simmer the cranberries, raspberries, and strawberries, covered, until the cranberries have burst, about 10 minutes. Into a medium bowl, force the mixture through the cheesecloth-lined strainer, using a small rubber spatula to press the fruit. Return the liquid to the saucepan. Stir in the sugar, water, lemon juice, and lemon peel, and simmer, uncovered, until the sugar is dissolved and the mixture has thickened slightly, about 5 to 10 minutes. Pour the syrup into clean glass bottles and store in the refrigerator for up to 3 months.
Makes 3 pints
We serve several kinds of hot chocolate at the lodge: one is the slow-overthe-stove method for thick milk-based hot chocolate. Another is a basket of to-go packets by the kitchen door for those heading out of doors. A third option, this recipe, is our hot chocolate mix that sits in a jar by the coffee station.
3 CUPS UNSWEETENED COCOA POWDER
1 CUP POWDERED SUGAR
1½ CUPS DRY POWDERED MILK
1 TEASPOON VANILLA POWDER
⅛ TEASPOON GROUND NUTMEG
Combine all ingredients together and store in an airtight container. (We use a wide-mouth half-gallon glass jar.)
Label the mixture with the following instructions: Use 3 tablespoons of hot chocolate mix with 8 ounces of hot milk (or water).
Store the hot chocolate mix in a cool dry place.
Makes about 30 servings
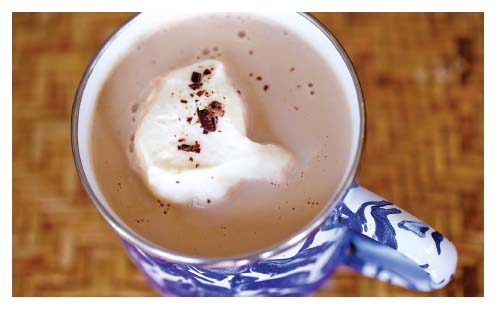
Chocolate biscotti are particularly delicious for dipping into hot chocolate or coffee by the fire in the winter. The varieties of biscotti recipes are endless.
½ CUP UNSALTED BUTTER
1 CUP SUGAR
3 EGGS
2 TEASPOONS VANILLA EXTRACT
2 CUPS ALL-PURPOSE FLOUR
⅓ CUP UNSWEETENED COCOA POWDER
1 TEASPOON BAKING SODA
¼ TEASPOON SALT
1 CUP CHOPPED HAZELNUTS
1 CUP DRIED SOFT CHERRIES, CHOPPED
4 OUNCES BITTERSWEET CHOCOLATE, FINELY CHOPPED
Preheat the oven to 300°F. Butter 2 baking sheets.
In a large mixing bowl, cream the butter and sugar until the mixture is light and fluffy. Beat in the eggs, one at a time, and the vanilla.
In a medium bowl, sift together the flour, cocoa, baking soda, and salt. Add the flour mixture to the butter-egg mixture. Stir in the hazelnuts, cherries, and chocolate.
Compress the mixture with your hands to make a dense, compact dough. Shape the dough into 2 logs, about 2 inches wide and 12 inches long. Slightly flatten the top of the logs, and place them 2 inches apart on one of the baking sheets.
Bake the biscotti logs for 1 hour until lightly browned. Remove the logs from the oven and place them on a cutting board to cool for about 5 minutes. Reduce the oven temperature to 275°F. Using a serrated knife, cut each log into diagonal slices about ¾ inch thick. Place the biscotti slices on the second prepared baking sheet about ½ inch apart. Bake for an additional 10 minutes or until the biscotti are dry and firm to the touch. Cool on wire racks before serving.
Makes about 32 biscotti
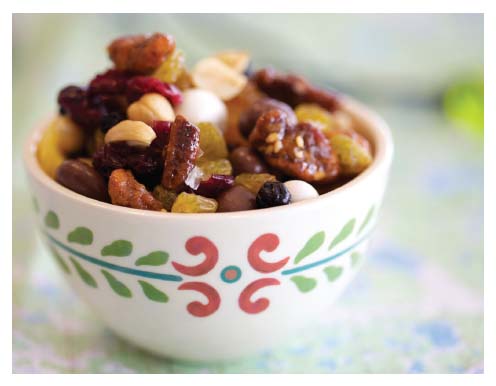
In the summertime, many guests enjoy hiking along the Iditarod Trail. One favorite hike is to Wolverine Ridge behind the lodge. We send them with our ever-changing and high-energy trail mix. Here is a current favorite version.
¼CUP DRIED BLUEBERRIES
¼ CUP TOASTED WALNUTS
¼ CUP MACADAM IA NUTS
¼ CUP DRIED MANGO
¼ CUP COCOA-DUSTED ALMONDS
¼ CUP DRIED YOUNG COCONUT
¼ CUP DRIED CHERRIES
¼ CUP DRIED APRICOTS
¼ CUP YOGURT-COVERED RAISINS
¼ CUP GOLDEN RAISINS
¼ CUP ROASTED AND SHELLED PEANUTS
In a large bowl combine all the ingredients. Store the trail mix in an airtight container or Ziploc®-style bag.
Makes 2½ cups
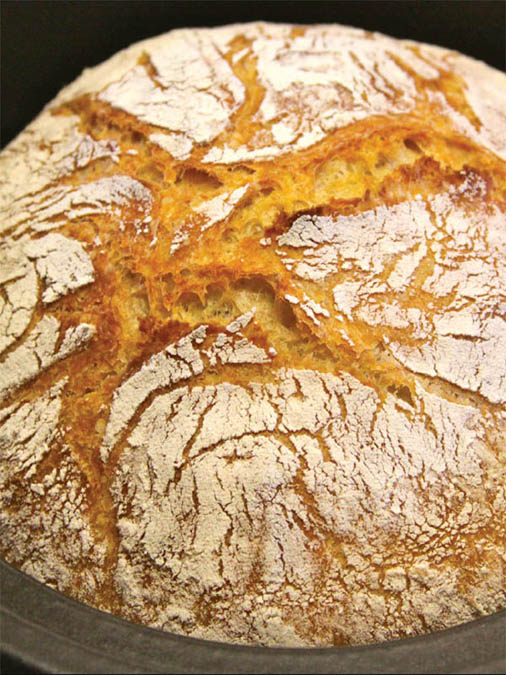
No knead bread was introduced to me by my daughter Mandy, who brings younger ideas into the kitchen even though I am resistant to change. This style of bread gained popularity following cookbook author Jim Lahey’s book My Bread, from which this recipe is adapted.
3 CUPS BREAD FLOUR
1 ¼ TEASPOONS SALT
¼ TEASPOON ACTIVE DRY YEAST
1 ⅓ CUPS WATER (COOL, 55 TO 65°F)
Combine the flour, salt, and yeast in a medium bowl. Add in the water and stir to mix. Cover the bowl with a tea towel and set the bowl at room temperature for about 12 to 18 hours.
Remove the dough from the bowl. Shape the dough into a round by tucking edges of the dough into a seam. Cover the dough with a floured tea towel and let rise again in a warm place for 2 hours. Preheat the oven to 475°F. Put a heavy pot with a lid (like a Le Creuset casserole or a Dutch oven) in the oven to heat. Carefully remove the hot pot from the oven and invert the dough into the pot, seam-side up.
Cover the pot and bake for 30 minutes. Remove the lid and continue to bake an additional 15 minutes or until the crust is a deep brown color. Cool the bread before slicing into it.
Makes 1 (10-inch) round
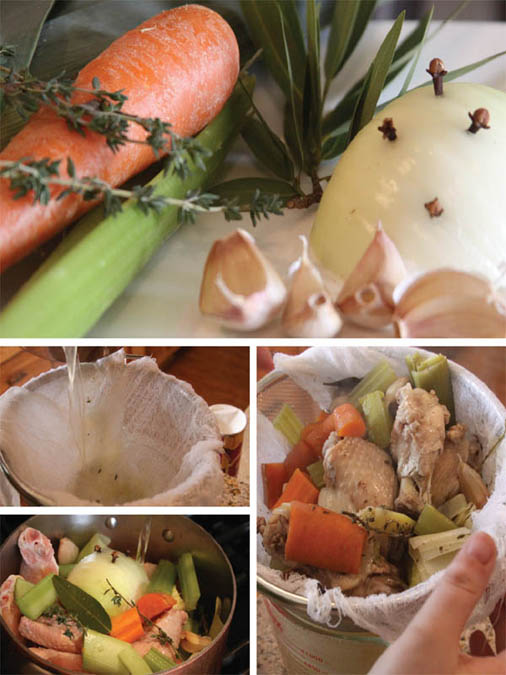
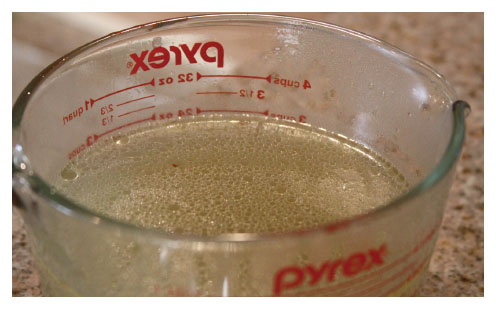
This basic homemade chicken stock is quick and simple. It is used in several recipes in this collection. We learned this recipe from Chef Jean-Georges Vongerichten of New York.
½ LARGE YELLOW ONION
4 CLOVES
2 POUNDS CHICKEN WINGS, CUT INTO 3 OR 4 PIECES EACH
1 MEDIUM CARROT, PEELED AND CHOPPED
½ STALK CELERY, CHOPPED
½ LEEK, CLEANED, GREEN PART DISCARDED, AND CHOPPED
4 CLOVES GARLIC
1 BAY LEAF
10 PEPPERCORNS
3 SPRIGS THYME
Stud the onion with the cloves and combine all the ingredients with 6 cups water in a large saucepan. Bring to a boil, and then lower the heat so that the mixture simmers steadily but does not boil. Cook, skimming any foam that accumulates, for about 1 hour.
Cool slightly, then strain through cheesecloth. Refrigerate (you can skim off the fat after the stock cools completely) and use within 3 days.
Makes about 6 cups
At Winterlake, I make pot pies often in the wintertime because they are so warmly satisfying. I use wide-rimmed white bowls that I also use for main dishes or some smaller, footed bowls used for courses that include main course salads. I roast a whole chicken and also roast all the vegetables for this dish to make the flavors pronounced. I prefer puff pastry for the flakiness and for the visual effect, but you may use regular pastry dough just as successfully.
1 WHOLE CHICKEN, ABOUT 3 POUNDS
SALT AND FRESHLY GROUND PEPPER
2 TABLESPOONS FINELY CHOPPED FRESH THYME
6 SMALL RED POTATOES, RINSED AND QUARTERED
2 LARGE CARROTS, DICED
1 MEDIUM RED ONION, CUT INTO EIGHTHS
OLIVE OIL
6 TABLESPOONS UNSALTED BUTTER
½ CUP SLICED MUSHROOMS
6 TABLESPOONS FLOUR
6 CUPS CHICKEN STOCK
1 SHEET HOMEMADE OR COMMERCIAL PUFFPASTRY
1 EGG, SLIGHTLY BEATEN
Preheat the oven to 425°F.
Rinse the chicken inside and out under cool water and remove any fat from the cavities. Season the chicken liberally with salt and pepper to taste, and thyme to taste. Place the chicken, breast-side up, on a rack in a roasting pan on the bottom oven rack, and roast until the meat is cooked through, about 1¼ hours.
Meanwhile, in a medium bowl, coat the potatoes, carrots, and onion in some olive oil. Season with more salt, pepper, and thyme. Place the vegetables on a baking sheet and cover with aluminum foil. Place the vegetables on the top rack in the same oven as the chicken. Bake for 30 minutes or until the vegetables are tender and cooked through.
Meanwhile, in a medium pan, place 3 tablespoons of the butter over medium-low heat. Add the mushrooms, season with salt and pepper, and sauté about 8 minutes. Remove the mushrooms and set aside. In the same sauté pan, add the 3 remaining tablespoons of butter over medium-low heat. Whisk in the flour and cook, whisking, until the flour is just golden brown, about 10 minutes. Add 1½ cup of the stock to the butter and flour mixture, stirring well.
In a large saucepan, bring the remaining chicken stock to a simmer over medium heat. Add the butter, flour, and stock mixture. Stir, and then simmer on low until the stock is thickened.
Remove the roasted chicken from the oven and transfer it to a cutting board. When the chicken meat is cool enough to touch, remove it from the bone. Into each of 4 wide-rimmed ovenproof bowls, place some of the chicken. Divide the roasted vegetables and the mushrooms among the bowls. Pour some of the thickened chicken stock in each bowl.
Cut the puff pastry into 4 squares. Brush each square with some of the egg. Sprinkle the square with some salt and some thyme. Place a square of puff pastry on the top of each bowl.
Place the bowls in the oven and bake just until the pastry is puffed and golden, about 10 minutes. Carefully remove the bowls from the oven and serve immediately.
Makes 4 individual servings
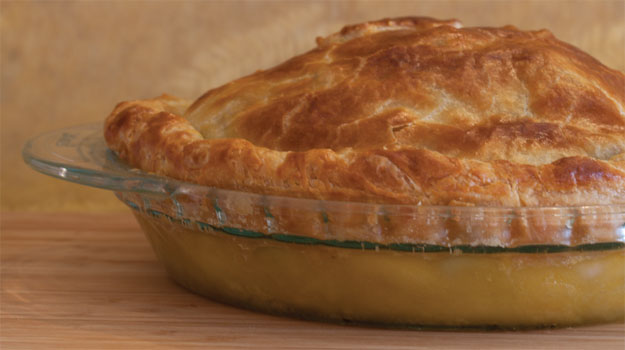
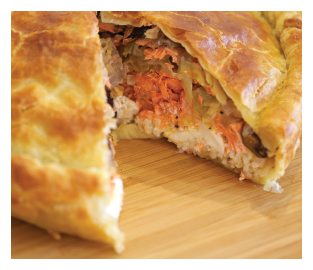
We’ve been making this recipe in one variation or another for thirty years. It’s still a favorite on our winter menus.
3 TABLESPOONS UNSALTED BUTTER
1 RED ONION, PEELED AND MINCED
½ POUND MIXED MUSHROOMS, SLICED
½ HEAD GREEN CABBAGE, CORED AND SHREDDED
1 POUND ALASKAN SALMON, SKINNED AND BONED
2 SHEETS HOMEMADE OR COMMERCIAL PUFF PASTRY
2 CUPS SHORT-GRAIN BROWN RICE
1 HARD-BOILED EGG, CHOPPED
2 TABLESPOONS MINCED FRESH PARSLEY
½ CUP SHREDDED SHARP CHEDDAR CHEESE
½ CUP FINE BREAD CRUMBS
SALT AND FRESHLY GROUND PEPPER
¼ CUP HEAVY CREAM
1 EGG,BEATEN
Preheat the oven to 375°F. Melt the butter in a wide sauté pan over low heat. Add the onion and sauté until soft, about 7 minutes. Cooking the onion over low heat makes it less likely to burn. Onion develops a lovely sweet and tender flavor when it is cooked. Add in the mushrooms and the cabbage. Turn the heat up to medium, adding a bit more butter if necessary. Sometimes I sprinkle a bit of water into the pan to create steam and help soften the cabbage. You could add in savory spices or herbs here also if you wish. My father loves caraway with cabbage so sometimes I use that. I place a lid or a piece of aluminum foil over the cabbage-vegetable mixture so it steams nicely. Remove the vegetables and set aside.
Poach, bake, grill, or pan-sear the salmon. Each of these techniques offers a little variation in flavor and texture. If you prepare the salmon any way other than poaching, I usually like to rub it with a good quality olive oil and salt and pepper the fish. This prevents the fish from sticking to the pan surface and protects the flesh from drying out before cooking. The salmon can be a little undercooked because we will cook it additionally in our pie. Cool the salmon and flake it into large-sized chunks.
Take a sheet of puff pastry and roll it out slightly onto a floured surface. Cover the second sheet with a cloth or plastic wrap so it doesn’t dry out. I like to roll out puff pastry a little bit so it doesn’t puff too much. If you buy commercial puff pastry, try to find a brand that uses butter rather than oil—it has a much better “mouth feel.” If butter is scarce, you can always make this dish with a regular favorite pie crust. I like to use a good sturdy rolling pin that has some weight and width to it. It doesn’t really matter if you select a pin without handles (better for big wide pieces of dough) or ones with handles (like Julia Child’s now in the Smithsonian museum), but purchase a good-quality rolling pin and it will last you a lifetime.
Place the puff pastry sheet into a 9-or 10-inch deep-dish pie pan, leaving the extra dough draped over the edge of the pie pan. Sometimes I make these pies in small individual servings using small pastry rings instead of a pie pan. I prefer to use glass pie pans because I can always take a peek at how the pie is doing on the bottom. For crusted pies, glass and non-shiny aluminum pans are best for a crispy bottom crust.
Place a layer of brown rice onto the pastry in the pan. Next add the chopped hard-boiled egg and the parsley. Add a layer of flaked salmon, then some shredded cheese. Next add the bread crumbs. Layer the onion, mushrooms, and cabbage into the pie pan (you can mix them all together if you want, but the layers look nice when you slice the pie). Sprinkle the pie with salt and pepper as you see fit along the way. Pour the cream over the pie ingredients. The sequence of these events doesn’t matter as much as your own personal taste. Some people feel very strongly about where the hard-boiled eggs are placed!
Roll out the remaining sheet of puff pastry onto a lightly floured surface. Brush the rim of the pie with a little water. Place the second sheet of pastry on top of the pie. Trim off the excess dough and crimp the edges of the pie together to adhere the two sheets of dough. Some people do this with a fork or between two fingers to make a decorative edge. Use leftover dough to cut out shapes if you wish. Make sure to slit the pie top with a few knife slashes so that steam can escape. Brush the pastry with beaten egg—or, if eggs are precious, just use a little cold water. Bake the salmon pie on the top rack of the oven for 35 to 40 minutes or until the pastry is a golden brown.
Makes about 8 servings
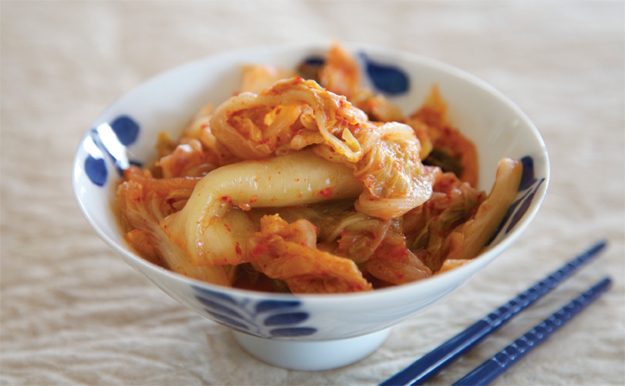
With apologies to any traditionalists, this is our own version of winter kimchi. It goes well with a little brown rice and a piece of salmon for a simple winter meal.
1 MEDIUM HEAD NAPA CABBAGE (ABOUT 1½ POUNDS)
¼ CUP KOSHER SALT
¼ CUP KOREAN RED CHILI POWDER OR FLAKES
6 TO 10 CLOVES OF GARLIC, PEELED AND MINCED
1 KNOB OF FRESH GINGER, PEELED AND MINCED
¼ CUP FISH SAUCE (NAM PLA)
¼ CUP LIGHT SOY SAUCE
4 GREEN ONIONS, COARSELY CHOPPED
½ CUP JULIENNED CARROTS
1 GRANNY SMITH APPLE, GRATED
¼ CUP MANDARIN ORANGE JUICE, FRESHLY SQUEEZED
Peel off any old or discolored cabbage leaves. Cut the cabbage lengthwise into quarters, remove the root ends, and then cut the quarters crosswise into bite-sized pieces.
In a small bowl, dissolve the salt into a small amount of warm water and pour the liquid over the cabbage. Toss the cabbage and saltwater with your hands. Let this sit at room temperature for about 4 hours or more. The cabbage will shrink down a bit as it begins to brine. Rinse the cabbage with cool water and strain to remove any excess water or brine. Place the cabbage into a wide mixing bowl.
In a separate small bowl, combine the chili powder with about ¼ cup of warm water to make a paste. Spoon this into the bowl of cabbage. Add in the minced garlic and minced ginger, the fish sauce, soy sauce, green onions, carrots, apple, and orange juice.
Put on a pair of lightweight kitchen gloves so the red chili powder doesn’t burn your hands. Toss and lightly rub the cabbage with all the ingredients together until the mixture is well blended.
Spoon the kimchi into a hot, sterilized quart-sized glass jar. Depending on how big the head of cabbage was, there might be some kimchi left over that can just be stored covered in a bowl. I prefer to use glass jars rather than plastic. I think plastic can impart an artificial taste into the kimchi. Leave about a half-inch of headroom in filling the jar to allow for expansion as the kimchi ferments. Cover the jar with a piece of cheesecloth or clean kitchen towel and leave out at room temperature overnight.
Cap the jar and place it into the refrigerator. Personally, I think you can use your kimchi immediately. It will change characteristics and continue to ferment over the next few weeks. Depending on how strong of a sour taste you prefer, find the optimal peak delicious time for your kimchi, probably within 2 weeks to a month. (If you know how to can and preserve, seal the jar in a boiling water bath to preserve the kimchi longer, for up to 3 months.)
Makes approximately 1 quart kimchi
A few years ago, I went to Southern California and stayed at the Chopra Center for an entire week. It was a remarkable experience. While there, I met a talented young chef named Greg Frey Jr. He shared this dish with me.
1 MEDIUM RED KURI SQUASH (ANY OTHER WINTER SQUASH CAN BE USED)
SALT AND FRESHLY GROUND PEPPER
3 TABLESPOONS OLIVE OIL
1 LARGE EGG YOLK
2 TABLESPOONS CHOPPED MIXED HERBS, YOUR CHOICE (WE USED FLAT-LEAF PARSLEY)
2 CUPS ALL-PURPOSE FLOUR (POSSIBLY MORE FOR THE DOUGH AND FOR ROLLING)
Preheat the oven to 350°F. Cut the squash in half and remove the seeds. Salt and pepper the squash halves and place face-side down on a baking sheet. Bake for 45 minutes to 1 hour until the squash is cooked thoroughly. Remove from the oven and cool first.
Remove the meat from the squash, either through a mesh screen or by hand, placing it into a large bowl. Add in 2 tablespoons of the olive oil, the egg yolk, herbs, and a little more salt and pepper. Add in the flour and use a pastry scraper or knife to “cut” the flour into the squash meat so the squash remains as light and fluffy as possible. You should form soft dough and this part is a little subjective. You might need more flour depending on how much liquid was in the squash or you might need less. Form dough into a ball that holds together, but is soft enough to stick your finger into without being coated in squash meat when you pull it out.
Let the dough rest for about 10 minutes. In the meantime, in a medium pot, bring about 2 quarts of salted water to a boil on the stove. Place a strainer that can fit inside the pot into the water. Reduce the heat to a simmer.
Cut a piece of dough off from the resting ball and roll it with your hands into a cylinder in plenty of flour. The dough will be quite soft so you need to be gentle. Cut the dough into ½ inch pieces. Using a gnocchi board, gently roll each piece of dough up and down the board. (If you don’t have a gnocchi board, try using the back of a fork.)
Drop some of the gnocchi into the simmering water. The dough will rise to the top of the water in a few minutes. Place 1 tablespoon of olive oil into a small saucepan over medium heat. Use the strainer to lift the gnocchi out, shake gently to remove extra water, and slide the gnocchi into the saucepan. Cook until the surfaces of the gnocchi are crispy, about 2 to 3 minutes. Remove the gnocchi from heat.
Makes 4 servings
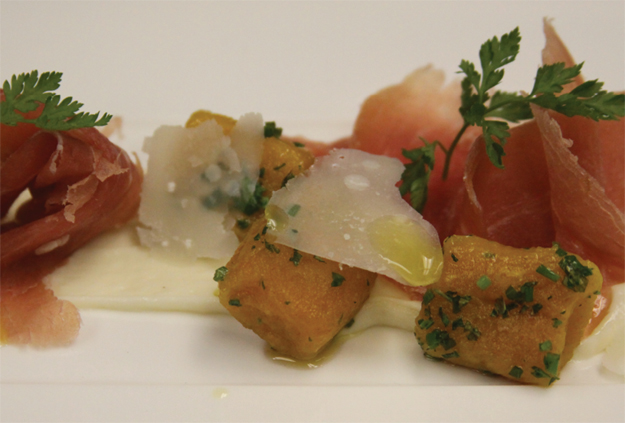
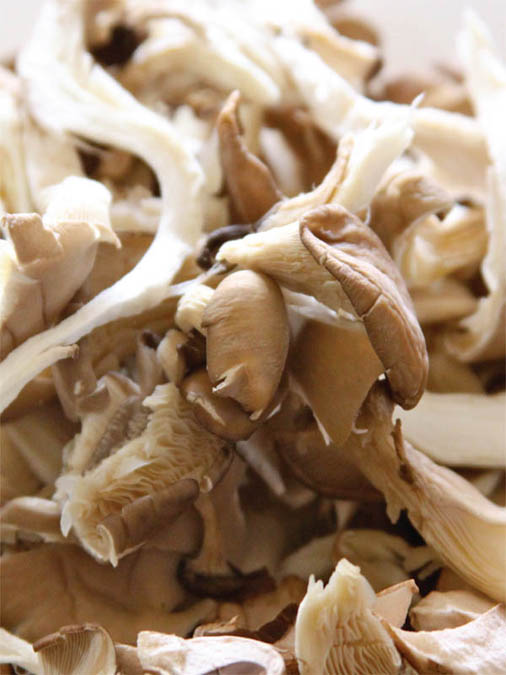
This recipe is an intriguing holiday alternative to turkey stuffing. Serve the pudding with a spoonful of mushroom gravy. The dish may be served at breakfast alongside fried eggs and ham. It is delicious at lunchtime with some salad greens. Vary the herbs, the type of mushrooms, and the bread to suit your taste.
3 TABLESPOONS OLIVE OIL
2 POUNDS MUSHROOMS, SLICED
2 CLOVES GARLIC, PEELED AND MINCED
2 TABLESPOONS FINELY CHOPPED FRESH ITALIAN PARSLEY
2 TEASPOONS FINELY CHOPPED FRESH SAGE
2 TEASPOONS FINELY CHOPPED FRESH THYME
SALT AND FRESHLY GROUND PEPPER
5 EGGS
2 CUPS HEAVY CREAM
1 CUP MILK
¼ CUP PLUS 2 TABLESPOONS FRESHLY GRATED PARMESAN CHEESE
6 CUPS (l-INCH) CUBES CRUSTLESS, DAY-OLD SOURDOUGH BREAD
Preheat the oven to 350°F. Lightly butter an 8-by-8-by-2-inch glass baking dish.
In a large sauté pan, heat the oil over medium-high heat. Add the mushrooms, garlic, parsley, sage, and thyme and sauté until the mushrooms are tender and brown, about 5 minutes. Remove the pan from the heat. Season the mixture with salt and pepper to taste.
In a large bowl, whisk the eggs, cream, milk, ¼ cup of the Parmesan, and more salt and pepper to taste. Add the bread cubes to the mixture and toss to coat the bread. Let the mixture stand about 15 minutes. Stir in the mushroom mixture.
Place the mixture into the baking dish and sprinkle the remaining 2 tablespoons of the Parmesan over the top. Place the casserole on a rack in the middle of the oven and bake until the pudding is brown and puffed and firm in the center, about 1 hour. Serve warm.
Makes 6 servings
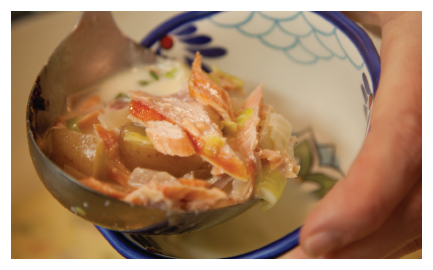
We have a recipe for a quick chicken stock in this collection but there are good quality canned versions available these days. Sometimes we make this chowder with vegetable stock for a nice harvest flavor.
2 TABLESPOONS EXTRA-VIRGIN OLIVE OIL
1 LARGE RED ONION,
PEELED AND DICED
2 LEEKS, TRIMMED, CLEANED,
AND SLICED
6 SMALL RED POTATOES, QUARTERED
2 CLOVES GARLIC, PEELED AND MINCED
SALT AND FRESHLY GROUND PEPPER
6 CUPS HOMEMADE CHICKEN STOCK
2 SPRIGS THYME
1 POUND HOT-SMOKED SALMON, SKIN-OFF AND FLAKED
1 CUP HEAVY CREAM
HOT PEPPER SAUCE, TO TASTE
Heat the oil in a large saucepan. Add in the onion and leeks. Sauté until the onion is soft, about 5 minutes. Add in the potatoes and garlic. Cook, stirring occasionally until the potatoes are slightly browned and crispy on the outside, tender on the inside, about 7 minutes. Season the vegetables with salt and pepper to taste.
Add in the chicken stock. Bring the liquid to a boil, and then reduce the heat to a simmer for about 10 minutes. Add in the thyme and the salmon. Check the broth for flavor, adding in any additional salt or pepper if necessary. Add in the heavy cream. Simmer on low, uncovered, for about 10 more minutes. Sprinkle in a little hot pepper sauce, if desired.
Makes 6 to 8 full servings or 12 small first-course servings
I bake beets rather than boil them so they don’t lose flavor or color. Sometimes we add baked apples to this recipe or we make beet soup with beef and cabbage added, which is hearty and comforting on cold evenings.
4 LARGE BEETS
1 LARGE RED ONION, PEELED OLIVE OIL
4 CUPS BEEF BROTH
2 TABLESPOONS LEMON JUICE
SOUR CREAM OR YOGURT, OPTIONAL
Preheat the oven to 350°F.
Wash the beets and dry them. Prick the beets a few times with a fork. Cut the onion in half. Rub the beets and onion lightly with oil. Wrap the beets and onion in aluminum foil and bake in oven until tender, about 1 hour. Cool the beets and onion to room temperature and peel. Roughly chop the beets and onion. Place them in a bowl of a food processor fitted with a metal blade and pulse several times. Add 1 cup of broth to the mixture and continue to process until the mixture is puréed. Add in the lemon juice. Place the purée mixture in a medium saucepan and stir in the remaining broth. Heat the soup over medium heat and serve hot. Spoon a dollop of sour cream or yogurt on top of the soup as garnish, if desired.
Makes 4 servings
This salad is delicious any time of the year, but it seems particularly appropriate in the fall and winter. I think sautéed mushrooms should be nicely salted and peppered, and for this dish I use a fancier salt, such as sea salt from France. If you don’t care for bacon or want to dress up the salad a little, try using smoked duck breast instead. For a nice change, add blood oranges and arugula to this salad, if available.
8 OUNCES SLICED BACON, CUT INTO l-INCH PIECES
¾ CUP FRESH ORANGE JUICE
3 SHALLOTS, PEELED AND MINCED
¼ CUP OLIVE OIL
¼ CUP PLUS I TEASPOON CIDER VINEGAR
4 ORANGES, PEELED, WHITE PITH REMOVED
10 OUNCES BABY SPINACH, WASHED AND DRIED
1 TABLESPOON GRAPESEED OIL
12 OUNCES MUSHROOMS, THINLY SLICED
SALT AND FRESHLY GROUND PEPPER
In a large sauté pan, cook the bacon over medium heat until crisp. Transfer the bacon to paper towels to drain. Pour off the drippings and reserve.
In a small bowl, combine ¼ cup reserved bacon drippings with the orange juice, shallots, oil, and ¼ cup of the cider vinegar.
Using a small sharp knife, cut between the membranes of the oranges to release the orange flesh from the skin.
Place the spinach in a large bowl and dress lightly with the grapeseed oil and the remaining teaspoon of the cider vinegar.
In a heavy, large sauté pan, heat the remaining reserved bacon drippings over medium-high heat. Add the mushrooms and sauté for 5 minutes, or until they are golden brown. Season the mushrooms liberally with salt and pepper to taste.
To serve, mound ¼ of the dressed spinach on a plate, top it with some of the sautéed mushrooms, pour the warm dressing over them, and decorate with the crisp bacon and orange segments. Repeat for 3 more servings.
Makes 4 servings
The rich and hearty combination of winter squash, cheese, and halibut becomes a distinctive dish. A panade can be thought of as a thick soup fortified with bread. You may modify this soup by omitting the halibut so that it’s a squash soup, or you might leave out the squash for a flavorful fish-centric main course.
1 SMALL WINTER SQUASH
1 TABLESPOON OLIVE OIL
SALT AND FRESHLY GROUND PEPPER
½ LOAF HEARTY SOURDOUGH BREAD ('A POUND)
2 TABLESPOONS UNSALTED BUTTER
1 MEDIUM RED ONION, DICED
2 CLOVES GARLIC, PEELED AND MINCED
8 CUPS CHICKEN STOCK
1½ CUPS GRATED GRUYÉRE CHEESE
1 POUND HALIBUT
Preheat the oven to 375°F. Butter a 6-quart ovenproof casserole.
Cut the squash in half. Scoop out the seeds. Brush the squash with a little oil, and season with salt and pepper to taste. Place the squash skin-side up on a baking sheet, cover with aluminum foil, and bake on the bottom oven rack for 1 hour, or just until tender. Set aside to cool. When cool, carefully remove the peel from the squash and cut the flesh into 1-inch cubes.
While the squash is baking, cut the bread into 1-inch cubes and place the cubes on a baking sheet. Toast the bread on the top rack of the oven for 15 minutes, or until all the cubes are lightly toasted and slightly crunchy.
In a large sauté pan over medium heat, melt the butter. Reduce the heat slightly and add the onion and garlic. Sauté until tender, about 10 minutes.
In a medium saucepan, heat the stock over medium heat.
Cut the halibut into 1-inch cubes.
In the casserole, spread half of the onion and garlic. Add half of the toasted bread cubes. Then add half of the squash cubes. Add half of the cheese. Add the halibut. Repeat the layering of the onion-garlic mixture, bread cubes, and squash. Top with cheese. Ladle in the broth. Bake, uncovered, for about 40 minutes.
Makes 4 servings
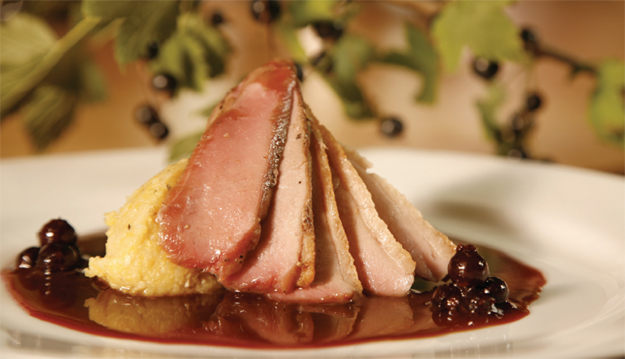
Duck breasts are so easy to cook, and they are so delicious. I think sometimes people don’t cook them just because they don’t know how. This recipe is simple and the technique used to prepare the duck may be used with any sauce.
2 TABLESPOONS OLIVE OIL
1 STALK CELERY, FINELY SLICED
1 LARGE CARROT, FINELY SLICED
1 LARGE YELLOW ONION, COARSELY CHOPPED
1 HEAD OF GARLIC,
SEPARATED INTO CLOVES, PEELED, AND MINCED
¼ CUP RED WINE VINEGAR
3 CUPS DRY RED WINE
2 SPRIGS FRESH THYME
6 WHOLE BLACK PEPPERCORNS
1 WHOLE DUCK BREAST,
ABOUT 2 POUNDS
2 SHALLOTS, PEELED AND MINCED
1 TABLESPOON SUGAR
2 CUPS BEEF BROTH
SALT AND FRESHLY GROUND PEPPER
1 PINT FRESH BLUEBERRIES, WASHED AND SORTED
Heat the oil in a large sauté pan over medium heat and add the celery, carrot, onion, and garlic. Cook for 2 to 3 minutes. Add the vinegar and stir, scraping the bottom of the pan with a wooden spoon to release the flavorful brown bits into the liquid. Pour in the wine. Add the thyme and peppercorns. Bring the mixture to a boil and lower the heat to simmer. Cook the marinade for 30 minutes and set it aside to cool to room temperature.
To trim the duck breast, separate the two halves of the breast. Remove any cartilage and excess fat. On the flesh side of the breast is a sliver of meat called the tenderloin. Remove it. Also on the flesh side, remove the silvery skin clinging to the meat. Turn the breast over and trim the fat until a ½-inch-thick layer remains. Score the remaining fat layer with slashes, making sure that you don’t cut through to the meat.
Pour the cooled marinade into a deep pan and place the duck breast in it. The duck should be completely submerged. Marinate the duck for about 5 minutes. Remove it and pat it dry. Reserve the marinade.
Heat a medium sauté pan over high heat. Place the duck in the pan, fat-side down. Cook the duck for about 8 minutes on the fat side until almost all the fat is seared. Spoon out and reserve any excess fat as it accumulates in the pan. The fat side should be browned and crispy. Turn the breast over and cook about 2 minutes on the flesh side. The flesh should be medium rare. Set aside the sauté pan. Remove the duck breast to a plate and keep warm. In a medium saucepan, bring the reserved marinade to a boil and reduce by about two-thirds, about 10 minutes. There should be 1 to 1½ cups of liquid remaining. Heat the medium sauté pan set aside earlier. Add 1 tablespoon of the duck fat to the pan. Add the shallots. Sauté the shallots for 1 to 2 minutes. Add the sugar and cook, stirring, cooking until the sugar is brown.
In a small bowl, strain the marinade. Place Zi cup of this liquid in the medium sauté pan, stir with a wooden spoon, and scrape the bottom of the pan to release flavorful bits. Pour the rest of the marinade into the sauté pan. Add the broth. Bring the sauce to a boil and cook about 8 to 10 minutes, reducing it to a thicker, more syrupy consistency. Season the sauce with salt and pepper to taste. Add the blueberries to warm them just before serving.
To serve the duck, slice each breast piece into 10 to 12 diagonal slices. On 4 plates, arrange 5 to 6 slices of the duck each. Ladle the blueberry sauce over the duck.
Makes 4 servings
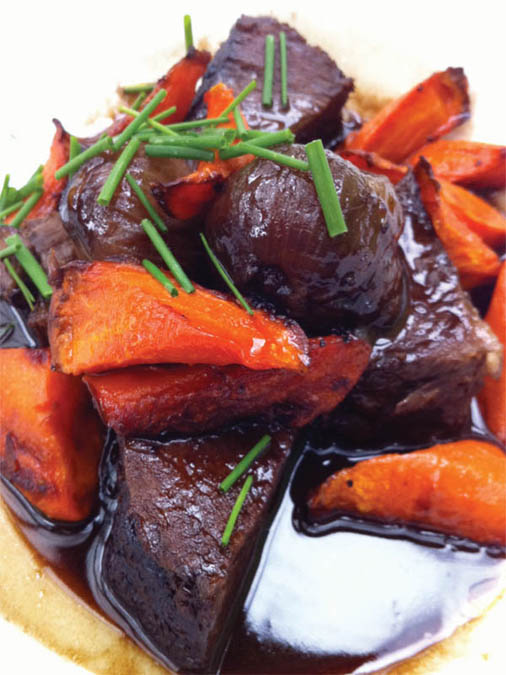
We have made this dish hundreds of times at Winterlake in one variation or another. It is really just braised beef served with a savory broth and roasted vegetables all around. For an extra rich broth, substitute the red wine with dark beer.
1 POUND BEEF CHUCK, CUT INTO 14-INCH CUBES
FLOUR FOR DREDGING
SALT AND FRESHLY GROUND PEPPER
2 TABLESPOONS UNSALTED BUTTER
2 TABLESPOONS OLIVE OIL
¼ POUND BACON, DICED
2 CLOVES GARLIC, MINCED
1 LEEK, TRIMMED AND WASHED, GREEN PART ONLY, SLICED
12 SMALL PEARL OR BOILER ONIONS, PEELED
½ BUNCH PARSLEY, STEMMED AND MINCED
2 CUPS BEEF BROTH
1 CUP DRY RED WINE
1 BUNCH FRESH THYME
2 CARROTS
1 SMALL BUNCH CHIVES
Preheat oven to 350°F.
Pat the beef cubes completely dry with a kitchen towel or paper toweling. Lightly dredge them in the flour, shaking off any excess. Salt and pepper the dredged beef cubes.
Set a large heavy-bottomed casserole pan over medium-high heat. Add the butter and oil. When the oil mixture bubbles lightly, add in the beef cubes, browning on all sides. This might have to be done in batches (don’t crowd the pan). Remove the beef and set aside. Drain the casserole of any remaining oil.
Add in the bacon, garlic, leek, onions, and parsley. Cook until the bacon is browned and crisp. Drain off any excess oil. Add back the beef and cover the meat mixture with the beef broth and wine. Add in the bunch of thyme. Cover the casserole and place in the oven. Bake for 1 to ½ hours (until the beef is tender).
In the meantime, trim, peel, and cut the carrots into diagonals. Add the carrots into the stew during the last 15 to 20 minutes of cooking.
Remove the bunch of thyme and discard. Garnish each serving with snipped chives. Salt and pepper to taste. Serve with rice, potatoes, or hearty French bread.
Makes 4 servings
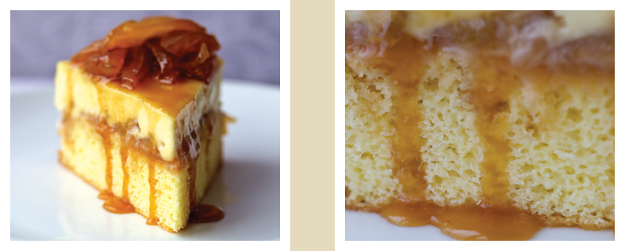
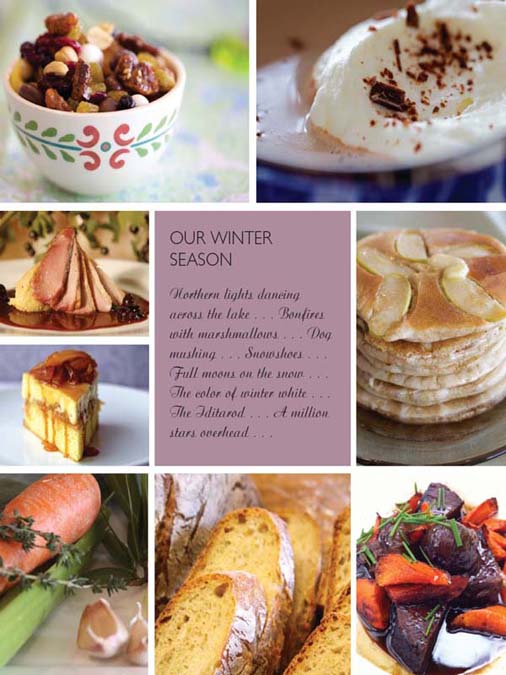
In the summer, cheesecake is a particularly good medium for showing off our freshly picked local berries. In the winter, we use simmered apples and apple cider. We prefer to use cake as the bottom layer rather than graham cracker crust.
¾ CUP CAKE FLOUR
1 TEASPOON BAKING POWDER
¼ TEASPOON SALT
7 EGGS, ROOM TEMPERATURE
2¾ CUPS GRANULATED SUGAR
2 TEASPOONS VANILLA EXTRACT
6 TABLESPOONS UNSALTED BUTTER, MELTED
½ TEASPOON DISTILLED WHITE VINEGAR
4 (8-OUNCE) PACKAGES CREAM CHEESE, AT ROOM TEMPERATURE
FRESHLY GRATED PEEL OF I LEMON
½ CUP SOUR CREAM, AT ROOM TEMPERATURE
l½ POUNDS COOKING APPLES (SUCH AS BRAEBURN OR GRANNY SMITH), PEELED, CORED, AND SLICED
½ CUP FIRMLY PACKED BROWN SUGAR
2 TABLESPOONS APPLE CIDER
Preheat the oven to 350°F. Butter a 9-inch springform pan and wrap the outside bottom and sides of the pan with aluminum foil.
Sift together into a large bowl ½ cup of the cake flour, the baking powder, and the salt. In two small bowls, separate 3 of the eggs. Beat the 3 egg yolks for 3 minutes on high in the bowl of a heavy-duty electric mixer fitted with the whisk attachment.
Add ½ cup of the granulated sugar and continue to beat until the mixture is thickened and the eggs are pale yellow, about 1 minute. Mix in 1 teaspoon of the vanilla.
Fold the egg mixture into the flour mixture. Add 3 tablespoons of the melted butter and blend.
Wash, rinse, and dry the mixer bowl and the whisk.
Beat together the 3 egg whites and the vinegar on high in the mixer bowl with the whisk attachment. Add ¼ cup of the granulated sugar and beat the egg whites until stiff peaks form. Fold the whipped egg whites into the flour mixture just until blended.
Spoon the cake batter into the prepared pan. Bake the cake just until the center of the cake springs back when lightly touched, about 10 minutes. Let the cake cool in the pan on a wire rack. Don’t remove the cake from the springform pan. Turn the oven off until 10 minutes before final cheesecake assembly.
In the bowl of a heavy-duty electric mixer fitted with the paddle attachment, mix the cream cheese and ½ cups of the granulated sugar on low until smooth. Add the lemon peel and the remaining 1 teaspoon vanilla extract. Add the remaining 4 eggs, dropping them into the cream cheese mixture one at a time and mixing thoroughly after each addition. Add in 2 tablespoons of the cake flour and the sour cream.
In a medium bowl, mix together the sliced apples, ½ cup granulated sugar, the brown sugar, and 2 tablespoons of the cake flour. In a medium sauté pan over medium heat, mix the remaining 3 tablespoons of the melted butter with the apple mixture and sauté until the apples are soft and the sugars have melted, about 5 minutes. Sprinkle the apple cider over the apples and continue to cook another 1 to 2 minutes. Cool the apple mixture before assembly.
Preheat the oven to 350°F.
Spread the cooled apple mixture on the sponge cake in the bottom of the 9-inch springform pan. Pour the cheesecake filling on top of the apple mixture. Place the foil-wrapped springform pan in a large shallow pan. Fill the pan with hot water to 1 inch up the side of the cheesecake. The water helps to insulate the sponge cake and provide moisture in the oven. Bake the cheesecake for 1 hour, or until the cake feels firm. Cool the cheesecake completely on a wire rack and then chill it, wrapped in plastic wrap, in the refrigerator for several hours before serving.
Makes 8 to 12 servings
