One of my favorite things about sewing is that it lends an aspect of creativity to every part of my life. I look at things in a way I didn’t before. When I shop for clothing, I think, This would be cuter if I changed the collar (or the pockets) or added a little something to the cuffs.
And the thing is, it doesn’t have to be hard, either. With this jean jacket, just cutting off the bottom and rebuilding it with fun fabrics did the trick. These directions will get you started with a similar project.
* Old jean jacket (mine happened to be green)
* Variety of print fabric scraps (enough to total ¼ yard of fabric)
* Print fabric strip for new bottom band and plackets
* Woven cotton fusible interfacing
* Clear quilting ruler
* Coordinating thread
* Chalk or air erasable marker
1. Use the quilting ruler to measure and mark 7” up from the bottom edge of the jacket all the way around. Draw a line all the way around the jacket. Cut off the 7”-wide strip.
2. From the piece that you just removed, follow the seamlines and carefully cut off the bottom band and the button and buttonhole plackets. Set these aside; you will use them as templates later.

note: These will be raw-edge pieces. See Sewing Basics on page 20.
1. Bring the cut jacket piece to the sewing machine with your collection of fabric scraps.
2. Starting at an end with the jacket piece right side up, place a scrap on top and stitch it down using your favorite appliqué stitch—blanket stitch, zigzag, satin stitch, or whatever. You don’t have to use the same thread color throughout or even the same stitch.
3. Add piece after piece, overlapping them slightly and stitching each in place as you go, until the whole jacket piece is filled. Trim any fabric that is hanging off the edges of the jacket piece, and press.

1. Measure the length and width of the bottom band that you cut off the jacket. Multiply the width by 2 and add ½” for seam allowances to determine the width of the accent fabric strip; the length is the same as the original band. Using these dimensions, cut 1 strip each from the accent fabric and the interfacing.
2. Measure the button and buttonhole placket pieces that you removed from your cut jacket bottom. To calculate the width, multiply the width of the original piece by 2 and add ¼” for seam allowances. For the length, add ¼” to the length of the original strip. Using these dimensions, cut 1 strip each from the accent fabric and the interfacing for each placket.
3. Press interfacing to the wrong side of each accent fabric strip.
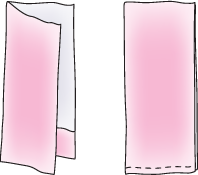
4. Fold the bottom band piece in half lengthwise, wrong sides together, and press.
5. Press under ¼” on one short end of each placket piece. With wrong sides together, fold each piece in half lengthwise. Edgestitch closed the folded ends on each placket piece ⅛” from the edge.

1. Pin, then sew the long raw edges of the band to the bottom edge of the embellished piece. Zigzag stitch the raw edges of the seam.
2. Fold the band down and press the seam toward the band. On the right side, edgestitch the band ⅛” from the seamline.
3. Pin, then sew the raw edges of a placket piece to each end of the embellished piece with the band, aligning the hemmed placket ends with the folded edge of the band. Press the seam toward the placket. On the right side, edgestitch the placket ⅛” from the seamline.
4. Sew the embellished piece to the bottom of the jacket, aligning the front edges.