I have the most adorable vintage pot metal lamp in my studio, but its shade was in need of a facelift. Slipcovers on furniture are wonderful because we can change them with the seasons or when we change our decor. So rather than take the glue-it-down approach, I created a slipcover for my little lamp. And I made it with some of the many fabric scraps stashed in my studio baskets and drawers. You can do the same thing with your lamps. It’s super-easy to make a pattern for any size shade.
* A cone-style lampshade (any size)
* 2 pieces of paper big enough to cover the lampshade all the way around (I used packing paper from a store that sells moving boxes.)
* Fabric scraps of any size, trimmed so the sides are straight
* 1 piece of muslin big enough to cover the lampshade
* Pom-pom trim or other trim to fit around the bottom edge of the lampshade
* Coordinating thread
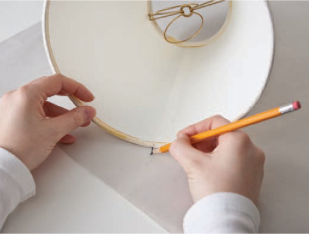
1. Find the seam on the lampshade. Lay the shade on its side with the bottom of the seam at the bottom of the large piece of paper. Mark both ends of the seam on the paper.

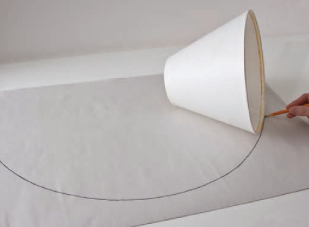
2. Roll the shade to the right, tracing its bottom curve with a pencil as you turn the shade. Stop at the seam and make a mark at the top and bottom of the seam.

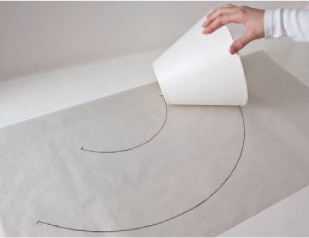
3. Roll the shade back to the starting point again, aligning the seam with the beginning seam marks. Be careful not to move the shade off your drawn line.
4. Repeat Steps 1–3 for the top edge of the lampshade.

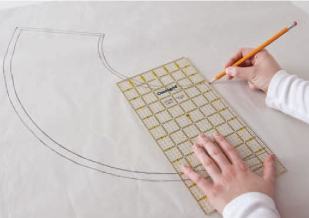
5. Using a ruler, draw lines to connect the top and bottom seam marks at each end. You now have an outline of the full shade.
6. To verify your measurements, measure the height of the lampshade to make sure it matches that of the outline all the way around. (Check each side first.) Using a tape measure, measure around the bottom and top of the lampshade, and make sure those match the length of the top and bottom lines you drew on the paper. Make any necessary adjustments.
7. Cut out the pattern piece, and wrap it around the shade to double-check that it matches.
8. Now add the seam allowances. Lay the pattern back down on another piece of paper. Using a ruler, make marks ½” outside the top edge and ¾” outside the bottom edge, and connect them. (Adding ¾” at the bottom gives you room for error: I’d rather my slipcover be a little bit long than find out at the end that it’s too short.) Add ½” at both straight ends.

9. Discard the first pattern piece without seam allowances. Cut out the new pattern piece, and lay it on top of the piece of muslin. This will be your crazy piecing foundation.
To add the crazy quilt piecing, see Keeping It Real: Crazy Quilt It (page 88).
1. Place the finished crazy-quilted muslin piece on your cutting mat with the pattern piece on top, and cut out.
2. Match the 2 straight ends right sides together and pin. Using a scant ½” seam allowance, sew the 2 edges together. Press.
3. To hem the bottom edge, turn it to the wrong side ¼", press, and then turn it ¼” again and press. Pin and topstitch on the wrong side ⅛” from the edge of the hem. Repeat to hem the top edge.
4. Sew pom-pom or other trim to the bottom edge of the slipcover.