Making a Mitered Border
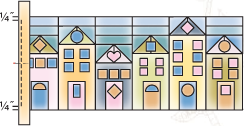
1. On the right side of the pillow front or quilt, mark a dot ¼” in from each corner, using chalk or an air erasable marker. These will be your pivot points for mitering.
2. Fold each border strip in half to find the center, and mark with a pin. Do the same for the top and sides of the pillow or quilt.
3. Match the centers of 1 side border and of 1 side of the pillow or quilt with right sides and raw edges together. Pin in place.
4. Using a ¼” seam allowance, sew from the center to the pivot point, backstitching at both ends. Repeat from the center to the pivot point on the other end, again backstitching at both ends.

5. Repeat Steps 3 and 4 to attach the other 3 border pieces. Press the seam allowances toward the border.
note: I have found that if I sew a long strip on from end to end, often I’ll have an extra ¼” or so left over. To remedy this, I have made it a habit to mark the centers and sew from the center to an edge and then sew from the center to the other edge. This way I always end up with equal amounts of fabric on each side. And if for some reason I’m a tiny bit short, I can always give a little stretch to the offending piece.
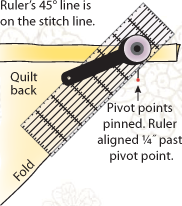
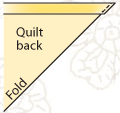
6. Place the pillow or quilt with attached borders right side up on a cutting mat. Fold it in half diagonally so the right-hand border seam is aligned over the top border seam. Pin at the pivot point so it does not shift.
7. Take your quilting ruler and lay the 45° line along the stitches you just sewed. Make sure the 45° mark is facing you; otherwise your cutting line will be upside down. Align the edge of the ruler so it is ¼” past your marked pivot point, being careful to keep that 45° line right on the seams. The edge of the ruler is your cutting line, and your sewing line is inside that line. With a rotary cutter, carefully trim off the excess fabric at the cutting line.

8. Pin the edge neatly in place just as you cut it, with right sides together. Using a ¼” seam allowance, sew from the raw edge to the pivot point, backstitching at both ends.

9. Repeat Steps 6–8 on the other 3 corners. Open the miters and press the seams open.