Freezer Paper Appliqué
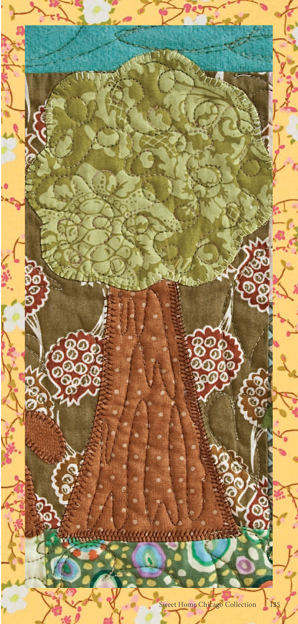
For appliqué pieces with edges neatly turned under, try the freezer paper method. You can use it to apply appliqués to everything from quilts to garments. The cool thing about freezer paper is that the shiny side adheres to fabric and paper when pressed. Even better, it peels off easily and leaves behind no residue.
For this process, you’ll need freezer paper, appliqué glue, spray starch, a stiletto tool, a small paintbrush, and an ultra-fine black permanent marker. I also recommend a mini iron for pressing under the edges. For more on these supplies, see page 13.
1. Trace your appliqué pattern piece with the marker onto the shiny side of the freezer paper.
2. Iron 3 pieces of paper on top of the matte side of the piece you just traced on. This creates a nice stiff template to work with.
3. Cut out the shape with your paper scissors.
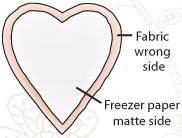
4. Iron the wrong side of a piece of fabric at least ½” larger than the template to the shiny side of your freezer paper template.
5. Cut the fabric around your template, leaving ¼” to turn under.

6. Place the cut appliqué piece, right side down, on an ironing surface. Use a pin or 2 to tack it in place.
7. Spray a large amount of spray starch into a cup so that you have a good amount of liquid to dip in. Dip your paintbrush into the starch and paint a generous amount onto the ¼” of extra fabric.
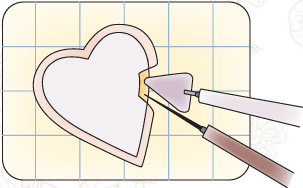
8. Using your stiletto tool, turn the wet, starched ¼” allowance of fabric onto the matte side of the freezer paper, ironing as you go along.

note: As you turn the fabric, get past tricky parts like the V of a heart by clipping with small scissors just barely to the freezer paper.

9. Carefully pull the paper out from the middle, and finger press or iron the turned fabric neatly in place.
10. Put tiny dabs of appliqué glue along the turned-under edge, and place the piece on your appliqué surface.
11. Let it set for a minute, and then blindstitch the piece in place by hand or machine appliqué.
