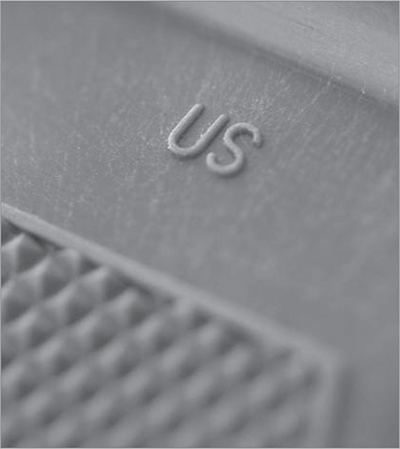
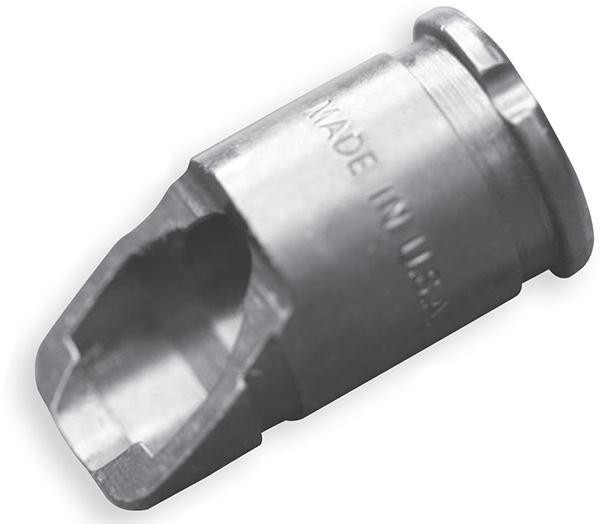
U.S.-made parts are marked as such, so it is clear you have gone to the trouble of building a kosher AK.
THE HALCYON DAYS OF PARTS KITS GALORE are long gone. Still, there are parts kits to be had, and the tools with which to build them still exist. While you may not be assembling dirt-cheap AKs any longer, the details of what goes into a build, and the things you’ll have to be aware of, have not changed. So, while not as many readers might find this chapter to be as useful as back then, you can benefit from having this knowledge tucked away in your database.
The first thing you have to know, which I have mentioned before, is that the AK receiver is not a blank slate. If you are assembling an AR-15 from a bare receiver, you can make it into just about anything you want. Short, handy M4 clone, or full-size-plus High Power Space Gun, you can build them both on the same receiver. You can build one, then take it apart, and then build the other, if you want. You can select from a host of calibers (but not go up from the .223 to .308, alas) and not have to do anything but pick up a “plain, standard, AR lower” from your local FFL.
Not so the AK. There is no such thing as a “plain, standard AK receiver” extant. There aren’t even plain, standard AK flats [Flats and tubes are explained later on this chapter. – Editor]. Even flats are made to fit a specific model and country of origin parts kit. If you are planning a build, plan ahead, there are a number of things for which you have to account. If you buy a kit, or still have one laying about the shop, garage or basement, your kits will have everything you need, save perhaps the barrel. The kit will determine what you can build.
U.S.-made parts are marked as such, so it is clear you have gone to the trouble of building a kosher AK.
Your flat comes caliber specific. It should also come with the particular holes you’ll need for your stock type — fixed or folding.
The rails are not only caliber specific, but you’ll have to attach them in the correct locations, or forever have a cranky AK.
First, caliber. The receivers will differ between the 7.62x39 and 5.45x39 variants. The ejector is the main difference between calibers, but not the only one. The magazine well opening is also different. Is your kit (or the replacement parts you plan to use) a single- or double-hook semi-auto trigger kit? You’ve got to know, or you’ll be doing extra cutting and fitting. You have to use the stock that comes in the kit, unless you plan to build using a different stock that you purchased. Which also means a different rear trunnion. And you have to pick one style before ordering a receiver, and order it accordingly. A fixed-stock receiver can have several different tang configurations, and all the folding stock variants differ as well. A Chinese underfolder, a Polish underfolder and a Yugo underfolder look similar, but won’t fit a receiver except the ones specifically made for them. Then there are the sidefolder variants. Luckily, the front end is the front end, more or less.
If you are buying a flat, you have to make sure your flat is specific both to caliber and stock configuration, a bent tube, ditto. The easiest way to get it all right is to simply contact NodakSpud with the particulars of your parts kit (“Polish underfolder,” “Tantal in 5.56” or “fixed-stock Romanian,” for instance) and have them ship the correct lower to your FFL.
If you plan to build from a flat or tube, you’d better know exactly what you have, or you may be the proud owner of a bent, welded and heat treated receiver, one requiring a particular parts kit to fit the receiver you so carefully fitted.
Do your homework, and shop carefully, before you log onto a secure page to order a parts kit. Some things to be aware of are the keywords you’ll see there:
This means all the parts in your kit came from the same rifle, and were kept together when stuffed into the plastic bag in which they were shipped. This is a good thing, as the barrel and bolt will be correctly headspaced (at least within commie specs) and the parts all came from a working rifle.
Generally, this means the barrel, bolt and trunnion are all matching, and the rest are what was handy. If so, then headspace will be fine, and since you’re doing the handwork to make all the rest fit anyway, it is no big deal.
Look out. This could mean anything from the wood is non-spec to every single part came from the spare parts bins — bins filled from scrapped-out rifles and the like. It probably means your rifle will need a whole lot of work to make it right.
Never a rifle, this is “one each of all the parts needed to make a rifle.” No two of them may have even met before they were scooped into the box and shipped overseas. These kits are definitely for the experience builder only.
Code for “You’d better apply for an SBR on a Form 1 before you start building.” Krink kits, and kits that commonly come with barrels too short such as some Hungarian models, will be in this category.
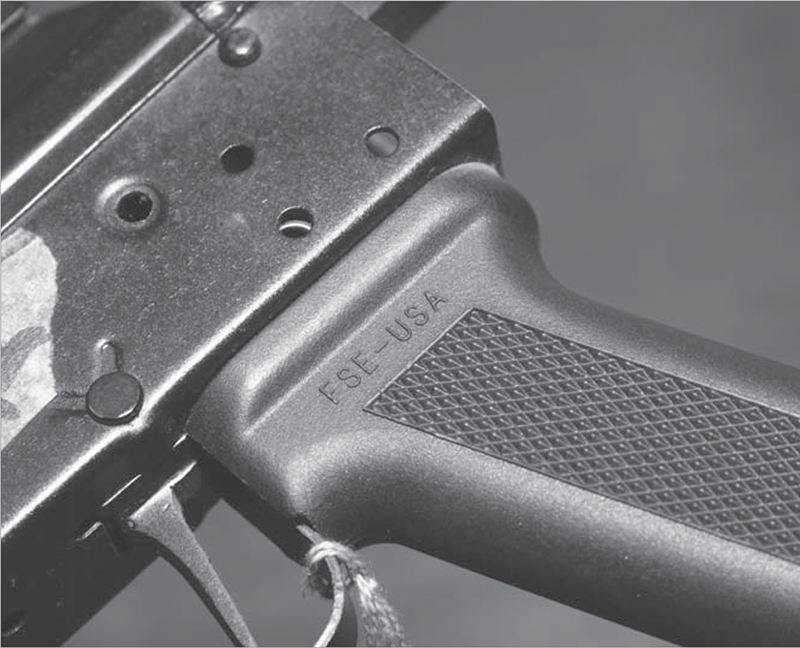
You need U.S. parts, so get them. This Tapco slant brake counts towards your 922(r) compliance.

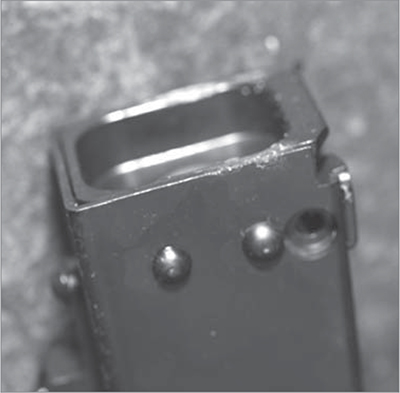
Note the front of the mag well. It is angled for a reason, and why you buy a flat pre-cut.

The dimples on the flat (some flats don’t have dimples) are magazine locators. They keep the magazine from wobbling in the receiver. You want dimples, or inside rails, to stabilize the magazine.
From flat to receiver. As soon as it begins bending, your flat is now a firearm. Do it right, and do it legally.
Note the bent flat lacks trunnion holes, while the unbent one has them. Having trunnion holes already drilled is a gamble: if yours don’t line up, you have some work to do to make them right.

Single- or double-hook? If your trigger parts are double, but the flat is single, you have to cut. If the opposite, fill or leave a gap.
A rifle that was made, then scrapped as a parts kit, without ever leaving the rack or being issued or fired.
Issued, but not fired, or fired so little as to not make any difference.
The kit may be rough, but someone took the time to look down the bores and set aside the rifles that had unpitted bores and strong rifling.
As with anything, the better the condition, the better the prospects of making a good rifle. And also the more you can expect to pay for the kit. I bought some AK-74 folder kits, like-new Bulgarian, when the parts kits were still commonly found. They cost me $249 each. Before they dried up, those same kits were going for $499. I bought Romanian kits at $79 for used, good bore and $99 for like-new. Before they dried up they went up to $249 and $299 respectively.
Well, that was back in 2007. I did a quick check, and found that parts kits for AKs are more expensive. (Big surprise.) And they often come with U.S.-made barrels. Also, the wood, fixed-stock kits are cheaper than the folders, again, no surprise. Wood, fixed stock kits starting at $500, and folders at $550 were the norm. These were all U.S.-made barrels, which adds an extra step to the building.
So, parts kits are still out there to be found, you just won’t find a guy at the local gun show with a pallet of them, selling them dirt cheap and with a discount for volume. Be aware of condition, as it makes a difference in the end result and the work to get there.
Second, we are not going to go through a blow-by-blow description of all the gory details of building an AK. To do so would require a book as big as this, not just a chapter. What I will be covering are the details you’ll need to know to intelligently shop for parts, seek out builders, or undertake the process of learning to build an AK yourself. The details of building vary from caliber, to model, to country of origin.
You also need a bench full of tools to build an AK. If you think “Hey, I’ll buy a parts kit, a flat, and the tools, and I’ll make my own inexpensive AK,” you’re going to be disappointed. By the time you buy the receiver fixture, bucking bar and anvil, barrel press and rivet punch, you’ve eaten up any savings from buying a ready-to-go AK. And then there is the multi-ton press. You can get all the tools except the multi-ton press from American Gunsmithing Institute (AGI). They also have instructions on how to do the work. The multi-ton press commonly comes from Harbor Freight.
Fire control parts count as three parts toward compliance.

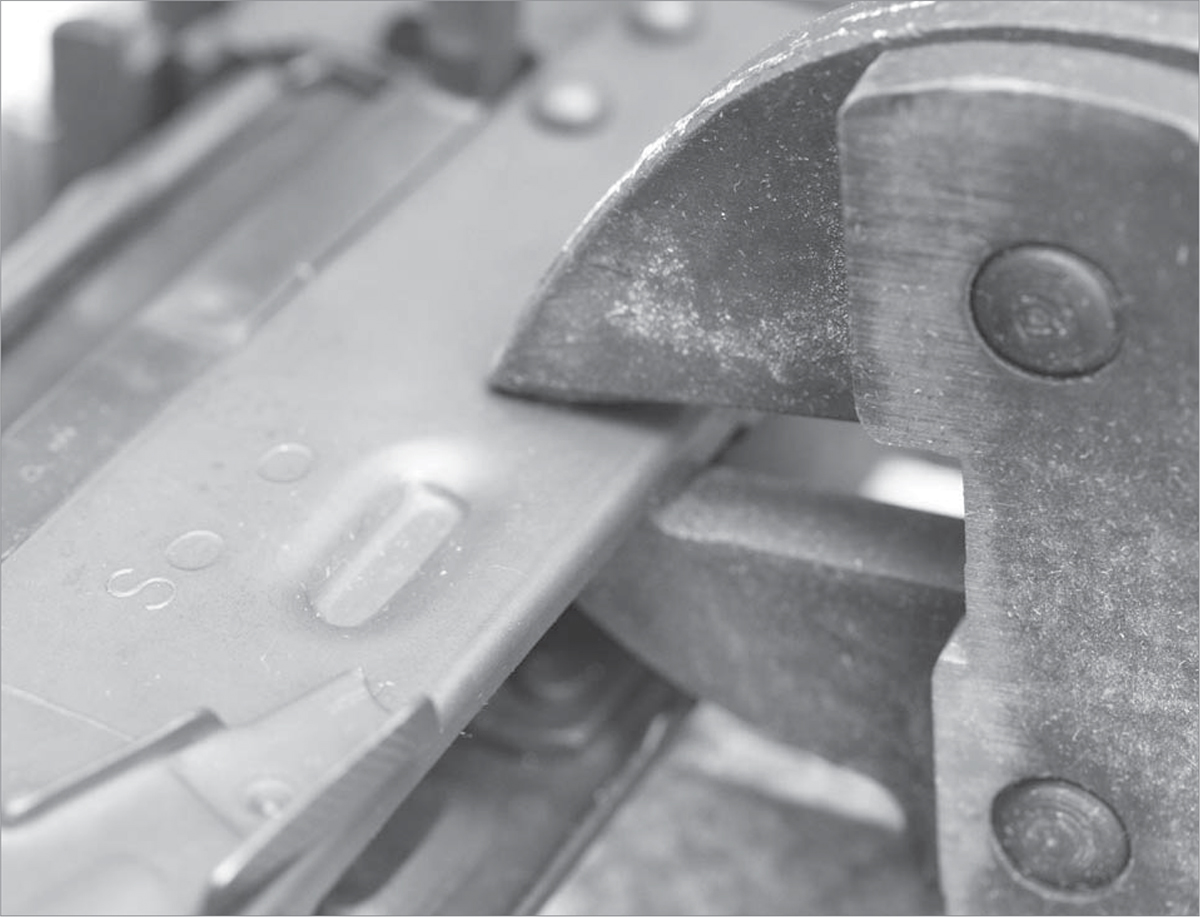
The pistol grip counts, too. So get the U.S.-made one that feels comfortable, and looks correct (if that matters to you).
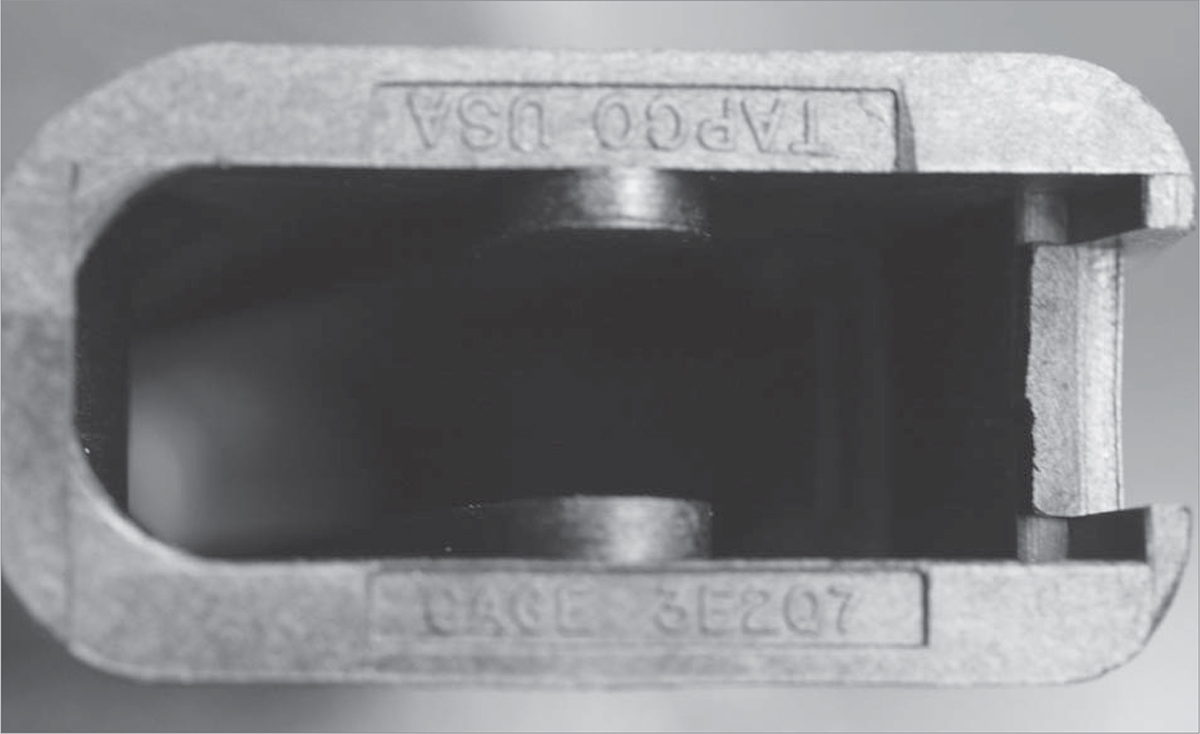
These clearly visible U.S.-made markings prove you’re 922 compliant.

Rivets or screws? Put me down in the rivet camp. After all, they were good enough for Comrade Kalashnikov.

A modified bolt cutter works quite well as a rivet setter.
The parts will be in a plastic bag or paper-wrapped in cardboard. They’ll be encased in Cosmoline. Pull the parts out and make sure they are all there. I had one parts kit arrive with two complete full-auto hammer/trigger assemblies. When I saw that, I immediately thought of the scene from the Jack Webb movie The D.I.: “Maybe in the Russian Navy they have rifles with two operating rods, two trigger assemblies and two bolts, but in the United States Marine Corps we only have one each.” I guess someone out there got the next box in line, which had no hammer/trigger parts. Since we’re changing those parts anyway, it doesn’t matter. But lacking some other part might mean you’ll have to either complain to the seller for redress, or buy the missing gizmo. Take off the handguards and stock. Typically, the trigger guard is free at its front end, where they torched the receiver away, and if you aren’t careful you can bend the trigger guard. If bent too much it won’t straighten properly, and you’ll have to buy another one. Or put up with a fugly trigger guard.
Grind off the rivet heads on the sheet metal that remains from the receiver. Use a bench grinder, a pair of heavy work gloves, and a shop apron that you will not mind getting impossibly grubby. Grind the heads flush with the sheet metal. Then grab the sheet metal edges with a big pair of channel locks, and pry it away.
The trunnions will still have the rivet stubs in them. On the rear, drill (carefully) the stubs out until you can drive them out with a punch and hammer. The trunnions are hardened, so you may bust a few drills getting a feel for the technique. From the inside, grind off the rivets for the trigger guard, front and rear. Again, don’t bend it.

The modified faces of the cutter jaws, made to be rivet-setter jaws.

You need a slew of rivets, of different sizes, and you need a tube. That tube is the center support.
The rivet setter in place, on the lower rear receiver of the front trunnion.
Once the old sheet metal is pried off, and the rivets gone, use a multi-ton press to push the barrel cross pin out. It is in there to stay, so getting it out may take more than a little work. (You can do it before you remove the sheet metal, it doesn’t really matter when.) Once it is out, use the barrel press to remove the barrel from the front trunnion. Then remove the last of the front rivets.
You now have the scrapped bits removed from the working parts and the parts you will be building on. You’re ready to think about the building.
The federal regulations concerning firearms are at times maddening, and at times quite rational. Occasionally they are both at the same time. One of the rational sections concerns unfinished receivers. Basically, it is the “80 Percent Rule,” meaning any receiver that has had less than 80 percent of the work done needed to make it complete is not yet considered a firearm. And it’s a good thing, too. If not for that, any section of pipe close enough in diameter could be construed as a future Sten gun, or who knows what. Exactly how the less-than-80-percent-work-done determination is made is not something I know, though I’d guess that if you wanted to market “79 percent receivers” you’d submit a sample to the ATFE along with the workflow charts showing how much you did and how much remained. (Quick bit of advice: I’m not an attorney, nor do I play one on TV. But I’d certainly want to be doing this as someone who was incorporated and had a firearms manufacturer’s license already. Otherwise, you might be in trouble, sending an 81 percent receiver in for inspection, lacking said manufacturers license. But that’s just me.)

Trigger guards on parts kits can easily be damaged. Take care in opening the package.

Knock the rust off after you’ve removed the trigger guard. And all other parts, too.

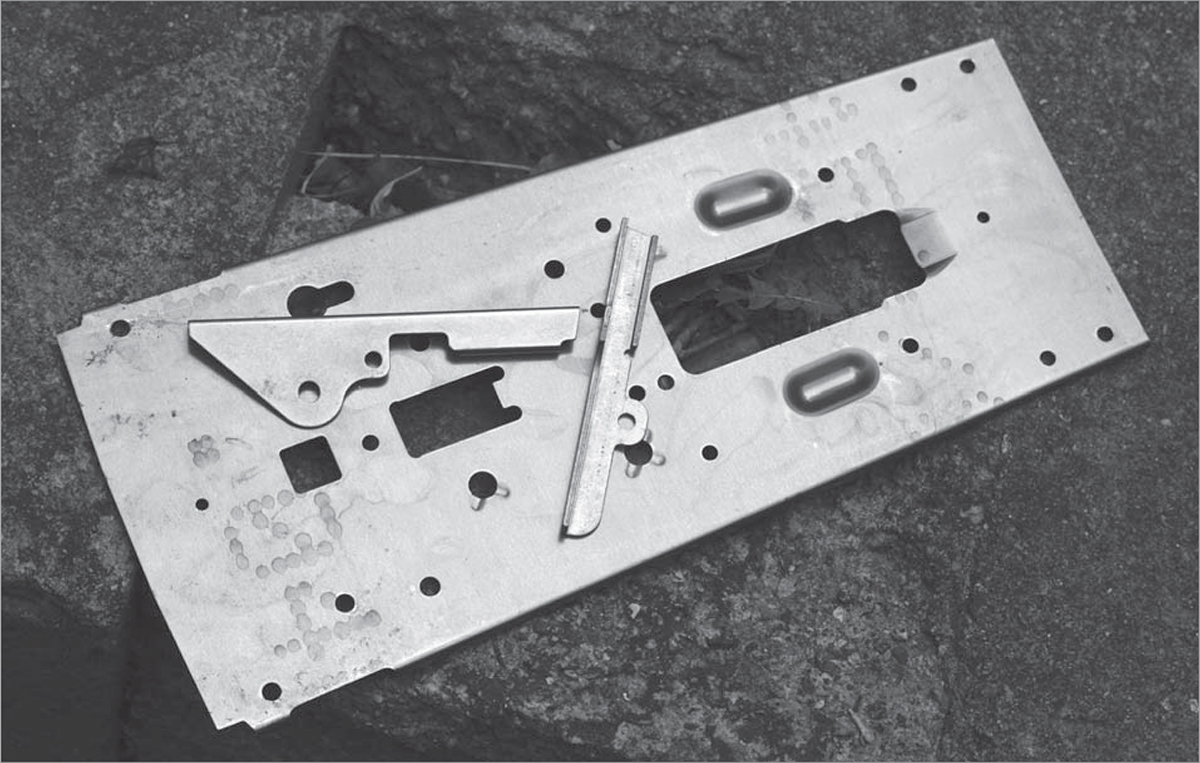
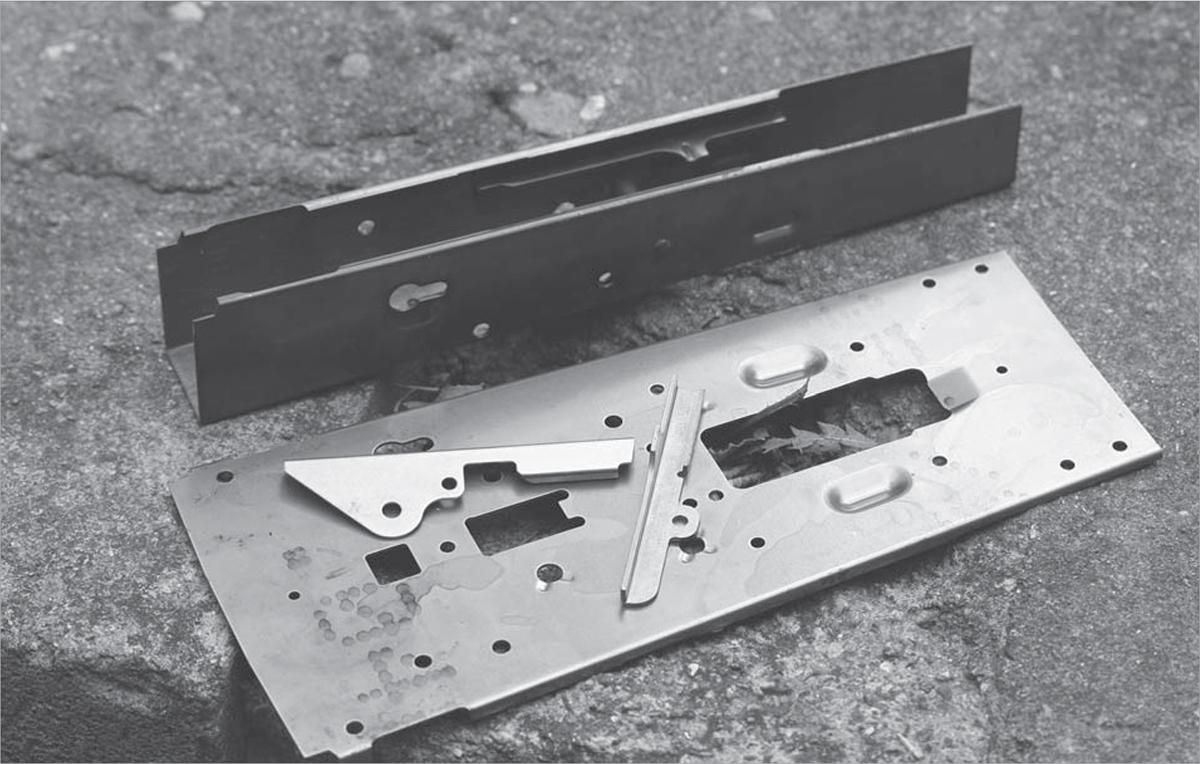
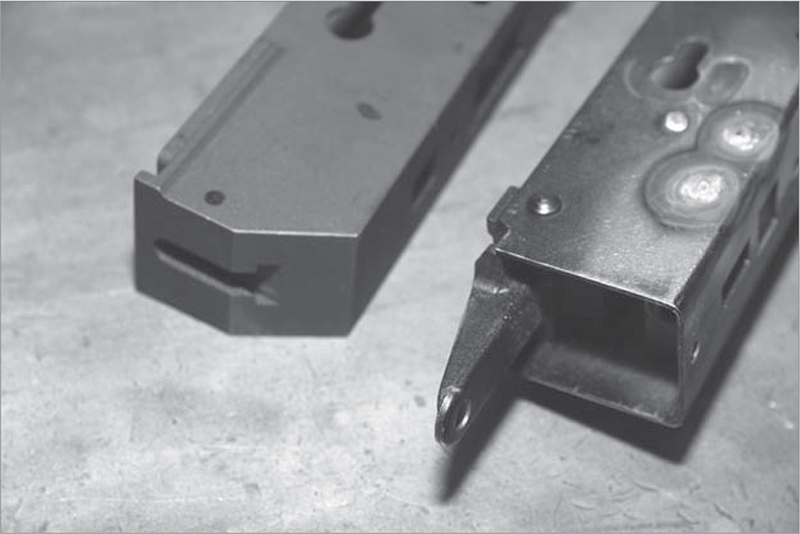
There’s a front trunnion with barrel in there. Your job is to get the sheet metal off.
As a result of the differing approaches to the “less than 80 percent” threshold, you are faced with two different types of partially-made receivers: flats and tubes.
Flats are just that, flat sections of sheet metal, with all the holes, magazine slot, etc. already drilled and cut. It is up to you to fold the flat into a channel and get all the holes to line up. Now, “just bending it” is more involved than hammering it over the edge of your workbench. And, it is also the step that takes you past the 80 percent threshold. As soon as you bend it, it is a firearm, and you’d better be sure it conforms to the laws of your state as well as federal regulations and statute. A quick heads up: Just because you are making the receiver from a flat does not exclude the assembled rifle from the requirement to be 922(r) compliant. To bend a flat you need a forming die, which is a big chunk of steel shaped like the interior of a receiver, plus a multi-ton press big enough to bend the steel. Bigger is better. Ten tons? Barely. Twenty tons is better, and more is good.
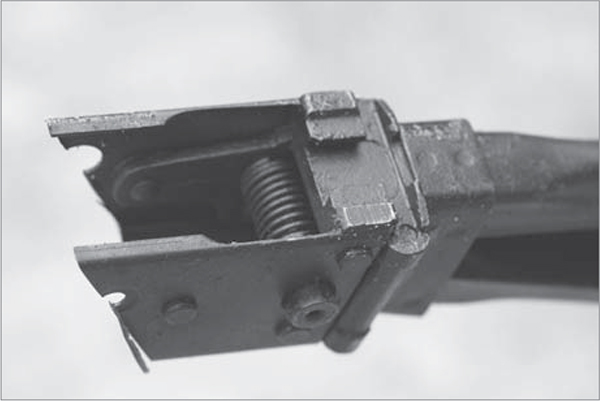
It must have taken a bit of skill to lop off the receiver right behind the trunnion, and not touch the important parts.

They used a bandsaw on this AK-74, and included two complete FA fire control units. Shades of the scene from the movie The D.I.
Making yours from an unmarked flat or tube is allowed, quoting from the ATFE:
per provisions of the Gun Control Act (GCA) of 1968, 18U.S.C. Chapter 44, an unlicensed individual may make a “firearm” as defined in the GCA for his own personal use, but not for sale or distribution.
Tubes are pre-bent flats. How can someone sell you a pre-bent flat and not exceed the 80 percent rule? They don’t drill the holes. The process is, acquire the tube, and then paste or tape the provided drilling diagram to the tube. Then drill the holes in the right places. You don’t need a multi-ton press, just a drill press and a selection of the correct-sized drills. However, if you aren’t very, very careful you can drill the holes slightly out of alignment, and that is a bad thing. I could point out at this stage that the absolute best tool for drilling holes and cutting the magazine well opening in a receiver tube is a milling machine. However, for the cost of a mill you could buy a footlocker full of ready-to-go receivers. If, however, you have access to one, then by all means use the right tool. Just remember you have to work the controls. You have to do the work yourself. Having your buddy the machinist do the cutting just means he has made his own AK receiver.
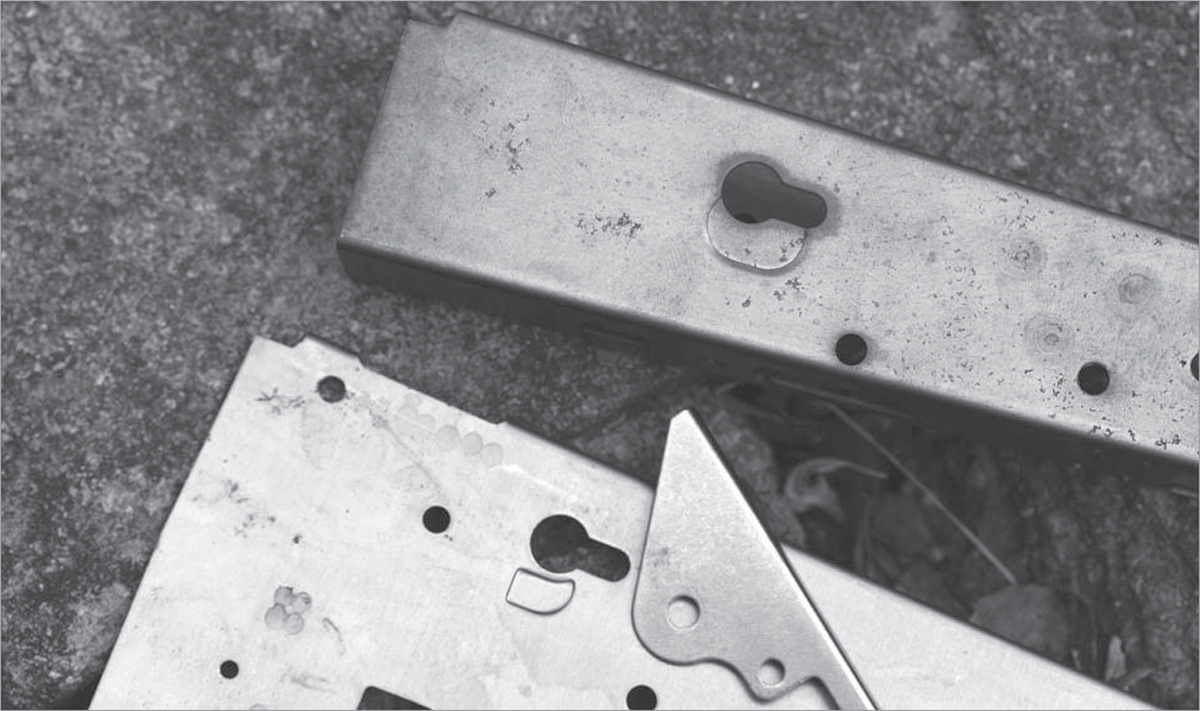
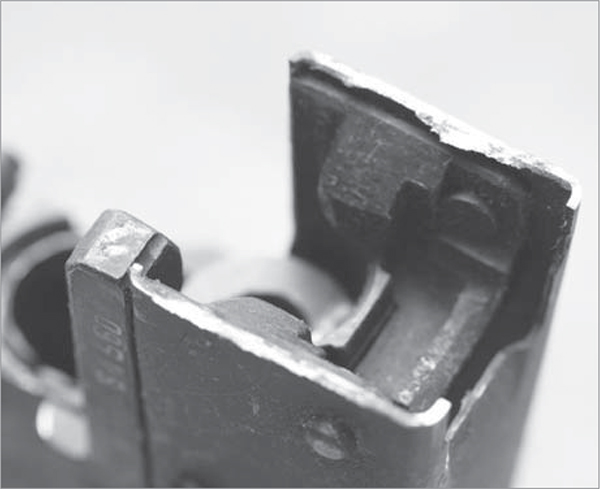
It is important to delicately pry the sheet metal off this trunnion if you expect to have a working sidefolder when you’re done.
In both methods you have to weld the interior rails in place. The rails are the guide rails and ejector for the bolt, and some rails also provide fillers for the magazine guides. If you are using an industrial welder, four or five spot welds will do. If you are using a bargain (let’s just call it “cheap,” OK?) benchtop spot welder you’d be wise to do six or seven welds. The correct AK receiver has two dimples stamped in place, acting as magazine guides. You can get the tools to stamp the dimples, or you can weld the rails with guides in instead. They both work to keep the magazine under control, but those shooters wanting a correct-appearing AK will opt for the dimples.
Your receiver dictates what kind of stock you put on it. Ditto the parts kit.
With the holes correctly located, rivets go in easy, and set hard and tight.
On both builds hand-fit the forward and rear lengths and rivet holes for the kit you have. Again, there is no “plain, standard AK” lower in this regard. As the factory intended the front and rear trunnions (the steel blocks that the barrel and stock go into) to be permanent installations, there was no incentive to make the rivet holes at all standard. If you had parallel assembly lines of AKs in the same factory, I’d bet the rivet holes would not line up on rifles from each line, even on rifles made on the same day. As for rifles made in different decades, in different countries, get real. (I’m sure someone will come to the defense of Soviet manufacturing standards and assert that all rifles were made to the highest level of precision. Ask him if he is driving a Lada, Yugo or Zil.) AKs were made as well as they had to be made, and were almost considered disposable items. The rivet hole locations are hand-locate-and-drill items. You can bet that if you build enough AKs you’ll find you’ll have to adjust the hole locations on some of them.
The ejector has to be heat treated before you weld it into place. That means a propane torch and a bucket of water or oil. The internal rails must be welded in place. For that, you need positioning rods or fixtures. The easiest way to properly locate the rails is by using drills as spacers. The rails are usually spot-welded into place. However, if you lack that, you can drill and rivet them in — you’ll need more than the usual number of rivets — or even use machine screws and solder. A welder I know took one look at the process and felt that “plug” welds would work too. That’s where you drill through the receiver wall but not the rails, and then weld through the hole to attach the rails, plugging the hole with weld as you finish. Welding in such a way is a bit delicate, and not something I’d turn over to any old welder, like the type who attaches tow loops to Mack trucks for a living.
Once you have the front trunnion free of the old receiver, you have to get the barrel out. You can’t fit it to the new receiver until you’ve gotten to here.
However, you do need help from an experienced welder, or knowledge of welding and the gear, to do any of this.
Next, spot heat treat the receiver. You can’t just heat treat the whole thing, it isn’t the correct alloy. Most manufacturer-made receivers, such as the NoDak Spud, use a 4100-series alloy. They can heat treat the whole thing. They also have the correct ovens, experience, and tempering fluids to do it correctly and not warp the receiver. Your flat, or tube, is a 1000-series alloy, and cannot be so heat treated. You have to spot treat it. This involves using a propane torch to heat each hole in turn to the correct temperature, then plunge it into water or oil. If you do not heat treat your receiver, the hammer and trigger pin holes will be too soft, wear with use, and your rifle will become unsafe to shoot. Conversely, if it’s too hard, the receiver will crack. A sheet metal receiver that lacks heat treatment will not last long, something I’m sure the Soviets found out pre-1947.

A good-fitting channel, and well-set rivets look like this. (It’s Russian, you’d expect it to be right.)
One drawback of a “virgin” kit is that the barrel is not going to have a pre-fitted gas block. That means more work, and more things that can go wrong.
You can check the fit of the carrier to the rails. However, the trunnion fitting, and the center support post and rivet, are likely to “tweak” the receiver rail alignment just a bit. Thus what fit was a free-running ride before may bind after later assembly work. So while it is fun to check, you really need to save that work for later.
Fit the trunnions and seat the rivets. The 17 rivets that go into an AK are not all the same. Sort them out, and keep like with like. Then, make sure the trunnions fit properly before you do any riveting. If needed, file or Dremel the top rails so the trunnion fits snugly, and the rails don’t sway the receiver out. A few minutes spent getting things right here will save you headaches to come. Make sure the rivet holes line up. You can even hand seat the rivets and hold things in place while you check the fit. If you find that you have to do some filing, go slowly. The ideal tool for riveting is the multi-ton press you used to fold the flat. However, if you used a tube, or folded your flat on someone else’s machine (you did pull the handle yourself, right?) then you may not have access to the press. In that case use a modified bolt cutter. A 12-ton press costs $120 or so to purchase. A 20-ton press runs $200. But you also have to find a place to keep it. It isn’t like you can shove a press into a closet when you need the floor space, because it is heavy, needs a concrete floor, and is not on wheels. A modified bolt cutter runs $80, and you can hang it on the wall next to the weed whacker. It sets rivets just fine.
Bullet guides (feed ramps to some) are caliber specific. If your kit needs one, get the right one, not just the cheapest one.

If you want to have a scope mount, that means more rivets or welding.

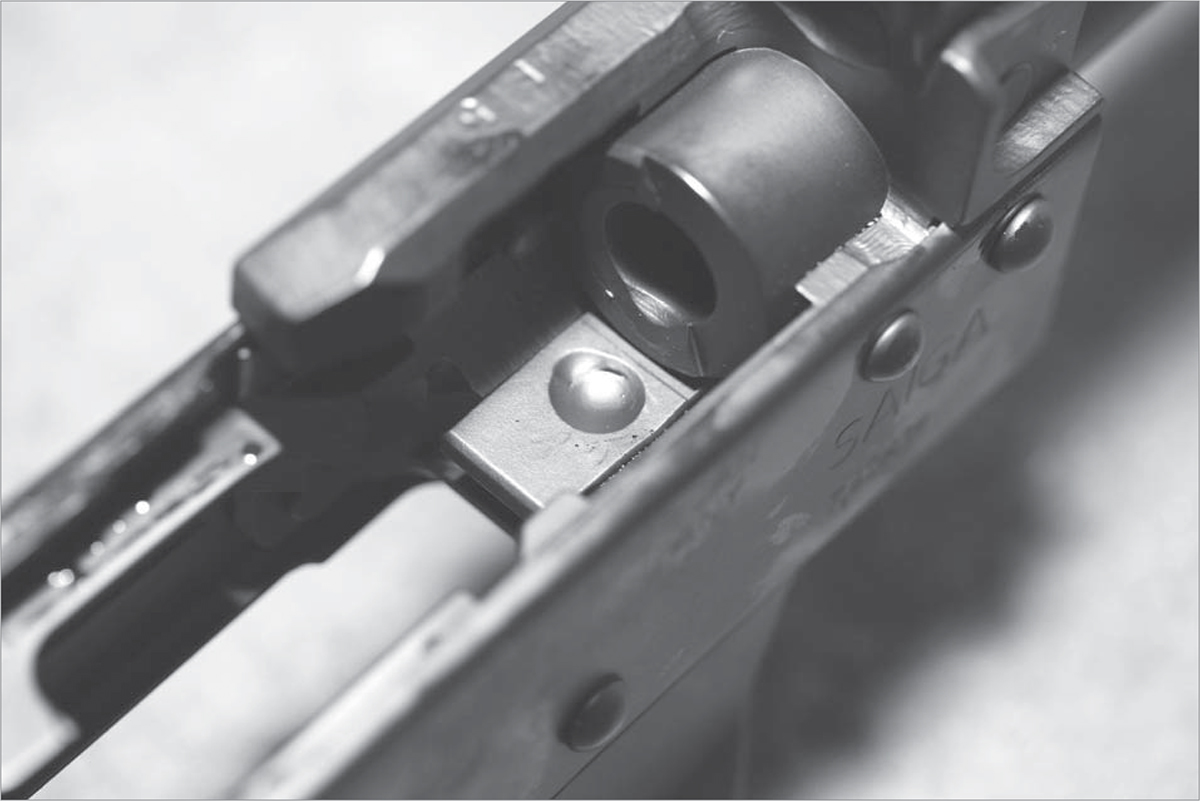
The rear sight pillar has to slide smoothly (and vertically) into the space in the trunnion. If it doesn’t, back it out and start again.

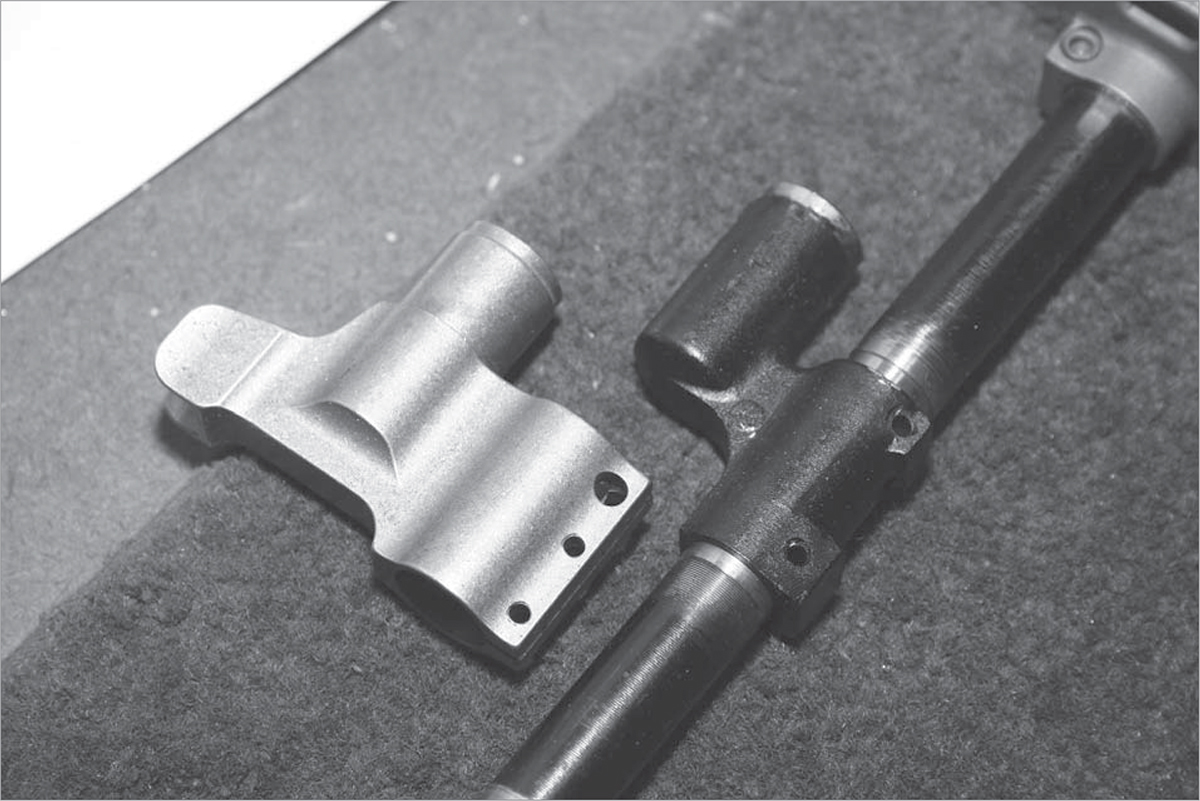
A sidefolder set up on a milled receiver. Oh, that had to cost some.
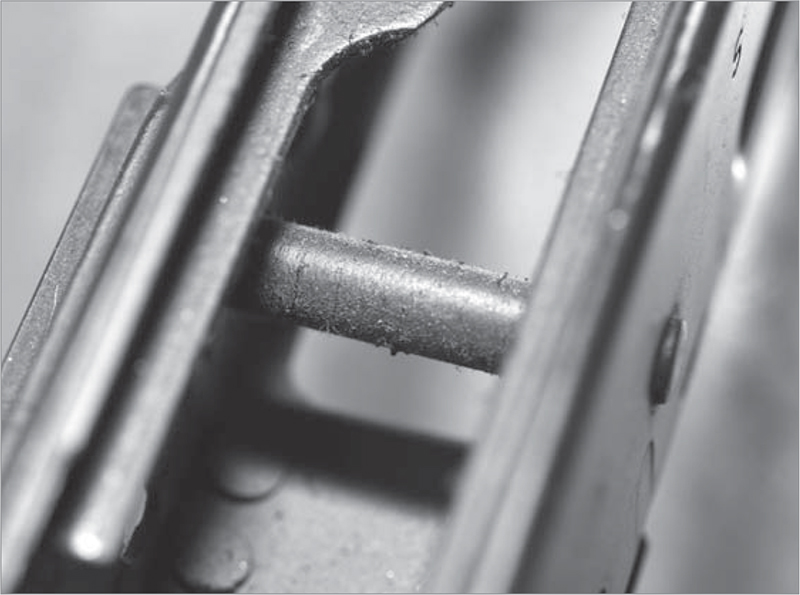
The center support is important. Don’t skip it because it makes for more work.
The question comes up of using screws or “u-drives” (a self-tapping sort of “fastener”) instead of rivets. All the professional builders I’ve talked to grimace when they hear mention of screws as a means of AK assembly. That’s because screws come loose. No gunsmith I know of is ever enthusiastic about screws on a firearm of any kind, let alone those that hold it together. Yes, you can degrease and apply Loctite, but screws still can come loose. Firearms vibrate a great deal when fired, and screws come loose when vibrated. There’s also the matter of the alleged time and cost savings. You have to buy screws, which cost pretty much the same as rivets. (A couple of bucks, big deal.) And the tools with which to install them. You’ll have to drill the trunnion holes out, from their metric size to the 10-24 or whatever thread pitch you’ve decided on. You need taps, and as the trunnions are hardened, you’ll probably break a tap now and then. Taps become dull. So, if you build only one AK, you might save a few bucks. If you build more, probably not save any at all. U-drives are worse, and I would not shoot one so built. (And I’m sure there will be a bunch of readers who own screw-built or U-drive built AKs at this point who will exclaim: “Mine works fine.” Good luck with that, I’m still not shooting it.)
One last assembly method you could theoretically use is welding. The trunnions could be welded to the receiver, but why? You’d need not only as much or more equipment as with a press or modified bolt cutters, but also the skill to use the welding gear.
Just get the proper rivets, a tool or the time on a press, and do it right.
Next install the center support. That is the sleeve and long rivet that goes in the middle of the receiver. It supports the long, empty receiver channel, keeping it from twisting or being dented in the middle. (I wonder if the very first pre-production and early production AKs had the center support. Did Mikhail think of it ahead of time, or did field testing make it obvious.)
The trigger guard and mag catch assembly are next. You’ll need a backing plate or bucking bar and anvil to set these rivets. The backing plate allows you to squeeze or hammer the rivets one at a time. The bucking bar and plate enable you to seat them all at once, using a multi-ton press. AGI makes all the tools you need here, as well as the forming fixture to fold your receiver flat into a channel.
Your receiver will need some Dremeling. Cut the carrier access gap in the rear channels of the carrier. Do not remove any more metal than is needed to fit the carrier down into the receiver, and allow it to ride on the rails. If the carrier binds on the rails, dress the rails with a file to make them even and the carrier a smooth-running fit.

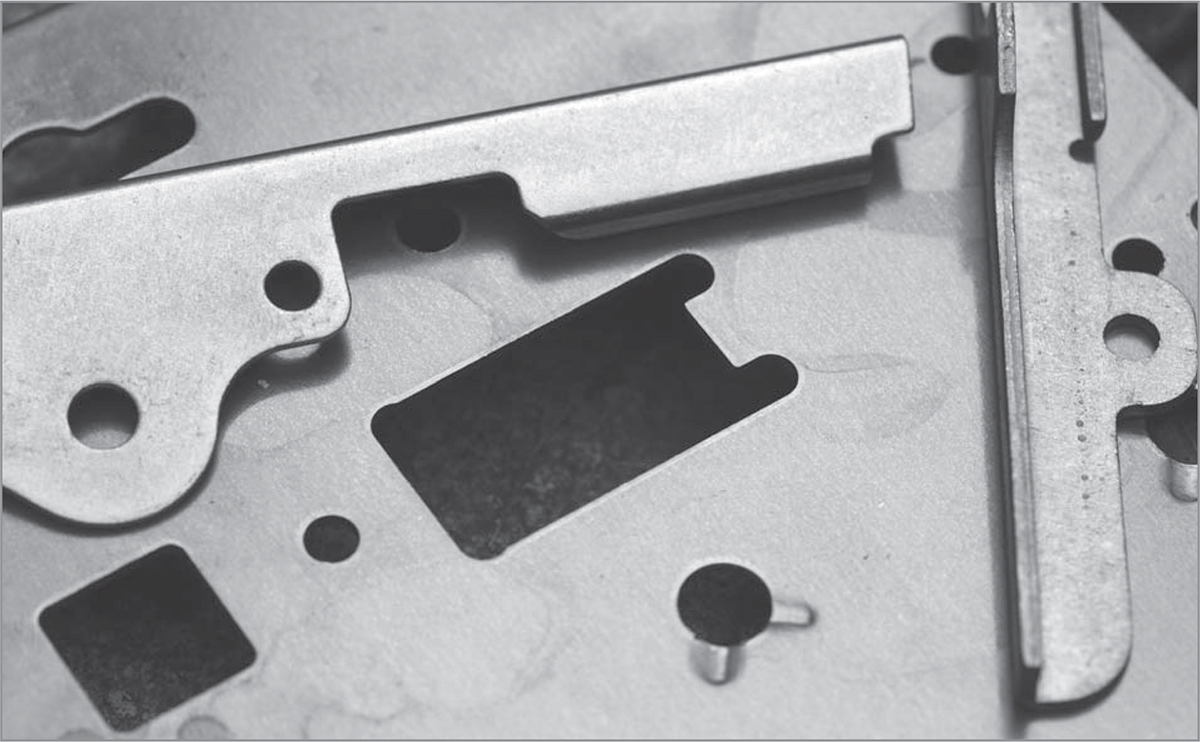
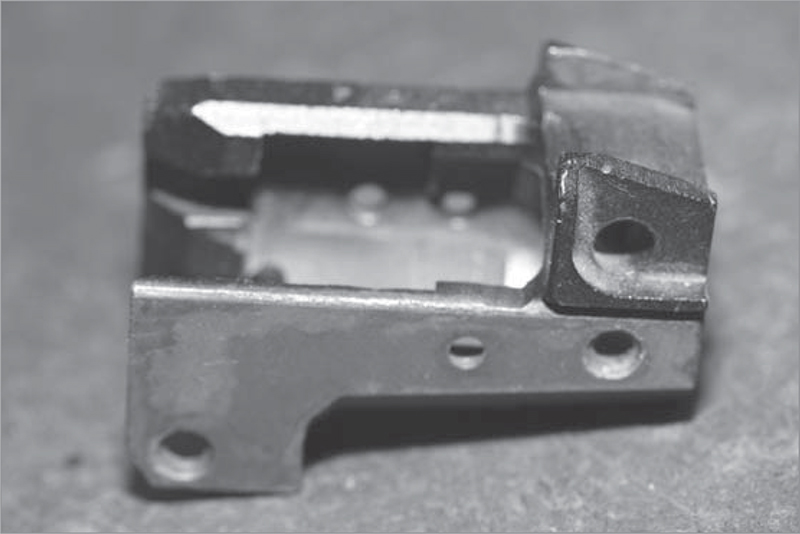
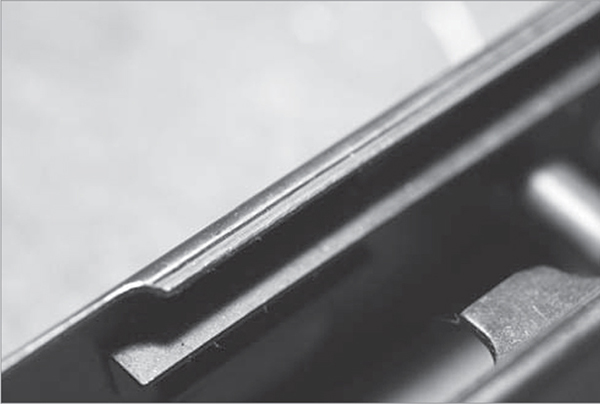
On a sectioned receiver note the ejector and guide rails.
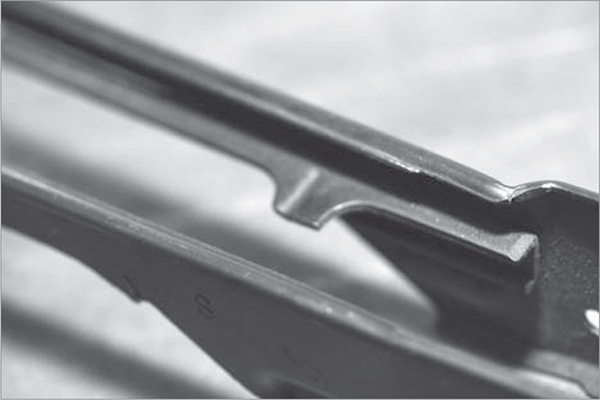
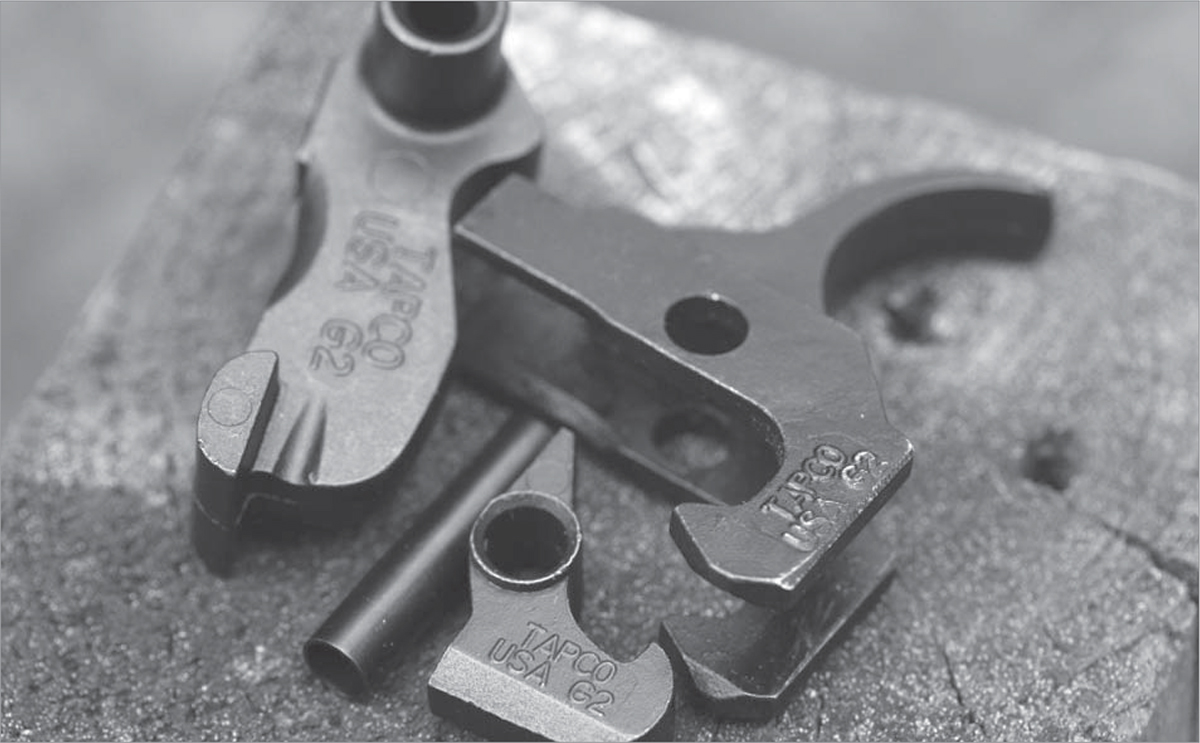
The ejector is the one with the little crease in it. The crease is a stiffening component. You must harden your ejector before you install it.
Barrel installation is a hassle for some, a breeze for others. First, be absolutely sure that your rivet installation on the front trunnion has proper clearance for the barrel shank. No clearance, no barrel fit. (You’d think that would be obvious, but some people can mess up anything.) Use a fixture and multi-ton press, or a long threaded rod that fits down the bore with wrenches and nuts to fit the threads. The trick is to get your barrel in vertically. That is, with the sights dead center above the bore. If you count on the top ends of the front trunnion to “straighten out” any misalignment as you press the barrel in, you’ll be disappointed. Get it right, be patient and keep things lined up, and it will go smoothly. Try to cut corners, or be sloppy, and you’ll have an ugly AK. (You won’t be the first.)

Saiga trigger guards, pried off of importable rifles. They’ll be replaced with proper, in-front-of-pistol-grip trigger guards.
If you are replacing the gas piston as part of your compliance set, look on the blued portion of the carrier. You’ll see a polished rivet. If you can’t see it, sand 1⁄2-inch behind the piston to show off the pin. First, notice how much play, if any, there is in the fit of the piston to the carrier. Some are loose, self-centering, and some are tight, made to be straight and fit. You’ll want yours to fit properly when you replace it. Place the carrier on partially-open jaws of a bench vise, and use a tapered punch to start the rivet. Once it begins moving, you can switch to a close-fitting straight punch, or just pull the rivet out on the other side with a pair of vice grips or channel locks. Or, center punch the rivet, and then drill with a drill one size below 1⁄8-inch. Either drill it out, or drill enough to drive it out with a drift punch. (As the man once said: this ain’t rocket science.) When you install your new one, take a few moments to check for length. Then, screw it in and check for fit. The simplest way to make sure it is locked in place is to have your welder tack weld it into place — assuming that when screwed in snug it is a free-running fit in the gas tube. Or, screw it in, drill through the existing hole, and install a pin. Peen over the ends, polish and paint/touch-up blue, and you’re done. You can drill here, while you can’t drill a new barrel, because the new piston fills the void completely. There should be no drill bit walking, if done right.
The top rails sometimes need to be dressed with a file to make sure the carrier rides smoothly on them.

The carrier insertion gap, cut out of the rails near the back of the receiver. (Typically, you rivet the rear trunnion in place, before making this cut.)
Assemble the handguards, making sure they fit the receiver/barrel installation. If minor filing on the piston tube is necessary to make it fit (it shouldn’t be, the distance is dictated by the parts attached to the barrel) then go slowly. It is easy to take metal off, hard to put it back. More likely, the handguards will have to be fitted, as the lower handguard is caught between the front of the receiver and the bracket locked onto the barrel. If you must cut or file, do it to the handguard. Handguards are cheap and common. Mess up the locking bracket, and you have a real problem.
Bolt on your stock, install the internals, and do a non-firing check. Which is a good segue to the next chapter, testing the AK. But before we go there, let’s take a moment to consider all the above.
When I wrote the first volume in this series, the cost to build could be kept under $200, tools not included. An “expensive” build would run something like $400. You really had to get crazy to spend $500 on an AK project. Prices for complete rifles at retail were along similar lines. You had to work to find one that was selling — actually selling, not on the wall at an absurd price — for over $500.
Today? A quick check uncovers a minimum price of $550, with lots of options up past $1,000. However, those are all U.S.-made, and built at a much higher quality level than the imports and mass builds we saw a decade-plus ago. Yes, they cost more, but we’re getting a much better product.
What does it cost to build today? Well, you need a parts kit. You’ll need the hand tools, which means at the very least a rivet setter, Dremel tool, files, etc. The tooling, which means at the very least a couple of hundred spent on a barrel install/remove tool, backing plates, etc. If you use pre-bent receiver channels, you’ll need a drill press. If you use flats, then a multi-ton press. If you use pre-made receivers, money and an FFL willing to do the transfer, but no forming block and press or drill press.
At the minimum, about $300-350 in tooling, plus the odds ’n ends parts such as rivets, propane to do heat treating, etc. At the top end, you can spend about $800 on tooling, and need at least one side of a two-car garage for the press, workbench, etc.
Then you need the parts kits. Those who stocked up on kits (“Buy ‘em cheap, and stack ‘em deep!”) were ahead of the crowd back then, but how many parts kits from that timeframe are still unbuilt? With a stack of Romanian parts kits you bought for $99, you’re ahead of the rest of us, at least if you’re still looking to build a vanilla-plain AK. The rest of us? Parts kits cost more now, and the addition of a U.S.-made barrel complicates things. Back when the need to use U.S.-made barrels was new, few parts kits with domestically produced barrels came with the gas block, front sight and rear sight pillar installed. You had to add those things, and it wasn’t always easy. Today, the suppliers are savvier, and they do that hard part for you. Yes, it adds to the cost, but the specialized tooling needed to drill and pin the front sight housing, gas blocks, etc. onto a barrel can be pricey.

The center support rivet in place.
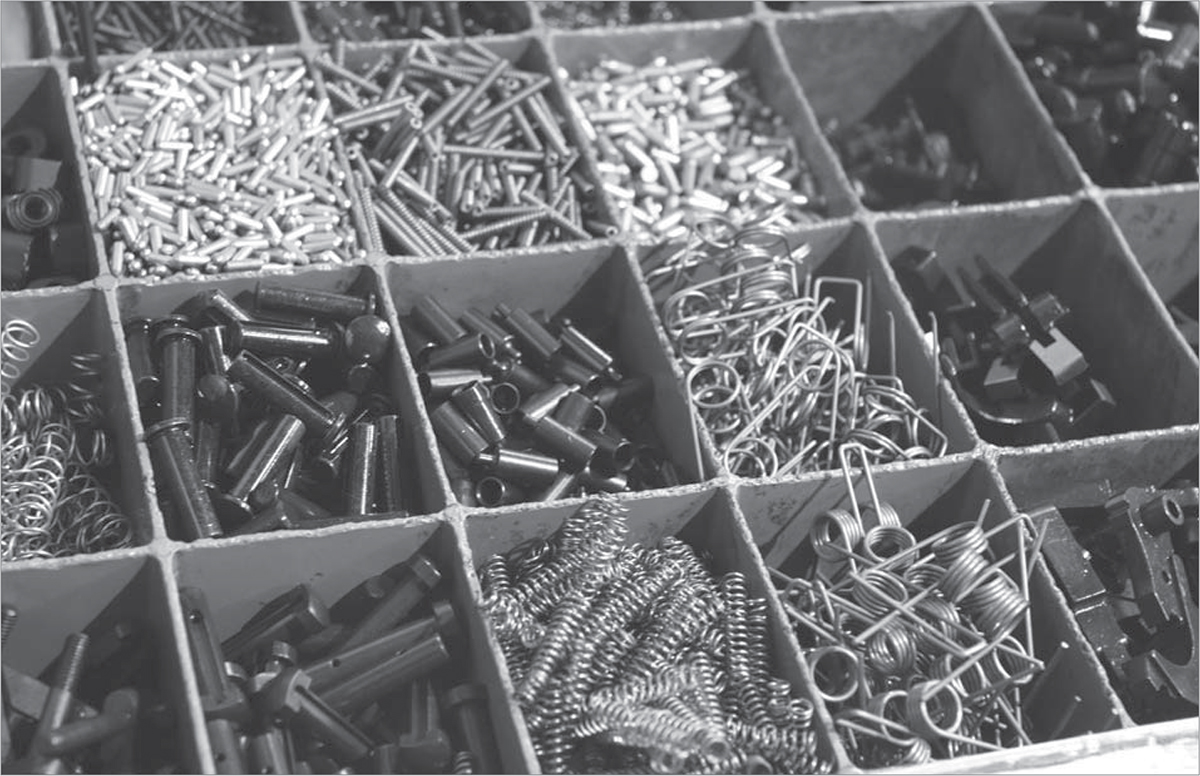
If you build AKs full time you have lots of parts. If you do one, you have just enough parts. Don’t lose yours, as you won’t have drawers like this into which you can dip.
Unless there is another flood of AK parts kits, with original barrels, such that we can see all kinds of options for $200 or less, (with the real rarities going for under $300) then there isn’t much point in building your own these days. Unless what you want simply isn’t an option that any commercial maker offers, or you really, really want to do it. Then, knock yourself out, but don’t try to convince us that you’re saving any money.
OK, you’re some years down the road, and you’ve worn out the barrel on your new or homebuilt AK. What to do? As I see it, the great mass of AK owners out there are going to be unwilling to simply scrap a rifle because the barrel is shot out. Especially if it has been reliable, if they’ve added custom features or accessories, and they have a rifle they like and know. However, fitting a new, virgin barrel to an existing AK receiver is not easy. Those with milled receivers using threaded barrels can rest easy. Any competent gunsmith can re-barrel your AK. It is the pressed-barrel AKs (the vast majority) that will be a problem.
You see, the notch on the barrel for the cross pin is difficult to duplicate. It defines the headspace of the rifle, and must be precisely located or things will go very wrong. When your rifle was made in whichever socialist worker’s paradise, the barrel and trunnion were machined and fitted by experienced workers. The barrel was pressed in, headspace set, and trunnion and barrel drilled as a unit. A replacement barrel cannot be drilled in place. If you pressed a barrel blank into the already-drilled front trunnion, and then tried to drill out the notch, you’d make a mess of things. The drill would “walk,” that is, try to bend away from the obstacle, cutting an oblong hole in the trunnion. Even a good end mill would have problems, but it could be done. Milling the notch beforehand would be a level of machine work beyond most gunsmiths, and a level of gunsmithing beyond many machinists.
No, the best way to do it would be expensive, but do-able: EDM the notch. Someone is going to make money in the future using EDM (electrical discharge machining) to cut the notch through the pin hole, after the barrel is pressed in and headspaced. The big question is, what will it cost? A new barrel, lathe-turned and ready, might run as little as $200. If a shop is set up to do the work they might be able to do it for $100 in labor. Is the U.S. market ready for a $300+ barrel swap, on a mass of AKs, most of which cost $350 when new?
We’ll see. Of course, if the market by then (or today, if we’ve gotten to the point of replacement AK barrels) generally supports AKs at retail of $500-$700, with some specialty ones going for over a grand, then a $300 barrel swap/rebuild seems a lot more reasonable.
Add in some upgrades for suppressor mounts, a Keymod or M-LOK handguard, and there just might be a new market segment ready to blossom. 