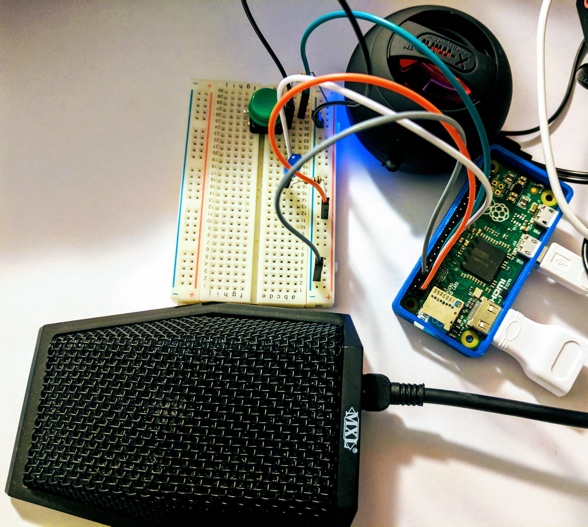
Let's add a button to our voice assistant. This momentary push button is connected to pin 2 (BCM numbering) and the LED is connected to pin 3.

Voice Assistant interface setup
- In order to read the button presses, we need to import the Button class from gpiozero:
from gpiozero import Button, OutputDevice
- When a button is pressed, the voice assistant needs to play a beep sound indicating that it is awaiting the user's command. Beep sounds of your choice can be downloaded from www.freesound.org.
- Following the beep sound, the user command is recorded for a duration of 5 seconds. The recorded file is then processed using the Houndify SDK. The following code snippet shows the trigger function that is called when the button is pressed:
       def trigger_function():
         os.system("aplay -D plughw:1,0 /home/pi/beep.wav")
         os.system("arecord -D plughw:2,0 -f S16_LE -d 5
         /home/pi/query.wav")
         os.system("aplay -D plughw:1,0 /home/pi/beep.wav")
         call_houndify()
- The trigger function is registered as follows:
       button = Button(4)
       button.when_released = trigger_function
Connect the button and the LED to the Raspberry Pi's GPIO interface to test the voice assistant.
Voice assistant setup
The voice assistant code file is available for download along with this chapter as voice_assistant.py. Download the code sample and try the following commands:
What is the weather in San Francisco?What is the weather in Santa Clara, California?Turn Lights OnTurn Lights Off
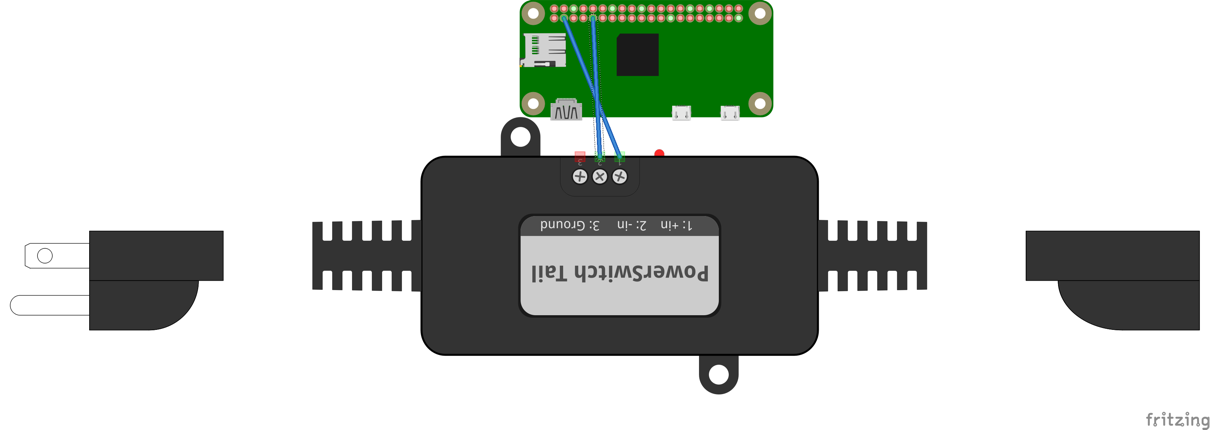
We have shared a video (on this book's site) that demonstrates the function of the voice assistant. Now, we have demonstrated the voice assistant using an LED. In order to control a table lamp, simply replace the LED with a power switch tail II (http://www.powerswitchtail.com/Pages/default.aspx).
Things to keep in mind:
- Add voice_assistant.py to /etc/rc.local so that it starts automatically on boot.
- The entire setup can be unwieldy. Assemble the components inside an enclosure to organize the wiring.
- Because the project involves electrical appliances, use prescribed cables and terminate them properly. Ensure that the cables are connected properly. We will share examples of the same on our website.
Project ideas and enhancements:
- Currently, the assistant works only at the press of a button. How will you make it listen for a keyword? For example, "Ok, Google" or "Alexa"?
- Is it possible to have a remote trigger? Think something on the lines of Amazon Tap.
- If you have lights such as Philips Hue or Internet-connected switches such as WeMo switch smartplug or the TP-Link Smart switch, you can control them using a voice assistant. IFTTT provides applets to control them yourself. Create a maker channel web hook to control them. Refer to Chapter 8 for examples.