No Sweat Hydro
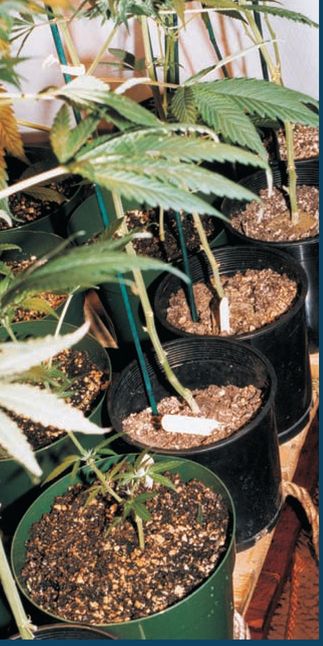
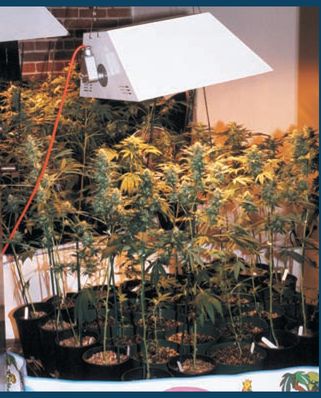
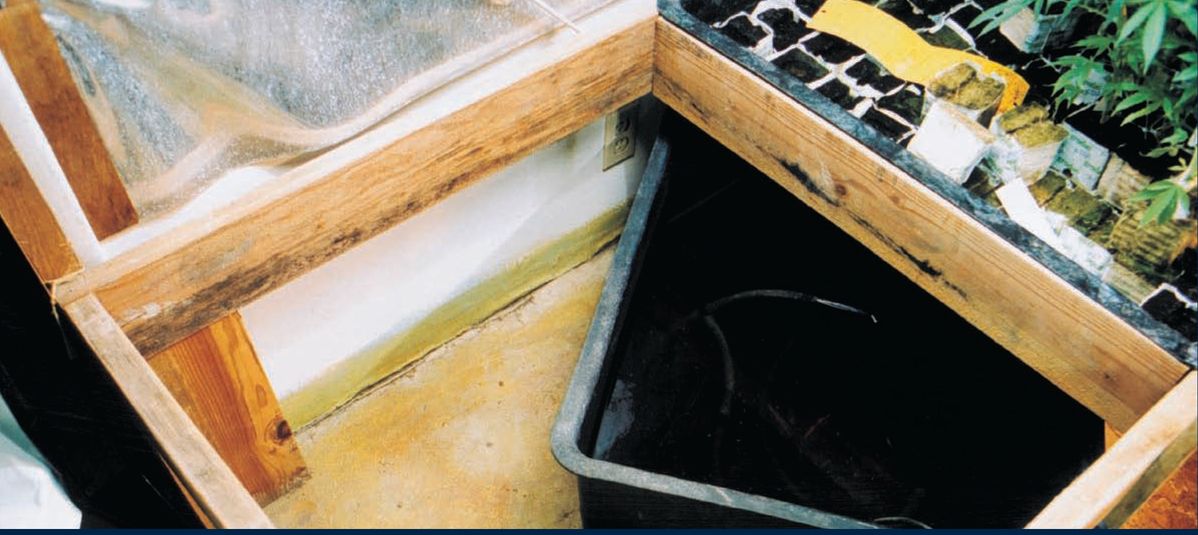
This wick system was constructed using a five-foot diameter kiddie pool, a shipping pallet and threegallon containers.
The planting mix in the containers drew water up the 3/8-inch nylon wicks. They maintained a constantly moist environment on which the plants thrived.
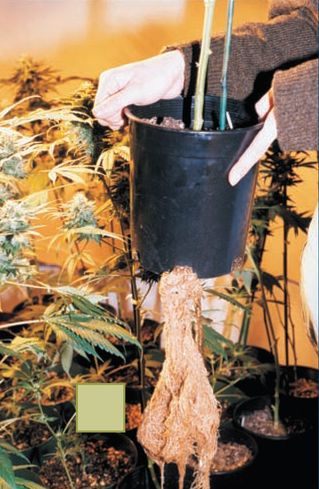
Some of the roots followed the wick down to the pool where they had unlimited access to the water/nutrient solution.
Most people don’t realize that they have been growing plants hydroponically for years. When a plant is placed in a container, it starts to grow using water, CO2 and various nutrients that the roots absorb. After a while the nutrients in the soil are depleted, plant growth slows, and the plant may show deficiency symptoms. Then fertilizer is added to the water and the plant starts to thrive again; it is being fed hydroponically. The soil acts as a non-nutritive medium that holds both water and the nutrients dissolved in the liquid.
The only difference between formal hydroponics and soil in the container is that the hydroponic medium starts off with no nutrients while the soil’s nutrients are mostly used up by the growing plant.
Hydroponics can be as easy as soil to set up and maintain. Although you have probably read material that tells you how hard it is to grow hydroponically, you will find that it is actually a very convenient way to grow plants.
THE SET-UP
There are many ways to set up hydroponic systems. Four are covered here; the wick and reservoir systems, which are two low-tech passive methods; and the ebb-and-flow and recirculating drip systems, which are the other two most popular hydroponic methods used by indoor gardeners.
PASSIVE SYSTEMS
Passive systems use capillary action to draw water from a reservoir to the planting medium as moisture is depleted. Just as water travels up the fibers of a tissue, water will travel up many planting media. The system self-regulates and requires little maintenance besides keeping water in the reservoir.
The Wick System
The wick system consists of containers filled with appropriate planting medium and braided 3/8-inch nylon rope that acts as a wick. Once the rope is moistened, it wicks up the water/nutrient solution so that water is either replaced as the plant uses it or lost to evaporation. As long as the reservoir below contains water the wick continues to draw it up as needed.
Equipment required for the Wick system:
1. Heavy duty rubber gloves: These protect you from harm when you are washing or rinsing containers, working with planting medium, or preparing fertilizer solution.
2. Tray: The heavy-duty plastic tray – to act as the reservoir – should be at least six inches deep. They are available at indoor garden shops or hardware/houseware stores.
3. Containers: Standard plastic plant containers with holes on the side are all you need. Six- or eight-inch diameter pots are the most convenient. If you plan to grow larger plants, you can use ten-inch diameter containers. Pots are available at garden shops, nurseries or flea markets. Used containers should be washed and then rinsed in a solution of one quart 3% hydrogen peroxide in a gallon of water.
4. Wick: 3/8-inch braided nylon rope is available at hardware/houseware stores.
5. Container support: The containers are to be raised above the tray. Wire shelving, blocks of wood, Styrofoam blocks, or plastic or wood pallets are just a few ways to keep the containers above water.
6. Planting medium: There are quite a few kinds; you should test your particular choice before setting up. A mixture of coarse vermiculite and coarse perlite, available at indoor garden shops, is an ideal medium. Horticultural clay pellets, mixed 5-1 with vermiculite work well, as do most peat moss-based planting media.
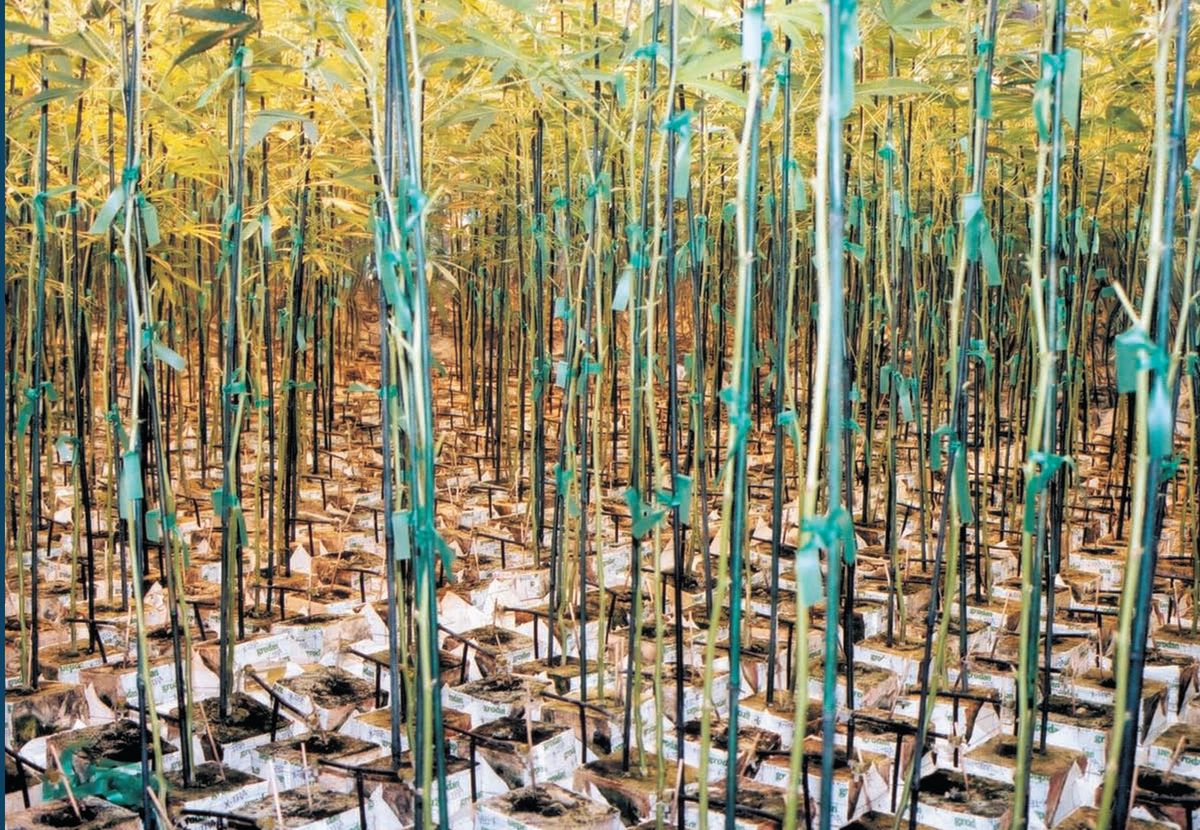
Drip system using four-inch cubes placed on rockwool slabs.
7. Fertilizer: Use a hydroponic fertilizer as recommended on the package. Choose a brand that is popular in your area. Most fertilizers use different formulas depending on the plant’s stage of growth, so use the proper formula for the stage of growth.
8. Pump: A small submersible pump is used to circulate the water/nutrient solution in the reservoir or an air pump with a foot-long aerator can be used to keep the water oxygenated and fresh.
Setting Up
1. Place two wicks in each container. One end should hang out of each of the four holes. The ends should be long enough to reach the bottom of the reservoir when the containers are in place.
2. Fill the containers two-thirds full with the planting medium.
3. Place the seedlings or transplants in containers and fill the container to one inch below the top.
4. Place the container supports in the tray and put containers in place.
5. Mix the water/nutrient solution according to directions on the label.
6. Water the containers until it starts to flow out of the bottom holes.
7. Fill the reservoir with water/nutrient solution.
8. Place the pump in the tray to circulate the water.
The frame for the tray is made with two-by-fours. The 30-gallon reservoir services two 3’ x 3’ trays.
Care
Make sure not to let the reservoir run out of water. Always refill with water/nutrient solution. Change the solution every three weeks and feed your house or garden plants with the old solution – they’ll love it. When you force the plants to flower, change the solution formula to “flowering” from “growth” stage.
The Reservoir System
The reservoir system eliminates the rope and container elevators. The six-inch wide, eight-inch tall containers are placed directly in the tray. Water is added to a depth of 2 1/2 inches. Twelve-inch diameter containers are submerged about three inches. When the water in the tray falls to one inch, the tray is refilled. The reservoir system is best used with horticultural clay pellets or lava as the medium. These soak up the moisture but provide large air spaces for the roots to obtain oxygen. The other planting mixes get too soggy under partially submerged conditions.
Another, slightly cheaper, medium you might consider is red lava; it is often used in west coast gardens. The lava exhibits very good capillary action and roots thrive on the rough, jagged surfaces. The three main problems with lava are that it is considerably heavier than the clay pellets, roots stick to it, and it doesn’t pour easily. The horticultural clay balls are less troublesome because they are much lighter, roots can be rinsed away easily, and they pour into containers conveniently.
The water in the tray should be heated to 72°F, the ideal temperature for roots. A submersible aquarium heater with built-in thermostat will keep the water at precisely the right temperature.
ACTIVE SYSTEMS
Ebb and Flow
Ebb-and-flow systems, sometimes called flood-and-drain, work by periodically flooding the medium and then draining it. The numerous advantages include easy set-up, low likelihood of breakdown, and easy repair. Marijuana plants respond very well to this system of irrigation.
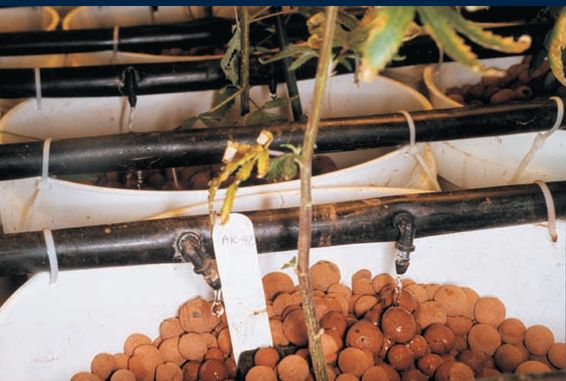
Constant drip system using horticultural clay pellets. The continuous flow of water and the large air spaces create an ideal environment for the roots. In this system each container is watered using two emitters. Should one emitter clog, the other will still provide moisture to the container.
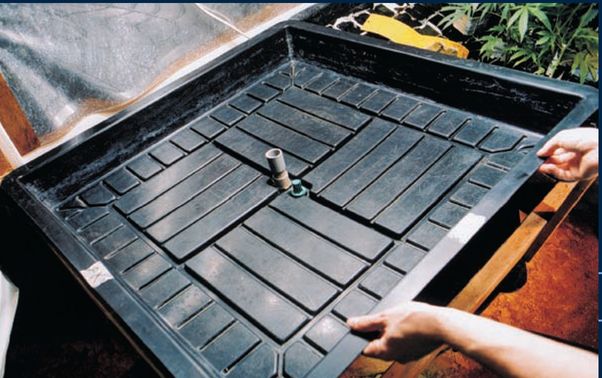
The tray is easily positioned in the frame and is held by the lips. This ebb-and-flow system has only two tubes. The small blue diffuser breaks the water up as it flows into the tray when the pump is activated, three times daily. The larger, gray PVC pipe is the overflow valve that drains back into the reservoir. When the pump shuts off, water in the tray drains from a hole in the tubing, which enables the water to drain back into the reservoir.
Equipment required for the Ebb-and-Flow system:
1. Tray mounted on a frame or table: Horticultural trays 2’ x 4’, 4’ x 4’, and 4’ x 8’, available at indoor grow shops, are the most convenient. However, trays can be purchased at houseware stores or made from wood coated with plastic resin or 30mm pond liner. The tray should be fitted with a drainage tube at the lowest part.
2. Reservoir: The reservoir should hold a minimum of two gallons of water for every square foot of tray space. For instance, a 4’ x 4’ tray (16 square feet) uses a 30-gallon reservoir. The plastic reservoir should be heavy-duty so that it can remain filled for extended periods of time without developing material fatigue. Indoor garden centers sell shallow, wide reservoirs that fit under ebb-and-flow tables. Heavy-duty trashcans may also be used but they are tall and need additional plumbing. For the most part they are not recommended.
3. Submersible pump with filter: These are available at indoor garden shops, houseware stores and pet shops. The price difference between a small pump and a larger one is only a few dollars, so buy the larger pump – it will be less taxed by its daily chores.
The numerous advantages include easy set-up, low likelihood of breakdown, and easy repair. Marijuana plants respond very well to this system of irrigation.
4. Small submersible pump or air pump: The small pump circulates water in the reservoir while air pumps release a wall of bubbles into the reservoir causing the water to circulate and pick up oxygen. The contact between the water and the air removes carbon dioxide from the water and replaces it with oxygen.
5. Tubing and drainage fixtures: The tray will have two drainage holes. The first should drain the tray more slowly than the pump fills it. The second is the overflow valve. A hole in the tubing leading from the pump can be used instead of a drainage hole. Once the pump starts, water backflows through the tubing and out the hole.
6. Multiple-event timer: to regulate the pump.
7. Aquarium heater: to keep the temperature at 72°F.
8. Appropriate planting medium such as rockwool, horticultural clay pellets, lava or coir.
Setting Up
1. Place the reservoir under the tray.
2. Place the pump in the reservoir after attaching the tube to it. Attach the other end of the tube to the fixture in the tray.
3. Plug the pump into daily multiple-event timer. During the vegetative cycle the timer is set to go on every 6 hours. During flowering it is set to go on when the lights go on, four and eight hours into the light cycle.
4. Plug in the circulating pump or air pump to oxygenate the reservoir water.
5. Place the drainage fixtures in the tray and attach tubing underneath so that all the water drains into the reservoir.
6. Place the rockwool in the tray. Large cubes (4-inch) can be used directly in the tray or rockwool slabs with smaller cubes can be used. The clay pellets can be placed directly in the tray, but it is more convenient to keep them in individual containers. If the holes in the containers leak pellets, use a piece of nylon netting or horticultural shade cloth to prevent loss.
7. Fill the reservoir and turn all the systems on.
The Drip System
The drip system is a very popular method of irrigating hydroponic gardens. A pump recirculates water from a reservoir along tubing to individual emitters. Each plant has an emitter to allow individual watering. The amount of water delivered and the number of times a day the plants receive irrigation is determined by the temperature, the size of the plant, and the planting medium. Setting up a drip system is similar to setting up an ebb-and-flow except that the pump moves the water through a series of tubes, then through individual emitters to the plants. The plants are held in containers, slabs of coir or rockwool, and individual emitters are placed within two inches of the stem of each plant.
Almost any medium can be used. Planting mixes, vermiculite-perlite and small gravel are considered wet mixes. They retain more water and need to be irrigated less frequently than planting mediums such as rockwool, coir or clay pellets. Wet mediums are watered every day or two at first. Once the plants grow and start using more water, the number of irrigations is increased. The drier mediums, rockwool and coir, are irrigated three times a day. The horticultural clay pellets do well with a constant drip because of the large air spaces between the pellets. Even with a constant flow of water the roots are exposed to large amounts of oxygen.


