
Coconut Cake with Raspberry Filling and Italian Meringue
LABORS OF LOVE

Coconut Cake with Raspberry Filling and Italian Meringue
Coconut Cake
WITH RASPBERRY FILLING AND ITALIAN MERINGUE ICING
Hands-on: 35 min. Total: 2 hr. 10 min.
My Aunt Wanda was a wonderful cake maker. She would make a version of this cake for my birthday every year, with the lightest, fluffiest, creamiest Italian meringue. Omit the liqueur if you prefer; just add a little water in its place to make the filling spreadable.
FILLING:
2 pints fresh raspberries (12 ounces)
1/3 cup sugar
2 tablespoons water
1/8 teaspoon salt
3 tablespoons cornstarch
3 tablespoons Chambord (raspberry-flavored liqueur)
CAKE:
Baking spray with flour
8 ounces cake flour (about 2 cups)
2 ounces coconut flour (about 1/2 cup), lightly toasted
2 teaspoons baking powder
1/2 teaspoon salt
11/2 cups sugar, divided
1/3 cup canola oil
2 tablespoons butter, softened
1 teaspoon vanilla extract
1 cup coconut water
6 large egg whites
ICING:
3 large egg whites
1/4 teaspoon cream of tartar
1/2 cup sugar
3 tablespoons water
1/8 teaspoon salt
1/2 cup unsweetened coconut flakes, toasted
1. To prepare filling, combine first 4 ingredients in a saucepan; bring to a boil. Cook over medium heat 5 minutes or until berries soften and begin to fall apart. Combine cornstarch and liqueur in a small bowl, stirring with a whisk until smooth. Add cornstarch mixture to raspberry mixture, stirring with a whisk; return to a boil. Cook 1 minute or until very thick, stirring constantly. Spoon mixture into a bowl; cover and refrigerate until needed.
2. Preheat oven to 350°. Coat 3 (8-inch) cake pans with baking spray; line bottom of pans with wax paper. Coat wax paper with baking spray.
3.a To prepare cake, weigh or lightly spoon flours into dry measuring cups; level with a knife. Combine flours, baking powder, and salt in a bowl; stir with a whisk. Place 11/4 cups sugar, oil, butter, and vanilla in a large bowl. Beat with a mixer at medium speed 5 minutes or until fluffy. Add coconut water; beat at low speed 1 minute or until combined. Add flour mixture; beat at low speed 1 minute or until well combined.
4.Beat 6 egg whites with a mixer at high speed until medium peaks form using clean, dry beaters. Add 1/4 cup sugar, 1 tablespoon at a time. Stir one-fourth of egg white mixture into batter; gently fold in remaining egg whites. Divide batter evenly among prepared pans. Bake at 350° for 19 minutes or until a wooden pick inserted in center comes out clean. Cool in pans 10 minutes on a wire rack. Remove from pans; cool completely on wire rack. Discard wax paper.
5. To prepare icing, place 3 egg whites and cream of tartar in a large bowl; beat with a mixer at medium speed 2 minutes or until foamy. Increase mixer speed to high; beat 2 to 3 minutes or until soft peaks form. Combine 1/2 cup sugar, 3 tablespoons water, and 1/8 teaspoon salt in a saucepan; bring to a boil. Cook, without stirring, until a candy thermometer registers 230°. With mixer on low speed, pour hot sugar syrup in a thin stream down the side of mixing bowl. Gradually increase speed to high; beat 3 minutes or until thick and cool.
6. To assemble cake, place 1 cake layer on a serving plate; spread with one-half of filling, leaving a ½-inch border. Top with another cake layer. Spread with remaining filling, leaving a ½-inch border. Top with remaining cake layer. Spread icing over top and sides of cake. Gently press toasted coconut into sides of cake.
SERVES 16 (serving size: 1 slice)
CALORIES 294; FAT 8.7g (sat 3.4g, mono 3.4g, poly 1.5g); PROTEIN 4g; CARB 49g; FIBER 3g; CHOL 4mg; IRON 1mg; SODIUM 225mg; CALC 45mg

Triple Chocolate Layer Cake
TRIPLE CHOCOLATE LAYER CAKE
Hands-on: 25 min. Total: 2 hr. 45 min.
Even your most demanding chocoholic will be satisfied with this trio: deep chocolate cake layers with a creamy milk chocolate filling topped with bittersweet chocolate glaze.
CAKE:
1 cup boiling water
1/2 cup plus 1 tablespoon unsweetened cocoa
2 ounces bittersweet chocolate, finely chopped
Baking spray with flour
11/2 cups granulated sugar
1/4 cup unsalted butter, softened
3 tablespoons canola oil
1 teaspoon vanilla extract
3 large egg whites
10 ounces cake flour (about 21/2 cups)
11/2 teaspoons baking powder
1/2 teaspoon baking soda
1/4 teaspoon salt
FILLING:
1/3 cup 2% reduced-fat milk
1 tablespoon granulated sugar
1 tablespoon cornstarch
Dash of salt
3.5 ounces milk chocolate, finely chopped
3/4 cup frozen reduced-calorie whipped topping (such as Cool Whip), thawed
GLAZE:
1/2 cup powdered sugar
1/4 cup unsweetened cocoa
1 ounce bittersweet chocolate, finely chopped
3 tablespoons 2% reduced-fat milk
1 tablespoon light-colored corn syrup
1. Preheat oven to 350°.
2. To prepare cake, combine boiling water and 1/2 cup cocoa. Add bittersweet chocolate; stir until smooth. Cool to room temperature (about 10 minutes). Coat 2 (8-inch) round metal cake pans with baking spray; line bottoms of pans with wax paper. Coat wax paper with baking spray; dust pans with remaining 1 tablespoon cocoa.
3. Place 1/2 cups granulated sugar, butter, canola oil, and vanilla in a large bowl; beat with a mixer at medium speed until well combined, about 2 minutes. Add egg whites, 1 at a time, beating well after each addition. Weigh or lightly spoon flour into dry measuring cups; level with a knife. Combine flour, baking powder, baking soda, and salt in a bowl, stirring with a whisk. Alternately add flour mixture and cocoa mixture to butter mixture, beginning and ending with flour mixture; beat until just combined.
4. Divide batter evenly between prepared pans. Bake at 350° for 26 minutes or until a wooden pick inserted in center comes out with moist crumbs clinging. Cool in pans 15 minutes on wire racks. Remove from pans; cool completely on wire racks. Discard wax paper.
5. To prepare filling, combine milk, sugar, cornstarch, and salt in a saucepan; bring to a boil, stirring constantly. Cook 1 minute or until very thick, stirring constantly. Remove pan from heat. Add milk chocolate; stir until chocolate melts and mixture is smooth. Scrape mixture into a bowl; cover and chill completely. Uncover and fold in whipped topping. Cover and chill 30 minutes.
6. To prepare glaze, combine powdered sugar and remaining ingredients in a saucepan over low heat. Cook 1 minute or until chocolate melts, stirring frequently. Place 1 cake layer on a plate. Spread filling over cake, leaving a 1/4-inch border. Top with remaining layer, pressing lightly. Drizzle warm glaze over top and down sides of cake.
SERVES 16 (serving size: 1 slice)
CALORIES 292; FAT 10.1g (sat 5.3g, mono 2.7g, poly 1g); PROTEIN 4g; CARB 50g; FIBER 2g; CHOL 8mg; IRON 2mg; SODIUM 160mg; CALC 56mg
TECHNIQUE TIP
It may seem excessive to use two different forms of dark chocolate, but it was necessary to get the deep chocolate flavor I was going for in this decadent cake. If I’d only used cocoa, the amount needed would have made the cake dry and dusty tasting. Combining cocoa and melted bittersweet chocolate balances the chocolate flavor and adds richness to both the cake layers and the glaze.
My Top 5
BEYOND-THE-BASICS TOOLS
There are so many specialized (and expensive) tools for the kitchen, some useful, and some ridiculous (the RoboStir comes to mind). But, if you are an avid or wannabe avid dessert-maker, here is a list of extras that are wonderful and worthwhile to have on hand.
1 Light-colored metal 9-inch springform pan. You can use a springform pan for so many baked goods: cheesecakes, single-layer tall cakes, chilled layer cakes, ice cream cakes—the opportunities are endless.
2 Light-colored metal 9-inch removable-bottom tart pan. If you enjoy tarts, whether sweet or savory, a tart pan with a removable bottom is essential to an accurately baked crust and a beautiful presentation.
3 A couple of high-quality thermometers. These are critical to some high-heat methods. First, a sturdy glass candy thermometer with a durable clip that attaches to the sides of a pan makes it easy to monitor sugary syrups hands free. Second, an instant-read probe thermometer tells you immediately that the recipe is at the target temperature.
4 Light-colored metal heavy jelly-roll pans. They are perfect not only for baking extremely thin cake layers, but for toasting nuts, coconut, and even spices. I prefer to use a light-colored metal pan so I can more easily see the amount of browning. A dark pan makes this more difficult.
5 Heavy-duty kitchen torch. If you love crème brûlée and caramelized meringues, upgrade your tiny hand-held torch to a Bernzomatic torch. Try making rainy-day indoor s’mores with it!


Baked Chocolate Mousse
BAKED CHOCOLATE MOUSSE
Hands-on: 20 min. Total: 8 hr. 52 min.
Light, silky, and rich with three types of chocolate, this baked mousse is like eating a chocolate cloud. Be sure to whip the egg mixture for the full 5 minutes to get the best texture in the finished mousse.
1/2 cup water
1/3 cup Dutch process cocoa
1 teaspoon instant espresso
4 ounces bittersweet chocolate, finely chopped
1 ounce unsweetened chocolate, finely chopped
1 tablespoon brandy
1/2 teaspoon vanilla extract
2 large eggs
2 large egg whites
1/3 cup sugar
Dash of salt
2 cups frozen reduced-calorie whipped topping, thawed and divided
Baking spray with flour
1/2 cup fresh raspberries
1. Preheat oven to 350°.
2. Bring ½ cup water to a boil in a small saucepan. Add cocoa and espresso, stirring until smooth. Remove pan from heat. Add chocolates, stirring gently until chocolates melt and mixture is smooth. Stir in brandy and vanilla. Pour chocolate mixture into a large bowl. Let stand 10 minutes, stirring occasionally.
3. Combine eggs, egg whites, sugar, and salt in the top of a double boiler. Cook over simmering water until sugar melts and a thermometer registers 120° (about 2 minutes), stirring constantly with a whisk. Pour egg mixture into a medium bowl; beat with a mixer at high speed until thick and ribbony, about 5 minutes.
4. Stir one-third of egg mixture into chocolate mixture; gently fold in remaining egg mixture. Gently fold 1½ cups whipped topping into chocolate mixture. Spoon batter into an 8-inch springform pan coated with baking spray. Smooth top.
5. Bake at 350° for 25 minutes or until almost set. Cool completely in pan on a wire rack. Cover and chill overnight (or at least 4 hours). To serve, run a knife around edge of pan; remove sides of pan. Top servings with a dollop of whipped topping and raspberries.
SERVES 10 (serving size: 1 wedge, about 1 tablespoon whipped topping, and about 1 tablespoon raspberries)
CALORIES 166; FAT 9.6g (sat 5.4g, mono 1g, poly 0.3g); PROTEIN 4g; CARB 19g; FIBER 2g; CHOL 38mg; IRON 2mg; SODIUM 51mg; CALC 21mg
TECHNIQUE TIP
Folding frozen whipped topping that’s been thawed into mousse, and then baking it was a first for me. The fact that the whipped topping was also reduced calorie resulted in a significant “aha” moment in the Test Kitchen when the finished chocolate mousse cake was perfectly creamy, dense, and absolutely delicious. Be very gentle when folding the ingredients together. Stop folding when the white streaks are gone, and not one more second.

Extreme Lemon and Chocolate Roulade
EXTREME LEMON AND CHOCOLATE ROULADE
Hands-on: 45 min. Total: 3 hr. 15 min.
Lemon and chocolate are a lovely and lively pair in this rolled cake. If you prefer milder lemon flavor, omit the rind from the filling. Or, if you are a bold lemon-lover (like me), don’t strain the rind out of the filling—enjoy the tartness and texture it provides.
CAKE:
Baking spray with flour
3 ounces cake flour (about 3/4 cup)
1/3 cup unsweetened cocoa, sifted
1 teaspoon baking powder
1/8 teaspoon salt
5 large eggs, separated
3/4 cup granulated sugar, divided
1 teaspoon vanilla extract
1/4 teaspoon cream of tartar
2 tablespoons powdered sugar
FILLING:
2/3 cup granulated sugar, divided
1 tablespoon grated lemon rind
6 tablespoons fresh lemon juice
3 tablespoons unsalted butter, divided
1/8 teaspoon salt
1 tablespoon cornstarch
3 large egg yolks
2 large eggs
11/2 cups frozen reduced-calorie whipped topping, thawed
1 tablespoon powdered sugarr
1. Preheat oven to 350°. Lightly coat a jelly-roll pan with baking spray. Line bottom of pan with wax paper. Coat paper with baking spray. Set aside.
2. To prepare cake, weigh or lightly spoon flour into a dry measuring cup; level with a knife. Combine flour, cocoa, baking powder, and salt in a bowl; stir with a whisk. Place egg yolks, 1/4 cup sugar, and vanilla in a large bowl; beat with a mixer at medium speed until light and fluffy, about 4 minutes. Place egg whites and cream of tartar in a medium bowl; beat at medium speed until foamy using clean, dry beaters. Beat mixture at high speed until soft peaks form. Gradually add 1/2 cup sugar, 1 tablespoon at a time, beating until stiff peaks form (do not overbeat). Stir one-fourth of egg white mixture into egg yolk mixture; gently fold in remaining egg white mixture. Sift one-half of flour mixture over top of egg mixture; gently fold in. Sift remaining flour mixture over top of egg mixture; gently fold in. Spread mixture evenly into prepared pan.
3. Bake at 350° for 9 minutes or until cake springs back when lightly touched in the center. Loosen cake from sides of pan; turn out onto a dish towel dusted with 2 tablespoons powdered sugar. Carefully peel off wax paper; cool 1 minute. Starting at narrow end, roll up the cake and towel together. Place, seam side down, on a wire rack; cool completely (about 1 hour).
4. To prepare filling, place 1/3 cup sugar, rind, juice, 2 tablespoons butter, and salt in a small saucepan over medium heat. Cook until butter and sugar melt, stirring frequently (about 4 minutes). Place 1/3 cup sugar, cornstarch, egg yolks, and eggs in a bowl; stir well with a whisk until smooth. Drizzle hot juice mixture into egg mixture, stirring constantly with a whisk. Return mixture to pan. Cook over medium heat until mixture thickens and a candy thermometer registers 180° (do not boil). Pour mixture through a sieve into a small bowl, pressing on solids. Discard solids. Add 1 tablespoon butter, stirring until butter melts and is combined. Cover surface of mixture with plastic wrap. Chill completely.
5. To assemble roulade, gently stir whipped topping into chilled lemon filling. Unroll cake carefully; remove towel. Spread lemon filling over cake, leaving a 1-inch border around outside edges. Reroll cake; place, seam side down, on a platter. Cover and chill 1 hour. Sprinkle cake with 1 tablespoon powdered sugar. Cut cake into slices.
SERVES 10 (serving size: 1 slice)
CALORIES 285; FAT 9.8g (sat 5.2g, mono 2.9g, poly 1.1g); PROTEIN 7g; CARB 45g; FIBER 1g; CHOL 195mg; IRON 2mg; SODIUM 161mg; CALC 61mg

Pecan Sticky Wedges
PECAN STICKY WEDGES
Hands-on: 58 min. Total: 11 hr.
These heavenly yeast wedges develop even more flavor when the prepared dough is refrigerated overnight. Just let them sit at room temperature for 30 minutes, and then pop them in the oven for about 30 minutes. Inspired by Joy of Cooking’s he-man–sized buns that have 629 calories and 14 grams of saturated fat each, this recipe yields gooey, sticky slices containing a third of the calories and saturated fat.
1 package dry yeast (about 21/4 teaspoons)
1/4 cup warm water (100° to 110°)
1/3 cup granulated sugar
1/4 cup 2% reduced-fat milk
1 teaspoon vanilla extract
1 teaspoon salt
2 large eggs
12.4 ounces all-purpose flour (about 23/4 cups), divided
9 tablespoons unsalted butter, softened and divided
Cooking spray
1 cup packed dark brown sugar, divided
3 tablespoons light-colored corn syrup
2 tablespoons mild honey
2/3 cup chopped pecans
2 teaspoons ground cinnamon
1. Combine yeast and warm water in the bowl of a stand mixer or a large bowl; stir with a whisk. Let stand 5 minutes or until foamy. Add granulated sugar, milk, vanilla, salt, and eggs; beat at low speed until well combined (about 1 minute).
2. Weigh or lightly spoon flour into dry measuring cups; level with a knife. Add 1/4 cup flour to yeast mixture; beat at low speed 1 minute or until well combined. Add 21/4 cups flour; beat at low speed until combined and a soft dough forms. Change paddle to dough hook; beat 8 minutes on medium speed or until smooth and elastic, scraping bottom and sides of bowl occasionally. Add 5 tablespoons butter, 1 tablespoon at a time, beating at low speed until combined after each addition and scraping sides, if necessary. Scrape dough onto a work surface sprinkled with 1/4 cup flour (dough will be sticky). Knead dough 1 minute or until smooth and elastic. Place dough into a large bowl coated with cooking spray. Cover and place in a warm place (85°), free from drafts, 1 hour or until doubled in bulk.
3. Combine 3 tablespoons butter, 2/3 cup brown sugar, corn syrup, and honey in a small saucepan; bring to a boil, stirring just until butter melts. Boil 30 seconds, stirring constantly. Pour syrup into a 12-cup Bundt pan coated with cooking spray. Sprinkle nuts over syrup. Cool completely.
4. Combine 1/3 cup brown sugar and cinnamon in a small bowl, stirring with a whisk.
5. Turn dough out onto a lightly floured surface. Gently press dough into a 16 x 12–inch rectangle. Melt 1 tablespoon butter. Brush surface of dough with melted butter. Sprinkle brown sugar–cinnamon mixture evenly over dough. Beginning at short side, roll up dough jelly-roll fashion; pinch seam to seal. Carefully lift roll, and fit into prepared pan. Pinch ends together. Cover with plastic wrap, and chill overnight.
6. Preheat oven to 350°.
7. Remove pan from refrigerator. Let stand at room temperature 30 minutes. Bake at 350° for 28 to 30 minutes or until a wooden pick inserted in center comes out clean and dry. Cool in pan 4 minutes on a wire rack. Place a plate upside down on top of pan; invert onto plate. Cool slightly before cutting.
SERVES 16 (serving size: 1 wedge)
CALORIES 265; FAT 10.8g (sat 4.7g, mono 3.9g, poly 1.5g); PROTEIN 4g; CARB 40g; FIBER 1g; CHOL 41mg; IRON 1mg; SODIUM 160mg; CALC 21mg

Roasted Grape and Pear Kuchen
ROASTED GRAPE AND PEAR KUCHEN
Hands-on: 27 min. Total: 3 hr.
1/2 cup warm 2% reduced-fat milk (100° to 110°)
1 package dry yeast (about 21/4 teaspoons)
1/2 cup granulated sugar, divided
2 tablespoons canola oil, divided
1 teaspoon vanilla extract
1 teaspoon grated lemon rind
1/2 teaspoon salt
1/2 teaspoon ground nutmeg
2 large eggs
9 ounces all-purpose flour (about 2 cups)
6 tablespoons unsalted butter, softened and divided
Baking spray with flour
11/2 cups seedless red grapes
2 firm peeled pears, cut into 1/4-inch-thick slices
1/4 cup chopped pecans
3 tablespoons brown sugar
1/2 teaspoon ground cinnamon
11/2 cups frozen reduced-calorie whipped topping (such as Cool Whip), thawed
1. Combine milk, yeast, and 1/2 teaspoon sugar in a large bowl, stirring with a whisk. Let stand 5 minutes or until mixture bubbles.
2. Add remaining granulated sugar, 1 tablespoon oil, vanilla, rind, salt, nutmeg, and eggs; beat with a mixer at low speed until well combined. Weigh or lightly spoon flour into dry measuring cups; level with a knife. Add flour; beat at low speed 5 minutes or until batter is smooth. Add 5 tablespoons butter, 1 tablespoon at a time, beating until fully combined after each addition. Smooth batter evenly into a 9-inch springform pan coated with baking spray. Cover and let rise in a warm place (85°), free from drafts, 11/2 hours.
3. Preheat oven to 450°.
4. Combine 1 tablespoon oil, grapes, and pears; arrange mixture in a single layer on a baking sheet. Bake at 450° for 20 to 25 minutes or until tender and beginning to caramelize. Cool completely. Reduce oven temperature to 350°.
5. Melt 1 tablespoon butter. Combine grape mixture, melted butter, pecans, brown sugar, and cinnamon in a bowl; toss gently to coat. Arrange mixture on top of dough. Bake at 350° for 30 minutes or until a wooden pick inserted in center comes out dry. Cool in pan 15 minutes on a wire rack. Remove from pan; place on a platter. Serve wedges with a dollop of whipped topping.
SERVES 12 (serving size: 1 wedge and 2 tablespoons whipped topping)
CALORIES 281; FAT 12.4g (sat 5.5g, mono 4.4g, poly 1.7g); PROTEIN 5g; CARB 39g; FIBER 2g; CHOL 47mg; IRON 1mg; SODIUM 124mg; CALC 39mg
TECHNIQUE TIP
For best flavor, use instant yeast, not rapid-rise. Letting the yeast do its thing for the full 11/2 hours develops amazing flavor. When roasting the pears and grapes, let the fruit cook until it gets completely soft and develops a beautiful browned, caramelized exterior. Caramelizing the fruit ahead removes excess moisture that would make the cake soggy, so let the oven work its magic and don’t be tempted to skimp on the roasting time.

Almond and Citrus Stollen
ALMOND AND CITRUS STOLLEN
Hands-on: 35 min. Total: 3 hr.
When I was in the Baking and Pastry Arts program at the Culinary Institute of America, my bread class chef-instructor made the most delicious Stollen bread I had ever tasted. While his was rich with butter, almond paste, candied fruit, and nuts, this lightened version is my homage to Chef Kastel’s artistry in the oven. Wrap the second loaf well, and it will keep up to 2 weeks.
SPONGE:
4.8 ounces bread flour (about 1 cup)
3 teaspoons dry yeast
1 teaspoon sugar
1/2 cup warm 2% reduced-fat milk (100° to 110°)
FINAL DOUGH:
1/4 cup sugar
1 ounce almond paste, crumbled
1 tablespoon grated orange rind
1 tablespoon grated lemon rind
1 teaspoon vanilla extract
10 tablespoons unsalted butter, softened
7.2 ounces bread flour (about 11/2 cups)
1 teaspoon salt
1/3 cup packed golden raisins
1/3 cup packed raisins
3 tablespoons fresh orange juice
FILLING:
3 tablespoons sugar
1 tablespoon unsalted butter, softened
2 ounces almond paste, crumbled
11/2 cups sliced almonds, divided
FINISH:
1 tablespoon unsalted butter, melted
2 tablespoons sugar
1. To prepare sponge, weigh or lightly spoon flour into a dry measuring cup; level with a knife. Combine flour, yeast, sugar, and warm milk; stir well (mixture is stiff). Cover and let rise in a warm place (85°), free from drafts, 30 minutes.
2. To prepare dough, beat sugar and almond paste at medium speed in a stand mixer with paddle attachment until mixture looks sandy, about 1 minute. Add rinds, vanilla, and butter; beat 1 minute or until combined (do not overbeat). Add sponge; beat 1 minute at low speed or until combined. Change mixer paddle to dough hook. Weigh or lightly spoon bread flour into dry measuring cups; level with a knife. Add flour and salt to sponge mixture; beat at low speed with dough hook 6 to 8 minutes or until smooth and elastic. Remove bowl from mixer; cover with plastic wrap, and let rise in a warm place (85°), free from drafts, 30 minutes.
3. While dough rises, combine raisins and juice in a microwave-safe bowl. Microwave at HIGH 20 seconds. Cover bowl with plastic wrap; let stand 20 minutes.
4. To prepare filling, combine sugar, butter, and almond paste in a bowl; beat with a mixer at low speed until completely combined (mixture will be crumbly). Add ½ cup almonds; beat at low speed 30 seconds or until well combined.
5. Return dough bowl to mixer. Add raisin mixture and 1 cup almonds; beat at low speed with dough hook 2 minutes or until well combined. Scrape dough out onto a lightly floured surface. Divide dough into 2 equal pieces. Press each piece into a 9- to 10-inch circle. Arrange half of filling on one-half of the dough circle. Fold over dough and pinch edges to seal. Repeat process with remaining dough and filling. Place loaves on doubled baking sheets covered with parchment paper. Cover lightly with plastic wrap, and let stand in a warm place (85°), free from drafts, 30 minutes.
6. Preheat oven to 350°. Remove plastic wrap from loaves. Bake at 350° for 35 to 40 minutes or until golden, rotating pan after 20 minutes. Remove pan from oven. To finish loaves, brush top and sides with melted butter. Cool completely on a wire rack. Sprinkle top, bottom, and sides of loaves with sugar.
SERVES 20 (serving size: 1 slice)
CALORIES 228; FAT 12g (sat 4.9g, mono 4.8g, poly 1.5g); PROTEIN 5g; CARB 27g; FIBER 2g; CHOL 19mg; IRON 1mg; SODIUM 122mg; CALC 42mg
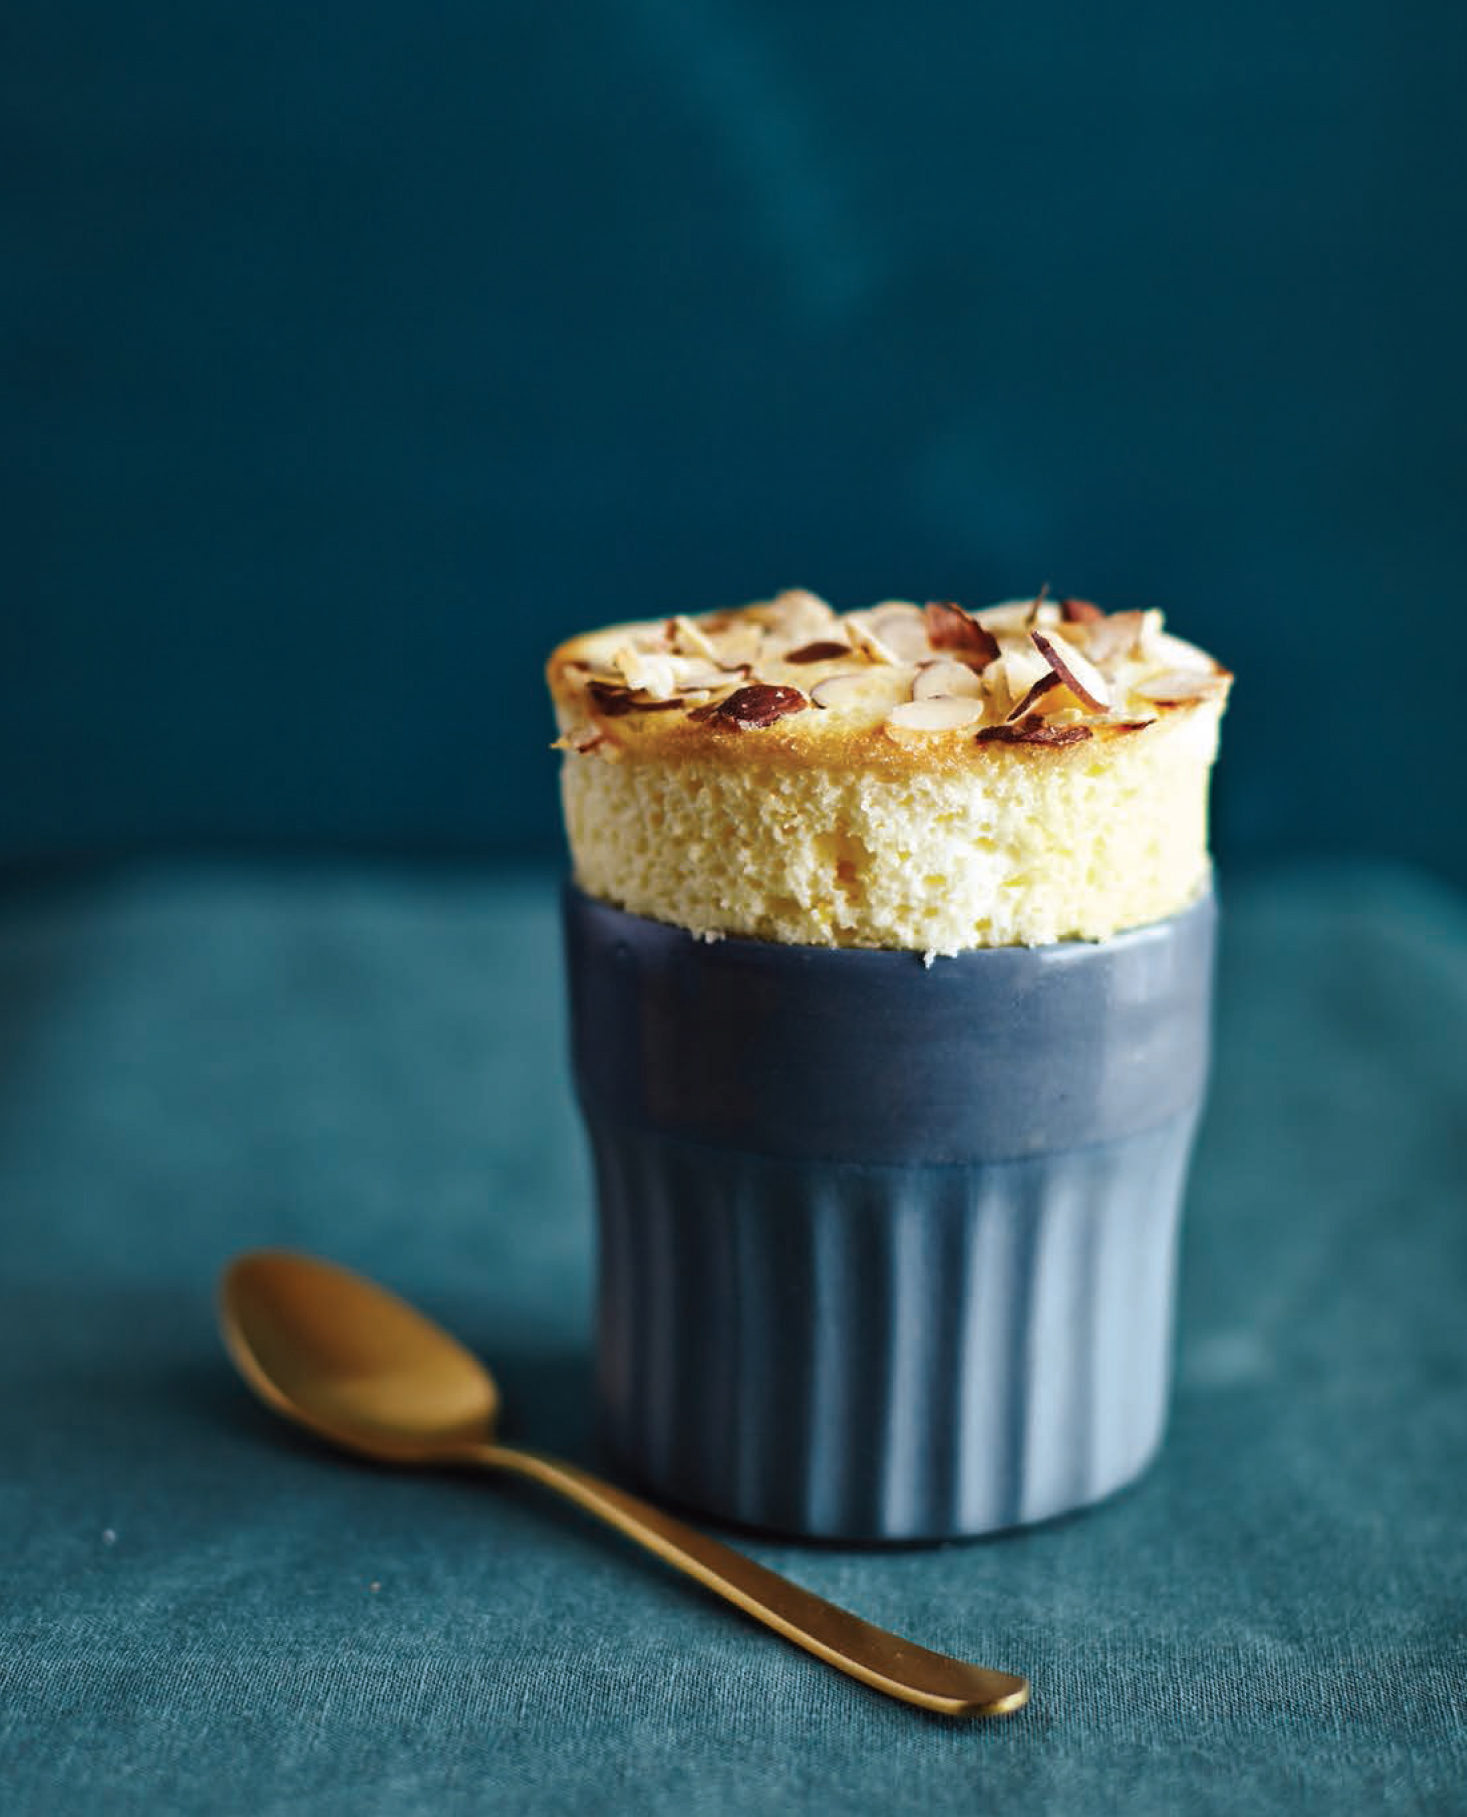
Lemon and Almond Soufflés
LEMON AND ALMOND SOUFFLÉS
Hands-on: 16 min. Total: 36 min.
I love a restaurant that offers a soufflé that you must order at the same time you order your entrée. The anticipation of the warm, creamy, cloudlike perfection makes me rush through dinner. For these lovely lemony soufflés, you can prepare the ramekins and the egg yolk mixture ahead, and then whip the egg white mixture at the last minute, fold them together, and pop them in the oven. They’re easy and very impressive. Take care when beating the egg whites; overbeating them will make the soufflés fall before they are fully cooked. Dust the tops lightly with powdered sugar just before serving, if you like.
Cooking spray
1/2 cup plus 2 tablespoons sugar, divided
2 large egg yolks
1.1 ounces all-purpose flour (about 1/4 cup)
3/4 cup low-fat buttermilk
1 tablespoon grated lemon rind
1/3 cup fresh lemon juice
2 tablespoons butter, melted
6 large egg whites, at room temperature
1/4 teaspoon cream of tartar
1/4 cup sliced almonds
1. Place a baking sheet in oven. Preheat oven to 425°.
2. Lightly coat 6 (8-ounce) ramekins with cooking spray; sprinkle with 2 tablespoons sugar, tilting dishes to coat sides completely.
3. Combine 1/4 cup sugar and egg yolks in a large bowl; beat with a mixer at high speed until thick and pale (about 2 minutes). Weigh or lightly spoon flour into a dry measuring cup; level with a knife. Add flour, buttermilk, and next 3 ingredients (through butter); beat at medium speed 1 minute or until completely combined.
4. Combine egg whites and cream of tartar in a large bowl; beat at medium speed until foamy using clean, dry beaters. Beat at high speed until soft peaks form. Reduce speed to medium, and add 1/4 cup sugar, 1 tablespoon at a time. Beat at high speed until medium peaks form (do not overbeat). Gently stir one-fourth of egg whites into lemon mixture; gently fold in remaining egg whites. Divide mixture among prepared ramekins. Sprinkle tops with almonds. Remove baking sheet from oven; place dishes on preheated baking sheet. Return baking sheet to oven. Immediately reduce oven temperature to 350°; bake at 350° for 20 minutes or until puffy and lightly browned. Serve immediately.
SERVES 6 (serving size: 1 soufflé)
CALORIES 213; FAT 8g (sat 3.5g, mono 3.1g, poly 0.9g); PROTEIN 7g; CARB 29g; FIBER 1g; CHOL 74mg; IRON 1mg; SODIUM 91mg; CALC 68mg
MAKING SOUFFLES
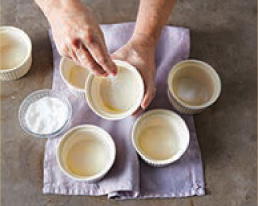
1. Lightly spray the ramekins with cooking spray; you don’t want a puddle collecting in the bottoms. Add the sugar, and tilt the ramekins so every inch is coated with sugar; dump the excess sugar into the next ramekin and repeat.
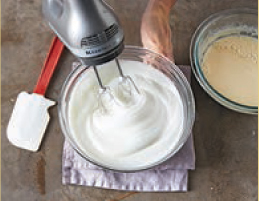
2. Beating the egg whites to medium peaks gives them room to stretch in the oven, and not break and deflate the soufflé before it’s served.
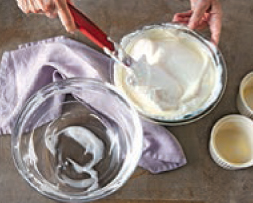
3. Stirring some of the egg whites into the soufflé base starts lightening up the batter so that the remaining whites can be folded in easily. Clean off any spills from the top edge of the ramekins to prevent the soufflé from sticking and not rising all the way.
MY TOP 5 TIPS FOR
CONTROLLING TEMPERATURE
Since so many of the recipes in this chapter have temperature-sensitive instructions, here are my top tips on how to manage the highs and the lows.
1 Unless specifically called for (like chilled butter in pie dough), ingredients should be at room temperature. So what is room temperature? In a bakeshop, room temperature is between 65° and 70°. If butter is too warm, it will not hold air whipped into it during the creaming process that makes cake layers rise, or it will melt too quickly, making cookies spread farther than intended. If flour is too cold, it will take cakes and breads longer to bake, resulting in dry loaves and layers. If eggs are too cold when added to butter and sugar mixtures, the butter will get chilled and form little lumps, resulting in holes in the cake layers. The easiest way to avoid trouble with temperature is to read the recipe all the way through and make sure all your ingredients are at the temperature recommended.
2 When making bread or other baked goods with yeast, the ideal rising temperature is 80° to 85°. If the recipe calls for a second rise or resting the dough on the counter, room temperature (65° to 70°) will be fine. If you have a proof mode on your oven, use it.
3 Some of the fillings and batters are chilled in the refrigerator and may be pretty thick or stiff when removed. Before you lighten them with whipped topping or meringue, stir the chilled filling with a whisk to make it creamy again. The fillings will be much easier to fold together afterwards.
4 I know, you’re anxious to dig into the cheesecake or panna cotta, but really, allowing them to chill overnight or for the minimum number of hours recommended will absolutely make a noticeable difference in the texture and even in the flavors. Be patient; you’ll be glad you were.
5 Use your thermometers. The difference between soft ball and hard ball stages is only about 10°, but the difference in results is light years apart. A crisp candy garnish or brittle will be a sticky pulling mess if the temperature of the sugar syrup is not accurate.

Orange Marmalade Nockerl
ORANGE MARMALADE NOCKERL
Hands-on: 25 min. Total: 39 min.
If you love soufflé, you are going to be nuts about Nockerl, a beautifully light yet creamy soufflé originating in Austria. When it is served in Salzburg, the meringue is shaped like the nearby rugged snowcapped mountain range.
1/4 cup half-and-half
2 tablespoons orange marmalade
1/2 teaspoon vanilla extract
Baking spray with flour
6 tablespoons granulated sugar, divided
4 large egg yolks
1/8 teaspoon salt
2 tablespoons cake flour
2 teaspoons grated orange rind
7 large egg whites
1/4 teaspoon cream of tartar
2 tablespoons powdered sugar
1. Preheat oven to 400°.
2. Combine half-and-half, marmalade, and vanilla in the bottom of an 11/2-quart glass or ceramic baking dish coated with baking spray, stirring with a whisk.
3. Place 3 tablespoons sugar, yolks, and salt in a medium bowl, and beat with a mixer at medium-high speed until light and fluffy, about 3 minutes. Add flour and rind; beat 30 seconds or until well combined. Place yolk mixture in a large bowl. Beat egg whites and cream of tartar at medium speed until foamy using clean, dry beaters. Add 3 tablespoons granulated sugar, 1 tablespoon at a time, beating at high speed until stiff peaks form (do not overbeat). Stir one-third of egg white mixture into egg yolk mixture. Gently fold in remaining egg white mixture. Scoop mixture into prepared dish (do not smooth top). Place on bottom rack in oven. Bake at 400° for 14 minutes or until golden. Sprinkle top with powdered sugar. Serve immediately.
SERVES 8 (serving size: 1 cup)
CALORIES 118; FAT 3.2g (sat 1.4g, mono 1g, poly 0.4g); PROTEIN 5g; CARB 17g; FIBER 0g; CHOL 95mg; IRON 0mg; SODIUM 95mg; CALC 24mg
TECHNIQUE TIP
Combining a layer of rich half-and-half and marmalade in the bottom of the baking dish creates an even creamier soufflé. If you aren’t a fan of orange marmalade, omit the orange rind in the filling, and substitute your favorite jam or preserves in the bottom of the dish.

Pumpkin-Hazelnut Layered Cheesecake
PUMPKIN-HAZELNUT LAYERED CHEESECAKE
Hands-on: 1 hr. Total: 13 hr.
Using low-fat and fat-free cream cheeses to lighten a cheesecake isn’t new, but adding a little flour and baking powder helps lighten their texture, making it creamy and smooth. Toasting the hazelnut meal really boosts its flavor in the cake layer. Instead of buying hazelnut meal, you can toast whole nuts, let them cool completely, and process in a food processor until finely ground. If you prefer, you can skip brushing the cake with the Frangelico liqueur.
CAKE:
2.25 ounces hazelnut meal (about 1/2 cup)
1/2 cup sugar
2 tablespoons unsalted butter, softened
2 tablespoons canola oil
2 large egg whites (reserve yolks for cheesecake)
1.5 ounces all-purpose flour (about 1/3 cup)
2 teaspoons cornstarch
1/2 teaspoon baking powder
1/4 teaspoon salt
Baking spray with flour
1 tablespoon hazelnut-flavored liqueur (such as Frangelico)
CHEESECAKE:
12 ounces 1/3-less-fat cream cheese
4 ounces fat-free cream cheese
3/4 cup sugar
3 large eggs
2 large egg yolks (reserved from cake)
2 tablespoons all-purpose flour
1 teaspoon vanilla extract
1 teaspoon ground cinnamon
1/2 teaspoon ground ginger
1/2 teaspoon ground allspice
1/2 teaspoon baking powder
1/4 teaspoon salt
1/4 teaspoon ground cloves
1 cup canned pumpkin puree
BRITTLE:
1/3 cup sugar
1 tablespoon water
3 tablespoons hazelnuts, roasted and coarsely chopped
Cooking spray
1 cup frozen fat-free whipped topping, thawed
1. Preheat oven to 350°.
2. To prepare cake, sprinkle hazelnut meal evenly on a rimmed baking sheet. Bake at 350° for 4 to 5 minutes or until lightly browned, stirring after 3 minutes. Cool completely (about 20 minutes).
3. Combine sugar, butter, and oil in a large bowl; beat with a mixer at medium speed until well combined, about 3 minutes. Add egg whites; beat 1 minute. Weigh or lightly spoon flour into a dry measuring cup; level with a knife. Combine flour, toasted hazelnut meal, cornstarch, baking powder, and salt in a bowl; stir with a whisk. Add flour mixture to sugar mixture; beat at low speed 1 minute or until just combined. Spoon batter into a 9-inch springform pan coated with baking spray; smooth top. Bake at 350° for 13 minutes or until a wooden pick inserted in center comes out clean. Brush top of hot cake with hazelnut liqueur. Cool completely in pan on a wire rack (do not remove or loosen sides of springform pan). Reduce oven temperature to 325°.
4. While cake cools, prepare cheesecake: Place cream cheeses in a large bowl; beat at medium speed 2 minutes or until smooth. Add sugar and next 10 ingredients (through cloves); beat at low speed 2 minutes or until well combined. Add pumpkin; beat at low speed until combined. Pour cheesecake batter over top of cooled hazelnut cake. Bake at 325° for 50 minutes or until cheesecake center barely moves when pan is touched. Remove cheesecake from oven. Run a knife around outside edge. Cool completely on a wire rack. Cover and chill 8 hours or overnight.
5. To prepare brittle, place sugar and 1 tablespoon water in a small heavy saucepan over medium heat; cook until sugar dissolves, stirring occasionally. Continue cooking about 2 minutes or until golden (do not stir). While sugar mixture cooks, sprinkle chopped hazelnuts over a 14 x 2–inch area on parchment paper lightly coated with cooking spray. Drizzle caramelized sugar over nuts. Cool 10 minutes or until firm; break into 14 pieces. To serve, cut cheesecake into wedges, dollop each wedge with whipped topping, and top with brittle.
SERVES 14 (serving size: 1 cheesecake wedge, about 1 tablespoon whipped topping, and 1 piece brittle)
CALORIES 292; FAT 14.9g (sat 5.2g, mono 6.7g, poly 1.8g); PROTEIN 7g; CARB 33g; FIBER 2g; CHOL 90mg; IRON 1mg; SODIUM 276mg; CALC 96mg

Tropical Pavlovas
TROPICAL PAVLOVAS
Hands-on: 52 min. Total: 6 hr. 52 min.
4 large eggs, separated and divided
1/4 teaspoon cream of tartar
1/8 teaspoon salt, divided
2/3 cup sugar
1/4 teaspoon vanilla extract
1/2 cup dry-roasted, salted macadamia nuts, finely chopped and divided
3/4 cup unsweetened pineapple juice
1/4 cup sugar, divided
2 teaspoons fresh lime juice
1 tablespoon cornstarch
1 large egg
1 tablespoon unsalted butter
1/2 cup diced pineapple
1/2 cup diced mango
1/2 cup diced kiwi (about 2)
1/2 cup small fresh raspberries
1 tablespoon thinly sliced fresh mint
1 tablespoon fresh lime juice
1/2 cup unsweetened coconut flakes, toasted
1. Preheat oven to 250°. Draw 8 (4-inch) circles on parchment paper. Turn parchment paper over; secure paper to a large baking sheet with masking tape.
2. Beat egg whites, cream of tartar, and a dash of salt with a mixer at medium speed until foamy (about 1 minute). Increase speed to high; beat until soft peaks form (about 1 minute). With mixer at medium speed add sugar, 1 tablespoon at a time, beating well after each addition. Beat at high speed until stiff peaks form (do not overbeat). Beat in vanilla. Reserve 3 tablespoons chopped nuts. Gently fold remaining nuts into egg mixture. Divide egg white mixture among the 8 drawn circles. Shape meringues into nests with 1-inch sides using the back of a spoon. Sprinkle reserved 3 tablespoon nuts over tops of meringue nests. Bake at 250° for 2 hours or until dry, rotating pan after 1 hour. Turn oven off; cool meringues in closed oven at least 4 hours. Carefully remove meringues from paper. Store in an airtight container until ready to use.
3. Combine pineapple juice, 2 tablespoons sugar, lime juice, and a dash of salt in a saucepan; bring to a simmer. Combine 2 tablespoons sugar, cornstarch, egg, and egg yolks in a bowl, stirring with a whisk until smooth. Gradually drizzle juice mixture into egg mixture, stirring constantly with a whisk. Return mixture to pan. Cook over medium heat until mixture thickens and a candy thermometer registers 180°. Remove pan from heat; stir in butter. Place pan in a large ice-filled bowl; bring curd to room temperature, stirring occasionally.
4. Combine pineapple and next 5 ingredients in a bowl; toss gently.
5. To assemble pavlovas, top each meringue with about 2 tablespoons curd, 1/4 cup fruit relish, and 1 tablespoon toasted coconut. Serve immediately.
SERVES 8 (serving size: 1 pavlova)
CALORIES 269; FAT 13g (sat 5.4g, mono 6.2g, poly 0.6g); PROTEIN 5g; CARB 36g; FIBER 3g; CHOL 73mg; IRON 1mg; SODIUM 137mg; CALC 32mg
SHAPING PAVLOVAS
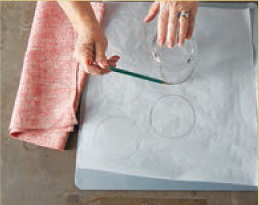
1. Use a dark color pen or pencil to draw 4-inch circles on the parchment paper so that when the paper in turned upside down the marks will still be visible.
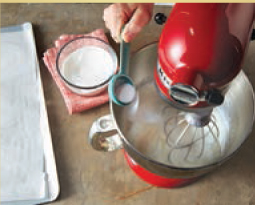
2. Adding lots of sugar to this meringue makes it creamier and thicker so that it holds its shape in the oven and develops a crisp texture. Add the sugar slowly so that it gets fully incorporated and inhibits the whites from whipping up stiffly.
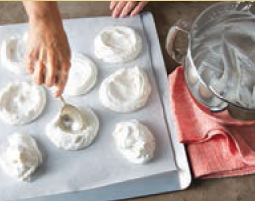
3. Scoop the meringue into a mound in the center of each circle. Using a spoon, shape each meringue into a nest, building the sides up and carving out the centers.

Torched Alaska
TORCHED ALASKA
Hands-on: 1 hr. 20 min. Total: 5 hr. 30 min.
Using Swiss meringue and scorching it with a kitchen torch yields yummy caramelized bits and eliminates the tricky baking part of a traditional baked Alaska—the potential melted mess. Chocolate and coffee ice creams create a mocha treat, but you can use any ice cream combination you prefer.
CAKE:
Baking spray with flour
2.7 ounces cake flour (about 2/3 cup)
3/4 teaspoon baking powder
1/4 teaspoon salt
4 large eggs, separated
1/3 cup sugar, divided
11/2 teaspoons vanilla extract
1/4 teaspoon cream of tartar
FILLING:
11/2 cups reduced-fat coffee ice cream
11/2 cups fat-free chocolate ice cream
MERINGUE:
5 large egg whites
1/3 cup sugar
1/4 teaspoon vanilla extract
1/4 teaspoon cream of tartar
Dash of salt
1. Preheat oven to 400°. Lightly coat a jelly-roll pan with baking spray. Line bottom of pan with wax paper; coat paper with baking spray.
2. To prepare cake, weigh or lightly spoon flour into dry measuring cups; level with a knife. Combine flour, baking powder, and salt, stirring with a whisk.
3. Place egg yolks and 2 tablespoons sugar in a large bowl; beat with a mixer at medium speed until thick and ribbony, about 4 minutes. Beat in vanilla.
4. Place egg whites and cream of tartar in a large bowl; using clean dry beaters, beat at medium speed until foamy (about 30 seconds). Increase speed to high, and beat until medium peaks form. Add remaining sugar, 1 tablespoon at a time, beating until stiff peaks form (about 2 minutes). Stir one-fourth of egg whites into egg yolk mixture. Gently fold remaining whites into yolk mixture. Sift one-half of flour mixture over top of egg mixture; gently fold in. Sift remaining half of flour mixture over batter; gently fold in. Scrape batter into prepared pan; spread evenly in pan with an offset spatula.
5. Bake at 400° for 9 minutes or until lightly browned and cake springs back when lightly touched. Run a knife around outside edge; cool in pan 4 minutes. Turn pan upside down onto a wire rack; remove cake. Carefully remove wax paper; discard paper. Cool cake completely on wire rack. Using a 31/2-inch round cookie cutter, cut 12 circles from cake. Discard remaining cake scraps.
6. To prepare filling, lightly coat 6 (8-ounce) ramekins with baking spray. Line each ramekin with plastic wrap, allowing the plastic wrap to extend over edges. Spoon 1/4 cup coffee ice cream into bottom of each ramekin, spreading evenly; top each with 1 cake round. Spread 1/4 cup chocolate ice cream over each cake layer, spreading evenly; top each with 1 cake round. Cover with plastic wrap; freeze 4 hours or up to overnight.
7. To prepare meringue, combine 5 egg whites and remaining ingredients in the top of a double boiler. Cook over simmering water 2 to 3 minutes or until a candy thermometer registers 160°, stirring constantly with a whisk. Remove from heat. Beat egg mixture with a mixer at medium speed until soft peaks form (about 6 minutes); beat at high speed until stiff peaks form.
8. Invert ramekins, cake sides down, onto a baking sheet; discard plastic wrap. Divide meringue evenly among servings, and spread evenly over each dome (the domes should be completely covered with meringue). Holding a kitchen torch about 3 inches from domes, heat the meringue, moving the torch back and forth until lightly browned. Transfer to individual plates, and serve immediately.
SERVES 6 (serving size: 1 Torched Alaska)
CALORIES 250; FAT 4g (sat 1.7g, mono 0.8g, poly 0.5g); PROTEIN 9g; CARB 45g; FIBER 2g; CHOL 93mg; IRON 1mg; SODIUM 255mg; CALC 118mg

Pineapple Shortbread Cakes
PINEAPPLE SHORTBREAD CAKES
Hands-on: 1 hr. 13 min. Total: 2 hr. 18 min.
3 (8-ounce) cans crushed pineapple in juice, undrained
3/4 cup granulated sugar
1/2 teaspoon salt, divided
1/3 cup light-colored corn syrup
4 teaspoons all-purpose flour
9 ounces cake flour (about 21/4 cups)
1/3 cup nonfat dry milk
1/4 teaspoon baking powder
12 tablespoons unsalted butter, softened
1/2 cup plus 1 tablespoon powdered sugar, divided
2 large egg yolks
1. Drain pineapple in a fine-mesh sieve, pressing on solids; discard or save juice for another use. Place pineapple in a medium saucepan over medium-low heat; cook 15 minutes or until all the liquid has evaporated, stirring frequently. Add sugar and 1/4 teaspoon salt; cook 8 to 10 minutes or until liquid is absorbed and mixture thickens, stirring frequently. Add corn syrup; cook 5 minutes or until mixture is very thick and sticky, stirring frequently. Add all-purpose flour; cook 1 minute or until mixture is very thick, stirring constantly. Scrape mixture onto a baking sheet, and spread into a thin layer; cover and chill completely (about 20 minutes).
2. Weigh or lightly spoon cake flour into dry measuring cups; level with a knife. Place flour, dry milk, 1/4 teaspoon salt, and baking powder in a fine-mesh sieve. Place butter in a large bowl; beat with a mixer at medium speed until smooth and creamy. Add ½ cup powdered sugar, and beat 2 minutes or until well combined. Add egg yolks, 1 at a time, beating well after each addition. Beat 2 minutes or until fluffy. Add flour mixture; beat at low speed until just combined. Divide dough in half. Shape into 2 (10-inch) logs; cover each with plastic wrap, and chill 30 minutes.
3. Preheat oven to 325°.
4. Cut each log into 12 equal pieces. Working with 1 piece at a time, roll dough into a 3-inch circle on a lightly floured surface. Place about 1 tablespoon filling in the center; bring edges together, and pinch closed. Gently press into a floured 13/4-inch square mold (cookie cutter) or shape into a square by hand. Repeat procedure with remaining dough and filling; place cake 2 inches apart on parchment-lined baking sheets. Bake at 325° for 25 minutes, turning cake over and rotating pans after 15 minutes. Remove cake from pans, and cool completely on wire racks. Sprinkle with 1 tablespoon powdered sugar.
SERVES 24 (serving size: 1 cake) CALORIES 168; FAT 6.3g (sat 3.8g, mono 1.7g, poly 0.3g); PROTEIN 2g; CARB 27g; FIBER 0g; CHOL 31mg; IRON 1mg; SODIUM 68mg; CALC 34mg
DRY MILK
Why add dry milk to these shortbread cakes? It provides structure and strength to baked goods and enhances browning, all without adding additional liquid to the recipe. It’s important to push the dry milk through a fine-mesh sieve because it tends to clump in hard granules; they need to be broken up for these cakes to have the right texture. Many large bakeries use dry milk in their cakes, muffins, and breads because it takes up less space, is more economical than liquid milk, and still provides flavor and quality to their products.

Raspberry Spice Buns
RASPBERRY SPICE BUNS
Hands-on: 45 min. Total: 3 hr. 1 min.
1 package dry yeast (about 21/4 teaspoons)
2/3 cup warm 2% reduced-fat milk (100° to 110°)
1/2 cup sugar
7 tablespoons unsalted butter, softened and divided
5.6 ounces all-purpose flour (about 11/4 cups)
5.2 ounces einkorn flour (about 11/4 cups)
1 large egg
1 teaspoon ground cinnamon
3/4 teaspoon salt
1/2 teaspoon ground allspice
1/4 cup all-purpose flour for kneading and shaping
Cooking spray
1/4 cup raspberry jam
1. Stir yeast into warm milk; let stand 5 minutes or until foamy.
2. Combine sugar and 6 tablespoons butter in a large bowl of a stand mixer; beat 1 minute or until combined (do not overbeat). Weigh or lightly spoon flours into dry measuring cups; level with a knife. Place flours in a bowl, stirring with a whisk. Add 1/2 cup flour mixture, yeast mixture, and egg to butter mixture; beat at low speed 2 minutes or until well combined. Beat in cinnamon, salt, and allspice. Add remaining flour mixture to butter mixture; beat at low speed with dough hook 8 minutes or until smooth and elastic, stopping to scrape sides and bottom of bowl 2 times. Scrape dough out onto a floured work surface; knead 1 minute, using as little additional all-purpose flour as possible to keep from sticking to surface. Place dough in a large bowl coated with cooking spray. Cover and let rise in a warm place (85°), free from drafts, 11/2 hours.
3. Turn dough out onto a lightly floured surface. Divide dough into 12 equal pieces. Lightly press each piece into a 3-inch circle. Drop 1 teaspoon jam into center of each circle. Gather edges together, and pinch to seal. Place sealed edge in bottom of muffin cups coated with cooking spray. Lightly cover pan with plastic wrap. Place in a warm place (85°), free from drafts, 30 minutes.
4. Preheat oven to 350°.
5. Remove plastic wrap from dough. Bake at 350° for 14 to 15 minutes or until lightly browned, rotating pan after 7 minutes. Cool in pan 2 minutes; remove from pan, and place on a wire rack. Melt 1 tablespoon butter. Brush tops of buns with butter. Serve warm or at room temperature.
SERVES 12 (serving size: 1 bun)
CALORIES 215; FAT 8g (sat 4.6g, mono 2.1g, poly 0.5g); PROTEIN 4g; CARB 32g; FIBER 1g; CHOL 34mg; IRON 1mg; SODIUM 159mg; CALC 26mg
TECHNIQUE TIP
Use as little flour on your work surface as possible when kneading and shaping these little buns. If you use too much, the dough will look gray instead of light brown. Substitute your favorite jam if you are not a fan of raspberry. Apple butter would go wonderfully well with the cinnamon and allspice added to the dough.

Smoked Cherry Bombs
SMOKED CHERRY BOMBS
Hands-on: 45 min. Total: 1 hr. 12 min.
At less than 100 calories, these little bombs pack a great cherry and almond blast. Use red dye–free cherries made with pure cane sugar for the best real cherry flavor.
1/2 cup cherrywood smoking chips
12 maraschino cherries with stems (such as Tillen Farms)
2 ounces almond paste
5 teaspoons sugar, divided
2 ounces 1/3-less-fat cream cheese, softened
1/4 teaspoon vanilla extract
Dash of salt
4 (14 x 9–inch) sheets frozen phyllo dough, thawed
3 tablespoons butter, melted
1. Preheat oven to 375°.
2. Pierce 10 holes on one side of the bottom of a 13 x 9–inch disposable aluminum foil pan. Place holes over element on cooktop; place smoking chips over holes inside pan. Heat element under holes to medium-high; let burn 1 minute or until chips begin to smoke. Arrange cherries on opposite end of pan. Carefully cover pan with foil. Reduce heat to low; smoke cherries 5 minutes. Smoking the cherries for 5 minutes may not seem like very much time, but it’s the perfect amount of time to create a blend of smoky and sweet. Do not open the foil top during this 5 minutes or the balance goes out of whack. Seriously. Remove from heat; let stand until cool.
3. Place almond paste and 1 tablespoon sugar in a bowl; beat with a mixer at medium speed until mixture looks sandy. Add cream cheese, vanilla, and salt; beat 1 minute or until well combined.
4. Place 1 phyllo sheet on a large cutting board or work surface (cover remaining dough to keep from drying); lightly brush with melted butter. Sprinkle with 1/2 teaspoon sugar. Repeat layers with remaining phyllo, butter (saving a little butter for the outsides), and sugar. Cut 12 (3.5 x 3–inch) rectangles through phyllo layers using a pizza cutter or a sharp knife. Spoon about 1 teaspoon almond mixture into center of each phyllo stack. Press 1 cherry, stem up, into almond mixture. Gather edges of phyllo, and press around stem to seal, forming a pouch. Gently brush outsides with remaining butter. Place on a baking sheet covered with parchment paper. Bake at 375° for 12 to 13 minutes or until crisp. Remove bombs from baking sheet, and place on a wire rack. Cool completely.
SERVES 12 (serving size: 1 cherry bomb)
CALORIES 87; FAT 5.5g (sat 2.6g, mono 2g, poly 0.5g); PROTEIN 1g; CARB 8g; FIBER 0g; CHOL 11mg; IRON 0mg; SODIUM 70mg; CALC 15mg
SMOKING CHERRIES
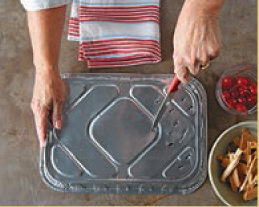
1. Pierce one end of the aluminum foil pan with the tip of a knife 10 to 15 times to allow the heat to easily penetrate the pan.
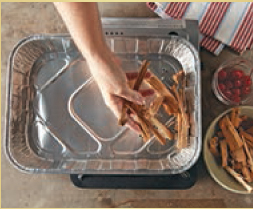
2. Place the wood chips over the holes in the pan, and then place the pan over the flame or heating element. The wood chips will begin smoking; if they flame up, reduce the heat.
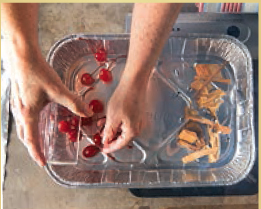
3. Arrange the cherries on the opposite end of the pan; cover the pan with foil to hold in the smoke. The aluminum pan gets very hot, so use thick potholders or a dry kitchen towel to protect your hands from burns.

Chocolate Marshmallows
CHOCOLATE MARSHMALLOWS
Hands-on: 50 min. Total: 2 hr. 50 min.
As is so true with many homemade goodies, once you experience an honest-to-goodness homemade marshmallow, store-bought will never pass your lips again.
1 cup water, divided
3 (1/4-ounce) packages unflavored gelatin
11/2 cups granulated sugar
1 cup light-colored corn syrup
Dash of salt
1 teaspoon vanilla extract
1/4 cup sifted unsweetened cocoa
Cooking spray
1/3 cup powdered sugar
1/3 cup cornstarch
2 teaspoons unsweetened cocoa
2 ounces bittersweet chocolate, finely chopped
1. Pour 1/2 cup water into a microwave-safe bowl; sprinkle gelatin on top.
2. Combine 1/2 cup water, sugar, corn syrup, and salt in a medium, heavy saucepan over medium-high heat; bring to a boil, stirring frequently. Cook, without stirring, until a candy thermometer registers 250°. Pour sugar mixture into the bowl of a stand mixer; let stand until thermometer registers 210° (about 15 minutes).
3. Microwave gelatin mixture at HIGH 20 seconds or until gelatin melts, stirring after 10 seconds. With mixer at low speed, beat sugar mixture using whip attachment; gradually pour gelatin mixture in a thin stream into sugar mixture. Beat in vanilla. Increase speed to high; whip mixture until light and fluffy (about 5 minutes). Reduce mixer to low speed, and gradually add 1/4 cup cocoa; beat until well combined. Using a spatula coated with cooking spray, scrape mixture into an 11 x 7–inch glass or ceramic baking dish coated with cooking spray; smooth top. Let stand at room temperature 2 hours.
4. Sift together powdered sugar, cornstarch, and 2 teaspoons cocoa into a jelly-roll pan. Using an offset spatula coated with cooking spray, remove marshmallow from pan; place in powdered sugar mixture. Using scissors well coated with powdered sugar mixture, cut marshmallows into 78 (1-inch) squares. Dust marshmallows with powdered sugar mixture; shake to remove excess mixture.
5. Arrange marshmallows on a wire rack placed on parchment paper. Place bittersweet chocolate in a small microwave-safe bowl; microwave at HIGH 30 seconds or until chocolate melts, stirring after 15 seconds. Drizzle chocolate over marshmallows; let stand until chocolate sets.
SERVES 26 (serving size: 3 marshmallows)
CALORIES 113; FAT 1.2g (sat 0.6g, mono 0.1g, poly 0g); PROTEIN 1g; CARB 27g; FIBER 0g; CHOL 0mg; IRON 0mg; SODIUM 16mg; CALC 4mg
TECHNIQUE TIP
Temperature control is the key to creating marshmallows with great texture. Cooking the syrup to 250° will give the marshmallows a fluffy yet firm texture and prevent the gelatin from taking over and turning them into gummy bears. Letting the sugar syrup cool to 210° gives it the right viscosity to start whipping and incorporating air right away. If your sugar syrup gets too cool, it will stick to the bowl and the beaters and you won’t be able to whip it to incorporate air. If you start whipping too soon, it will just take a lot longer to get the ultimate marshmallow texture you want.