As a first step, we should create the search domain. A search domain is a cluster of machines in which we store our documents.
To create a search domain, first, we need to navigate to the CloudSearch section of the AWS Console and click on the Create a New Domain button.
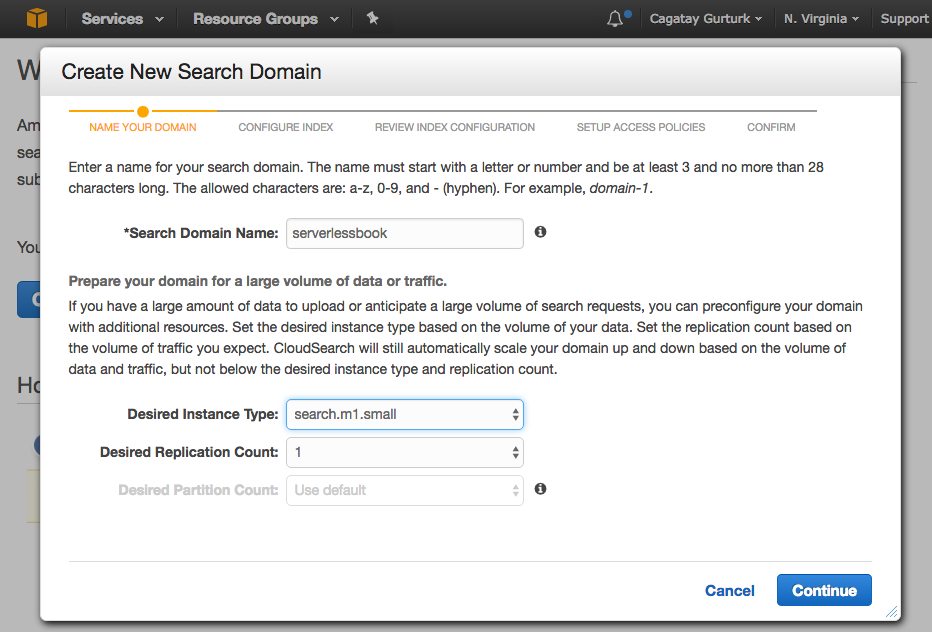
After pressing this button, a new wizard will launch that will walk you through the new search domain creation. You should specify a name for your search domain, and in our case, we name it serverlessbook:

On the same screen, you should also specify an instance type. So far, we never had to specify any instance type, but CloudSearch is not fully serverless, so you will be launching virtual machines under the hood. CloudSearch has a family of instances starting from search.m1.small to search.m3.2xlarge. These instances have different hardware configurations and different pricing per hour. For our example, we will pick the smallest instance, search.m1.small, and also set Desired Replication Count as 1. We will also set Desired Partition Count to 1 for the exercise.
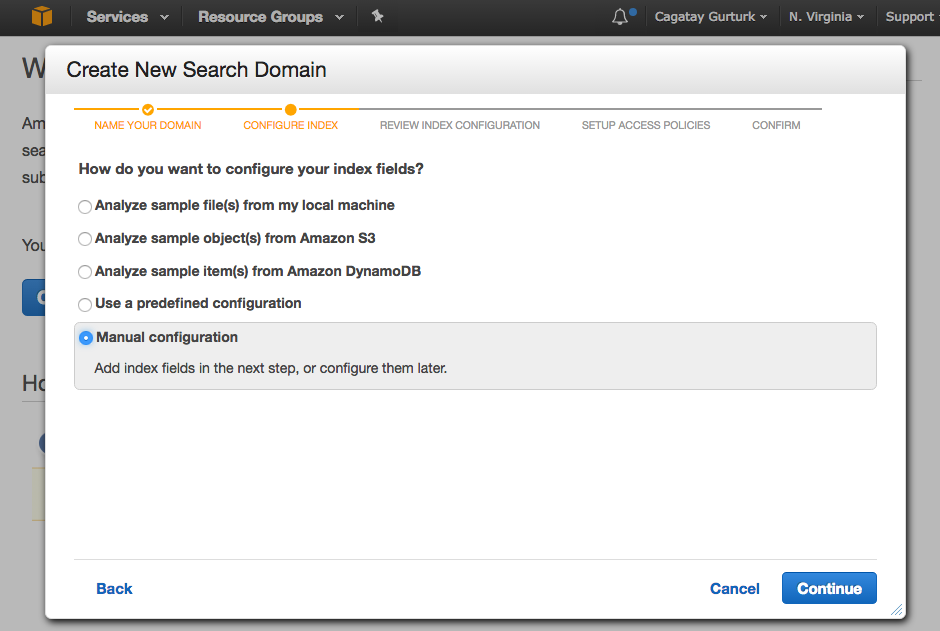
When we click on the Continue button, we are prompted to configure our index for the search domain. AWS gives us some options to analyze the current documents to predict an indexing structure, but here, we will choose the Manual Configuration option to customize our indexed fields in documents:

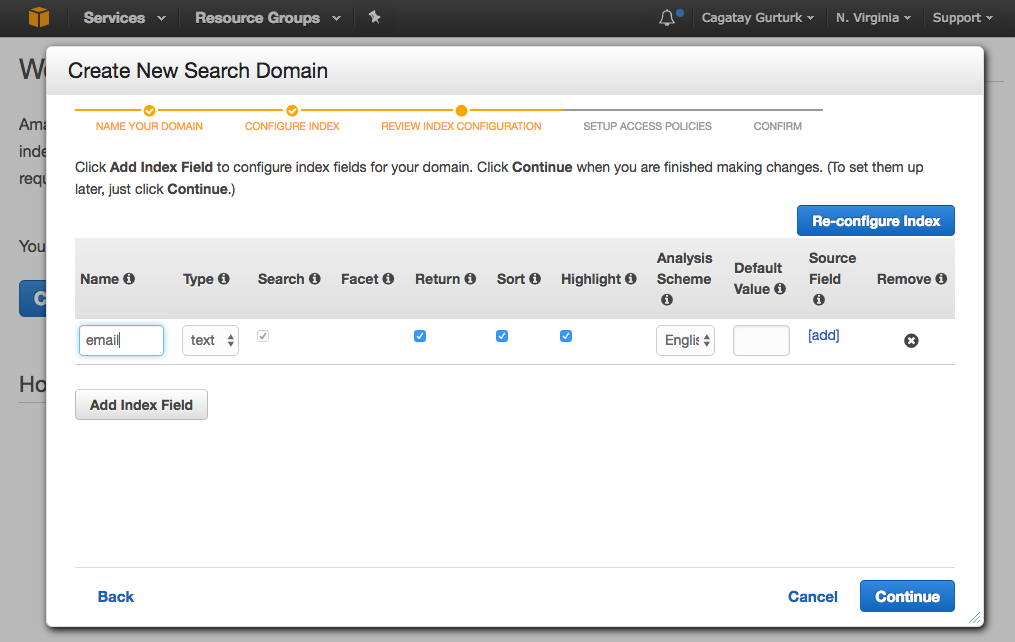
On the next screen, we are prompted to enter indexable fields in our document:

Here, we add email, userid, and username as indexable fields and select text as Type for all the items. Note that we have more options here, such as numeric or date value, but as we only have string values in our users table, we select text.
At the start of the wizard, we could also select Analyze sample item(s) from Amazon DynamoDB and let CloudSearch decide about indexable fields in the domain. However, we wanted to show you how to do the configuration manually, so we did not go that way.
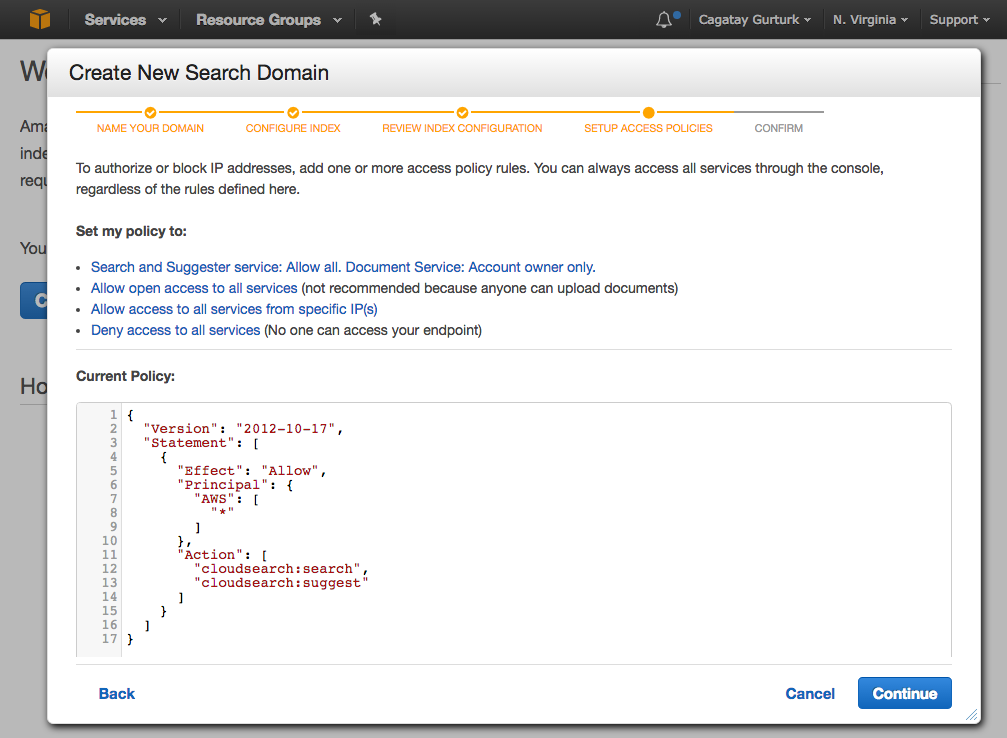
Like all AWS services, we have to define an access policy for CloudSearch also. On the next screen, we can select one of the predefined policies or write our own:

For the sake of simplicity, we will write the following policy to the box:
{
  "Version": "2012-10-17",
  "Statement": [
    {
      "Effect": "Allow",
      "Principal": {
        "AWS": [
          "*"
        ]
      },
      "Action": [
        "cloudsearch:search",
        "cloudsearch:suggest"
      ]
    }
  ]
}
This policy allows public access for the Search and Suggester service, but only allows the current AWS owner to upload documents.
After this step, you'll be prompted to confirm all the configurations and create the search domain by clicking on the Confirm button. It will take up to 10 minutes to launch your search domain and bring it online.