Chapter 20
Basic Skills
It drives me slightly nuts when I see someone in a restaurant sawing away at his or her steak and shredding it into ever-finer shreds. Likewise, when I see someone hacking at a chunk of wood with a folder or small utility knife. I witness this kind of thing all too frequently. Of course you know how to use a knife. But in case you have some friends who do not, here is a review of the basic cuts to aid in the instruction of your friends.
Cutting
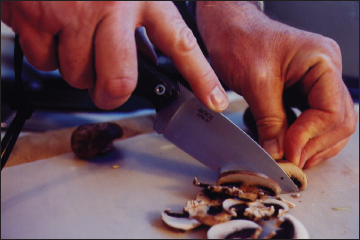
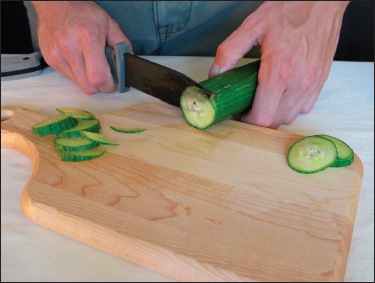
The Draw Cut: Place your edge on the surface to be cut and draw the edge across it while maintaining downward pressure. This is not sawing. Sawing is the ineffective method of drawing a smooth edge with no saw teeth back and forth over the intended cutting surface with no downward pressure. Press down and draw. This will do for most any steak.
The Push or Press Cut: Place your edge on the thing to be cut and simply push down.
The Shear Cut: Anchor the tip of your knife so it does not move. Holding the handle in one hand, use the secured tip as a fulcrum and press down with your edge on the material to be cut.

Cutting veggies with a draw cut.
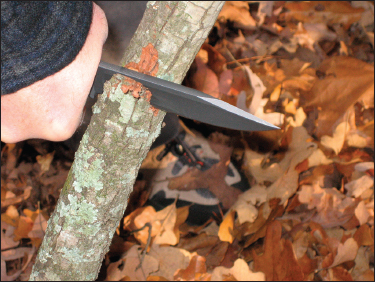
Leverage advantage of no choil with a press cut.
Gerber LMF II illustrates a press cut.
The Slash: Move your edge to and through the material to be cut, usually done with speed. The combination of a slash and a draw cut is taught in certain blade arts and is a highly effective technique.
The Stab: Secure the handle firmly and drive the point of your blade into that which you wish to penetrate.
The Chop: Swing your edge with force into the material to be cut. A chop with a small knife is futile and damaging to the edge of the knife. Even medium-sized blades of around seven inches are miserably ineffective as choppers. Use a chopper, such as a machete or other big knife, to chop.
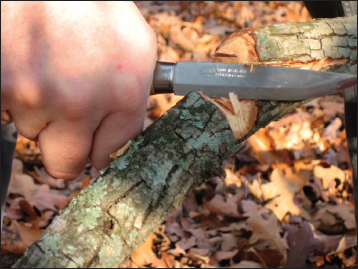
Mora knife making a shear cut into a hardwood limb.
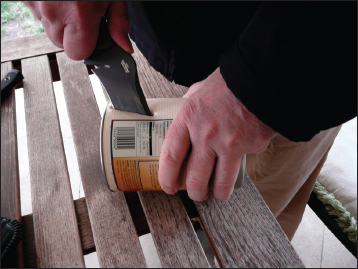
Stab with ZT fixed blade.
Batoning: If you need to chop things and have no chopper, use a baton. A baton is anything used to baton, or strike, the back of your blade. This is an effective technique for cutting large things with a small knife. Correctly done, it will not damage the knife. Simply place your edge onto the thing you wish to cut and strike the spine of the blade directly over the cutting surface—lightly, not like you’re hitting a home run. Repeat.

Close-up of an orange tree limb slashed by Mace Vitale’s forged camp knife.
Since it’s a critical survival skill, we’re going to cover batoning in a little more detail. A baton is anything sturdy that can be used to pound a blade through a resistant medium: a chair or table leg, a large or small Maglite, even a hard-soled shoe will serve.
Hold the baton in a loose pivot grip so that it can rotate around the junction of your fingers where you grasp it. Hold the knife with a loose but firm grip so that it can pivot around the axis of your thumb and second finger. The other fingers should be somewhat loose. The knife must be able to pivot to avoid stress in the event of a misplaced strike. Use the edge to cut if you’re using a folder. No folder should be driven through a resistant medium point first, whereas a fixed blade can be. If using a folder, the key thing is to not put direct stress on the lock.
Strike the back of the blade directly over the place where the edge is in contact with the surface to be cut. By striking in this spot, you transfer the force of the blow through the blade and into the object you are cutting with little stress on the blade. Correct baton technique will stress your knife far less than chopping with it, since the edge must absorb the energy of the strike when chopping. Chopping with a folder or small knife is ineffective in any event. If you use proper technique, batoning wood should not damage your knife, either fixed blade or tactical folder.
To cut through a flat surface, say a door, place the belly of the blade, the part just behind the point, on the surface. Again, strike directly above the contact point. Since you are using a curved part of the edge, the cut will be a bit easier than when you use the straight part of the edge.
When would you use a baton? When there is no ax or machete available and you need to cut saplings for an emergency shelter, through a locked door to escape a burning building, or open a car body to extract a trapped passenger. I read a story about one of the firefighters who was near Ground Zero on 9/11. He was running from his car to the scene when he heard cries from inside a shipping container where a woman had been trapped when the container was flipped over by the blast. The firefighter was alone. He had none of the tools of his trade with him. He used his folder and his flashlight to make two diagonal intersecting cuts, pulled the sheet steel out of the way, and rescued the woman. His folder was a tactical from one of America’s leading manufacturers. Cutting through steel like the firefighter did may destroy your knife, but a knife is a small price to pay for a life.
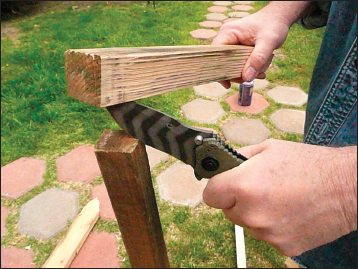
Batoning a folder.
If you want to be ready in an emergency, practice this skill before you need it. Don’t wait until a building is burning down around you before you try to use a baton. Reading about how to do something is not the same as actually doing it. Be inventive; use expedient batons. See how effective a flashlight is compared to, say, the hard heel of a shoe. Obviously a sneaker would be less effective as a baton than a table leg. However, in a recent test a small woman was able to cut through the roof of a car with a tactical folder and one of her boat shoes.
Try cutting different things, such as tree limbs, discarded doors, plywood, and junked car bodies. You will learn about the resistance of various materials and become proficient in the skill. If you go at it seriously, you may make a few mistakes and you may wreck a knife or two in the process. But that’s a small price to pay to acquire a valuable skill. Don’t complain to the knifemaker if you wreck a knife while learning. Consider it the price of education.
Sharpening
Some knives are easier to sharpen than others. Some steels respond to the stone better than others. Ease of sharpening is related to, but not entirely determined by, the hardness of the steel. Other factors, such as the grain, texture, or the nature of the steel play a part, as do how the blade is ground, the sharpening material, and method.
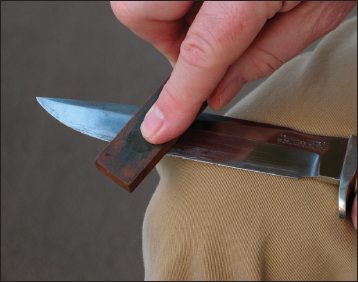
Pocket India stone being used to sharpen the Randall Model 1.
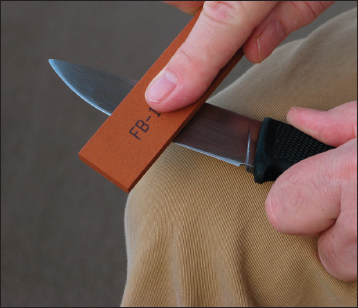
Using a Norton pocket stone to sharpen this Fällkniven F1.
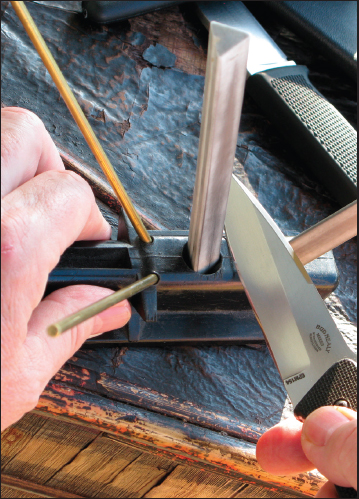
Spyderco Tri-Angle Sharpmaker.
I will try to simplify the matter and describe a general process that can apply to virtually all common steels and knives. In general, I have found that the stainless steels are harder to sharpen than carbon steels, either because stainless is heat treated to a harder level or due to the nature of the material in general. I only mention it because it’s possible that you might be doing everything right, but because it is taking so long to get an edge, you might think your method is incorrect. It may be, but even if you’re doing everything right, you will probably find that it takes longer to get a sharp edge on, say, a blade of 440C than one of 1095. Personally, I have found it to be a devil of a job to sharpen knives made with S30V with an ordinary stone, whereas VG-10, 01, 1095, Sandvic 12c, and others come up fairly easily. I also had a VG-10 blade that a stone the size of Mt. Rushmore couldn’t sharpen. Keep in mind that these are general comments. Your results may vary.
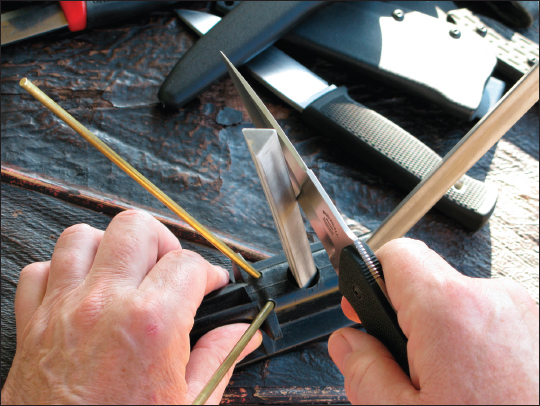
Another view of proper usage of the Spyderco Tri-Angle Sharpmaker.

Using a Lansky pocket touch-up sharpener on this Lone Wolf Harsey.
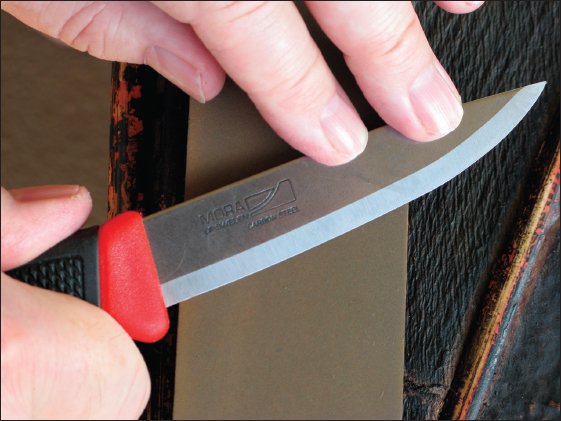
Using the Scandi bevel as a sharpening guide.
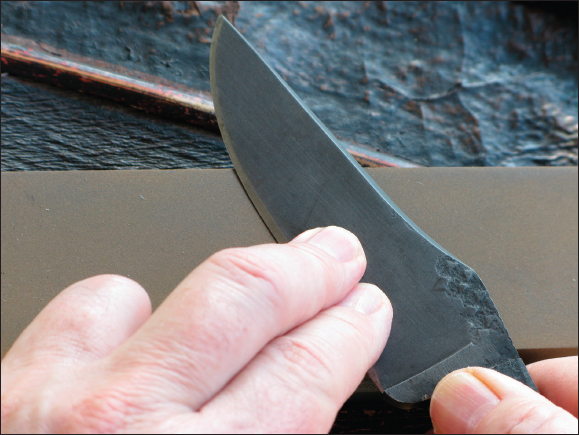
Sharpening a convex edge by drawing away from the edge.
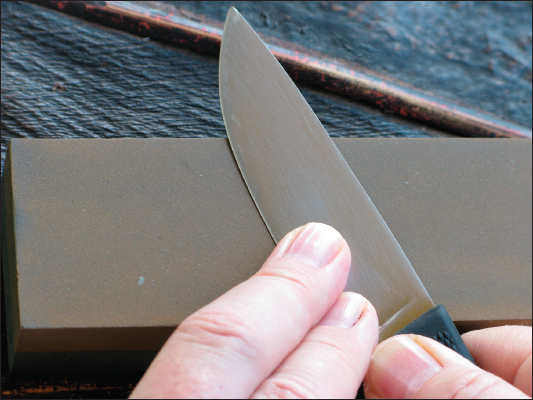
Sharpening Fällkniven F1 with a convex edge by drawing away from the edge.
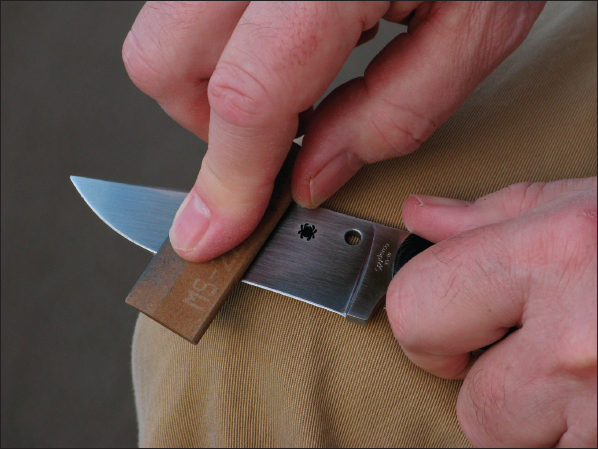
Using a slip stone to sharpen this Spyderco fixed blade.
Mostly, I use Norton stones. From the large bench size to pocket-sized stones, I have found them to do a good job. If the bevel on a knife has been worn away, I start with the rough grit then go to fine grit. If there’s still a good bevel, I only use the fine grit.
I also use the Spyderco Tri-Angles for quick touch ups. The Tri-Angle is a good tool until you’ve gone through the bevel and need to reset it. Then you’ll have to go to the stone. I also sometimes use a Lansky pocket touch-up device for just that, a quick touch-up in the field.
There are good alternatives. DMT and EZE-LAP both produce diamond sharpeners that I have seen do good work. I look forward to trying them out.
Almost everyone tells you to sharpen a knife using the same method: lay your blade on the stone and, according to the angle of the bevel you want, push your edge into the stone as if you were slicing off a thin slab. This works for most edges most of the time.
If you have a convex edge, or want one, do exactly the opposite. Lay your blade on the stone and, according to the angle of the bevel you want, pull your edge away from the stone, in effect stropping it.
In either case, continue working one side of the blade until you get a wire edge, which you can feel with your fingers. It’s a good idea to count your strokes. When you get a wire edge on one side, turn over the blade and repeat on the other side.
Once you get to a working edge, you will need to remove the wire edge. You can do this by stropping the edge carefully along the stone, or stropping on leather; even cardboard will serve.
To use a pocket stone, you reverse the entire process. Hold the blade steady and move the stone along the edge. Since pocket stones are small, you do not want to push into the edge. Doing so will likely result in a cut. Instead stroke away from the edge. This is how swords, machetes, and other large blades are sharpened in the field. Any knife can be sharpened with the same method.
Use some kind of light oil to float steel particles up and out of the stone’s pores. Wipe everything clean afterwards.
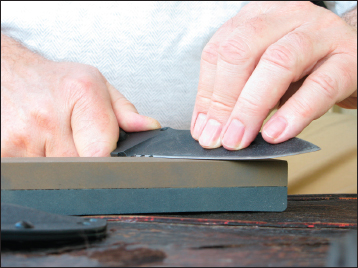
A good angle for sharpening a Tops Mil-Spie 5.
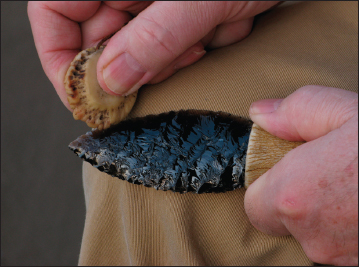
Sharpening an obsidian blade with a piece of antler.
Flint and obsidian knives are sharpened by using pressure to flake small chips from the edge. A piece of antler is an ideal chipping tool. If you get a chance, do try a flint or obsidian knife. The cutting ability will likely surprise you. A good obsidian blade will cut as fine as any modern steel blade. The downside, as there’s always a downside, is that they break easily.
Maintenance
Taking care of your knife is extremely simple. When it gets dirty, wash it. When it gets wet, dry it. If it’s carbon steel with no rust-preventing coating and you’re in an area of high humidity, keep a light film of oil on it—it doesn’t matter what kind. In the tropics, where rust is ever lurking and ready to pounce, I keep my carbon steel knives rust-free with coconut oil. Olive oil is equally good. So is machine oil if you’re not going to use the knife for food preparation. I don’t think you need to oil a carbon steel knife if you live in a desert area, but keep an eye on it. I do the same even with stainless steel in the humid tropics. Otherwise, I do what the makers say and don’t worry about it. Flint and obsidian do not rust. There is no maintenance requirement.