
1 BIKE, KIT AND EQUIPMENT
THERE’S NOTHING WRONG WITH TREATING YOURSELF TO SOME BLING NEW CYCLING KIT BUT WHAT SHOULD YOU BE SPENDING YOUR MONEY ON TO MAKE THE BIGGEST DIFFERENCE TO YOUR CYCLING?
‘Don’t buy upgrades; ride up grades.’ EDDY MERCKX
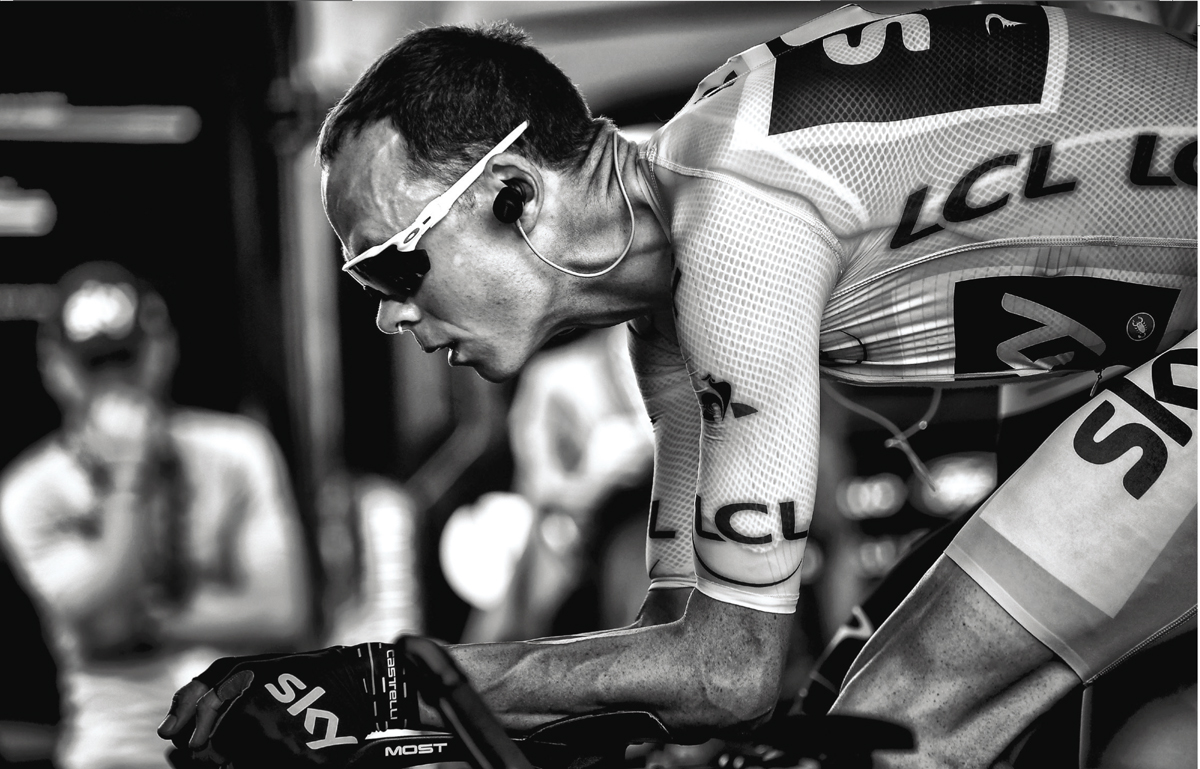
IF WE’RE ALL BEING HONEST with ourselves, one of the main appeals of cycling is the bike and its accompanying kit. We’re all guilty of constantly thinking about that next bike, go-faster wheelset or must-have high-tech and high-performing item of clothing. There’s absolutely nothing wrong with this, it’s part of the fun, and if you can afford the best kit, I don’t see why you shouldn’t treat yourself to it, regardless of your riding ability. Don’t be put off by ‘all the gear, no idea’ mockery and inverse snobbery; if having great kit makes you feel good and motivates you to ride, go for it. However, it’s not the bike and the kit that makes a successful cyclist, and cycling doesn’t have to be a cripplingly expensive pastime. If you’re reading this book, you’re looking to improve your cycling and shouldn’t need your hand held through the process of buying a bike. Prioritise getting the best frame you can, even if that means dropping a groupset level or two, as you can always upgrade components down the line but it’s the heart of the bike that makes the real difference. If possible, get a fit done before buying to establish the geometry and frame size you need and use that information to inform your decision. You probably already have strong opinions on frame materials, Shimano versus Campagnolo versus SRAM, and your preferred brand of bib shorts, so I’m not going to cover those basics, aside from a brief comment about frame materials. Whether it’s carbon, alloy (aluminium), steel or titanium, a poor-quality frame is poor quality. By the same token, if you go for a reputable brand, regardless of material used, it’ll perform. In the professional peloton, there’s no denying that carbon is now king and, for its strength and stiffness-to-weight ratio, ease of moulding to aero profiles and affordability, it’s easy to see why. However, a pro team requires a staggering number of bikes and has to kowtow to sponsors. This makes the use of bespoke and artisan steel and titanium unrealistic, but for non-pros looking for that one-off dream bike, you won’t necessarily be limiting yourself by not choosing carbon. Don’t worry about the supposed fragility or limited shelf life of carbon, this is largely a myth. It’s an incredibly strong and resilient material that stands up, not only to the power put out by the likes of Sir Chris Hoy or Kristina Vogel in a sprint, but also the stresses generated by a Formula 1 car or a jet aircraft. It’s also not prone to the accumulation of fatigue that metals suffer from so, in theory, if well looked after, should outlast a metal frame. Carbon is extremely strong in the direction that it’s designed to take load in but can be relatively fragile to impact and crushing. Classics are handlebars spinning round into the top-tube, damage from over-tightening components or crushing in a work stand. Invest in and learn to use a torque wrench, use carbon assembly paste to reduce the amount of torque required and always be mindful of not applying crushing or impact forces. If your carbon frame does get damaged, it’s not the end as there are a number of companies now offering excellent repair services. Look after it well and a carbon frame can last you a lifetime.

A shiny top end of the range groupset may be a tempting upgrade but probably won’t be the best investment in terms of performance gains.
What I will deal with in this chapter are the ‘biggest bang for your buck’ things that you can spend your hard-earned money on. The items that’ll give you the biggest return on your investment and allow you to train and ride to your maximum potential. These include ensuring that your bike fits properly, and overcoming the complaint of every cyclist, from novice to pro, of saddle soreness. I’ll also address buying and setting up an indoor trainer, and why using one isn’t just about not riding in the rain. If you don’t already own one, I’ll explain why buying and learning to use a power meter is probably the best investment you can make. Finally, if you’re looking at adding a bike to your stable, I’ll advise about which type will have the greatest benefit to your overall riding.
‘I see it all the time: an obviously fit cyclist using a good bike, but riding in a position so bad that it cancels out most of the advantages of the expensive machine and the hours of training.’
PHIL BURT, FORMER LEAD PHYSIOTHERAPIST WITH THE GREAT BRITAIN CYCLING TEAM

If you’re spending thousands on a bike, investing a couple of hundred on a professional bike fit is a no-brainer
Professional bike fit
Apart from the delectable searing pain in your legs when you push hard, there’s no reason to suffer pain or discomfort on the bike. Whether it’s lower back stiffness, numbness in your hands or feet, or sore knees, there’s no need for it. A combination of a professional bike fit and maybe some prescribed off the bike conditioning work should make cycling pain free, until you want it to hurt. Getting a professional bike fit, especially if you do suffer from discomfort or have a history of injury, is a no-brainer investment. If you can keep pedalling strongly for four or five hours, without having to constantly squirm in your saddle or stop to stretch out your back, the gains over a long sportive will be measurable in minutes, definitely not a marginal gain. If a bike fit prevents you picking up an overuse injury or compounding an existing one, you’ll be saving yourself an enforced layoff from riding and possibly the cost of physiotherapist bills.
Bike fits have become increasingly available to all riders, but how do you know you’re getting a good one and what should you look for?
THE TRADITIONAL BIKE FIT METHOD In a really old school traditional bike shop, you might be sized up for a frame and given a position based on the Italian CONI bike-fitting manual. Published in 1972, it looked at a group of 20-year-old professional cyclists and, because they rode fast, assumed that the commonalities of their positions would make everyone ride fast. Unfortunately, this doesn’t hold true and although it’s a quick and easy method, it won’t take any account of your individual body type and it forces your body to adapt to the bike.
OBSERVATIONAL BIKE FITS Observational fits based on the beliefs of the fitter of what a rider’s position should look like. You’ll often find this style of fitting in bike shops and, sitting on a jig and listening to the sage-like words of the fitter, it can seem very convincing. It’s an improvement on a traditional CONI fit as it does at least look at the individual, but with no objective data and relying on the fitter’s take on a good position, most riders end up looking the same.
OBJECTIVE DATA BIKE FITS You’ve then got a host of generic formulae and equations, based on measurements such as inseam, that are used to predict saddle heights and other components of fit. This style of fitting does at least gather some objective data and recognises that proportions are important to bike fitting, but it fails because it’s totally static, generic and doesn’t even consider how the rider interacts with their bike.
STATIC BIKE FITS With a static individualised fit, it’s heading in the right direction and starting to utilise methodical and repeatable techniques. You’ll sit on a jig and, using a plumb bob and goniometer, the fitter will use accepted ranges of joint angles to optimise fit. The problem is that cycling isn’t a static activity and an apparently ideal position on the jig can fall apart once the rider starts to pedal.
DYNAMIC BIKE FITS Moving into the 21st century, dynamic fits can be conducted using video analysis and motion capture. Retül and Dartfish are both examples of this type of fit. Although it’s more costly than the other methods, this is the gold standard for getting an accurate and personalised bike fit. However, motion capture isn’t instant bike-fitting nirvana. Even with the best kit, a fit is only as good as the experience and knowledge of the fitter conducting it. Too many fitters are simply applying neutral ranges without considering and accommodating the unique qualities of the rider. This is where doing some research really counts and I’d strongly recommend finding a fitting studio that offers a physiotherapist-led bike fit.
The bike fit process
Before you go anywhere near a jig or motion capture system, the fitter should take a full and detailed history from you. This should include your cycling goals, any problems you currently have and your injury history. Your goals are especially important. For most sportive riders, the number one priority of a fit is comfort or sustainability. However, if you’re a time trialist or looking to race shorter duration events on the road or track, comfort is less of an issue and aerodynamics become more important.
The fitter should then move on to a physical examination, assessing your flexibility, mobility and any other factors that might influence your position on the bike. This information, combined with the data collected during the actual bike fit, will allow the fitter to find a suitable riding position for you. This may involve you having to change some components on your bike, such as the stem, saddle, cranks or handlebars, or even potentially finding that your frame just isn’t suited to you. For this reason, I’d factor a physio-led bike fit into your budget when buying a new bike. A 3D motion capture system such as Retül can point you towards the frames most suited to accommodate your riding position. By dropping a groupset on your spec or choosing slightly less bling wheels, you’ll be able to afford one, and it’ll definitely have a far more positive impact on your cycling.

The position you get at the end of a bike fit is only the start of the process of finding your optimal set-up.
Establishing your position isn’t the end of the process, as finding your ideal set-up is a constant evolution. It’s likely that you’ve had to make some compromises, such as sacrificing aerodynamics for comfort or sustainability. You will probably have been given some exercises to help your body adapt to the new position and to allow your position to be further improved in the future.
If you want to find out more about bike fit before committing to one, Bike Fit: Optimise Your Bike Position for High Performance and Injury Avoidance by Phil Burt is regarded as the best book on the subject. Phil was the lead physiotherapist for the Great Britain Cycling Team and, as well as being one of the leading minds in bike fitting, is an unsung hero of the last three Olympic Games. His knowledge and experience is unparalleled and I’d consider his book a must-have for your cycling library.
‘Bike fit for me is one of the most important factors for success on a bike. If you’re not at one with your bike it can create so many problems from not having the power to push the pedals optimally or maybe it’s a case of you getting injuries. You see so many people that aren’t sitting properly on their bike. Whenever you get a new bike, make sure you get a good bike fit. At our training camp in December we have the opportunity for having our positions checked and this is especially important for new riders who may have been riding a different brand of bike. I don’t spend a huge amount of time doing it because I’ve been riding that long and my position has developed over the years to be pretty efficient. That’s important too as, with time, your position will evolve so it’s an ongoing process.’
TIFFANY CROMWELL, CANYON/SRAM
The madness of crank length
One aspect of your bike fit, especially if you’re shorter in stature, is crank length. Forming the link from your pedals to the drivetrain, your cranks have a direct impact on your saddle height and pedalling dynamics. Many riders will notice a change in saddle height of just a few millimetres, but won’t even question their crank length, which can easily vary by up to 10mm (⅜in). If you’ve bought an off-the-peg bike, chances are its cranks will sit in the fairly limited range of 170–175mm (6⅔–7in) but, even more likely, they’ll be the industry bog standard 172.5mm (6¾in). It’s not uncommon to find the same 172.5mm cranks fitted to both a 58cm (23in) and a 52cm (20½in) frame. It’s only when you get down to small female-specific frames that crank lengths suddenly shrink to 165mm (6½in).
If you assume that the prevalent 172.5mm cranks are aimed at, and are correct for, an average-sized male rider of 5ft 10in (1.78m), you can calculate that your cranks should equate to approximately 9.7 per cent of your height. This is only a rough calculation and there are a number of more sophisticated versions using inside seam length and other variables, but the key fact that these calculations show is that suitable crank length varies significantly more than most bike manufacturers allow for.
This is especially pertinent for shorter riders and if you’re less than 5ft 10in, it’s very likely that you’re currently riding cranks that are too long. If your cranks are too long, in order to be able to adequately extend your knee at the bottom of your pedal stoke, you have to drop your saddle height. When you come to the top of your pedal stroke, this lower saddle height, in combination with the long cranks, means more knee flexion, the associated greater strain on your knees and reduced efficiency.

If you’re at the tall or small end of the height spectrum and have bought an off the peg bike, check your crank length.
A further knock-on effect is that your angle of hip flexion will be significantly reduced. An overly tight hip angle will result in discomfort and lower power output. You may also experience a sensation of almost kneeing yourself in the chest, especially when down on the drops or in time trial position. Many riders will also find that their hips rotate externally to compensate for this, resulting in a knees-out pedalling style.
It’s not unusual when riders do fit correctly sized cranks, especially if they’re shorter in stature, to find it has a massive positive impact on their comfort and performance on the bike. Pedalling style can improve, existing knee discomfort can diminish (and even cease), and holding a more aerodynamic position can suddenly become far easier.
Saddle choice and avoiding saddle soreness
As we’ve already seen, there’s no need to be uncomfortable on the bike, and this of course applies to your backside. Even experienced cyclists suffer in silence with saddle soreness or aren’t aware of the simple steps they can take to prevent it. After the 2012 Olympic Games, the Great Britain Cycling Team suspected that saddle soreness might be an issue, especially for the female riders, and they conducted a survey. They found that 100 per cent of the riders had suffered from issues, but had just accepted them as part and parcel of cycling. Solving this problem was made a priority and a panel of experts was assembled, including tribologists (friction experts), reconstructive surgeons who were experts in dealing with pressure sores, and top consultants in vulval health. Now all riders on the team are instructed in personal care to minimise soreness, and saddle and chamois technology is constantly being developed. After the Rio Olympics, Laura Kenny was quoted as saying how the work of the medical team with regard to dealing with saddle soreness had changed her life.
Finding the right saddle for you is essential and, although pressure mapping technology and measuring sit bone width can point you in the right direction, it’s largely a case of trial and error. If your saddle doesn’t feel right, change it. Many shops offer ‘try before you buy’ – and you should be prepared to try a few before you find one that’s right. Don’t think that wide and padded necessarily means comfortable and don’t be scared of trying some of the more outlandish split-nosed designs. Once you find a saddle that works for you, stick with it and fit the same one on all your bikes.
‘Pros often don’t get much choice about saddles as you’re supposed to ride whatever the sponsors supply. But, when I was with Rapha/Condor/Sharp, we had Fizik, which I really liked. They offered 3 or 4 different saddles based on rider biomechanics and having that choice was brilliant. It makes sense, we’re all different and a 60kg five foot nothing climber is bound to want something different to a burly six foot 75kg sprinter.’
DEAN DOWNING, EX-PRO, FORMER BRITISH CIRCUIT RACE CHAMPION AND NOW COACH
Be aware that, in addition to your saddle, your shorts and chamois can have a massive impact on comfort. Seam position and pad shape varies massively between brands and models so, again, you may need to try a few before you find the one that works for you. Don’t buy cheap cycling shorts. Budget shorts are a guaranteed route to a sore behind. You may pay more for the recognised and respected manufacturers, but the quality of the pad and the improved comfort it’ll deliver will definitely repay your investment.
Once you’ve found the correct saddle and shorts, make sure you work through the points below to make saddle soreness a thing of the past.
How to avoid saddle soreness
Bike fit Persistent saddle soreness can be a sign that your position on the bike isn’t right. If you tend to get sore only on one side, this can be indicative of a possible asymmetry such as a leg length discrepancy.
Chamois cream If you’re not using chamois cream, start now. It can feel a bit strange when you first set off if you’re not used to it but it does make a big difference.
No knickers Never wear an additional layer between the chamois and your skin. Cotton especially prevents the technical fabrics in the chamois and shorts functioning properly and will trap a layer of moisture next to the skin. This will increase friction and the risk of bacterial infection.
Stand up Even on flat rides, try to stand up out of your saddle every 10–15 minutes to give your backside a bit of a break and to restore some blood flow.
Get your shorts off Don’t sit around in your shorts at the end of a ride, get them off and shower as soon as possible. Never, ever reuse a dirty pair of shorts.
Clean and dry When showering, the aim is to get clean but not sterile. Don’t scrub, and avoid using flannels, sponges and exfoliators. Avoid removing all the natural oils and bacteria, both of which enhance the barrier function of the epidermis. Use a gentle washing cream, such as Dermol 500, and always rinse well with plenty of plain water. Pat dry and avoid rubbing. Wear loose clothing to aid drying and airflow. You can also use an unperfumed moisturiser to improve barrier function.
Keep it natural down there Mainly for the ladies, but I know some male riders also like the trimmed option. Pubic hair helps with the transport and evaporation of sweat away from the skin. It also provides some friction protection. Hair removal methods, such as shaving, depilatory creams and epilation, are damaging to the epidermis and increase the risk of ingrowing hairs and hair follicle infections. Trim hair using a bikini trimmer.

Saddle soreness isn’t an inevitable part of cycling and, if you’re suffering from it, something’s not right.
Indoor trainer
If you’re serious about improving your cycling, an indoor trainer is an absolute essential. All of the midweek workouts in this book are best suited to being completed on an indoor trainer. You’ll get plenty of riders who’ll say ‘man up and get out on the roads’, but they’re completely missing the point. You don’t ride indoors to escape the weather, you ride indoors because it’s the best way to maximise the benefits you’ll get from training, especially if your time is limited. Riding indoors isn’t a soft option, far from it. I’d take an outdoor ride every time, no matter what the weather, but I know that the indoor trainer is the key to becoming a better rider. You can ride at exactly the right intensity for exactly the right amount of time and focus 100 per cent on the effort you’re making. There’s no distraction of other road users, no junctions to slow down for and, when you’re having to dig in really deep for that final push, you don’t have to worry about a car pulling out in front of you or not seeing a pothole. Yes, riding indoors is boring, yes, you get uncomfortably sweaty and yes, most sessions are painful, but the gains are definitely worth it.
Turbo vs rollers vs static bike
Choosing an indoor trainer can be a fairly bewildering and overwhelming retail experience, with a huge number of makes, models and types to choose from. With both a turbo and rollers, you use your existing bike, either bolting it to the turbo or simply riding on the rollers. A static bike is a stand-alone piece of kit.
For the majority of riders, the most affordable and flexible option is probably a turbo. The newer direct-drive ones are especially good and, from a workout perspective, will cover almost all eventualities. However, I can’t emphasise the bike handling and pedalling technique benefits of rollers enough. If you have the space and the budget, getting both is really the best option. Warm up, cool down and do leg speed and recovery spins workouts on the rollers, and use the turbo for the hard yards.
The main thing is to find an indoor training solution that works for you and that you will use. Indoor training isn’t fun and, as you’ll normally be doing it at the end of a long day at work, any excuse or obstacle, mental or physical, to overcome can easily break your resolve.
‘In my professional days it [turbo trainer] would have been the first piece of equipment I would have saved from a fire. Reaching your full potential will almost be impossible without it.’
GRAEME OBREE, DOUBLE BREAKER OF THE WORLD HOUR RECORD, DOUBLE INDIVIDUAL PURSUIT WORLD CHAMPION AND CYCLING INNOVATOR
Turbo
What is it?
A turbo trainer is a metal frame that you bolt your bike to using a special rear QR skewer. A roller then presses against your rear tyre and, by using a fan, fluid or magnets, generates resistance for you to pedal against.
Direct drive trainers replace the roller against your rear tyre with a cassette that They’re your generally drivetrain quieter, drives directly. deliver more consistent performance and don’t chew up your rear tyre.
Cost
£100 – £1,500 +
What to look for and what to avoid
It can be tempting to go for a cheap and cheerful turbo but it’s likely to be unbearably noisy, not feel realistic and put you off using it.
You can get a good workout with a mid-price turbo, especially if you already have a power meter on your bike, so don’t think you have to get one that displays loads of data and metrics.
Do look for variable resistance, though, and a handlebar-mounted lever to alter it with.
Pros
You can find a turbo for most budgets and there are always plenty of second-hand ones.
You’ll probably be using your regular bike so your position will be spot on.
If you’re short on space, many fold top flat.
You can generate plenty of resistance so they are good for high power and strength efforts.
Cons
Non-direct drive models can chew up your rear tyre. Consider investing in a turbo-specific tyre or even a dedicated rear wheel and cassette.
If you do go for a budget trainer, expect it to be noisy.
As your bike is locked in place, you won’t be developing your balance or bike handling skills.
Rollers
What is it?
Three drums mounted in a frame that you ride on. A rubber belt connects one of the rear rollers to the front one so that your front wheel rotates too.
Most makes and models are similar in design but the profile, shape, size and material of the drums does vary.
Most offer limited, if any, resistance options and only top-end models will produce ride data.
Cost
£150 – £1,500
What to look for and what to avoid
If you’re fairly new to rollers, look for wider drums and a parabolic shape, which helps keep you in the centre.
The bearings and sturdiness of some budget sets of rollers can be poor.
If you’re planning on using them for pre-race warm-ups or need to store them away after use, ensure they have a good folding mechanism.
Pros
Brilliant for developing balance, bike handling skills, smooth pedalling technique and leg speed.
You can get a decent set of second-hand rollers fairly cheaply.
You’ll be riding your normal bike so your position will be correct.
Less tyre wear than a turbo.
Cons
With less resistance, they’re not suited to higher power efforts.
You may have to invest some time in learning to ride them before you can start doing proper workouts.
Static bike
What is it?
A dedicated stationary bike varying from cheap and cheerful ‘fitness models’ from your local catalogue store to high-end commercial models.
Cost
£100 – £2,250
What to look for and what to avoid
Avoid low-price fitness models like the plague. The experience of riding won’t be anything like riding on the road and it’ll probably just end up as a clothes horse.
Spinning-style bikes can be good as the fixed flywheel can aid the development of a smooth and even pedalling technique. However, training feedback is minimal or non-existent and the resistance mechanisms can be fairly crude.
You really do get what you pay for with static bikes. If you definitely want one, get a Wattbike or similar.
Pros
If you’ve got the space, a stationary bike is always set up and ready to go and there’s no need to bring your road bike indoors.
Higher end models offer an amazing amount of feedback, data and flexibility.
Cons
You will have to spend a fair amount to get a model that’s worthwhile.
You’ll need space to leave it permanently set up.
You might struggle to exactly replicate your riding position.

An indoor trainer is essential to maximise your cycling potential, especially if you’re pressed for time and fitting training around work and family commitments.
‘You can get so much structure and benefit from using an indoor trainer. Pros can get out and ride during the day but, especially during the winter, if you can only ride early in the morning or in the evening, they’re brilliant. For me I just never felt safe or that I was getting a quality training session when riding in the dark dodging cars and potholes. It’s time efficient, you can get a really good session done in an hour.’
DEAN DOWNING, EX-PRO, FORMER BRITISH CIRCUIT RACE CHAMPION AND NOW COACH
Although professional riders will use indoor trainers, especially for pre-race warm-ups and post-race cool-downs, most won’t put the hours in on them that non-pros do. The simple reason for this is that most pros will overwinter in a climate that’s more amenable to riding. They’re not tied by work to early mornings or evenings and will gravitate to areas that provide ideal roads and climbs for the workouts they need to do.
LEARNING TO RIDE ROLLERS
If you do decide to opt for rollers, don’t get too stressed about learning to ride them, it’s really not that hard. You manage to hold a straight line on the road and rollers are no different. It’s also a myth that, if you do come off the rollers, you’ll go shooting across the room. You may have an embarrassing little tumble but that’ll be it. There are some great technique videos available on the internet and here are some key pointers to follow.
•The best place to set up your rollers when you’re learning is in a doorway. This allows you to lean against the frame if you lose your balance without having to take your hands off the bars.
•Make sure you adjust the length of the rollers so that the front roller sits just in front of your front axle.
•Having to clip in can freak some riders out so, until you’re confident, put on some flat pedals and trainers.
•Stay relaxed and don’t grip your bars too hard. If you’re tense, you’ll overreact to the bike moving underneath you and make it feel twitchy.
•Don’t look down at your front wheel – you wouldn’t do this when you’re riding on the road. Place a water bottle or track pump on the floor 1½–2 bike lengths in front of the rollers. This will give you something to focus on and help you with your balance.
•Once you get going, listen to the pitch and volume of the whir the rollers are making. If it’s constantly changing, your pedal stroke is uneven. A smooth and even sound means that your pedal stroke is the same.

Virtual reality
Virtual reality trainers have been around for a while, but with improved smart trainers and subscription packages such as Zwift, the degree of interaction and closeness to real riding has massively improved. There’s already a large community of riders who ‘meet up’ for group rides and even race online. The experience is becoming increasingly sophisticated, with the trainer adjusting for sitting on the wheel of another rider or even for hitting a sector of cobbles. It’s a lot of fun and can certainly help to boost your motivation levels. It’s important, though, to remember that an indoor trainer shouldn’t become a complete substitute for riding outdoors. They’re brilliant for those focused sessions that are difficult to complete outdoors or for when the weather makes riding on the road dangerous. However, whenever possible, longer endurance-style rides should be done outdoors and not on an indoor trainer. Spend too much time on an indoor trainer during the winter and you’ll definitely find that your bike handling skills will have suffered when you do finally emerge into the great outdoors in the spring.
There’s no doubt that the sophistication and applications of virtual reality to cycling are going to evolve rapidly. During a presentation at the International Cyclefit Symposium 2016, Dr Scott Drawer, head of Sky Performance Hub, the man charged by Team Sky to develop the next marginal gains, talked about the potential of virtual reality. He envisaged similar set-ups to Formula 1, where sophisticated simulators allow extensive testing. A rider’s position or bike set-up could be altered and then, with a 100 per cent realistic simulated riding experience and performance analysis, the impact of those changes could be assessed. We’ve already seen Belgian company Bioracer develop a virtual wind tunnel that uses green-screen technology, and should make aero testing affordable and more widely available.
Setting up your pain cave
As we’ve already seen, you have to make your indoor trainer set-up as alluring as possible. You might not necessarily want to do the sessions or look forward to them, but don’t make your set-up your excuse to avoid doing them.
Getting started is the hardest bit of any session, so make it as easy as possible. The ideal is to find a location where you can leave your trainer set up and ready to go. If you’re using a turbo-specific tyre to save wear on your road tyres, there’s no way you’ll go through the faff of changing a tyre prior to a session. Buy a cheap second-hand rear wheel, a lower-tier-compatible cassette, and then you’ll just need to swap a wheel in. Even that can prove too much of an obstacle, though, so if you know your next session is a turbo workout, set it up at the end of your previous one. Make sure all of your kit is laid out and ready to go, bottles filled and tyres pumped up. Have all of your devices pre-synched – tech issues can easily break your resolve.
You’re likely to spend quite a bit of time on it so put some effort into getting your indoor trainer set-up right.
Think carefully about where you’re going to site your trainer. The shed at the bottom of the garden might seem like a good idea, but does it have a power supply and will you fancy traipsing out to it in the pouring rain? Make sure the room is cool and well ventilated and has a hard, solid floor. Garages can be perfect, but in the depths of winter you may need to wrap up until you get going. A basement or ground-floor room is the ideal as, although modern trainers are far quieter and if you site it on a rubber mat on top of some old carpet underlay, noise from vibration can be significantly reduced, flat or apartment dwellers do need to be considerate of neighbours below. Intense indoor workouts require high levels of focus and concentration so a location where you won’t be distracted is preferable. Shut yourself away and make it clear that, if the trainer’s whirring, you’re not to be disturbed.
You’re going to sweat, so make sure you have plenty of towels and water on hand and a ‘sweat thong’ to protect your bike, as sweat can be really corrosive to sensitive areas such as the headset. Also, from a comfort perspective, you move less in the saddle on an indoor trainer, so decent shorts and chamois cream are musts.
Even in the coolest garage, once you start riding hard on an indoor trainer, you’ll start to overheat. This increases your rate of perceived exertion so if you don’t attempt to keep cool, you’ll be compromising the effectiveness of the workout. One, two or even three high-powered fans can make a massive difference to your comfort levels and how you perform on the indoor trainer.
If your budget doesn’t stretch to a smart trainer and a virtual reality subscription, some old race footage and a decent playlist can give you a motivational boost. Wireless headphones are another worthwhile investment as a dangling cable that’s a bit annoying after five minutes will drive you completely mad after an hour on the turbo.
INDOOR CYCLING CLASSES
If, for whatever reason, you can’t get an indoor trainer or can’t find the motivation to ride one, indoor group cycling classes can be an option. However, you need to be careful about the class you pick and ideally should look for one that’s led by a cyclist. You should be able to use your own cycling shoes but might struggle to accurately replicate your riding position. You won’t be able to do the exact workouts prescribed in the book and, unless you’re lucky enough to belong to a gym with a fleet of Wattbikes, training feedback is likely to be limited and often completely subjective. If your gym does have Wattbikes or similar, though, and you can use them outside of class times, this can be a great option for those midweek sessions.
Power meter
If you’re not already objectively monitoring your riding intensity with either a heart rate monitor or a power meter and utilising training zones, you stand to make some massive gains. If this applies to you, it could be tempting to dip your toe in the water first with the cheaper option of a heart rate monitor but, although you can train reasonably well and significantly improve using a heart rate monitor, I can’t urge you strongly enough to invest in a power meter. I’ll confess that, having used and been fairly successful using a heart rate monitor for a number of years, I was fairly late joining the power meter party. However, when I finally succumbed in 2013, it’s not hyperbole to say it revolutionised how I rode and approached my cycling training. At the time, I was racing long course duathlons, focusing on defending my age-group world title at Powerman Zofingen. Pacing the 150km (93-mile) bike leg, which was followed by a hilly 30km (18½-mile) run, was crucial. Once I’d tested for my functional threshold power (FTP) and found my training zones, riding to power facilitated far more accurate and consistent pacing than I’d ever managed with a heart rate monitor. I was riding my regular training routes faster but, more importantly, feeling far fresher at the end of them. I was cutting out all of those little spikes and digs that, although barely noticeable at the time, accumulate over the course of a long ride and eventually lead to your pace tailing off. It made pacing so much easier that, especially on time trials, it almost felt like cheating. More intense intervals were no longer a guessing game, with no need to account for heart rate lag – I knew from the first pedal stroke exactly the intensity I was riding at. It also allowed me to objectively and accurately monitor my training load and to plan effective tapers and peaks. Like a bike fit, a power meter doesn’t give you quite the same shiny-object-buying pleasure as a new set of fancy wheels, but it has far more potential to improve your riding.

Without a doubt a power meter should be top of your kit upgrade wish list. Using one will make you a better cyclist.
‘I was one of the first to use a cycling computer for racing. Then in 1984 I started using a heart rate monitor to track my performance. The big one for me, though, was using watts. I was one of the first to get into power meters and that was a major transformation.’
GREG LEMOND, THREE TIME TOUR DE FRANCE WINNER AND DOUBLE WORLD CHAMPION
‘When I first started working with professional cyclists eight or nine years ago, SRM power meters were state of the art and incredibly expensive. Now, there are more brands and they’re so much more affordable. Every bike that all the riders on the team use is equipped with a power meter. Our riders would almost feel naked now without one! There’s no doubt that structured training using power is the best way to improve performance. It’s just a brilliant tool for maximising training efficiency.’
ANDREAS LANG, TEAM PHYSIOLOGIST, CANYON/SRAM
Just for pros?
Even though the price of power meters is coming down, buying one still represents a fairly hefty financial outlay. Like saddles and bikes, you’ve actually got an advantage over the pros as you won’t be obliged to use the power meter and head unit supplied by the team’s sponsors. If you buy a power meter from one of the established manufacturers, you can be certain you’re buying a professional-level product. Many riders think that their ability or the level they ride at doesn’t justify buying one, but this is a mistake. I’d argue that a power meter is of more value to a time-strapped rider than to a pro. With limited time to train, optimising the training benefits of every pedal stroke is a priority and a power meter allows you to do that. It’ll mean an end to junk miles and significantly reduce your risk of overtraining. Power meters are especially useful for pacing sportives and Gran Fondos. On these long and gruelling rides, often over mountainous terrain, your ability to pace well is key to riding strongly throughout the event. A power meter removes all of the guesswork from pacing. It’s likely, if you’re tackling an event such as L’Étape du Tour, that you’ll have invested in a decent bike, put significant hours into your training and probably spent a fair bit on travel and accommodation. Getting your pacing wrong, which even the most experienced riders can do, can easily turn your big day into a disappointing hellish nightmare. Surely a device that massively minimises the risk of that happening is worth investing in? The effectiveness of power meters is demonstrated by the fact that, after the 2017 Vuelta a España, Alberto Contador called for them to be banned in races. His argument was that they allowed riders to pace their riding so well that they removed the spontaneity and aggression of racing.
Power vs heart rate
If you’re still not convinced of the benefits of cycling with power, here’s a summary of the pluses and minuses.
•The biggest advantage of using a power meter is that the wattage you’re seeing is absolute and unaffected by external variables in the way that heart rate is. Pre-event nerves, an argument with your other half before heading out for a ride or an encounter with an aggressive dog can all raise your heart rate. Conversely, illness or fatigue can depress it. Also, over the course of a long ride, a phenomenon known as cardiac drift causes your heart rate to drop relative to the effort you’re putting in. You’ll feel as though you’re pushing hard but your heart rate will stay stubbornly low. Power is unaffected by any of these factors and gives 100 per cent accurate feedback on the output you’re producing.
•There’s always a lag with heart rate in responding to any change in intensity. This can present a problem for interval sessions. For example, if you’re performing 5-minute Zone 5 intervals using heart rate, you’ll probably find that it takes at least the first minute or so to build into the correct zone or you’ll go off too hard in an attempt to get your heart rate up quickly and struggle to finish the effort. With power, you can be sure you’re hitting the right intensity from the first pedal stroke and, especially for high-intensity work, this can be invaluable.
•From a training analysis and planning perspective, we’re only just scratching the surface of what’s possible with power meters. By using analysis software such as TrainingPeaks, power data can give you incredible insights into your training and even allow you to accurately plan tapers and peaks for key events. As more third party software developers become involved, data analysis will become increasingly sophisticated. Former Great Britain Cycling Team and Team Sky nutritionist Nigel Mitchell believes that the close relationship between pacing and fuelling is an area that will see significant advances. He’s convinced that in the not-too-distant future, power meter data will be interpreted to tell you what and when to eat on the bike. We’re already at the point where usable automatic gear shifting systems based on power are available and, whether you think this is a good or a bad thing, cycling is going to become more tech- and data-heavy.
•For most riders, the main disadvantage of power is the cost, but, to reiterate, you might have to put off that wheel upgrade to get a power meter but it’ll be far more beneficial to your riding. Also, as patents expire and more manufacturers enter the market, prices will continue to fall.
•Another disadvantage is that a power meter only tells you the power you’re generating, it doesn’t tell you how hard your body is working to produce those watts. This is why you shouldn’t ditch your heart rate monitor when you get a power meter but should combine these two metrics. If you notice, for example, that, for a given power, your heart rate is elevated above what it normally would be for that output, this could be a good indicator that you might be ill or run down and need to back off a bit. Similarly, a low heart rate relative to power could indicate fatigue or that you’ve gained fitness and need to retest your FTP and set new training zones.

Whether warming-up, training or racing, a power meter ensures you’re getting the most out of every pedal stroke.
‘I never used a power meter until I joined Canyon/SRAM. I’d never wanted one or needed one – well, I didn’t think I needed one. But when I broke my ankle and I was making my recovery and comeback they just wanted to monitor my progress. I promised myself I wouldn’t become a power nerd but I have!’
HANNAH BARNES, CANYON/SRAM
‘We still use heart rate but it has its limitations. For example, if you’re doing sprint training, say five to thirty second efforts, you’ll always look at power first as you’re wanting to see how powerful their sprint is. For longer efforts and rides, looking at heart rate is useful. If you track heart rate and power, over the course of three or four days, or three weeks on a Grand Tour, you can see how the rider’s power output for a given heart rate starts to tail off as fatigue builds. If a rider normally puts out 250 watts at 160 bpm but we’re only seeing 220 watts for that heart rate, this could be a sign of fatigue, overtraining or even illness.’
ANDREAS LANG, TEAM PHYSIOLOGIST, CANYON/SRAM

In a bunch race, react to the race and not the numbers on your power meter. You can nerd out on the data afterwards.
With the glut of data that a power meter produces, it’s easy to suffer from paralysis by analysis. Riders spend more time pawing over their ride data than actually riding or become robotic slaves to their power meters, losing spontaneity from their cycling. I’ll sometimes tape over my power meter during a time trial, just to check that the numbers aren’t limiting my performance. If I’m in a bunch race, unless I’m making a heroic solo break I won’t be looking at my power meter, I’ll be reacting to the riders around me. Conversely, some riders buy a power meter and never really get the most out of it. They might brag about their peak power during the café stop but, in the main, it’s just an expensive and fairly redundant piece of kit on their bike. You have to invest a bit of time and effort into learning how to use one and meaningfully interpret the data but, at the same time, not become a power geek.
‘Power meters only really became universally used towards the end of my career as a rider but now, as a coach, the more I learn about them and the data they produce, the more I realise their huge benefit. For most of the time that I was racing, it was on heart rate and feel. Years of experience meant I became pretty good at knowing when I was tired, when I’d gone hard and if I needed to back off a bit. Even with a power meter, having that self-awareness and feel is still really important. Power data won’t tell you if your legs are sore or if your sit bones are aching but, if you can combine power data with good body awareness, it’s brilliant. When I did start using one in my final year, it didn’t make me overhaul my training but it did confirm that I trained hard and I certainly tweaked a few things and added some more structure.’
DEAN DOWNING, EX-PRO, FORMER BRITISH CIRCUIT RACE CHAMPION AND NOW COACH
Buying a power meter
When buying a power meter, it is important to avoid being tempted by some of the cheaper systems, which don’t measure power directly using strain gauges but instead estimate it indirectly from speed and other metrics. The whole point of using power is that it’s a more accurate way to assess your riding intensity, so why would you choose any system that’s inherently inaccurate?
Although there are plenty of new manufacturers coming onto the market, it makes sense to be wary of first generation products as they tend to be plagued by glitches. There was a fascinating blog written by a clever engineering sort who took it upon himself to build his own power meter. His thought rationale was that the cost of the components, such as the key strain gauges, was low and actual assembly fairly simple, so how hard could it be? Well, he found that 95 per cent of the project was easy but getting the power meter to give data that were reliable, accurate and comparable from ride to ride was incredibly frustrating and practically impossible. It’s not the components that you’re paying for with a power meter, it’s the R&D that have gone into nailing that final 5 per cent. If you buy a power meter from an unestablished manufacturer, they’ll probably still be ironing out those 5 per cent kinks when it comes to market and you’ll be an unwitting guinea pig.
One of the factors that have made power meters more affordable has been some manufacturers producing single-sided units. These measure the power from one leg and then simply double up to give a full power reading. Obviously, no human being is perfectly symmetrical and most riders have a stronger leg, but for comparing ride to ride and pacing, the inaccuracy will remain constant and is acceptable for most riders. However, if you can stretch to a two-sided system, the ability to compare sides, especially if you’re rehabbing from an injury, together with the pedal stroke analysis metrics that are available, make it worthwhile. I’ve found that when I’m fresh and riding below FTP, my left/right balance stays at 50/50. However, when I start pushing hard or I get fatigued, my stronger right leg starts taking on the lion’s share of the work.
Next, you should consider whether you’ll want to swap your power meter between a number of bikes and how often you intend to do this. Rear wheel hub-based designs, as long as you’re running compatible groupsets and monitor chain and cassette wear, are probably the simplest to swap back and forth as it’s simply a case of changing a wheel. However, you can then be faced with the dilemma of racing on a training wheel or training through the winter on a high-end race wheel. Pedal-based systems aren’t all quite as simple as changing a set of pedals, with some requiring accurate torquing, but are probably the best bet if you have multiple bikes. However, you may find you’re restricted to a cleat and pedal system that doesn’t suit you. If you’re running the same groupset across your fleet, a non-driveside single-sided option isn’t too tricky to move from bike to bike. If your power meter will be staying on one bike, driveside crank and spider-based options, such as the original SRM power meter, are reliable and accurate.
Remember that you may have to factor a head unit into your budget. If you already own a cycling computer that is ANT+ compatible, most power meters will talk to it.
There’s no doubt that more options for power measurement will become available. For example, a system in the sole of cycling shoes is due on the market soon. However, before leaping on the latest technology, talk to other riders about their experiences with the various systems on the market and check out some objective reviews. I highly recommend DC Rainmaker’s site for his reviews.
Additional bikes
The good news, for your bank balance at least, is that you can follow the advice in this book and become an extremely successful cyclist with just one bike. However, if you are hankering after a new bike, the following would be the best options for improving your training options and riding performance.
Winter training bike
A winter bike can double up as a commuter and will bear the brunt of wear, saving your summer bike for when speed and performance are your priorities. If you spec your winter bike with a compatible groupset to your summer bike, as you upgrade components on the latter, the cast-offs can live out their days on your winter hack. Over the course of a few winters, a dedicated winter bike can definitely recoup its cost in saved wear to your summer pride and joy. Another advantage of having a dedicated winter training bike is that you can set up your summer bike permanently for indoor training. This means no wheel- or tyre-changing hassle and no dragging a dirty bike through the house, and it makes you far less likely to bail on those gruelling indoor workouts.
I’d suggest trying to get your position as near to matching as you can on all of your bikes. Some people recommend a more relaxed position for winter but, if you’ve had a professional bike fit, it shouldn’t be affected by the seasons. You may, however, want to choose a greater range of gears that’ll allow you to spin up climbs on winter rides that specify steadier efforts.
Disc brakes make a lot of sense on a winter bike, taking the braking surface away from the mud and wet, and saving on rim wear. They also give you a bit more clearance for wider tyres, giving you a bigger contact patch for improved grip and a plusher ride.

Your cherished carbon race bike won’t melt in the rain but a dedicated winter workhorse that’s set-up for foul weather is a good idea.
Full mudguards should be viewed as an essential for a winter bike, especially if you’re joining any group rides. You can get clip-on guards for almost any bike and, although they may be a bit fiddly to fit and spoil the aesthetics slightly, they should be considered essential for winter riding. Full-length guards, with proper flaps, keep your backside and feet dry and your bike cleaner, and make yours a pleasant wheel to follow.
A slightly left field and definitely old school suggestion for a winter training bike is to go fixed. With a fixed gear, there’s no freewheeling, so you earn every kilometre and you’ll feel even a fairly sedate Sunday club run. You’ll get high-cadence leg speed work on the flats and downhills, and big gear and low-cadence strength work on any climbs. The fixed gear also encourages you to develop a smooth and even pedal stroke, which definitely translates to regular riding. There’s something quite meditative about the rhythm you settle into when riding fixed and you never have to deal with the frustration of misfiring gears. Best of all, especially if you fit full-length mudguards, cleaning and maintenance is minimal. Just run the chain through a rag, lube and occasionally tension it, and you’re pretty much done. It’s not for everyone, especially if you live in a very hilly area, but for a real winter workhorse fixed is definitely worth considering.
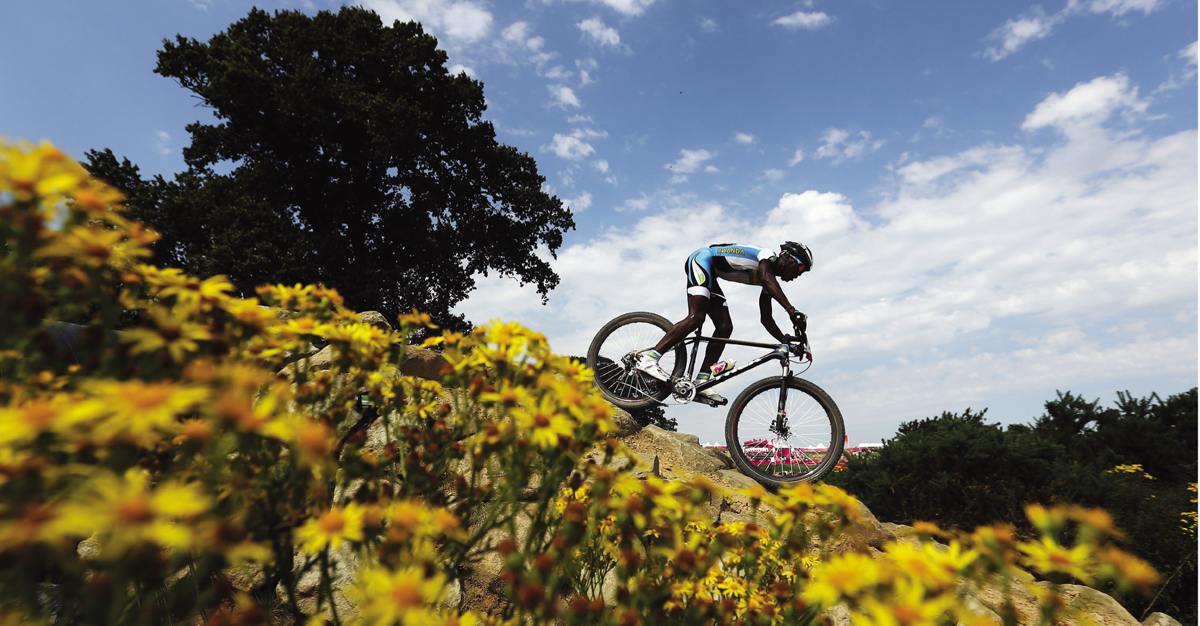
Mountain bike/cyclo-cross bike
It’s no coincidence that one of the best bike handlers in the pro peloton, Peter Sagan, comes from a mountain biking background. These skills, along with providing some great photo opportunities, are one of the main reasons for his success on the road. By being so comfortable and relaxed on the bike, he saves an incredible amount of energy, which gives him a real edge when the race heats up.
Almost all road cyclists can benefit from including some off-road riding in their training and a mountain bike or cyclo-cross bike opens up this possibility to you. Hours spent road riding can result in a very static riding style and poor bike handling skills. Off-road cycling forces you to constantly change your riding position, learn cornering and braking skills and become an all-round better bike rider. This translates into faster all-round riding, especially on more technical roads, and a greater ability to deal with unexpected hazards such as falling riders or potholes. Icy, wet and dark winter conditions can make roads unpleasant and dangerous places to be, and being able to get off the roads gives you a safe and enjoyable winter option. Off-road cycling gives a much more interval-style workout than road cycling. This gives you a great top-end hit, and sudden steep climbs or slogs through mud are an alternative to gym sessions for building cycling-specific strength and power. Off-road cycling provides a far more total body workout than road cycling. You’ll be using your upper body to soak up lumps and bumps, lift your front wheel over trail obstacles and gain extra power on steep climbs. Having to constantly shift your weight and centre of gravity to maintain traction and balance will challenge your trunk muscles in a way you’ll never experience on the road. Riding off-road punishes choppy and heavy-footed pedal mashing. Try to muscle up a loose or slippery climb and you’ll soon spin out and be off your bike and walking. To maintain traction, you have to develop an even, circular and smooth pedalling style. You can then transfer this pedalling technique to your road cycling where it’ll result in far smoother, more economical and faster riding.
Riding off-road will make you a better road rider and give you a fun training option.
If you opt for a cyclo-cross bike, this is an incredibly versatile choice. Run it with road tyres and you’ve got a brilliant winter training bike. Leave the knobbly tyres on and you can explore bridleways and byways that you’d never venture on with a road bike. There is an increasing number of cyclo-cross friendly sportive-style rides, which are great fun and can add real variety and a challenge to your event schedule. Racing cyclo-cross through the winter is brilliant for bike handling skills and fitness. It’s an incredibly accessible form of racing that will be covered more thoroughly in Chapter 8. It’s no coincidence that, no matter what their preferred discipline, young riders working through the Great Britain Cycling Team Performance Pathway are encouraged to race cyclo-cross. For developing bike handling skills and overall fitness, it’s hard to beat. With a background in cyclo-cross, Tom Pidcock, in 2017, won junior world titles in both that discipline and the time trial, and is being tipped for a great future on the road. Again, like Peter Sagan and his mountain biking background, the skills Tom has learned riding cyclo-cross make him a more relaxed and energy-efficient rider whether on- or off-road.
Adventure/gravel bike
A final option to consider, which can potentially serve all three options of winter trainer, mountain bike and crosser, is an adventure/gravel bike. These tend to have slightly less racy geometry than an all-out racing cyclo-cross bike and will also usually have drillings for mudguards and pannier racks. Some also allow you to run 650b (27½in) wheels with fatter tyres for more mountain biking type trails and then swap in 700c (29in) wheels with narrower cyclo-cross or even road tyres.
GEARING
Not so long ago, the standard gearing set-up on a road bike was 53/39t chainrings on the front and a cassette giving a range of 11–23t or 11–25t at the rear. If you wanted lower gears, you’d be looking at a triple chainset but they tended to be the preserve of tourers and recreational riders. Hills tended to be a knee-popping grind or an out of the saddle wrestling match with your handlebars. Now, though, with 11-speed cassettes giving huge 11–32t ranges and compact (50/34t) and pro or semi-compact (52/36t) chainsets, spinning higher cadences even up the steepest climbs is possible and triples have been pretty much consigned to the dusty spare parts box at your local bike shop. Mountain bikers are already using 12-speed cassettes with 10–50t ranges and road riders are modifying these set-ups for use on the road. So what gearing should you opt for and how low should you go?
Think about your fitness level and the type of riding you’ll mainly be doing. For the vast majority of sportive riders, a compact (50/34t) chainset paired with an 11/12–28t cassette should cover most eventualities. If you’re tackling a very hilly event or heading for some big mountains, though, you might want to consider upping the cassette to a 32t. Don’t be put off by disparaging comments from old school or ‘macho’ riders, there’s nothing tough about grinding up hills. On recent Grand Tours Chris Froome, Alberto Contador and other top contenders have been spotted running compacts and 32t cassettes. It not only allows them to maintain a more efficient seated position on steep climbs but, with the stages ahead to consider, results in less muscular stress. Also, don’t worry about ‘spinning out’ on flats or descents. Turning your top gear of 50/11 at 100 rpm will see you travelling at just under 59kph (37mph) and, although you may go faster on long downhills, you’re likely to be freewheeling. As mentioned, road riders are experimenting with even wider ranging mountain biking cassettes but, in my opinion, you can go too low with your gearing. You’ll struggle to keep your front wheel down, will barely be travelling above walking pace and will have significant jumps as you shift through your gears, which can make maintaining rhythm difficult. Apart from extreme cases or specific needs, such as an injury, there should be no need to go lower than a 34t chainring paired with a 32t sprocket for road riding.
Stronger riders and those looking to race, who might want a bigger top gear, or, if you tend to favour flatter riding, a pro or semi-compact (52/36t) chainset offers a great option. You might also want to consider, if the course is suitable, running a smaller ranging cassette, such as 11–25t, as there will be less of a jump between gears. This is the set-up I have on my summer road bike that I’ll ride sportives and circuit race on. For hilly routes, though, I’ll change down to an 11–28t cassette.
Traditionalists, or those who ride and race predominately on the flat, may want to opt for a 53/39t chainset but, for a relatively small gain in your highest gear with the extra tooth upfront, you’re likely to be sacrificing a fair amount of climbing efficiency. That said, not all of us are spinners, and a higher-gear and low-cadence approach may suit some riders better. Much has been made over recent years about the efficiency and effectiveness of high-cadence pedalling, and it certainly works for Chris Froome, but a number of studies have shown that optimal cadence is very much an individual thing. Don’t become obsessed about spinning or having to maintain 90 rpm+; find the cadence that works best for you and choose the appropriate gearing that allows you to maintain it.
Other kit, clothing and equipment gains
If you’ve ticked all the boxes described in this chapter and are still looking for ways to buy some speed, there are certainly some seconds to be found.
As the rider accounts for 80–90 per cent of drag created, the biggest kit and equipment gains are to be made by focusing on your clothing and, as previously mentioned, your position on the bike.
Starting from the head down, aero road helmets are a fairly recent phenomenon in the pro peloton and their origins can be traced back to Mark Cavendish’s win at the World Championships in 2011 when, as part of British Cycling’s marginal gains philosophy, his helmet’s vents were taped over to reduce turbulence and drag. The first commercially available versions weren’t especially aesthetically pleasing and were met with a fair amount of derision. However, a combination of positive wind tunnel results and wins on the road have now made them the norm, especially on flat sprint stages. Gains are relatively small, typically in the 15–20 seconds range over 40km (25 miles), for an aero road helmet versus its vented equivalent. It should be noted that all ‘aero gains’ stats should be taken with a pinch of salt, especially if released by equipment manufacturers. The ranges given in this chapter were obtained from a number of sources and are only given as a comparative exercise. However, rider position can significantly affect this, and the gains can easily be offset by losses due to overheating in hot conditions. For time trialists, even more outlandish aero helmet designs have become increasingly popular and, offering gains of up to a minute over 40km, can offer significant bang for your buck gains. Again though, before you rush out and buy the most aero-looking teardrop helmet you can find, this figure is an optimal best case scenario. If you tend to move your head, look down or your riding position means that the helmet’s tail doesn’t transition smoothly to your upper back, those gains can easily turn into losses.

With the rider accounting for the vast majority of drag, if you’re putting on a rain jacket, do that zip up!
Clothing wise, if every second counts, a well-fitted high-tech skinsuit can save over 2 minutes over 40km compared with standard jersey and shorts. Again, this wasn’t lost on the Great Britain Cycling Team at the 2011 World Championships, where they pioneered skinsuits for bunch races on the road. Like aero road helmets, they’re now commonplace and, unlike skinsuits for track and time trials, are available with pockets for carrying spares and food. A quality skinsuit doesn’t come cheap but, compared with aero upgrades to your bike, represents good value for money. If you have gone to the trouble and expense of getting a skinsuit, don’t negate all the gains by pinning on your number badly. Keep it low, use plenty of pins and even look into number pockets, which can be retro fitted. For day-to-day riding and sportives, a skinsuit is probably overkill, but try to keep the aerodynamics of your clothing in mind. Fitted is always better as any audible flapping in the wind is lost speed. Do up your jersey on descents and flats, and avoid loosely fitting shell layers in poor conditions. Modern weatherproof technical jerseys allow you to stay warm, fairly dry and still aero. Another cheap but significant clothing gain, up to 30 seconds over 40km, are aero overshoes.
Also worth mentioning, while talking about the rider, are shaved legs. Specialized went to the trouble of aero testing shaved versus unshaved legs in the wind tunnel and found, for an averagely hairy rider, impressive savings of a minute over 40km. Well worth the cost of a razor! Thankfully they found much smaller gains for shaved forearms and, good news if you wear a beard, virtually none for facial hair.
If you’re trying to justify buying that new aero bike, compared with sorting out your position and clothing, the cost per second saved won’t help you. Like for like in terms of geometry, aero versus regular tubing will probably only save you 20–30 seconds over 40km. Similarly, the gains from aero handlebars, seat posts and such like will be fairly minimal. If all optimised they can add up, but there’s definitely more significant and less costly gains to be made.
Manufacturers tend to under spec wheels so, if you’re looking to spend some money on your bike, your rolling stock is a good bet.
If you’ve bought a bike off the peg, even a fairly high-end model, upgrading the wheelset could be worthwhile. Manufacturers look to cut costs somewhere on a bike and the most common candidate is the wheels. For racing against the clock, on all but the hilliest courses a deep section or 3/5 spoke on the front and a rear disc will be the fastest, gaining 1–2 minutes over standard section wheels depending on wind conditions. For bunch events and sportives, upgrading your stock wheels to some aero and lightweight 30–50mm (11⁄5–2in) wheels is definitely worthwhile. Over the course of a 5–6-hour Gran Fondo, you’ll be looking at significant savings in both minutes and energy. Don’t ditch your stock wheels, though – keep them for training and winter duties. With a greater understanding of aerodynamics, an area that has received a lot of attention recently has been the relationship between the tyre and the rim. This can be crucial, and it’s easy to totally negate the aero benefits of your wheels by running the wrong tyre. The current trend for wider rims and wider tyres gives a smooth aero transition from rim to tyre and consistently tests faster in the wind tunnel. Most wheel manufacturers now make tyre recommendations to use with their products. Additionally, this wider rim and tyre set-up facilitates lower tyre pressures which, contrary to the previously held ‘narrow and hard is faster’ wisdom, reduces rolling resistance and increases speed. Taking the time to experiment with tyre pressure and adjusting it to the conditions can make a significant difference to how your bike performs. Exact set-up depends massively on rider weight and preferences but, once you’ve found what works best for you, checking tyre pressure should always be part of your pre-ride check. A final note on tyres is that although lightweight high performance tyres can feel great, the time they could save you over a long event has to be weighed up against the time it’ll take you to fix a flat. The pros are lucky enough to have a following car with spare wheels; we’re not so fortunate, so running more robust and resilient tyres is probably the wise choice.
When it comes to measurable performance boosts, upgrading your groupset probably represents one of the poorest returns for money spent. You might save a couple of hundred grams by speccing top-tier components but the difference in performance to mid-tier is negligible. Electronic shifting is trickling down to mid-tier groupsets now and, although it’s probably not going to save you measurable time, its slickness and reliability, assuming you remember to charge it, is impressive.
Disc brakes have revolutionised mountain biking and cyclo-cross and, as of November 2017, have been made legal in bunch road races in the UK, Australia and America at all levels of the sport. With the main limiting factor to braking performance being the tyres’ contact patch with the road, the benefit to actual stopping distance is debatable. However, for sportives and Gran Fondos, especially on mountainous routes, they’re definitely worth considering if you’re buying a new bike. On long descents, there’s no risk of rims overheating and potential tyre blowouts. Additionally, for winter riding especially, disc brakes mean that your rims are no longer effectively very expensive sacrificial components.
Whatever bike you ride or components you spec on it, getting into a good maintenance routine offers marginal gains and minimises maximal losses. A well-maintained bike is less likely to suffer from ride-ending mechanical failure and, for consistent training, you have to be able to rely on your bike day in and day out. Basic cleaning and drivetrain maintenance is a bare minimum, and a clean and well-lubed chain can easily save you a not insignificant 10 watts. Chain lubricant technology is a really hot topic at the moment, with secret wax, molybdenum and Teflon blends closely guarded secrets. It was rumoured that the cost of preparing Bradley Wiggins’s chain for his hour record in 2015 was upwards of £6,000. There’s probably no need to go this far, but keeping your chain clean and maybe even considering a waxed chain for key events will make you faster. Poorly indexed gears cause frustration, wasted energy and, as was the case with Andy Schleck and Alberto Contador in 2010, a dropped chain was a Tour-determining event. Like flapping clothing, any excessive drivetrain noise is wasted energy. Check your tyres after each ride for embedded flints or glass, as that can be a puncture waiting to happen on your next ride, potentially your big event for the year. You don’t need to become a pro bike mechanic, but by developing a basic understanding of how your bike works and how to maintain it, you can improve your performance.
How to improve your cycling performance
Spend your money wisely
You can improve massively as a rider without spending a lot of money. However, if you are looking to invest some money in your riding, don’t be seduced by bling upgrades.
Professional bike fit
If your bike isn’t correctly fitted, you’ll never achieve your true cycling potential. A quality bike fit should be a priority for all riders. Ideally, look for a physiotherapist-led bike fit using a modern motion capture system.
Indoor trainer
Not a soft option for avoiding bad weather but a vital tool for focused training. Invest time in considering the type of indoor trainer that best suits your needs and in setting it up so that you’ll want to use it.
Power meter
A genuine game changer that’s definitely worth the investment. Prices will continue to drop and, if you’re looking for one upgrade that has the potential to transform your riding, this is it.
Second or third bike
Far from essential but can definitely facilitate training and add variety to your riding. Road cyclists have massive amounts to gain, in both fitness and bike handling skills, from hitting the trails on a mountain bike or cyclo-cross bike.
Maintenance
A clean bike is a fast bike. Any drivetrain noise or creaking or rubbing elsewhere on the bike means wasted watts that can easily cancel out the gains of aero wheels or frameset. Also, you need to have 100% confidence in your bike, especially when descending, so knowing it’s well maintained is a must.

We all like carbon bling but there are plenty of ways to get faster without spending loads of cash.