As you may know from experience developing Cocoa apps, Interface Builder is a large part of any project. Now that we’ve built our data model and we have a template ready in Xcode, it’s time to put together the user interface.
There are two things to note before we get into the fun of Interface Builder. First, this isn’t going to be Delicious Library. We’ll be using standard widgets for our application to help keep the non--Core Data code to a minimum. Second, there are a lot of features we could add to this application, but we’re going to hold back. Extra features, although useful, might detract from our current focus of porting the primary functionality from iOS to the desktop. Once we have that new foundation in place, we can start adding features.
The first part of the user interface we’ll work on is the objects in the xib file. As with most applications, we need to add the AppDelegate to the xib so it will be both instantiated on startup and properly linked into the application itself.
Depending on the whims of the templates within Xcode, the AppDelegate may already be in the xib file upon opening MainMenu.xib. If it is, great! Move on to the next section. If it’s not, we need to add it. In addition, please note that depending on the version of Xcode that’s running, the application delegate could have the application name prepended to it. If it does, we must substitute that name for any reference to AppDelegate in this context.
To add the AppDelegate to the xib file, follow these steps:
Find the NSObject in the Library palette, and drag it to the xib’s window.
Click the name of the NSObject. When it’s editable, change it to AppDelegate.
Go to the Identity tab on the Inspector palette, and change the class of the object from NSObject to AppDelegate.
Right-drag from the application to the AppDelegate object, and select Delegate.
After these steps, the AppDelegate class will be instantiated when our application launches, and the application will send all delegate messages to it.
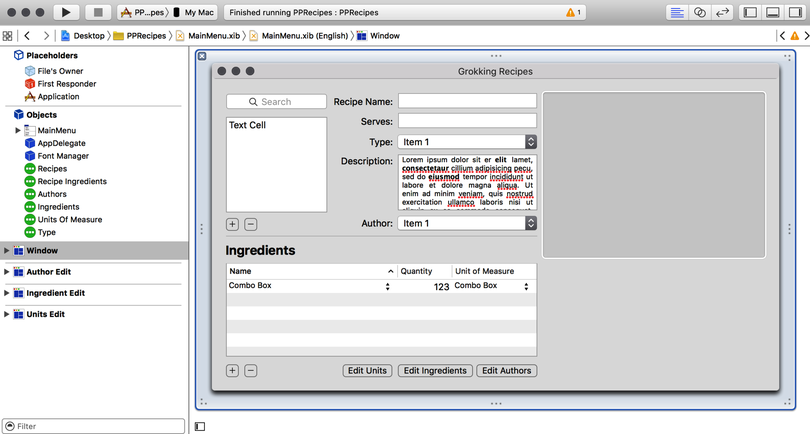
We want our application to display a list of all the recipes in a single window. To accomplish this, we need to be able to reference the data so it can be displayed. So, let’s add three NSArrayController objects into our xib that reference that data. Our window then references those NSArrayController objects. Once the NSArrayController objects are added and configured, the xib looks like this:

To add an NSArrayController for the recipe entities, follow these steps:
Find the NSArrayController object in the library, and drag it to the xib file.
Click the name of the NSArrayController. When it is editable, rename it to Recipes. If you have trouble getting the element into edit mode, change the name in the Identity inspector in Interface Builder, and change the Label field in the Document section.
On the Attributes tab of the inspector, change the mode from Class to Entity, and change the entity name to Recipe.
Make sure the Prepares Content flag is selected.
On the Bindings tab of the inspector, bind ManagedObjectContext to the AppDelegate with a model key path of managedObjectContext.
Now that we have the Recipe entity’s NSArrayController built, we need to configure the other two NSArrayController instances, one for the RecipeIngredient entity and one for the Type entity. The type NSArrayController follows the same steps as our Recipe entity, but we need to set the entity name to Type so it will populate with Type objects. Other than that one difference, we follow the previous steps to complete the type’s NSArrayController.

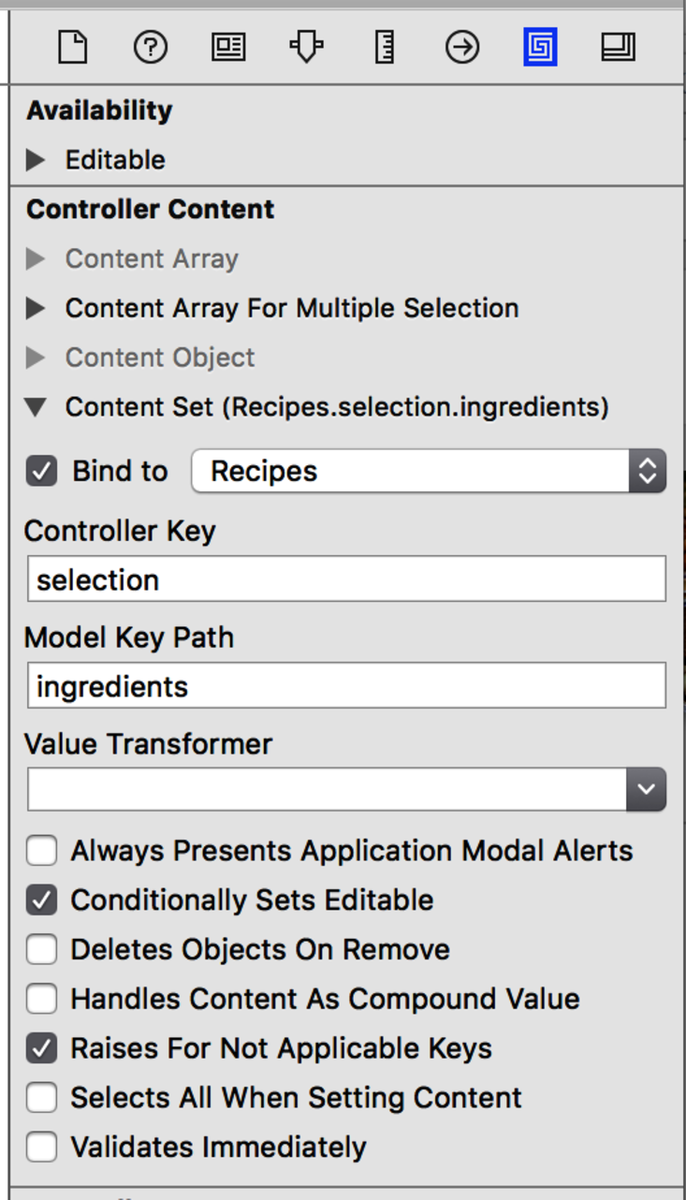
Set the identity of the last NSArrayController, the recipe ingredients’ NSArrayController, to RecipeIngredient. In the Attributes inspector, choose Entity, and set the entity name to RecipeIngredient. Set the bindings as before, with one additional change: on the Bindings tab of the inspector, enable the content set in the controller content and point it at the recipe’s NSArrayController with a controller key of selection and a model key path of ingredients. See the following image.
Now we’re ready to build the NSWindow.