cookie
basics
This pictorial guide is dedicated to every cookie baker who’s ever had questions about ingredients, equipment, and techniques. Use these helpful pointers to ensure success in all of your cookie baking ventures.
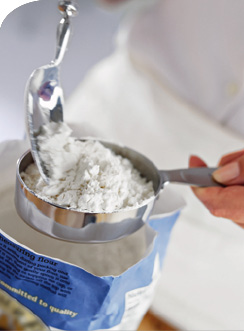
cookie dough tips
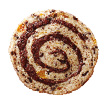
• super slicing When making cookies that are formed into a log, chilled, and sliced, form the log into an evenly round roll. Then place the log into a drinking glass or baguette pan to help keep its shape. If the dough is still too soft to slice after chilling, quick-chill it in the freezer for 20 minutes. Use a sharp, thin-bladed knife to slice the dough. Rotate the roll between cuts to prevent one side from flattening.

• divine drops Minimize spreading of drop cookies by greasing the cookie sheets with shortening only if the recipe directs. Also be sure to cool the cookie sheets completely between each batch. To make your drops evenly sized, use a small ice cream scoop instead of a spoon to scoop the dough.
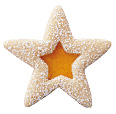
• righteous rolling When making cutout cookies, work with only half of the dough at a time; chill the rest to keep it from getting too soft. Dip cookie cutters into flour between cuts to avoid sticking. Make cutouts close together so fewer rerolls will be needed; chill scraps before rerolling. Use a plastic spatula to transfer cutouts to a baking sheet. Bake similar-size cutouts together so they will all be done at once.
eggs-actly
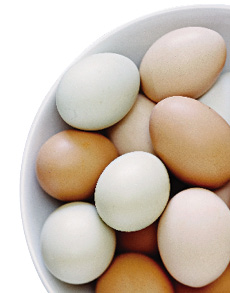
In the Better Homes and Gardens® Test Kitchen, all the cookie recipes are tested with large eggs. If you wish, you can use refrigerated egg substitute instead of whole eggs. Just follow the directions on the package.
Treat your family to the very best cookies you can bake.
batch baking: Bake cookies on a large cookie sheet one batch at a time on the center rack or on two small cookie sheets set on two oven racks and baked at the same time. If using two cookie sheets, switch them halfway through the baking time for even baking.
the oven temperature test: To check your oven temperature for accuracy using a freestanding oven thermometer, set the oven at 350°F and let it heat up for at least 10 minutes. Place the thermometer inside the oven. Close the door and heat the thermometer for at least five minutes. If the thermometer reads higher than 350°F, then reduce the oven setting by the number of degrees’ difference each time you bake. If the thermometer reads lower than 350°F, then increase the oven setting by the number of degrees’ difference. If your oven is more than 50 degrees off, it’s a good idea to have a service technician adjust the thermostat.
great greasing: When a recipe calls for greased cookie sheets, dip a ball of waxed paper in shortening and wipe the sheets with a light coating. Or use a light coating of nonstick cooking spray. You may also use parchment paper or a silicone mat in place of greasing the cookie sheet.
spaced out: Be sure to leave enough space between cutout cookies and dough balls so the cookies do not bake into one another. Follow guidelines in recipes.
master mixing: All of the recipes in this book can be made using either a portable hand mixer or a stand mixer. If you use a hand mixer, when you add the flour beat in as much as you can. Stir in the remaining flour using a wooden spoon.
ready or not? Check cookies for doneness after the minimum baking time called for in your recipe. If they appear done, use a thin plastic spatula to transfer cookies to a cooling rack. (A metal spatula may scratch cookie sheets.) Some cookies need to set for one or two minutes before moving them.
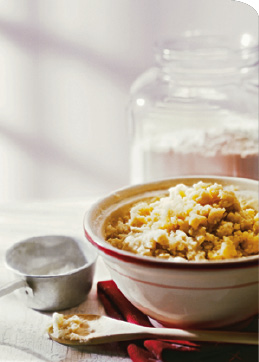
measuring up
Correctly measuring ingredients is one of the simplest secrets to successful cookie baking. To get the best results from your baking projects, follow these measuring cues.
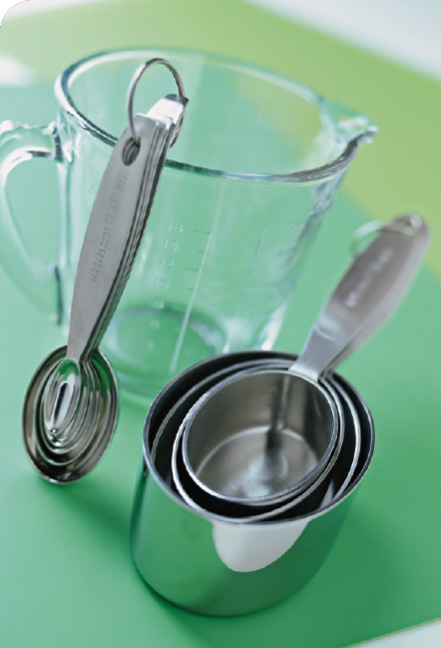
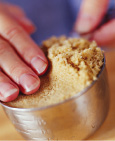
Sugar: Granulated sugar should be spooned into a dry measuring cup or spoon and then leveled off with the straight edge of a knife or spatula. Powdered sugar is measured the same way but should be sifted beforehand. Brown sugar should be pressed into a dry measuring cup until it holds the shape of the cup or spoon when it is inverted.
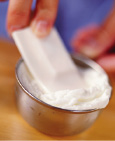
Shortening: Measure solid shortening by pressing it into a dry measuring cup or measuring spoon with a rubber scraper. Level off the excess with the straight edge of a knife. Shortening is also sold in sticks with markings on the wrapper that indicate tablespoon and cup measures.
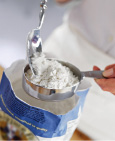
Flour: To measure flour, stir it in the bag or canister to fluff it up. (Sifting is not necessary, except with cake flour.) Gently spoon the flour into a dry measuring cup or spoon, filling it to overflowing. Level off the top with the straight edge of a knife or spatula. Avoid packing the flour into the cup or tapping the cup to level it.
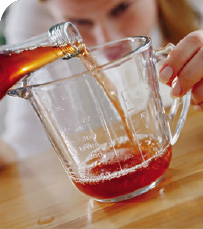
Liquids: Pour liquid in a glass or clear plastic liquid measuring cup placed on a level surface. Read the markings on the cup by bending down so you see them at eye level.
sheet smarts
If the cookie sheets in your cupboard are lightweight, warped, or dark with baked-on grease, then it’s time for some new ones. Here are some tips to help you choose cookie sheets.
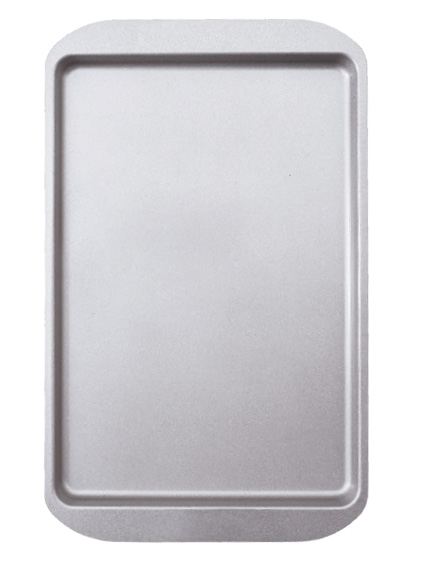
• Look for shiny, heavy pans that have very low or no sides.
• Avoid dark-color cookie sheets, which can easily cause cookies to overbrown.
• Use jelly-roll pans (four-sided, 15×10×1-inch baking pans) for bar cookies only. Other types of cookies will not brown evenly in these pans.
• Be sure to choose a cookie sheet that fits comfortably in your oven. There should be at least one to two inches of space all around the pan. You want a cookie sheet that handles easily, so pay close attention to its size and weight.
• Insulated cookie sheets tend to yield pale, too-soft cookies, so steer clear of this type of sheet for cookie baking purposes.
• Perforated cookie sheets and accompanying silicone mats are not all they’re cracked up to be. They do not help cookies bake any more evenly than on a standard cookie sheet, and cleanup is difficult due to crumbs becoming lodged in the perforated mat.
• Cookie baking stones are not necessary to bake cookies. Testing shows that cookies baked on stones take longer to bake and don’t brown enough on the bottom. The weight of baking stones, as well as the fact that they are very breakable, makes them less convenient to handle than metal pans.
Heavyweight cookie sheets can stand up to high temperatures—they won’t warp or bend in the oven’s heat.
sticking solutions
Parchment Paper: Use this moistureproof paper to line baking pans and cookie sheets to make cookies easier to remove. In addition parchment paper makes cleanup a breeze. After use just toss it in the garbage.
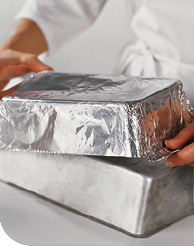
Aluminum Foil: Lining baking pans with foil makes removing the bars from the pan easier. Foil also helps keep pans from being damaged from knife cuts and makes cleanup much easier. Just shape the foil over the outside of the pan, extending it over the edges about one inch, then place the shaped foil inside the pan. If your recipe calls for a greased pan, grease the foil inside the pan (or choose no-stick foil). Bake and cool the bars as usual, then grasp the extra foil at the edges to pull the uncut bars out of the pan.
high-altitude cookie baking: Cookies need less adjustment for high altitude than other baked goods. Start by increasing the oven temperature by 25°F and decreasing the baking time by a minute or two. If further adjustment is necessary, reduce the sugar by a couple of tablespoons. If a recipe calls for baking powder or baking soda, you may need to reduce the amount by 1⁄8 teaspoon. Make just one recipe change at a time.
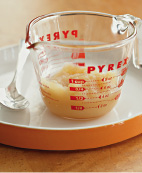
Less Fat, More Applesauce! If you experiment with applesauce or fruit puree as a substitute for fat in drop or bar cookie recipes, replace no more than half the butter or shortening with the fruit product. The cookies will be moist and cakelike because the fruit holds moisture. Applesauce or fruit puree does not work in cutout or slice-and-bake cookies because it makes dough too soft to hold its shape.

Candied citrus peel and crystallized ginger are sold in packages in the spice aisle, baking aisle, or the produce section.
Chocolate-hazelnut spread, such as Nutella brand, can be found in the grocery store near the peanut butter.
Edible glitter and luster dust are sold at crafts stores in the cake decorating section and through mail order catalogs.
Lemon, lime, and orange curd are found next to the jams, preserves, and jellies in larger supermarkets.
Mini phyllo cups are sold in the bakery department of larger supermarkets or with specialty items.
Meringue powder is sold at crafts stores in the cake decorating section and in mail order catalogs.
Phyllo sheets are in your grocer’s freezer case near frozen desserts.
Pine nuts and pistachio nuts can be found in the produce section or in the snack aisle of your grocery store.
fun dried fruit: Don’t stop with raisins (dried grapes). You can purchase apples, apricots, bananas, carambolas (star fruit), cherries, cranberries, currants, dates, figs, mangoes, papayas, peaches, pears, persimmons, pineapples, and plums in dried form. They’re all intensely sweet, chewy, and great for cookie baking. Once you’ve opened a package, wrap the remaining dried fruit airtight and store it in the freezer for up to 6 months.
• Either a sharp knife or kitchen shears make quick work of cutting large pieces of dried fruits into bite-size pieces. Dip the knife or shears into hot water or lightly spray with nonstick cooking spray to keep the fruit from sticking.
Peanut Butter Facts
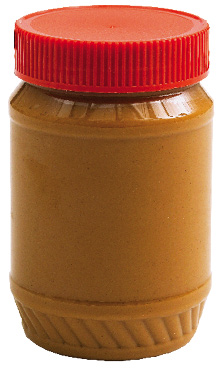
By law peanut butter must be 90 percent peanuts; no artificial flavor, colors, and preservatives are allowed. Peanut butter usually contains stabilizers to keep the oil from separating. Natural peanut butter, made only with peanuts and oil, must be stored in the refrigerator and stirred before use. Either type makes delicious cookies.
what’s the difference?
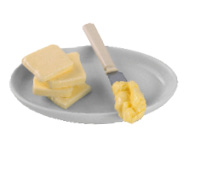
Butter versus margarine: Butter is the first choice for cookies because it contributes a rich flavor and consistent results. Stick margarine will work if it contains at least 80 percent fat. Avoid low-fat, liquid, and soft spreads.
Pure vanilla extract versus imitation vanilla: Vanilla extract comes from long, slender seedpods called vanilla beans. Circulating diluted alcohol through finely chopped vanilla beans makes pure vanilla extract. Imitation vanilla is an artificial flavoring made of synthetic flavors and coloring and is an inexpensive substitute for extract. For most uses measure the same amount of imitation vanilla as you would pure vanilla extract.
Dark molasses versus light molasses: Thick, dark, syrupy molasses is a byproduct of refining cane or beet sugar. When describing molasses, light refers only to flavor, not color or calorie or sugar content. Light molasses, also called mild-flavor molasses, comes from the first boiling of the refining process and is sweet in flavor. Dark molasses, from the second boiling, is not as sweet as light molasses but has a distinctive, robust flavor. Light and dark molasses can be used interchangeably in recipes.
Evaporated milk versus sweetened condensed milk: Evaporated milk is made by removing the water from whole milk. Sweetened condensed milk is milk that has had the water removed and then sugar added. They are not to be used interchangeably in recipes.
Baking soda versus baking powder: Baking soda is an alkaline leavening agent that is used in conjunction with acidic ingredients, such as buttermilk or brown sugar, to form bubbles of air that make cookies rise. Baking powder is not used in conjunction with an acidic ingredient in recipes because it already contains the acidifying agent (cream of tartar). Do not use these products interchangeably for baking.
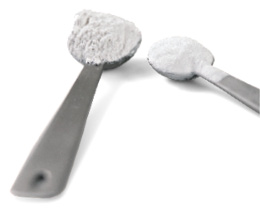
Liquid food coloring versus food coloring paste: Liquid food coloring, usually available in just four colors—red, green, yellow, and blue—has a relatively low concentration of dye. Paste food coloring is highly concentrated and available in a wide variety of colors. Use less paste coloring than you would liquid.
Savvy Storage
Make sure the cookies have cooled completely on a wire rack before storing. If they are still warm, they are likely to stick together. Use storage containers with tight-fitting lids. Never store crisp cookies and soft cookies in the same container; crisp cookies will soften and soft cookies will harden. To store most cookies, bars, and candy, layer them between waxed paper in an airtight container. Unless a recipe directs otherwise, store cookies and candy at room temperature for up to three days (up to two days for meringue-base cookies) or freeze (unfrosted, unfilled, and/or undrizzled) for up to three months. Store bars at room temperature for up to three days or in the refrigerator as specified in recipe. You can freeze bars (unfrosted or undrizzled) for up to three months. Be sure to store cookies or bars topped with creamy frostings or delicate toppings in a single layer.
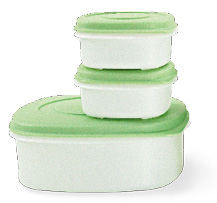
Freeze with Ease
Use these tips to freeze your cookies.
• Cookie Containers: Use sturdy containers with tight-fitting lids. Keep a variety of shapes and sizes on hand for different types and amounts of cookies—any extra air in the container makes the cookies prone to freezer burn.
• Store Smart: Separate layers of cooled cookies with pieces of waxed paper. The paper protects from crumbing and provides insulation against freezer burn. Label each container, listing the name of the cookies and the date they were made. If the cookies need to be filled or frosted before serving, add a note with clear instructions.
• Proper Thawing: Thaw cookies in the refrigerator or on the countertop. Leave the cookies in their storage container to avoid damage due to condensation. Frost them, fill them, and/or serve them after they have completely thawed.
what is freezer burn? Freezer burn occurs when food dries out in the freezer, which affects the food’s flavor and texture. To minimize these effects, store cookies in airtight containers designed for the freezer. However, anything stored too long will suffer from freezer burn. Store cookies no longer than three months for best quality.
store ingredients wisely
Here are storage guidelines for various baking ingredients.
baking powder and baking soda: Store at room temperature; check expiration dates on packages.
brown sugar: Store in a sturdy container with a tightly fitting lid at room temperature for up to six months.
butter: Refrigerate in original packaging for up to one month. To freeze, thoroughly wrap the package with plastic wrap and freeze for up to six months.
chocolate: Store baking chocolate wrapped in plastic wrap and foil in a cool, dark place. Store chocolate pieces in a resealable bag or storage container. Store milk chocolate and dark chocolate for up to a year and white chocolate for up to eight months.
coconut: After opening, tightly close package or put in a resealable bag and store in the refrigerator for up to two months.
eggs: Store whole eggs in the carton in the coldest part of the refrigerator for up to five weeks after the packing date.
flour: Store all-purpose flour in an airtight container in a cool, dry place for 10 to 15 months. Store whole grain flours for up to five months. For longer storage, refrigerate or freeze flour in a moistureproof container.
granulated and powdered sugars: Store these types of sugar indefinitely in airtight containers in a cool, dry place.
spices: Store in airtight containers in a dry place away from sunlight and heat. Most whole spices keep for one to two years; ground spices keep up to a year.
Cookie Packaging
Sending cookies to loved ones is a great way to show you care. Use these tips to ensure your treats arrive unharmed.
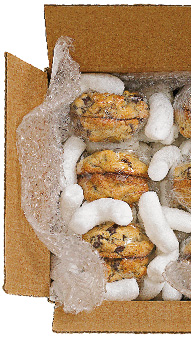
• Choose crisp or firm cookies, such as sliced, drop, or bar cookies. Avoid moist, frosted, or filled ones.
• Wrap cookies in plastic wrap individually, in back-to-back pairs, or in stacks.
• Line a sturdy cardboard box with plastic bubble wrap and pack cookies in layers of packing peanuts or tissue paper. Fill the box completely so the cookies do not shift. Seal the box with packing tape and mark it “perishable.”
ahh, nuts!
Many people like the flavor and texture nuts give to cookies. But if your kitchen is a nut-free zone, for most recipes you can simply leave them out. There are exceptions, however. If a recipe calls for ground nuts, they take the place of some flour and fat, so they are essential to the structure of the cookies. If nuts are the primary ingredient, omitting them leaves a bland, unappealing cookie. Here are some cookie-friendly nuts.
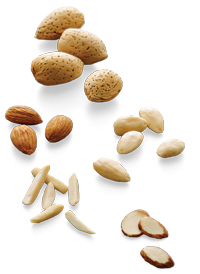
Almonds These nuts have pale, smooth meat and a delicate flavor. Almonds come whole, sliced, slivered, or chopped. Toasting them helps retain their crunch.
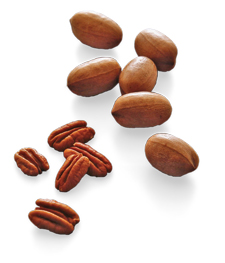
Pecans Sweet, buttery pecans have the highest fat content of any nut. Use them interchangeably with walnuts.
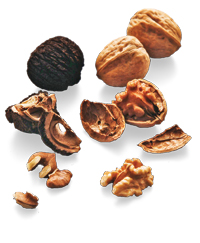
Walnuts Mild-flavor English walnuts are the best nut for all kinds of baking. Black walnuts have a distinctive and intense flavor and can be slightly bitter.
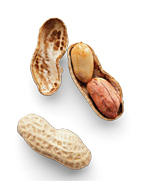
Peanuts Not technically nuts, peanuts are legumes that grow beneath the ground. In cookies use unsalted, roasted peanuts unless otherwise specified.
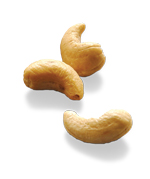
Cashews Buy these rich, buttery nuts raw or roasted, salted or plain. For baking, use unsalted roasted cashews unless otherwise specified.
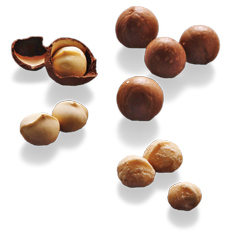
Macadamia Nuts Native to Australia but grown primarily in Hawaii, macadamia nuts taste rich, sweet, and buttery. Use them whenever you would use cashews.
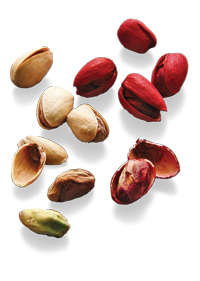
Pistachios Their mild and sweet flavor is similar to almonds, which make a suitable substitute. The shells may be tan or colored red with vegetable dye. The nut meat is green.
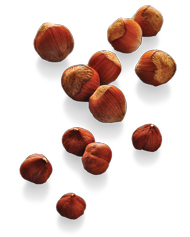
Hazelnuts Also called filberts, hazelnuts have a mild, sweet flavor. Remove the bitter skins by rubbing the nuts between your hands before baking.
Toasting heightens the flavor of nuts, seeds, and coconut. To toast, spread the nuts, seeds, or coconut in a single layer in a shallow baking pan. Bake in a 350°F oven for 5 to 10 minutes or until light golden brown and fragrant; watch carefully and stir once or twice.
chocolate and more chocolate
Smooth, rich chocolate comes in many forms. Here’s a rundown on some basic varieties.
Unsweetened chocolate Sometimes called baking or bitter chocolate, this product is pure chocolate with no added sugar.
Semisweet chocolate Pure chocolate with added cocoa butter and sugar, this versatile product is available in bars, blocks, and pieces.
Bittersweet chocolate There are no legal guidelines for this term, but the product is usually darker and less sweet than semisweet chocolate.
Milk chocolate This product consists of pure chocolate with added cocoa butter, sugar, and milk solids.
Sweet baking chocolate Made of pure chocolate with added cocoa butter and sugar, this chocolate is sweeter than bittersweet chocolate but less sweet than semisweet chocolate.
Unsweetened cocoa powder This product is pure chocolate with most of the cocoa butter removed. Cocoas labeled “Dutch-process” or “European-style” have been treated to neutralize the natural acids, giving them a mellow flavor and a reddish color.
what exactly is white chocolate?
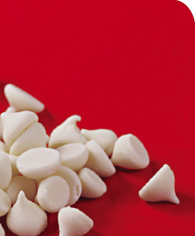
All the white baking products you can find at the supermarket (such as baking squares, baking pieces, baking chunks, and white candy or confectioners’ coating) are not created equal. Some contain cocoa butter, while others do not. The only products that are true white chocolate contain cocoa butter. Read your recipe before heading to the store. When a recipe specifies white chocolate baking squares with cocoa butter, be sure to check the product for the words “cocoa butter.”
chips to try
You’ll be in for a yummy change of pace when you try new flavors of chips in your cookie recipes.

cinnamon: These are slightly smaller than the standard chip and deliver an intense sweet-spicy flavor.

semisweet: These classic chips were introduced by Nestlé Co. in 1939. You’ll also find milder, sweeter milk chocolate morsels and darker, richer bittersweet chips. All are interchangeable in recipes.

white chocolate: These aren’t true chocolate—they contain no chocolate liquor, a paste from which all versions of the real thing are made. They have a mild, sweet vanilla flavor and a creamy texture.

cappuccino: These chips take on the flavor and color of sweetened coffee and cream. Coffee lovers are in for a treat.

mint: You’re probably familiar with the chocolate-mint-flavor chip. These pastel green chips have a more delicate mint flavor.

raspberry-chocolate: These semisweet morsels are laced with a luscious and tangy berry flavor that adds a touch of sophistication to cookies.

cherry: Any size—regular or miniature—bursts with fruity flavor and festive red color.

butterscotch: These blond bits contribute a buttery brown sugar flavor to cookies and bars.
tips on storing chips
• Store chips in a cool, dry place for up to three months.
• After opening the package, transfer remaining chips to an airtight container.
• The morsels keep best in constant temperatures. When exposed to temperature changes, the surface of the chips can develop a film called “bloom.” It’s actually just fine traces of melted cocoa butter that has rehardened, and it won’t affect the flavor or performance of the chip.
decorating guide
A punchy color palette, swirls and pipes of frosting, and sprinkles of sparkly sugars and candies work hand in hand to create exquisite cookies that look almost too beautiful to eat.
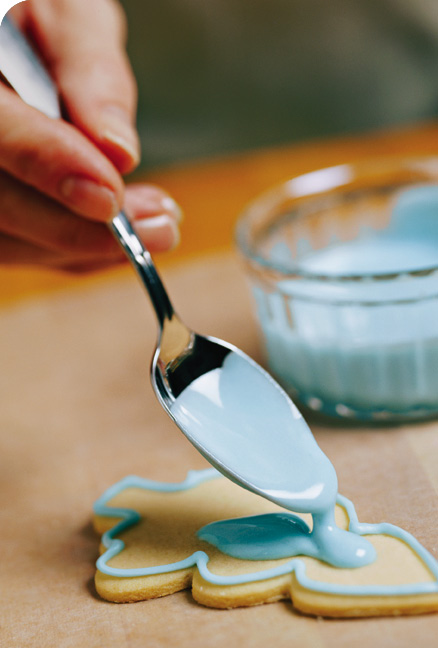
decorating tools

Tweezers This versatile tool comes in handy for adding decorative embellishments such as dragées or candies to your cookies.

Fluted pastry wheel Create decorative scalloped edges with a pastry wheel, which also works nicely to cut geometric shapes out of cookie dough.
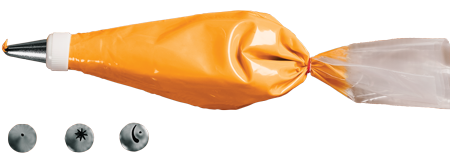
Decorator bags For ease and convenience, use plastic disposable decorator bags to pipe frosting. When you are finished decorating your cookies, simply discard the bag.
Decorating tips Tips for decorating bags come in several shapes and sizes, but you actually need only three—a round tip, a star, and a leaf—to decorate cookies. Choose tips with small or medium holes to pipe frosting.
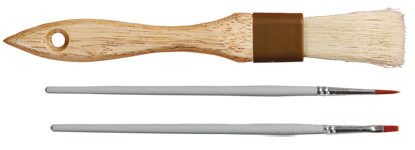
Brushes The quickest way to glaze or ice cookies is with a brush. Use a large pastry brush to apply an egg wash on unbaked cookies; once baked, the glazed cookies have a nice sheen. Use small paintbrushes for detail work, such as applying thin strokes of frosting or luster dust to cookies.
How to work with Buttercream Frosting:
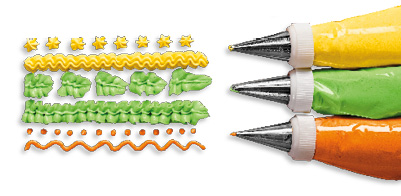
To pipe Buttercream Frosting, fill a decorator bag about two-thirds full of frosting. Fold the corners over and roll the bag down to the frosting. With one hand grip the bag near the roll above the frosting. Apply pressure with the palm of your hand, forcing frosting toward the tip. Use your other hand to guide the tip of the bag.
Star Tip: Besides stars, a star tip creates shells, zigzags, and decorative borders.
Leaf Tip: To form leaves, hold the bag at a 45-degree angle, keeping the top opening parallel to the surface. Squeeze out some frosting to make the base of a leaf. Continue squeezing but ease up on the pressure as you pull toward the leaf tip. Stop the pressure, then pull away.
Round Tip: The round tip is ideal for writing and creating dots, lines, stems, and vines.
How to work with Royal Icing:
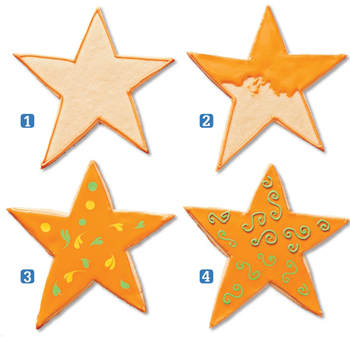
1 Use a small round tip to pipe an icing outline around the cookie. The piped edge creates a border to hold the icing inside.
2 Using a large paintbrush, spread the icing to reach the piped outline icing. This is your base coat.
3 To create the wet-on-wet effect, pipe squiggles of a second color on still-wet icing. The decorative pipes sink into the base coat, creating a smooth top. To create a marbled effect, use a toothpick to pull swirls of the piped icing through the base coat. Decorate one cookie at a time to ensure the icings dry evenly.
4 To create a multidimensional effect on cookies, ice the cookies and let dry. Then pipe additional icing on top and add dragées or sprinkles to the pipes.
assorted toppers
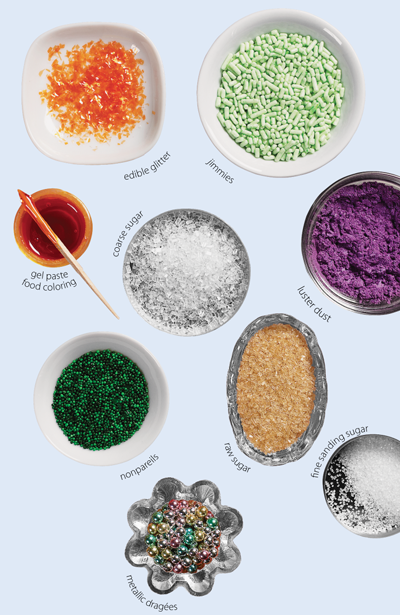
Sugars Several types of sugars add sparkle and color to cookies. Fine sanding sugar gives the cookies a highly dramatic sparkle. Decorating or coarse sugar contains granules that are about four times larger than regular granulated sugar. Raw sugar, or Demerara sugar, contributes a delicate molasses flavor to cookies along with its brownish color and texture. Top iced cookies with sugars when they are slightly dry but still tacky.
Luster dust This shimmering powder comes in gold, silver, and pearl tones as well as many colors. Add luster dust to icing for a metallic sheen. You may also brush it onto dried icing for a shimmery finish by mixing 1⁄2 teaspoon luster dust with 2 teaspoons vodka. The alcohol in the vodka evaporates, leaving a paintable mixture ready to apply to dried icing with a small paintbrush.
Edible glitter Much flakier than sugar, edible glitter makes cookies glisten when sprinkled onto icing that is still wet.
Candies, nonpareils, and dragées Tiny candies and other small embellishments provide fun decorating effects on cookies. Nonpareils are tiny opaque balls that give texture to cookies. They come in a wide range of colors.
egg painting: Use egg paint to apply color to cookies only before baking. In a small bowl stir together 1 egg yolk and a few drops of water. Divide the mixture among several bowls. Mix a little paste food coloring into each. Use a small, clean brush to paint various colors onto unbaked cutouts. If the egg paint thickens while you’re working with it, stir in water, one drop at a time. more than one color, leave a narrow strip of cookie between the painted areas so the colors don’t run together.Clean the brush with water between colors. Bake as cookie recipe directs.