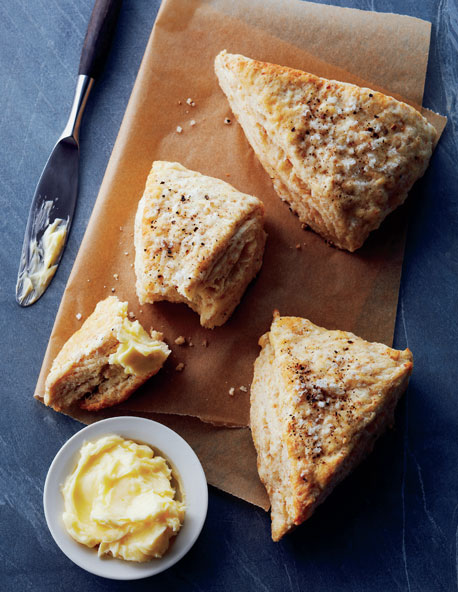
A basket of freshly baked biscuits is one of life’s little miracles. Want to win friends and influence people? Stop reading books and start baking biscuits! With this frozen-butter method you can bypass the messy job of cutting in the fat and skip straight to incredible flavor and flaky texture. Imagine—baking the butter into the biscuit! MAKES 8 TO 12 BISCUITS, DEPENDING ON THE SIZE
3 cups (750 mL) of all-purpose flour
1 cup (250 mL) of any whole wheat flour
2 tablespoons (30 mL) of baking powder
1 teaspoon (5 mL) of salt
1 cup (250 mL) of rock-hard frozen butter
1½ cups (375 mL) of milk
Coarse finishing salt
Coarsely ground black pepper
Preheat your oven to 400˚F (200˚C) and turn on your convection fan if you have one. Line a baking sheet with parchment paper or a nonstick liner to minimize cleanup.
In a large bowl, whisk together the all-purpose and whole wheat flours, baking powder, and salt, evenly distributing the finer powders amidst the coarser ones. Grasp the butter and firmly grate it through the large holes of a box grater into the flour below. Working quickly, toss the flour and butter shards together with your fingers until the fat is fully distributed throughout the flour.
Pour in the milk and stir with the handle of a wooden spoon until a dough mass forms. (The handle of the spoon is gentler on the dough.) Working quickly so the heat of your hands doesn’t begin to melt the butter, gently knead the dough in the bowl a few times until the dough gathers up all the flour in the bowl. Fold it over a few more times to add a bit more strength to the dough and a few more flaky layers to the biscuits.
On a lightly floured work surface, pat and roll the dough into a disc about 12 inches (25 cm) across and 1 inch (2.5 cm) thick. Cut the works into either 8 or 12 wedges. Arrange the wedges about 1 inch (2.5 cm) apart on the baking sheet. Sprinkle with the coarse salt and freshly ground pepper. Bake until light, fluffy, crispy, and golden brown, 12 to 15 minutes. As soon as you can handle them, serve and share!
TWIST
Perhaps these biscuits are so good just the way they are that you would never consider tweaking them. Perhaps their flaky, buttery deliciousness is perfect just the way it is. In which case, any creative indulgence should be focused on flavoring some more butter—butter for melting onto the biscuits. You might work miracles with 1 cup (250 mL) of soft butter, ½ cup (125 mL) of honey, maple syrup, marmalade, or brown sugar, and 1 teaspoon (5 mL) of vanilla extract.
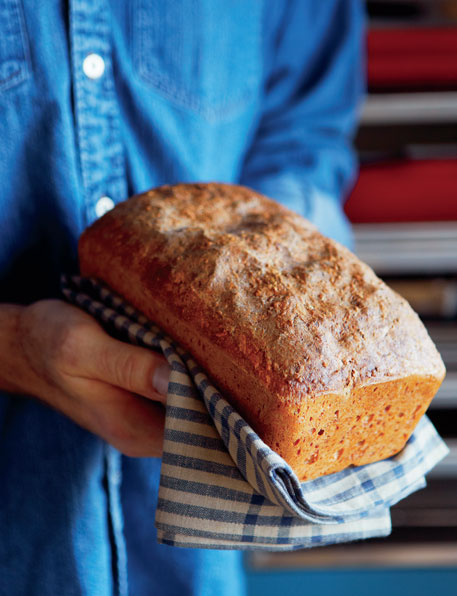
Few kitchen achievements rival a loaf of freshly baked hand-crafted bread. Especially when you can stir together this bread dough in 60 seconds flat and skip the hassle of kneading your arm off. Not only is this high-moisture dough easy to make, but it also allows for an overnight rest, which makes it taste dramatically better. This is the bread I bake for my family every day. MAKES 1 LARGE LOAF
3 cups (750 mL) of all-purpose or bread flour
1 cup (250 mL) of Red Fife or any other whole wheat flour
½ cup (125 mL) of old-fashioned rolled oats or multigrain hot cereal blend such as Red River Cereal
2 teaspoons (10 mL) of salt
½ heaping teaspoon (3 mL) of active dry yeast
2¼ cups (550 mL) of warm water
In a large bowl, whisk together the all-purpose and whole wheat flours, oats, salt, and yeast, evenly distributing the finer powders amidst the coarser ones. Measure in the water, and with the handle of a wooden spoon, thoroughly and vigorously stir until a coarse dough forms, just a minute or two. Continue stirring with the handle until all the flour in the bowl is gathered up into an evenly mixed dough ball, a few minutes more. (I usually do this step after dinner.)
Cover the bowl with drum-tight plastic wrap. Let the dough rest overnight on the kitchen counter. Just by combining flour and water, elastic gluten will automatically form and continue to strengthen within the dough. In 8 to 12 hours or so, the dough will have bubbled and doubled, and long, elastic gluten strands will have formed without any laborious kneading.
The next morning, preheat your oven to 425˚F (220˚C) and turn on your convection fan if you have one. Lightly oil a large loaf pan.
Uncover and marvel at your risen dough. Lightly dust the dough with flour. Gather the works up from the edges and flip it over. Roll it into a rectangle and transfer it to the loaf pan, gently and evenly encouraging it into the corners. Let the dough rest, uncovered, until it doubles and precariously rises well above the rim of the pan, another 1 to 2 hours or so, more than enough time to pre-heat the oven and more than enough time to forget to preheat the oven. Gently and gingerly transfer the pan to the oven and bake for precisely 45 minutes. Immediately remove the loaf from the pan so the bottom doesn’t get soggy. Let it rest on a rack. As soon as it’s cool enough to handle, serve and share!
TWIST
There are many, many ways to freestyle your own ideas into this bread. The whole wheat flour, for instance. Reduce the white flour by 1 cup (250 mL) and add another cup of whole wheat for an even more rustic bread. Or drop the whole wheat entirely and add an equivalent amount of more white for a more refined bread. The oats or grains are really just a garnish for the dough; any porridge-style cereal blend works. My go-to favorite is the organic St. John Valley Cereal from Speerville Flour Mill in New Brunswick, speervilleflourmill.ca. Wheat bran, wheat germ, and cornmeal are great too.
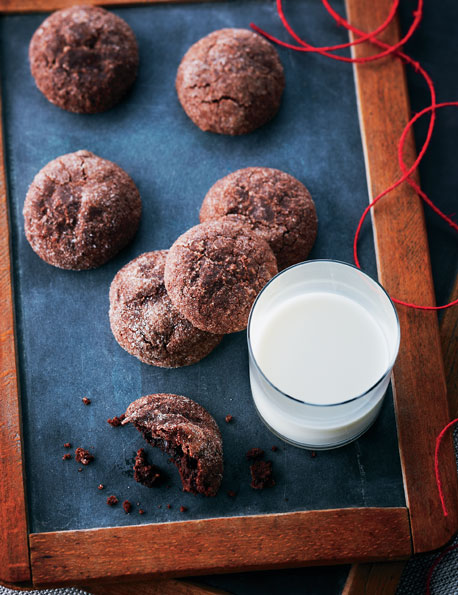
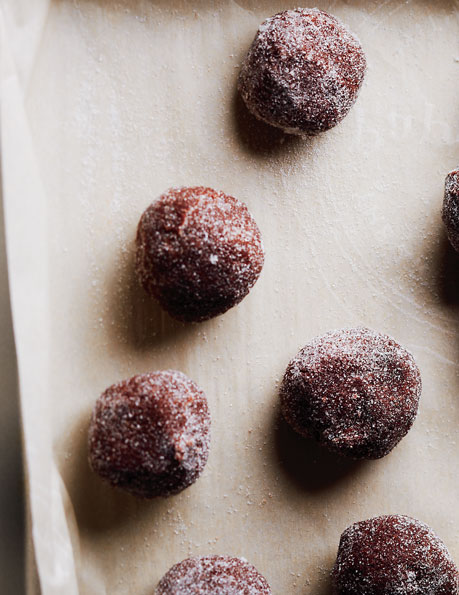
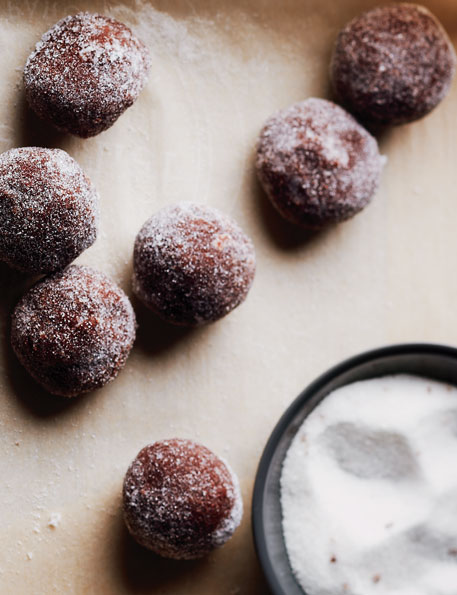
Every now and then you stumble onto a bit of perfection. Years ago my buddy, renowned Vancouver pastry chef Thomas Haas, introduced me to these cookies. I promptly introduced them to everyone I know—they’ve been a staple in my holiday gift baskets ever since—and now I’m proudly telling the world: these are the best cookies I’ve ever baked. Thanks, Thomas, for sharing them! MAKES ABOUT 60 COOKIES
1 pound (450 g) of bittersweet chocolate, chopped
½ cup (125 mL) of butter, at room temperature
1 teaspoon (5 mL) of vanilla extract
1 teaspoon (5 mL) of pure orange extract
4 eggs
1 cup (250 mL) of sugar, plus more for rolling
2 cups (500 mL) of ground almonds
2 tablespoons (30 mL) of cocoa powder
Set up a double boiler to melt the chocolate while insulating it from direct, damaging heat by placing a large heatproof bowl over a smaller pot of barely simmering water. Put the chocolate and butter in the bowl and gently stir the works until the chocolate is completely melted and the mixture is smooth and shiny. Stir in the vanilla and orange extracts, then remove the bowl from over the water.
Toss the eggs and sugar into a large bowl and beat with an electric mixer on the highest speed until the sugar is smoothly dissolved and the mixture thickens dramatically into smooth ribbons that fall from the beater, no more than 10 minutes. In a separate bowl, whisk together the ground almonds and cocoa powder.
Pour the egg mixture over the chocolate mixture, then sprinkle with the almond mixture. Fold the works together with a rubber spatula until everything is evenly combined. Cover and refrigerate until thoroughly chilled and firm, several hours or even overnight.
Preheat your oven to 325˚F (160˚C) and turn on your convection fan if you have one. Line a baking sheet or two with parchment paper or a nonstick liner.
Pour a little sugar into a shallow dish. Scoop out tablespoonfuls of the dough and roll them into 1-inch (2.5 cm) balls. Toss the balls in the sugar, evenly coating them with sparkly bits. Arrange 1 inch (2.5 cm) apart on the baking sheet. Bake for 10 to 12 minutes. They’ll slump a bit and crisp on the outside but the inside will stay delightfully fudgy. Transfer to racks to cool. As soon as they’re cool enough to handle, cram a few in—strictly for quality-control purposes—then serve and share!
TWIST
Remember the old days when chefs wouldn’t give out their recipes and there was always a secret ingredient or two anyway? Not anymore! Now we’re happy to share and we’re happy when you make our recipes your own by stirring in your own ideas. These cookies may have been created in Thomas Haas’s pastry shop, then tweaked and simplified a bit in mine, but ultimately they become yours as soon as you bake them once.
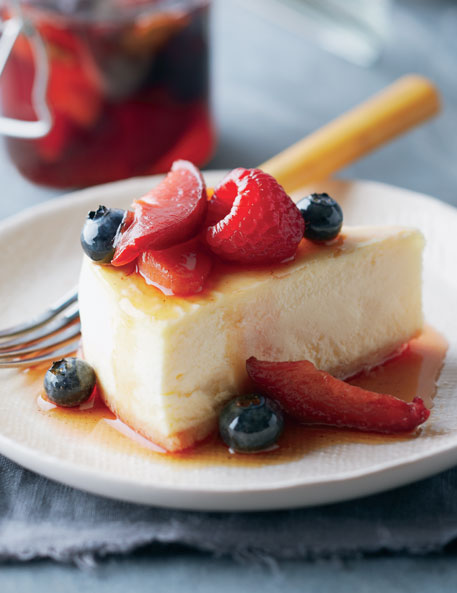
Few desserts are tastier—or easier—than ripe tree fruit soaked in a simple spiced sugar syrup. When your local fruit is at its best, that’s the time to capture its flavors by simply simmering them with sugar. SERVES 4, WITH LEFTOVERS
2 cups (500 mL) of full-bodied Chardonnay or your favorite wine
1 cup (250 mL) of sugar
1 teaspoon (5 mL) of vanilla extract
1 heaping teaspoon (6 mL) of your favorite baking spice, such as cinnamon, nutmeg, star anise, ground cloves, ground allspice, ground cardamom, even rosemary
2 to 3 pounds (900 g to 1.35 kg) of ripe plums, peaches, apricots, nectarines, apples, cherries, or pears
Pour the wine, sugar, and vanilla into a large pot over medium heat. Sprinkle in your choice of spice and bring the works to a slow, steady simmer.
Meanwhile, cut the unpeeled fruit into large chunks, discarding any core or pits. Add the fruit to the simmering syrup. Simmer, stirring gently and checking progress frequently, until the aromatic syrup softens and tenderizes the fruit, permeating it with flavor. This will take just a few minutes or as long as 30, depending on the type and ripeness of the fruit.
This compote is delicious freshly made but it’s even better once it cools down and refrigerates overnight. Once the syrup thickens and the flavors blend, this treat is perfect ladled over ice cream or a slice of cake. Serve and share!
TWIST
Tree fruit tend to be fairly firm once ripe and are thus able to absorb a bit of heating and simmering, but what about delicate berries? Try tossing a pint or two of ripe, fragrant berries in at the last second, then refrigerate the works straight away. Raspberries, blackberries, strawberries, and blueberries are all delicious in this compote.
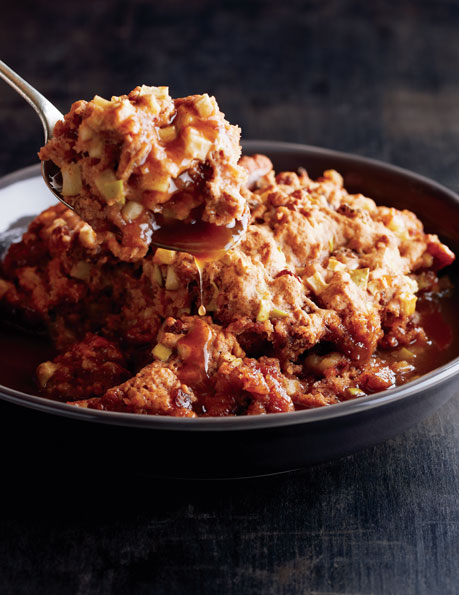
Here’s how it works. Make dinner. Mix this pudding together in 5 minutes flat. Put it in the oven. Eat dinner. When you’re done, so is this delicious dessert—and it even makes its own sauce. Too easy! SERVES 6 TO 8
For the pudding
½ cup (125 mL) of milk
1 teaspoon (5 mL) of white vinegar
1 teaspoon (5 mL) of vanilla extract
½ cup (125 mL) of raisins
1 cup (250 mL) of all-purpose flour
¼ cup (60 mL) of dark brown sugar
2 teaspoons (10 mL) of baking powder
1 teaspoon (5 mL) of cinnamon
1 small apple (unpeeled), diced
½ cup (125 mL) of walnuts
For the built-in sauce
2 cups (500 mL) of apple cider, apple or orange juice, or water
2 tablespoons (30 mL) of butter
1 cup (250 mL) of brown sugar
1 teaspoon (5 mL) of your favorite baking spice (optional)
Preheat your oven to 350˚F (180˚C) and turn on your convection fan if you have one.
Begin with the pudding. In a small bowl, stir together the milk, vinegar, and vanilla, then toss in the raisins. Let the works rest for a few minutes while the raisins plump a bit and you get the rest of the pudding ready.
In a large bowl, whisk together the flour, brown sugar, baking powder, and cinnamon. Stir in the apples and walnuts. Pour in the milk mixture, switch to a wooden spoon, and stir the works into a smooth batter with a few swift strokes. Pour the batter into a large baking pan, allowing it to slump but not encouraging it into the corners.
Make the sauce. Pour the cider into a small pot and bring it to a boil. Turn off the heat and whisk in the butter, brown sugar, and spice (if using). Gently pour the hot sauce around the mound of pudding, forming a moat of sorts. As the pudding bakes the sauce will puddle and pool and yield delicious results. Bake until the pudding is floating in goodness, firm, and a toothpick inserted in the center comes out clean, about 30 minutes. Serve and share!
TWIST
If you enjoy your time in the pastry kitchen and are ready to take it up a notch, try experimenting with your baking spices a bit. Get to know their flavors—cinnamon, nutmeg, allspice, cloves, cardamom, anise, ginger, mace, juniper, coriander, fennel, lavender, licorice, saffron, star anise. Learn their personality. Start with two, one in the pudding and one in the sauce. Spices are strong and thus tend to be mutually complementary yet retain their distinct aromatic character. Give it a try and see what you find!
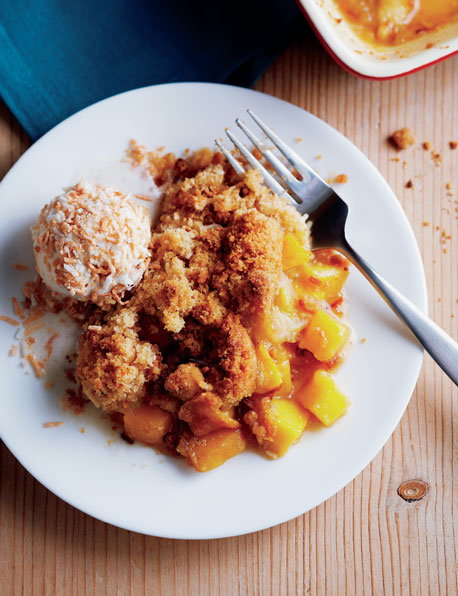
I grew up in apple country, and I’ve been eating (and later baking) apple oatmeal crisps since I could walk, so it didn’t take me long to create this island version when I washed ashore as a Caribbean chef. This dish was an immediate and bona fide hit on my dessert menu. The flavors and fruit may be different but it’s still an apple oatmeal crisp to me! SERVES 4 TO 6
For the filling
3 ripe mangoes, peeled and diced
4 bananas, cut in chunks
½ cup (125 mL) of brown sugar
The zest and juice of 1 lime
¼ cup (60 mL) of all-purpose flour
For the topping
1 cup (250 mL) of all-purpose flour
1 cup (250 mL) of sweetened shredded coconut
1 cup (250 mL) of brown sugar
1 teaspoon (5 mL) of nutmeg
½ cup (125 mL) of butter, melted
For serving
1 cup (250 mL) or so of toasted flaked coconut
Your favorite vanilla ice cream
Preheat your oven to 375˚F (190˚C) and turn on your convection fan if you have one. Lightly oil an 8-inch (2 L) square baking dish.
Craft the filling. In a medium bowl, combine the mangoes, bananas, brown sugar, and lime zest and juice. Toss until the works are well mixed and the sugar has dissolved onto the fruit. Sprinkle on the flour and toss just until evenly combined. Pile the works into the baking dish and spread evenly.
Create the topping. In a medium bowl, whisk together the flour, coconut, brown sugar, and nutmeg, evenly distributing the textures and flavors. Drizzle with the melted butter and mix the works together with your fingers, forming a crumbly topping. Sprinkle evenly over the fruit mixture. Bake until bubbly and golden brown, 30 to 45 minutes.
Put the toasted coconut in a bowl. Scoop the ice cream into small balls and roll them in the crispy coconut. Nestle alongside spoonfuls of the warm crisp. Serve and share!
TWIST
If you can imagine the creative thread connecting this dish to an old-fashioned apple oatmeal crisp, then you can imagine the ideas along the way. With these basic measures, a baking dish, and a hot oven, you can reliably produce a delicious fruit crisp with whatever ingredients and ideas you have lying around.
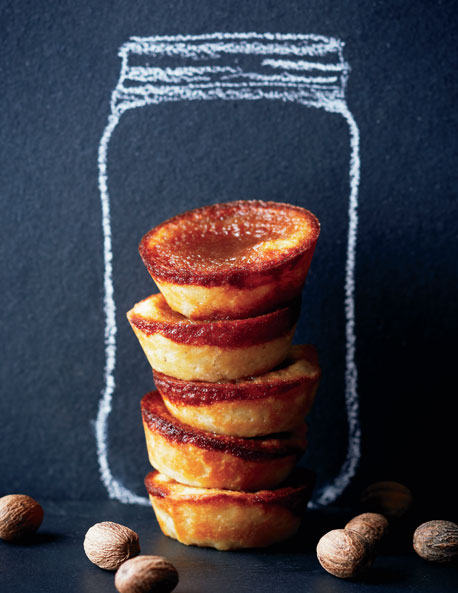
Can you monkey with a classic? Is it allowed? Sure, but be prepared to justify your actions. Argue that brown butter has ten times more flavor than plain melted butter. Affirm that anyone can make plain pastry, but you prefer nutmeg-scented butter pastry. Assert that the corn syrup in normal butter tarts is bland, that maple syrup is much tastier. Stand your ground and watch as the end justifies the means. MAKES 24 TARTS
For the pastry
3 cups (750 mL) of all-purpose flour
1 cup (250 mL) of sugar
1 teaspoon (5 mL) of freshly grated nutmeg
½ teaspoon (2 mL) of salt
1 cup (250 mL) of rock-hard frozen butter
½ cup (125 mL) of ice water
For the filling
2 cups (500 mL) of butter
1 cup (250 mL) of real maple syrup
1 cup (250 mL) of brown sugar
4 teaspoons (20 mL) of vanilla extract 4 eggs
¼ cup (60 mL) of all-purpose flour
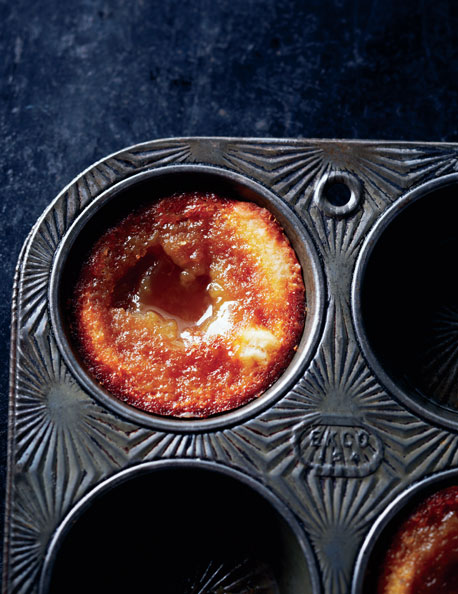
Preheat your oven to 450˚F (230˚C) and turn on your convection fan if you have one. Lightly oil a standard muffin pan.
First make the pastry. In a large bowl whisk together the flour, sugar, nutmeg, and salt, evenly distributing the finer powders amidst the coarser ones. Grasp the butter and firmly grate it through the large holes of a box grater into the flour below. Working quickly, toss the flour and butter shards together with your fingers until the fat is evenly distributed throughout the flour. The cold, separate pieces will yield dividends in flavor and texture as the butter creates flaky layers of pastry.
Sprinkle the ice water into the works and stir into a dough mass with the handle of a wooden spoon. Working quickly so the heat of your hands doesn’t begin to melt the butter, knead the works a few times until the dough gathers up all the flour in the bowl. Fold it over a few more times to add a bit more strength to the dough and a few more flaky layers to the pastry.
Flour your hands, the dough, the work surface, and a rolling pin. Roll the pastry out into a circle about 15 inches (38 cm) wide and ¼ inch (5 mm) thick. Using a 3½-inch (9 cm) cookie cutter (or an empty 19-ounce/540 mL can with both ends removed, or the ring from a wide-mouth canning jar), cut circles from the pastry, as many as you can. Form a pleat along one side and fit the pastry into the muffin cups, evenly filling each cup right to the rim. Gather up the remaining dough, roll out, and repeat.
Now craft the filling. Brown the butter by melting it in a saucepan, then keep on cooking it, swirling gently. Eventually the moisture in the butter will heat, steam, foam, and evaporate away. Once that moisture is gone, the butter fat left behind can rise in temperature—past the boiling point of water—into the browning, flavoring zone. Take it as far as you dare—the deeper the color, the deeper the flavor—but be ready. The line between brown and burnt black is crossed quickly, and turning off the heat to stop the cooking isn’t enough. Pouring in the maple syrup will do the trick, though. Let cool for 10 minutes.
Whisk together the brown sugar, vanilla, and eggs, then whisk into the butter. Lastly, stir in the flour.
Evenly divide the filling among the pastry shells. Bake until the pastry is beautifully browned and the filling is partially set but still a bit runny, about 12 minutes. Cool slightly until you can remove the tarts from the pan. Serve and share!
TWIST
It’s easy to assume that recipes are written in stone, that a dish can’t change because “that’s the way it’s always been done.” It’s also easy to see cooking as an opportunity to stir your own personality into your food. The key is to be present, to be watchful, to smell and taste and absorb as many of the clues in front of you as you can. It won’t happen overnight, but eventually you’ll feel confident enough to spot an opportunity and dream up a twist of your own.
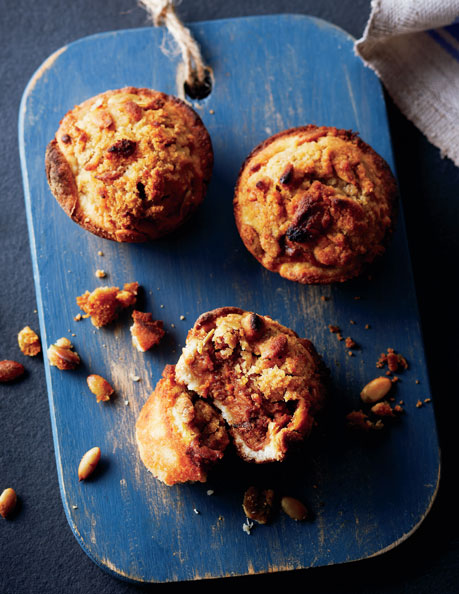
Can you make a butter tart taste like a pumpkin pie? Yes! These tarts evolved from basic butter tarts, but they’ve come so far that they’re really more like little mini pumpkin pies. But does it really matter where they came from? It’s where they’re heading that counts. In this case, your table! MAKES 24 TARTS
1 recipe for tart pastry (page 234)
For the filling
A 28-ounce (796 mL) can of pure pumpkin purée (not pie filling)
4 eggs, lightly beaten
2 cups (500 mL) of brown sugar
1 cup (250 mL) of butter, melted
2 teaspoons (10 mL) of vanilla extract
¼ cup (60 mL) of all-purpose flour
1 tablespoon (15 mL) of grated frozen ginger
1 tablespoon (15 mL) of freshly grated nutmeg
1 tablespoon (15 mL) of cinnamon
1 teaspoon (5 mL) of ground allspice
1 teaspoon (5 mL) of ground cloves
For the crumble topping
1 cup (250 mL) of all-purpose flour
1 cup (250 mL) of pumpkin seeds
1 cup (250 mL) of brown sugar
½ cup (125 mL) of butter, melted
Preheat your oven to 450˚F (230˚C) and turn on your convection fan if you have one. Lightly oil a standard muffin pan.
Make the pastry according to the instructions on page 234, grating in a whole nutmeg instead of just 1 teaspoon. Roll it out and cut it as described and line the muffin cups.
Next, craft the filling. In a large bowl, combine the pumpkin, eggs, sugar, butter, vanilla, flour, ginger, nutmeg, cinnamon, allspice, and cloves. Whisk together until smooth. Evenly fill the pastry shells.
Make the crumble topping. In a medium bowl, use your fingers to toss together the flour, pumpkin seeds, and brown sugar. Drizzle with the butter and mix the works evenly until a light, crumbly topping forms. Top each tart with its fair share.
Bake until the pastry is beautifully browned and the filling cooks through and puffs slightly, about 20 minutes. Cool slightly until you can remove the tarts from the pan. Serve and share!
TWIST
In cooking, one idea can lead to another and another. A pumpkin pie theme leads to lots of aromatic baking spices and pumpkin purée, which together call for a crisp topping. And what better to top pumpkin pie tarts with than pumpkin seeds?
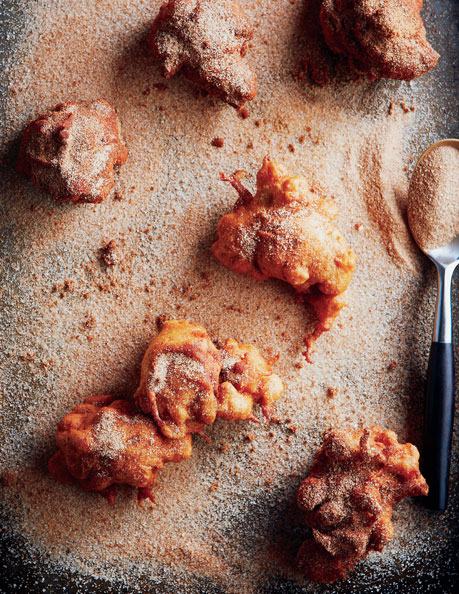
This classic country fair treat delivers the same flavors as homemade doughnuts but without the hassle. Fritter batters are easy to make and spectacularly delicious. This is the sort of treat you haul out after you’ve served calves’ liver or burnt dinner or the like—to rebuild your reputation! MAKES 20 OR SO FRITTERS
For the cinnamon sugar
½ cup (125 mL) of sugar
2 tablespoons (30 mL) of cinnamon
For the fritters
1 cup (250 mL) of buttermilk
2 eggs
1½ cups (375 mL) of all-purpose flour
½ cup (125 mL) of brown sugar
1 tablespoon (15 mL) of cinnamon
2 teaspoons (10 mL) of baking powder
½ teaspoon (2 mL) of salt
1 pound (450 g) of lard (or 2 to 3 cups/500 to 750 mL vegetable oil)
2 green apples (unpeeled), cut in small dice
Make the cinnamon sugar first. Simply whisk together the sugar and cinnamon in a medium bowl. Set aside.
For the fritters, pour the buttermilk into your blender or food processor; crack in the eggs. Pulse until smooth, just a moment or two. Add the flour, brown sugar, cinnamon, baking powder, and salt. Blend the works into a smooth batter. Let the batter rest for 15 minutes or so, allowing the stressed-out gluten to relax and tenderize.
While the batter rests, melt the lard in your favorite high-sided skillet or large pot over medium-high heat. For best results you’ll need a pool about 1 inch (2.5 cm) deep or so. Heat the lard until a deep-fat thermometer reads 365˚F (185˚C).
When you’re ready to fry, stir the apples into the batter. Carefully drop heaping tablespoonfuls of the batter into the hot oil, being careful not to crowd the pan. Cook until golden brown and crispy on the bottom, just 1 or 2 minutes, then flip and give the same treatment to the other side. The oil will cool slightly and you may need to crank the heat to keep close to 365˚F (185˚C). When the fritters are crispy and dark brown on both sides, carefully remove them with a skimmer or slotted spoon, toss them in the cinnamon sugar until evenly coated, then transfer to paper towels. Bring the fat back up to its optimum temperature before repeating with the remaining batter. Serve and share!
TWIST
Feel free to try this treat with bananas and nutmeg instead of apples and cinnamon. Simply substitute 2 teaspoons (10 mL) of nutmeg for the cinnamon and chop 2 bananas instead of the apples. See which version your table prefers and see if you can dream up another!
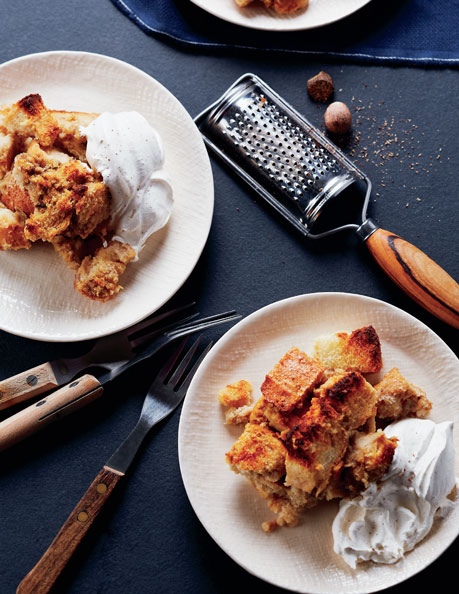
A simple bread pudding is one of the easiest treats to get into the oven and onto the table. It’s easy for a few flavors to tag along as well, because once you’ve mastered the basic recipe you can easily freestyle your own ideas into the works. SERVES 8
For the bread pudding
4 eggs
1 cup (250 mL) of milk
1 cup (250 mL) of whipping cream
¼ cup (60 mL) of any rum
1 cup (250 mL) of brown sugar
1 tablespoon (15 mL) of vanilla extract
4 ripe bananas, mashed but still chunky
1 loaf of your favorite bread, cubed
For the whipped cream
2 cups (500 mL) of whipping cream
2 tablespoons (30 mL) of sugar
1 teaspoon (5 mL) of freshly grated nutmeg
1 teaspoon (5 mL) of vanilla extract
Preheat your oven to 350˚F (180˚C) and turn on your convection fan if you have one. Lightly oil a 13- × 9-inch (3 L) baking dish.
To make the pudding, in a large bowl, beat the eggs. Add the milk, cream, rum, brown sugar, and vanilla. Whisk until thoroughly combined. Stir in the chunky banana. It’s OK if the banana makes the works a bit lumpy. Stir in the bread cubes, evenly coating every piece with the delicious custard. Let the works rest until the bread absorbs all the custard, 10 minutes or so. Pour the mixture into the baking dish. Bake until the pudding is set and cooked through and the top is golden brown, about 40 minutes.
Meanwhile, whip the cream with the sugar, nutmeg, and vanilla until soft and pillowy.
Serve and share with mounds of whipped cream!
TWIST
Bread pudding started out as an easy way to use up stale bread, so don’t feel limited in your bread choices—any average-sized loaf works. Just remember, the better the bread, the better the pudding. Experiment with different baking spices, both in the whipped cream and in the pudding. Try stirring in other fruit, like apples. Nuts work well too. And of course chocolate in its many forms can sneak in—cocoa powder or melted chocolate in the batter or chips in the pudding. Your call!
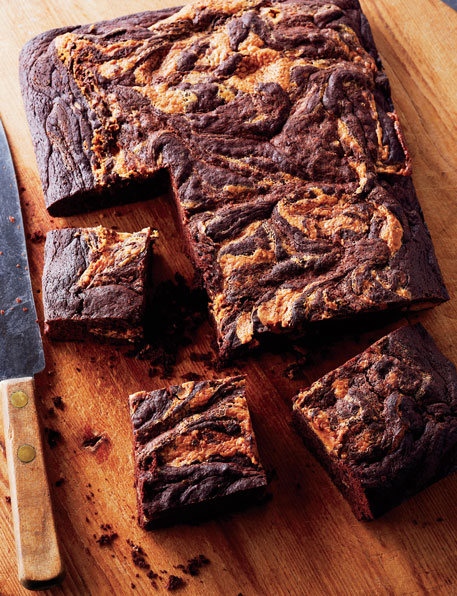
The only thing better than a batch of warm dark chocolate brownies is a batch of the same fudgy goodness with peanut butter swirled in. It’s a surprisingly simple twist to a classic batch of brownie love! MAKES 12 LARGE BROWNIES
For the brownies
1 cup (250 mL) of all-purpose flour
½ cup (125 mL) of cocoa powder
1 teaspoon (5 mL) of baking powder
½ teaspoon (2 mL) of salt
8 ounces (225 g) of bittersweet chocolate, chopped
1 cup (250 mL) of butter
4 eggs, lightly beaten
2 cups (500 mL) of brown sugar
1 tablespoon (15 mL) of vanilla extract
For the peanut butter swirl
½ cup (125 mL) of your favorite peanut butter
2 tablespoons (30 mL) of butter
¼ cup (60 mL) of icing sugar
½ teaspoon (2 mL) of nutmeg
½ teaspoon (2 mL) of vanilla extract
Preheat your oven to 350˚F (180˚C) and turn on your convection fan if you have one. Lightly oil a 13- × 9-inch (3 L) cake pan and fit it with a piece of lightly oiled parchment paper that covers the bottom and extends up and over two of the sides.
Begin with the brownies. In a bowl, whisk together the flour, cocoa powder, baking powder, and salt. Set aside. Set up a double boiler to melt the chocolate while insulating it from direct, damaging heat by placing a large heatproof bowl over a smaller pot of barely simmering water. Put the chocolate and butter in the bowl and gently stir the works until the chocolate is completely melted and the mixture is smooth and shiny. Remove the bowl from over the water, then whisk in the eggs, sugar, and vanilla until smooth. Add the flour mixture, stirring the works until smooth yet again. Set aside.
Now craft the peanut butter swirl. In a small bowl, whisk together the peanut butter, butter, icing sugar, nutmeg, and vanilla until smooth. Sneak a taste if you like. Set aside.
Pour half of the brownie batter into the prepared pan, shaking and easing it evenly into the corners. Evenly distribute small spoonfuls of the peanut butter mixture over the chocolate batter, using about half the mixture. Top with the remaining brownie batter. Dot with the remaining peanut butter mixture. Drag a spoon handle through the peanut butter batter, adding a swirl effect to the works. Bake until a toothpick inserted in the center comes out clean, about 30 minutes. When they’re cool enough to handle, cut, serve, and share!
TWIST
Brownies are not the sort of thing to take too seriously— they’re ripe for experimenting. Try skipping the peanut butter and instead adding a layer of broken-up Skor bars or your favorite candy bar to the middle. Or bake the brownie batter in small terracotta flowerpots and top with cookie crumb dirt and gummi worms.
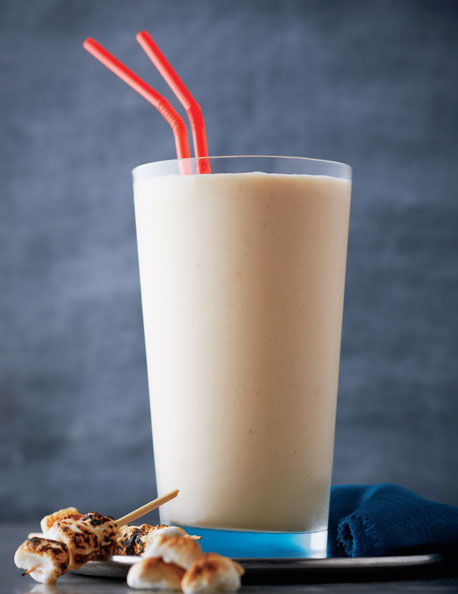
See what happens when you relax in the kitchen and try out your own ideas, no matter how crazy? I mean, imagine browning and toasting an entire bag of mini marshmallows under your broiler, then tossing them into a milkshake. Sheer madness. Now stop imagining and do it! SERVES 4 TO 6 (IF YOU FEEL LIKE SHARING)
A 1-pound (450 g) bag of mini marshmallows
2 cups (500 mL) of milk
6 to 8 large scoops of your favorite vanilla ice cream
1 teaspoon (5 mL) of vanilla extract
Set an oven rack on the bottom shelf and remove any other racks. Preheat your broiler.
Spread the marshmallows out evenly on a large baking sheet. Place the pan on the bottom shelf and broil until puffed, golden brown, and melting, 6 or 8 minutes. Watch closely—the secret is to brown them as much as possible without blackening.
Add the milk, ice cream, vanilla, and half of the marshmallows to your blender and process until a smooth, thick milkshake forms. Add the remaining marshmallows and give the works a final buzz. Pour into glasses, serve, and share!
TWIST
You can’t improve on perfection, but if you happen to have a bit of true orange extract around, just a splash or two will magically transform a blender full of this shake into a delicious creamsicle milkshake!