Face: Side View: Demonstration
Placing the elements for a side view of a face is similar to that for the front and three-quarters view. As with all drawings, look for proportions and places where the elements align. You may want to examine the proportions with a tool such as a pencil, dividers or a sewing gauge.
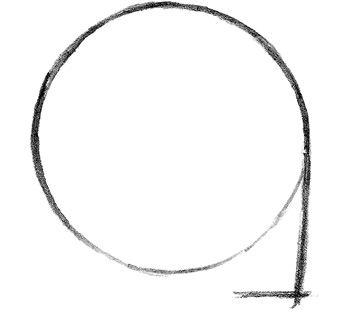
STEP 1 Sketch the Basic Shapes
Sketch a circle for the top and middle portion of the head. Sketch a vertical line down from the right side of the circle for the front of the face. Add a short horizontal line at the end of the vertical line, slightly lower than the circle, as the base of the chin.

STEP 2 Add Lines for the Eye, Nose and Ear
Sketch a horizontal line, halfway between the top of the chin, the circle and the base of the chin, for the placement of the eye. Sketch a vertical line to the right of the circle to help with the placement of the nose. Another vertical line, coming from the center of the circle, will help with the placement of the ear.
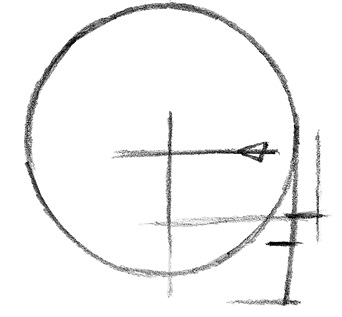
STEP 3 Add the Eye Shape and Lines for the Nose and Mouth
Sketch a triangle for the eye, placing it about a third of the distance from the right edge of the circle to the vertical line for the ear. Sketch a horizontal line a little less than half the distance from the eye line to the chin line for the base of the ear. Add a short horizontal line a little less than half the distance from the previously established nose line to the chin line to help place the mouth.
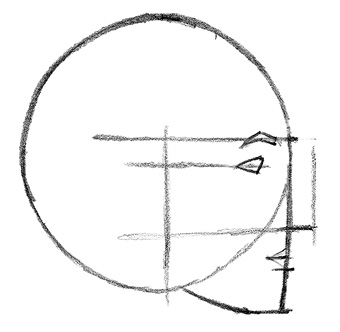
STEP 4 Add Eyebrows and Lips
Add a horizontal line for the eyebrow. Sketch the eyebrow, making it slightly curved. Add lines for the lips, connecting them to the vertical line in the front of the face.
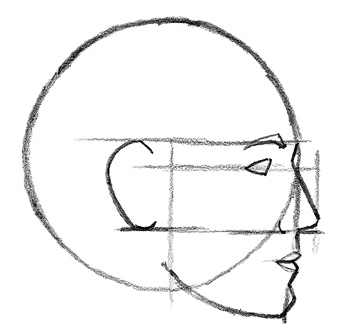
STEP 5 Add the Ear and Form the Profile
Sketch the ear shape, placing it slightly left of the central vertical line and from the brow line to the nose baseline. Form the profile of the face and complete the jawline, which ends near the lower right part of the ear.
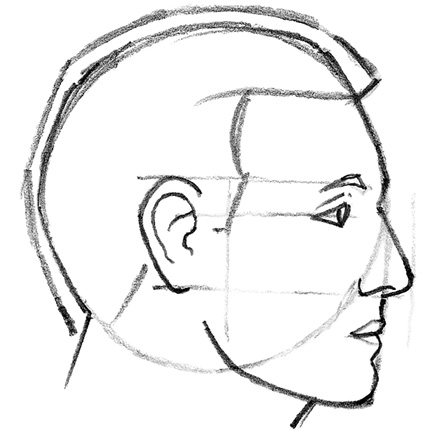
STEP 6 Add Details
Add details to the eyes, ears and nose. Add the hair and neck.


