I first introduced Honeycomb to you in Zentangle® Untangled, and I had a really positive response to it. I decided to include it here again to add some further ideas on how to use it as well as introduce it to new readers.
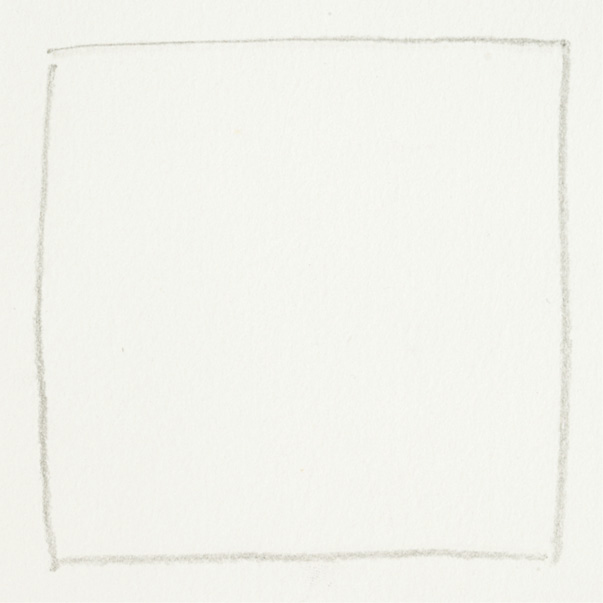
STEP 1 Create a pencil border on your tile.
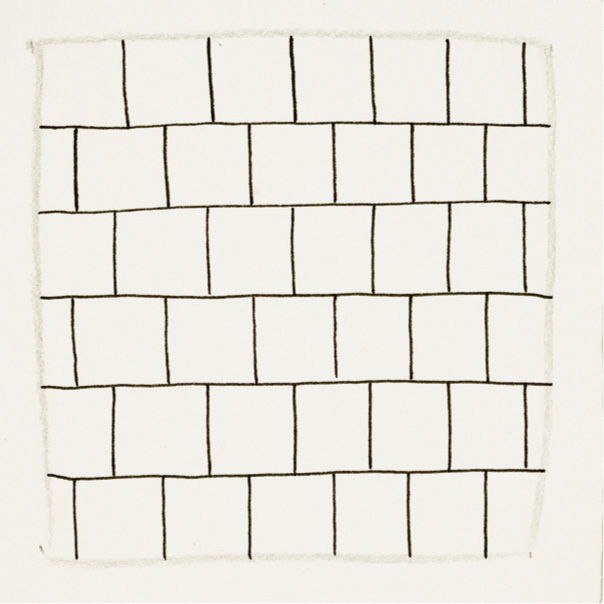
STEP 2 Draw evenly spaced lines across the tile—about five should fit nicely.
Then turn your tile 90 degrees and draw lines across to give your tile a “square brick” appearance.

STEP 3 Across each row, connect the bottom third of each vertical line to the corners of the square beneath it. This will look like roofs on houses. Do this to all the squares.

STEP 4 Turn the tile 180 degrees. Repeat step 3. You’ll see a zigzag effect take shape across your tile.

STEP 5 Fill in the zigzag effect as desired. My suggestion is to solidly color one direction and put a pattern (I’ve used fine lines) in the other.
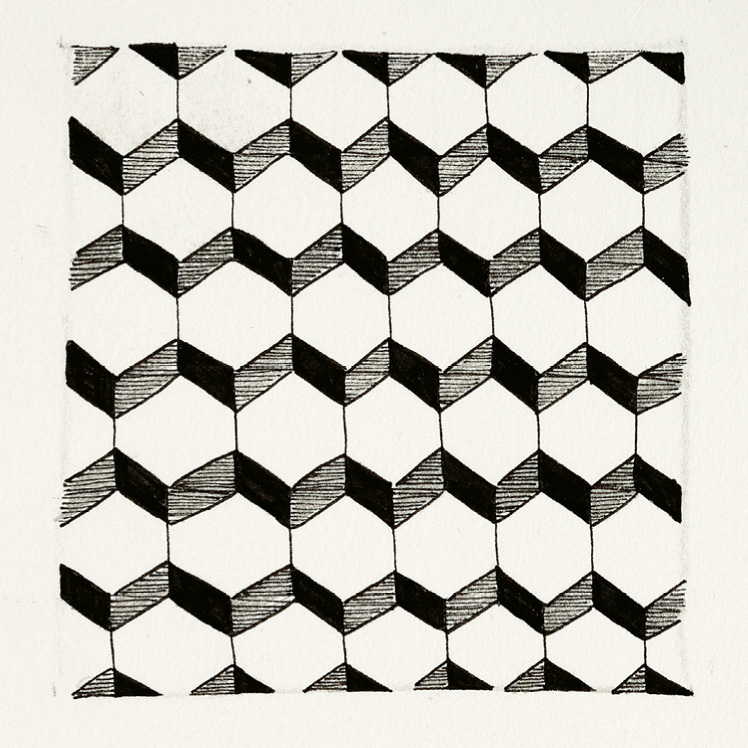
STEP 6 Shade as desired. I suggest choosing one part of each shape and shade that area in each hexagon.
Use these tiles to practice Honeycomb. It looks complicated, but it isn’t. You just need to concentrate until it comes instinctively to you.
Downloadable worksheet available at http://www.createmixedmedia.com/zentangle-untangled-workbook