23
Hairpin
Surprisingly easy to sculpt, ornate little hairpins like these can also be enormously satisfying to whittle, offering an opportunity to carve using slow, considered strokes. It’s best to seek out source material from a particularly sturdy, tough wood. Therefore trees like yew, hornbeam and oak provide the best stems for carving, adding durability to your finished hairpins. As with many of the more delicate carvings in this book, sanding and oiling to finish will embellish your woodwork, highlighting the grain and bringing depth to the wood.

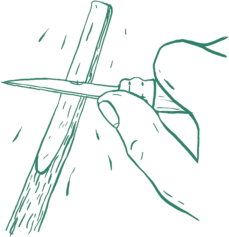
1. Select a 1.5–2cm (⅝–¾in) diameter piece of wood, 15–20cm (6–8in) long. Taper one end, beginning your strokes roughly 7cm (2¾in) back from the top. Do this on both sides to create an even, flat surface around 3mm (⅛in) deep.
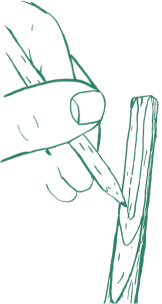
2. With a pencil, draw an outline of the hairpin on the flat surface.
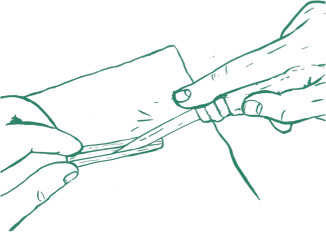
3. Carefully cut the shape out – use a chopping board or equivalent to press down on when necessary. Make sure to leave the bottom part attached to the stick.
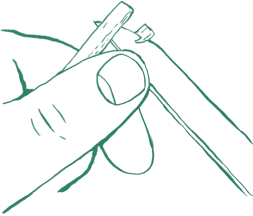
4. Carve points on the two ends using small push cuts. Sand the hairpin thoroughly and carefully.
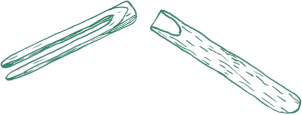
5. Sever the hairpin outline from the rest of the stick – it is no longer necessary as a grip while whittling the hairpin. You can do this either using a wood saw or by whittling down the end of the stick until you have reached the back of the pin.
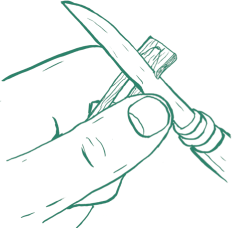
6. Carve around the bottom outline. Sand the whole hairpin a little more to soften.

7. Oil the pin to finish (see Helpful Extras), and leave to one side to dry.


