37
Bird’s egg
Carving a near-perfect, rounded wooden egg can be an enormously satisfying exercise. Attention to detail is key, using precise cuts to form an evenly curved surface. The eggs in this example mimic the natural scale of a songbird egg, such as that of a thrush or blackbird. However, depending on the wood you have available, size is a matter of personal choice, and large eggs can look equally striking. A good way to display the eggs is to place them inside a homemade nest. Nests can be constructed by weaving together sticks or straw, shaping a hollow in the centre. The eggs themselves can also be painted, exhibiting the colours of a chosen species of bird.


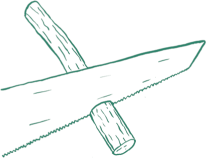
1. Cut a short section of dry wood, around 2–3cm (¾–1¼in) in diameter.

2. Place your penknife blade just off-centre on the stick section, and make a stop cut all the way around, forming a circular line.

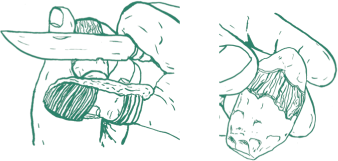
3. Use short paring cuts to begin tapering both sides from the line. Make sure you cut equally all around the shape, rounding the ends evenly. Go slowly with this, and you may want to wear a thumb guard or glove for added protection. The shape should now begin to look like this.

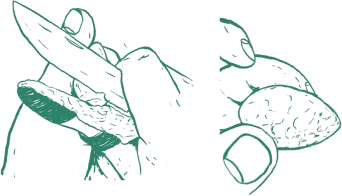
4. Whittle down the very ends to a smooth, rounded curve, implementing progressively shorter cuts.

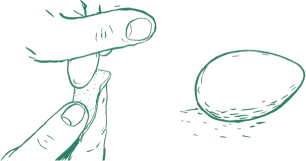
5. Sand thoroughly to finish, beginning with a medium-grit sandpaper before refining with a finer grit.


