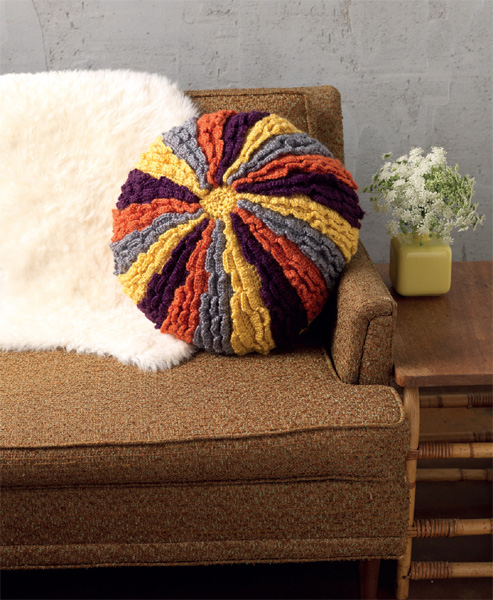
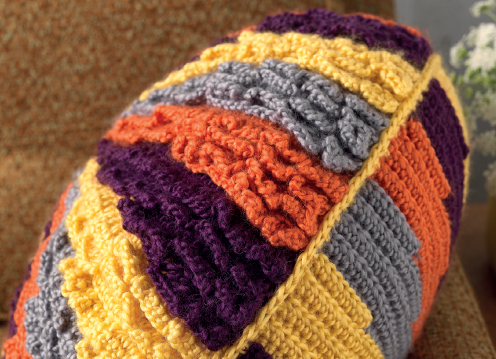
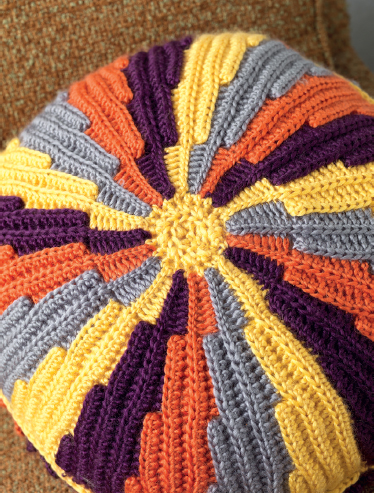
Layers of colorful ruffles join together to create a wedged color wheel that packs a major punch in this tactile cushion. It’s guaranteed to brighten up even the most boring sofa!
DESIGNED BY KATHY MERRICK
19" (48.5 cm) in diameter.
Each wedge = 9" × 2½" (23 × 6.5 cm).
Worsted weight (#4 Medium).
Shown here: Caron Vickie Howell Sheep(ish) (70% acrylic, 30% wool; 167 yd [153 m]/3 oz [85 g]), in #12 Yellow(ish) (A), #3 Grey(ish) (B), #14 Coral(ish) (C), and #5 Plum(ish) (D), 2 skeins each.
Size I/9 (5.5 mm), or size needed to obtain gauge.
19" (48.5 cm) round pillow form; tapestry needle.
14 ¼ sts and 13 rows = 4" (10 cm) in hdc blo. Take time to check your gauge.
Note: Work in back loops only.
1st Wedge
ROW 1 (RS): With color A, ch 33, hdc into 3rd ch from hook (ch 2 counts as first hdc throughout) and in each ch to end—32 hdc, ch 1, turn.
ROW 2: Sl st in first 8 hdc, hdc to end of row, ch 2, turn.
ROWS 3 AND 4: Hdc in next 23 hdc—24 hdc, ch 2, turn.
ROWS 5 AND 6: Hdc in next 15 hdc—16 hdc, ch 2, turn.
ROW 7: Hdc in next 7 hdc—8 hdc, ch 2, turn.
ROW 8: Hdc in next 7 hdc, fasten off color A.
2nd Wedge
Attach color B to last hdc of 1st Wedge, ch 2.
ROW 1: Hdc in next 7 hdc across in Row 8 of 1st Wedge, hdc in each of next 8-st hdc step, hdc in each of next 8-st hdc step, hdc in each of last 8-st sl st step—34 hdc, ch 1, turn.
ROWS 2–8: Rep Rows 2 to 8 of 1st Wedge, fasten off color B.
3rd and 4th Wedges
Rep as for 2nd Wedge with colors C and D.
5th to 20th Wedges
Rep as for 2nd Wedge, continuing in color sequence A, B, C, and D.
Chart Key
Attach color A to 1st Wedge at narrow end and work around inner edge as foll:
ROW 1: Hdc in each hdc post of each wedge—20 hdc, turn.
ROWS 2 AND 3: Hdc2tog across—5 hdc, turn, do not fasten off.
Seaming
Sl st edges of 1st Wedge tog with last wedge in each st across. Fasten off.
1st Wedge
Work Rows 1–8 as for 1st Wedge of back, do not fasten off, turn.
Ruffle
Note: Work in front loops only on RS of wedge.
ROW 1 (RS): Ch 3 (counts as first dc), *2 dc into next front loop, dc into next loop, ch 3, sc into next loop, ch 3, dc into next loop; rep from * once more, ending rep with sc in last loop, ch 10, turn.
ROW 2: Sc in first loop of next step, ch 3, dc in next loop, 2 dc in next loop, dc in next loop, ch 3, insert hook in 5th ch of ch 10 from Row 1, then sc in next loop tog with ch, ch 3, dc in next loop, 2 dc in next loop, dc in next loop, *ch 3, sc in next loop, ch 3, dc in next loop, 2 dc in next loop, dc in next loop; rep from * once more, ch 3 (does not count as dc in next row), turn.
ROW 3: *Dc into first loop, 2 dc into next loop, dc into next loop, ch 3, sc into next loop, ch 3; rep from * 4 times more, sc in last loop, ch 10, turn.
ROW 4: Rep Row 2 across 32 loops, do not ch 3, fasten off.
2nd Wedge
Work as for 2nd wedge of back, then work ruffle as for 1st Wedge of front.
3rd and 4th Wedges
Rep as for 2nd wedge with colors C and D.
5th to 20th Wedges
Rep as for 2nd wedge, continuing in color sequence A, B, C, and D.
Center and Seaming
Work as for back.
With WS tog, join front and back around circumference by working 8 hdc in each wedge section, leaving 4 wedges open. Do not fasten off. Insert pillow form.
Cont joining last 4 wedges of front and back tog. Fasten off. Weave in ends.
COLOR TIP
Adding one neutral (here, gray) to a colorful mix helps make projects look sophisticated rather than childlike. If gray’s not your thing, try black, white, or tan.