“To every action there is always an equal and opposite reaction.”
-Sir Isaac Newton
The world can be a confusing and complicated place, but one thing remains true. The universe will always strive to maintain balance in order to sustain itself. Your body is no different, it too must maintain balance between opposing muscle groups in order to function properly. Practicing handstands can help you achieve that balance (pun intended).
Seriously though, if you do pull-ups all the time and don’t work any overhead pressing into your routine you will undoubtedly be setting yourself up for shoulder problems, including limited range of motion, poor posture, impinged tendons or worse.
Yep, you’ve gotta do some kind of overhead pressing to keep you’re joints healthy. The most common way to do this is with weights, in which case you’ll have to join a gym or get a set of dumbbells, barbells or kettlebells to keep in your home. The alternative, of course, is to practice handstands. Not only can handstands build strength and endurance in your shoulders, they also provide an active stretch for the lats. Hand-balancing also improves neurological function and body awareness. Additionally, inverted positions are excellent for the body’s circulation.
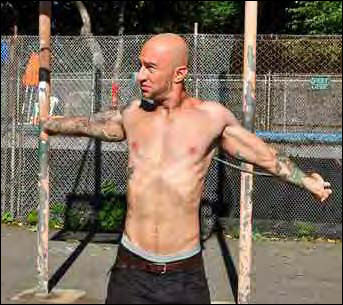
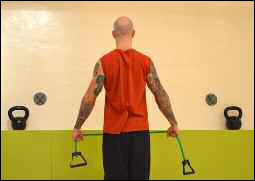
Before you begin handstand practice, I recommend that you prep your shoulders by performing shoulder rollouts. Though this exercise is often referred to as a shoulder dislocation, practicing these should actually make your shoulder joints stronger and less likely to dislocate, so I call them shoulder rollouts.
It is also worth noting that this is the only exercise discussed in this book in which I recommend a piece of equipment other than a bar. A rubber stretch band is the best thing to use for these.
Hold the stretch band in front of you with your hands just wider than hip distance. Pull your hands outward to create some tension on the band. From here reach your arms up overhead and bring them all the way around to the other side.
Not only can handstands build strength and endurance in your shoulders, they also provide an active stretch forthelats.
You’ll need to stretch the band wider as you go around your back, so make sure there is enough slack on your band to allow you to do this. Just like when you’re doing pull-ups, be careful not to let your shoulders shrug upward as your arms go overhead.
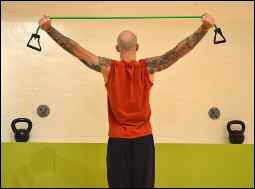
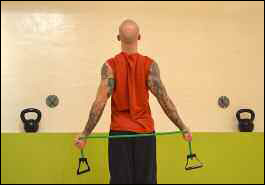
Don’t let your shoulders shrug upward as your arms go overhead.
Shoulder rollouts are actually a great warm-up before any upperbody workout. I highly recommend that you make them a regular part of your fitness regimen. If you don’t have access to a rubber exercise band, you can use a stick or other long, lightweight object. Backward arm circles are another good substitute for those of you looking to avoid additional equipment.
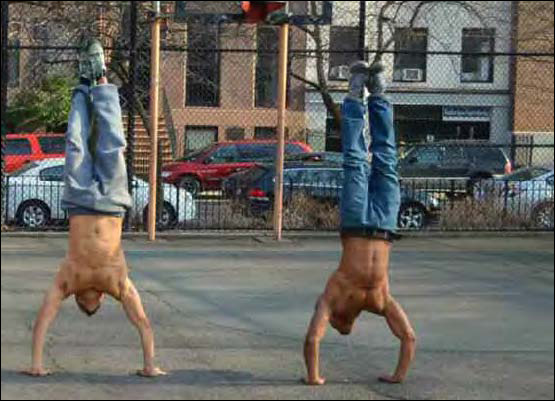
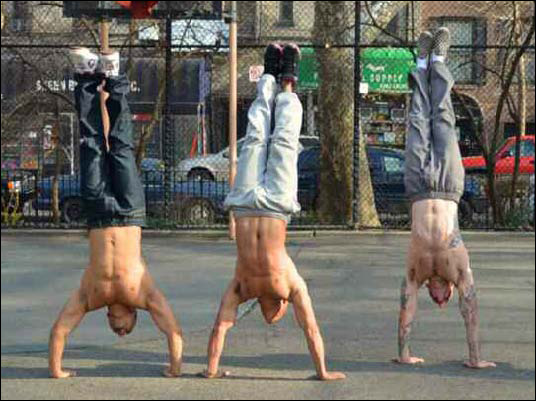
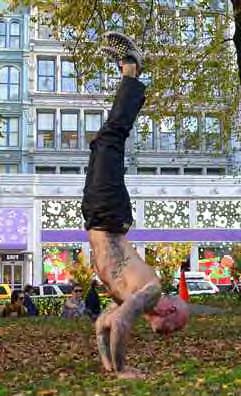
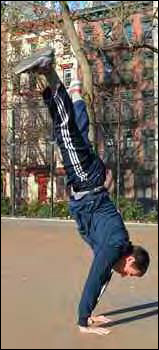
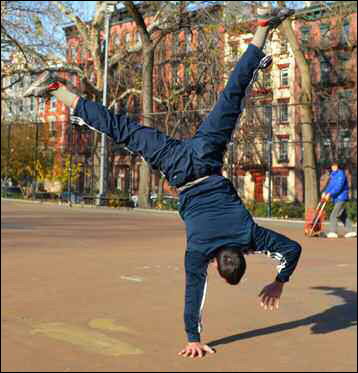
In the beginning, you’ve got a few things that you can practice concurrently in order to build to a freestanding handstand. The first thing to try is kicking up into a handstand against a wall.
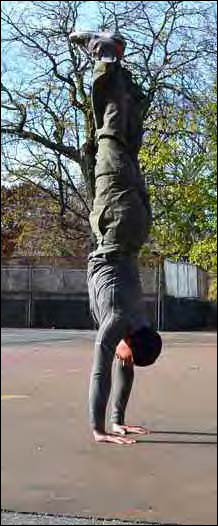
Start out by facing the wall, then reach both your hands up over your head and take a small step forward. From here, plant your hands firmly on the ground a few inches away from the wall with your elbows locked as you kick one leg up and then the other. If you can get into the handstand position, try to hold it for several seconds before coming down. Don’t push your luck right away though, gradually build up to longer holds. In time, you should aim to hold your handstand as long as possible without coming down. I recommend a minimum of one minute against the wall before you begin working on a freestanding handstand.
If you aren’t strong enough (or confident enough) to jump right in with the kick-up method, check out these other suggestions and come back to the kick-up when you feel ready.
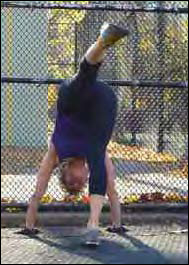
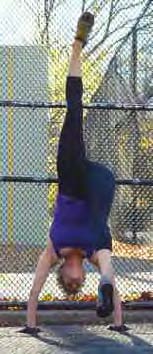

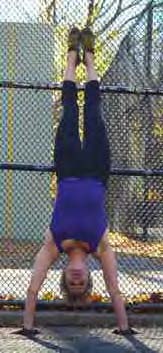
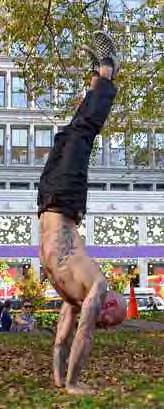
Keep your legs straight when kicking up into your handstand.
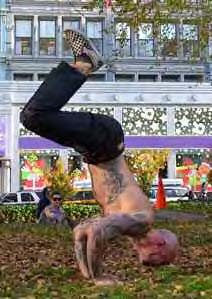
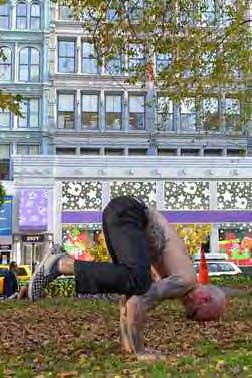
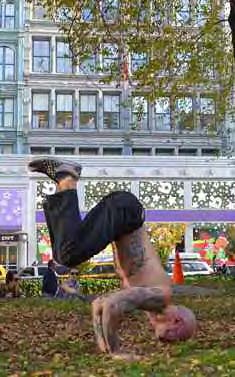
Known as a crow pose in yoga, the frogstand will give you a feel for balancing on your hands, without the instability of having to support your body in a vertical position. To perform a frogstand, squat down and place your hands on the floor with your elbows slightly bent. Next, bring your knees up towards your armpits and rest your shins on the backs of your arms (your triceps). Try to look out rather than down as you tip your weight forward and come off your feet. In the beginning, you can bend your elbows as much as you need to. Think about making a little shelf with your arms for your legs to rest on. In time, you’ll be able to straighten out your arms when performing your frog-stand. Once you can accomplish this, you’ll soon be ready for a freestanding handstand.
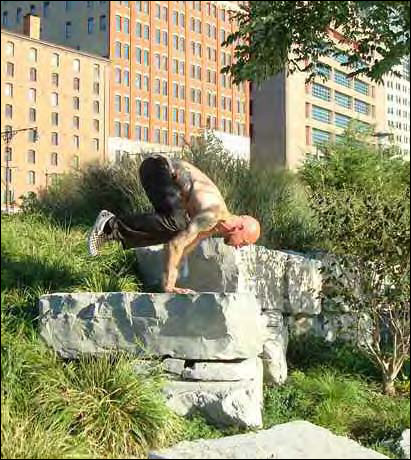
The frogstand can help you get a feel for balancing on your hands.
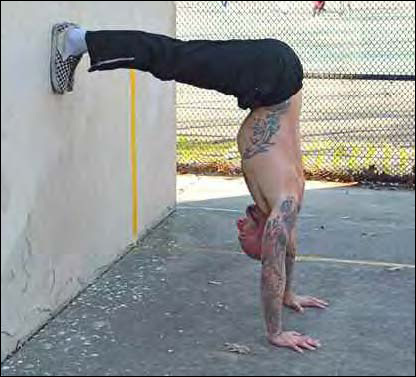
Get into a push-up position with your feet at the base of a wall. Now slowly start to walk your feet up the wall as you gradually bring your hands closer towards it. Start by trying to get your hips over your shoulders like an upside-down L-hold. In time you will be able to get your body fully vertical from this position by walking your feet higher up on the wall and bringing your hands closer to it. Once you can do this, kicking up into a handstand should be no problem.
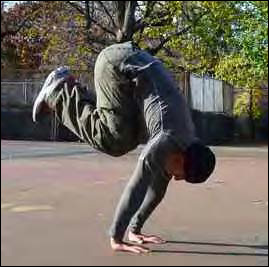
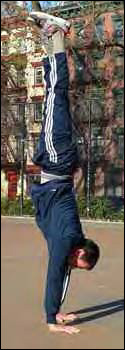
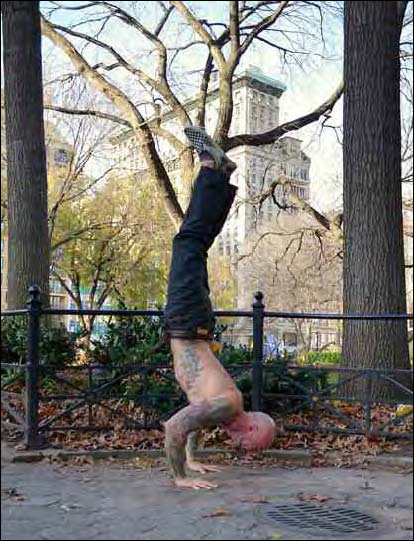
After several weeks or months of practicing those basics, you should eventually be ready to move up to attempting a freestanding handstand. This can be intimidating because there is nothing to catch you if you fall. You must take a leap of faith and go in
with confidence that your body will know what to do if you tip over. If you’re having a hard time getting over your nerves, it can help to have a spotter. It’s can also be helpful to practice on a soft surface like grass or rubber.
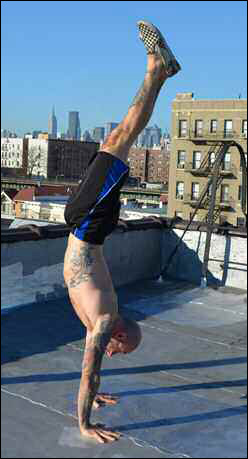
While a free-standing handstand can be a challenging shoulder and arm workout when held for long enough, the balance is typically the most difficult part to learn. It takes a lot of time to find the “sweet spot” between over-balancing (tipping over) or under-balancing (falling back to your feet).
Unlike your foot, which was made for standing, your hand doesn’t have a true heel, so it’s best to put slightly more weight in your fingers than in your palms when balancing on them. If you are a tiny bit over-balanced, you can stay up by pressing your fingers into the ground. When you’re under-balanced, there is less you can do to keep from coming down.
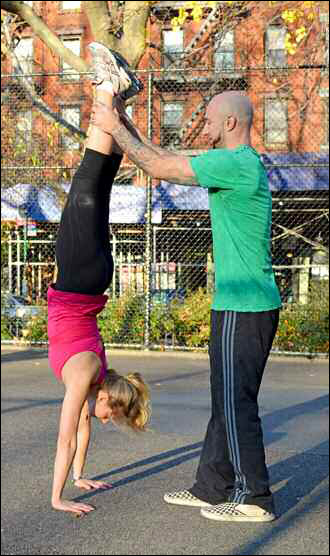
If you’re having a hard time getting over your nerves, it can help to have a spotter.
Since the fear of falling can make training the freestanding handstand intimidating, it’s important to learn how to come down safely when you lose your balance. The two easiest ways to do this are to kick down, like you would coming down from a wall, or to perform a pirouette, which isn’t quite as fancy as it sounds.
If you are in a handstand and you feel yourself losing your balance towards the front of your body (underbalancing), falling to your feet should happen fairly naturally. Just remember to float down gently and maintain straight legs on your descent.
If you feel yourself losing your balance towards the back of your body (overbalancing), the smartest thing to do is lift one hand from the ground and take a small step forward with it. Quickly turn your hips and your body should float down towards your toes. This should also happen somewhat naturally.

Pira-what?
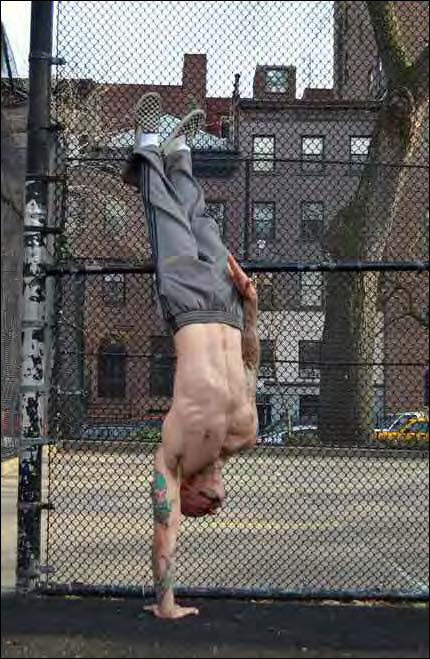
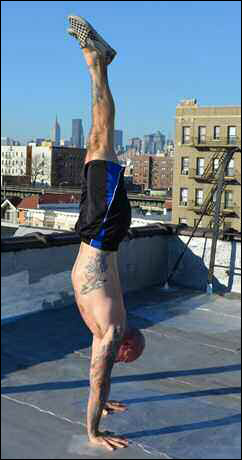
In modern gymnastics, handstands are performed with a perfectly straight line from top to bottom. For this reason, a lot of people will tell you that arching your back during a handstand is bad form. In my experience, however, it is helpful to allow your back to arch while you are learning to find the balance. In time, you can work on reaching your legs upward, pressing into the floor and tightening your abs, lower back and glutes to achieve an aesthetically pleasing straight line from head to toe (or hands to toe as the case may be). Though in theory, a perfectly straight handstand can require less effort to hold in terms of muscular output, the balance is harder to find, especially for people who have limited shoulder mobility. Aim towards the eventual goal of a totally straight handstand, but til then, just try to find the balance wherever you can.
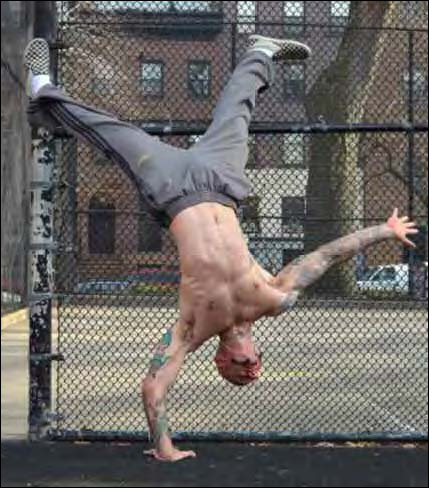
Transitioning from a handstand against a wall to a free standing handstand is a challenging and potentially discouraging process. I was terrible at hand balancing when I started out, but I’ve been practicing for a while now. For me, the key has been consistency; I rarely miss a day of practice, even if it’s just a couple of minutes at the end of a workout. Some days it comes harder than others, but when I fall, I just get up and try again.
The press to handstand is a much more challenging way to get into a freestanding handstand. There are a few different ways to approach it.
The simplest variation is to begin in a frogstand and try to press yourself by extending your legs as you press with your shoulders and arms.
Begin in a frogstand and try to press yourself by extending your legs as you press with your shoulders and arms.
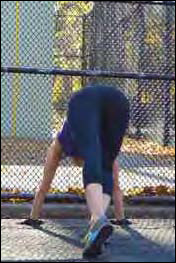
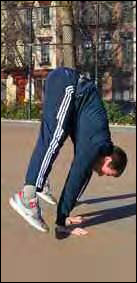
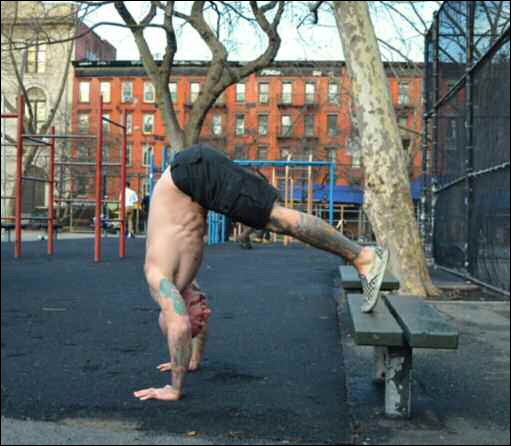
You can also press to a handstand from your feet, by bending over, placing your hands on the ground, and shifting your weight forward into your palms. Engage your core as you raise your legs up. This takes lots of practice and requires better than average flexibility, so keep at it! This can be done from a normal standing position or with your legs in a straddle.
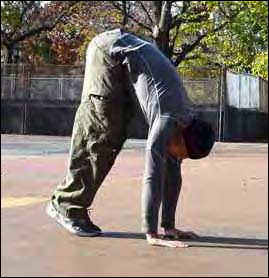
This takes lots of practice and requires better than average flexibility, so keep at it!
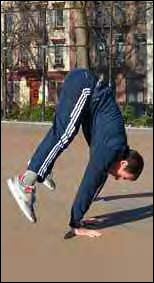
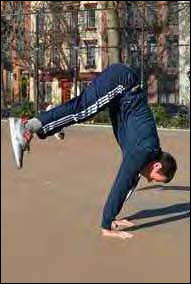

Engage your core as you raise your legs up.
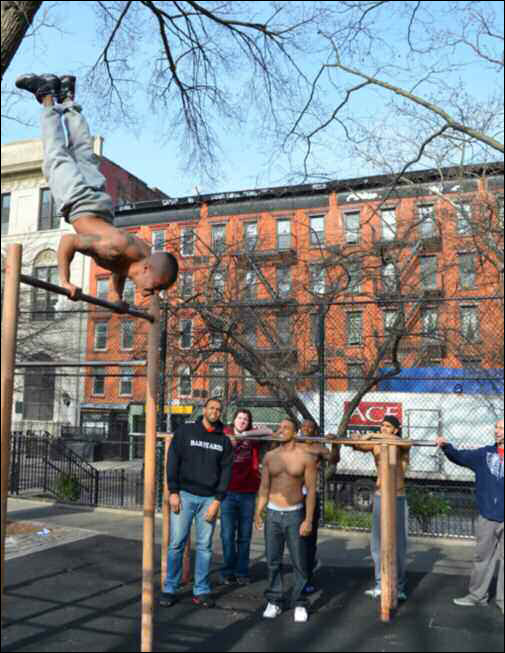
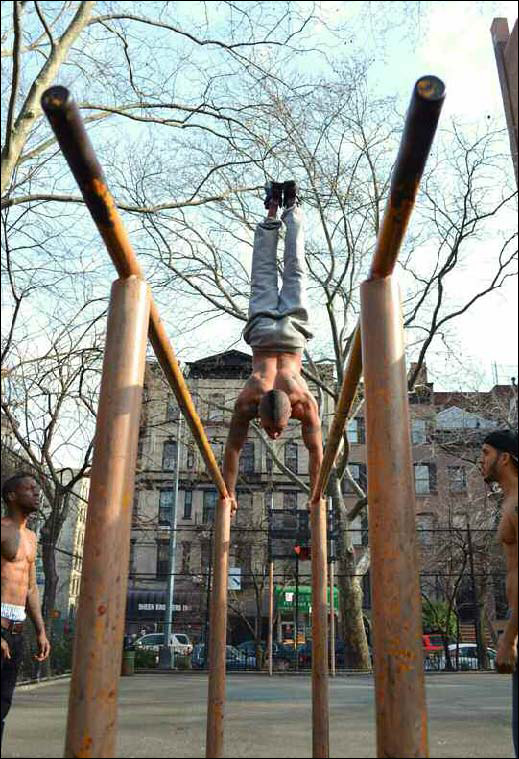
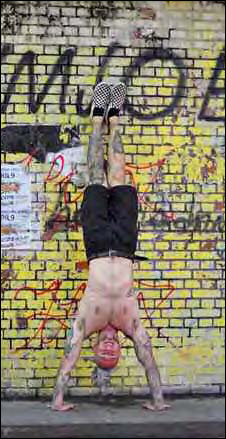
Though I recommend learning to do a handstand on the ground first, handstands can be performed on bars or other objects once you reach a certain level of comfort. Performing a handstand on a straight bar or parallel bars requires tremendous control as well as grip strength. Straight bars and parallel bars are both good choices for practicing this move, though each is challenging in unique ways. Either way, get a feel for the handstand on a low bar(s) first before trying it up high. You’ll need to learn to safely bail out of this move and land on your feet without hurting yourself before going for it on the high bar.
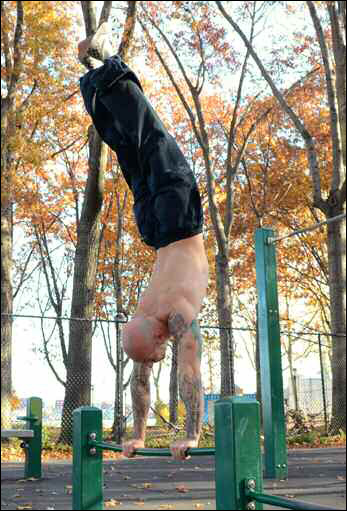
You’ll need to learn to safely bail out of this move and land on your feet without hurting yourself before going for it on the high bar.
If you’re going to do a handstand on a high bar, you’ll have to get up there first by performing a muscle-up or a rollover. From there, it’s a lot like the press to handstand discussed earlier. Just like muscle-overs and other advanced bar moves, the fear factor is high for moves like this one. And for good reason - try this stuff at your own risk!
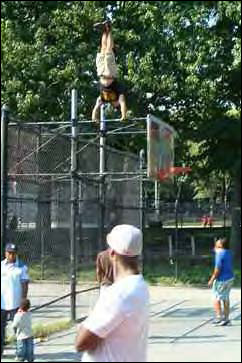
Just like muscle-overs and other advanced bar moves, the fear factor is high for moves like this one.
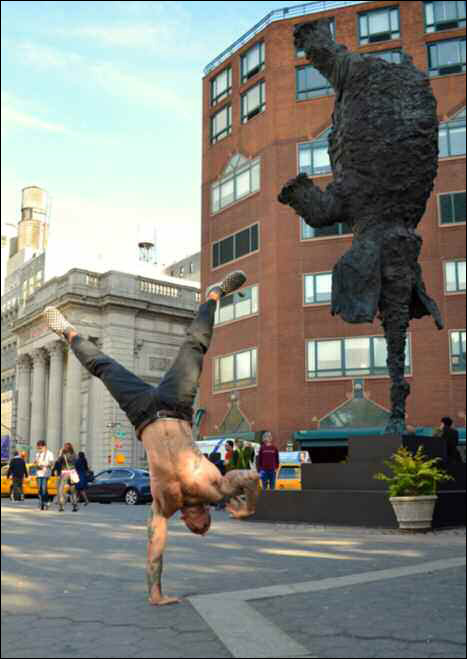
The ultimate handbalancing progression is the one handed handstand. To even hold this move for one entire second can take lots of practice. Only once you can hold a normal freestanding handstand for a full minute should you begin training the one handed version.
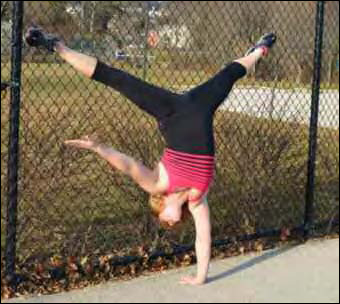
When going for a one handed handstand, begin by getting into a standard two hand handstand first. From here slowly shift your weight towards one side as you spread your legs for balance. (Hip mobility play a big part in this, so make sure to practice your straddle on the ground as well.) Start by trying to touch your hand to your shoulder quickly before returning it to the ground. Eventually you might be able to stay on one hand a bit longer. You may find it helpful to reach your free arm away from your body for balance. Advanced handbalancers can get their entire body straight over just one hand.
In addition to just holding handstands, doing handstand push-ups (and handstand push-up variations) is also essential. After all, you need to work those muscles through a full range of motion!
If you aren’t strong enough to do a full handstand push-up yet, the pike push-up is a great way to ease in. Pike push-ups allow you to train the movement pattern without having to bear your entire body weight.
Rest your toes on a bench or step and get down in a push-up position. From here, walk your hands back toward the bench while you pike your hips up in the air over your shoulders. (The position is very similar to the upside-down L shape we discussed a few pages back.) Make sure to keep your back straight by taking the stretch in your hamstrings, though you may bend your knees a little if you need to in order to keep your hips up over your shoulders. Lower yourself down until the top of your head touches the ground and then push yourself back up – that’s one rep.
Lower yourself down until the top of your head touches the ground and then push yourself back up - that’s one rep.
Once you can do ten consecutive pike presses without too much trouble, you’re ready to try a full handstand push-up against a wall. Kick up into a handstand with your back slightly arched. Engage your core muscles and keep your body tight as you lower yourself down and press yourself back up. Make sure you touch your head to the ground on every rep to ensure a full range of motion. You can also try touching your nose to the floor instead of the top of your head to allow yourself to go a bit lower.
Once you can do ten consecutive pike presses without too much trouble, you’re ready to try a full handstand pushup against a wall.
The freestanding handstand is a tricky move to get the hang of on its own, adding a push-up to it takes things to a whole other level!
The freestanding handstand push-up requires tremendous strength, balance and total body control, so before you think about training for this move, I suggest getting to the point where you can do at least ten wall assisted handstand push-ups and hold a freestanding handstand for a full minute.
When performing handstand holds, I’ve often found it helpful to look in between my hands. With the freestanding handstand push-up however, I’ve found it better to look a few inches in front of my hands. Since the balance changes throughout the range of motion, I recommend practicing static holds at the bottom and middle positions to help train for this feat. When a freestanding handstand push-up is performed on the bar, it is quite a sight to behold!
When a freestanding handstand push-up is performed on the bar, it is quite a sight to behold!
If you want a bigger range of motion for your handstand press, you’ve got some options. You could use a set of parallettes (miniature parallel bars) or you could set up two sturdy objects alongside each other with enough room for your head to fit in between. Of course you could also try it on the dip bars if you are feeling bold. Any method that allows you to drop your head below your hands will add a new challenge to your handstand press.
Often discussed, though never actually executed, the one arm handstand push-up is the holy grail of bodyweight strength training.
In theory, the one arm handstand push-up is the ultimate calisthenics exercise. However, a full, clean rep has never been documented as far as I know. I have no doubt that someone will eventually perform one (and get it on video), but in the meantime the rest of us will just have to continue to train hard and keep the dream alive.
The one arm handstand push-up is the holy grail of bodyweight strength training.