“Don’t ask what the world needs. Ask what makes you come alive, and go do it. Because what the world needs is people who have come alive.”
-Howard Thurman
Performing a body lever is no easy task. Even once you’re already proficient in pull-ups and muscle-ups, it can still take months or years to achieve a solid lever hold. You better really love bodyweight training if you are going to embark down this road. Only those of you who have a burning passion for building bodyweight strength should proceed.
Levers (especially the front lever) are among the most challenging bodyweight exercises out there. They require tremendous core strength as well as a powerful upper-body. Practicing towards these movements can build serious strength in your arms, chest, back and abs. Levers also train you to use your muscles to work together, which is how to utilize them most effectively. Let’s check out the different types of levers that you can perform on the bar.
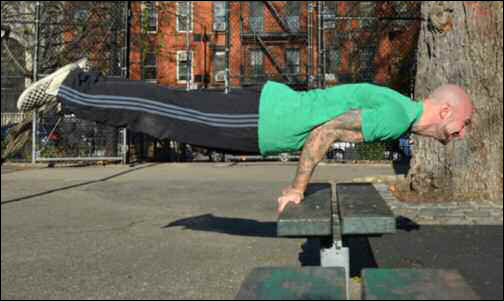
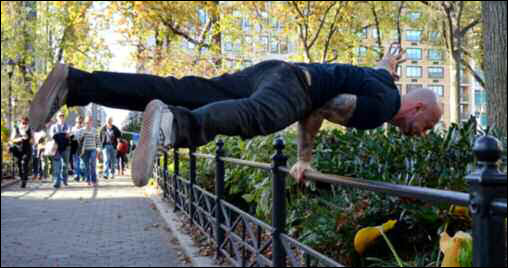
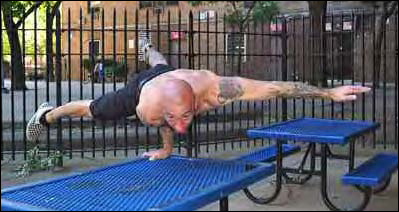
This is one of the only non-bar exercises I’ve included in this book, though like the handstand, it can be performed on a bar when a high level of confidence and comfort have been attained. As the name implies, an elbow lever is performed by leveraging your bodyweight against one or both elbows while balancing on your hand(s) with your body stretched out in a horizontal position. Though it looks similar to a gymnastics planche, the elbow lever is a less difficult skill due to the fact that your upper-body is resting on your arm(s).
While an elbow lever can be performed on a variety of surfaces, I recommend starting out by practicing on a bench, step or any other flat, raised object. This will allow you to wrap your fingers around the side of the object, which most people will find a bit easier than using a flat handed grip.
I recommend starting out by practicing on a bench, step or any other flat, raised object.
The other advantage of practicing on a bench is that it allows for more room to lift your legs into position, as opposed to the limited amount of space when starting with your hands on the floor. This will give you more wiggle room to play with the balance.
Make sure to keep your abs contracted and engage your lower back as you raise yourself into position. It is also important to pitch your upper-body forward in order to counterbalance the weight of your bottom half. Your elbows will likely need to be extended beyond ninety degrees in order to achieve a solid elbow lever hold. Note the positioning of my elbows and hands in the photo below:
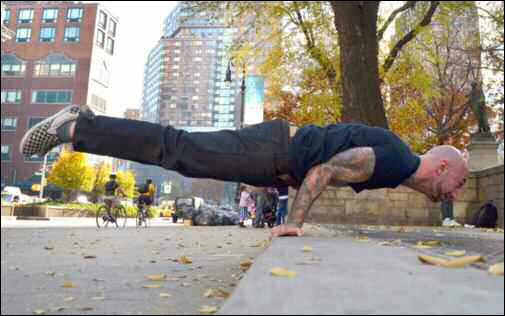
It is important to pitch your upper-body forward in order to counterbalance the weight of your bottom half.
When practicing the elbow lever, you’ll want to position your elbows right up against your hip bones. Concentrate on squeezing your midsection tight as you lift up into position, as some of your elbow will inevitably wind up against your stomach. It may take some time to get used to the sensation of having your elbows jutting into your abdomen; beginners tend to find it especially unpleasant. With practice, however, you can eventually learn to make peace with the feeling.

You’ll want to position your elbows right up against your hip bones.
As it is a hand-balancing skill, the elbow lever can also be a useful tool in working towards a freestanding handstand. It’s a nice intermediary step between the frogstand and handstand.
Though break-dancers and other skilled hand-balancers have a way of making this move seem effortless, the one arm elbow lever is a very challenging feat, so be patient if you endeavor to add this one to your arsenal.
“Start out by simply trying to get your feet off the floor to get a feel for the balance before attempting to fully extend your body.
Just like the two arm version, start out by simply trying to get your feet off the floor to get a feel for the balance before attempting to fully extend your body. It is helpful to spot yourself with your free hand in the beginning by reaching it to the side and resting one or several fingers on the surface upon which you are balancing. From here you can try to take the hand away for a second to get a momentary feel for the full exercise, eventually removing it altogether.
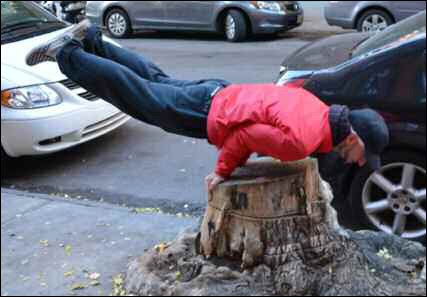
There are a couple of subtleties to performing an elbow lever that are unique to the one arm version. First off, it can help to rotate your body away from the ground slightly when performing this variation to prevent yourself from tipping over to that side. You want your weight evenly distributed on both sides of your hand.
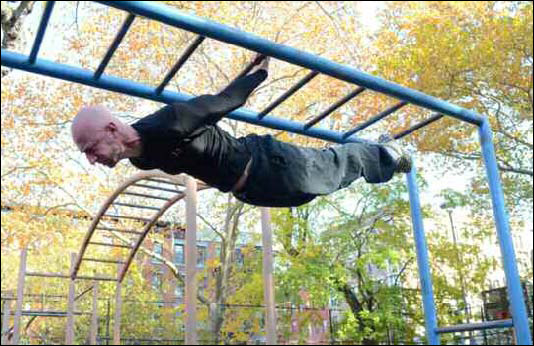
The one arm elbow lever can, of course, be performed on a bar.
Additionally, holding your body in a triangular formation with your legs in a straddle can also make it a bit easier to find the balance with this exercise. With practice, you’ll improve to the point where you can work on bringing your body into a straight line.
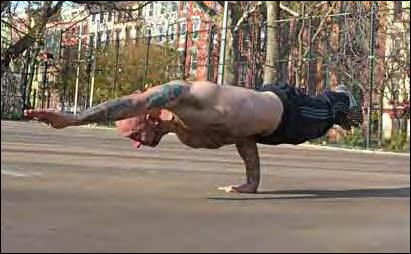
With practice, you’ll improve to the point where you can work on bringing your body into a straight line.
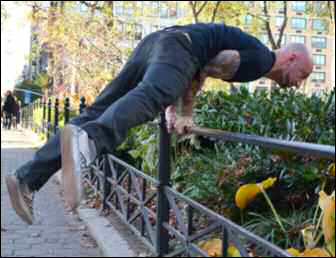
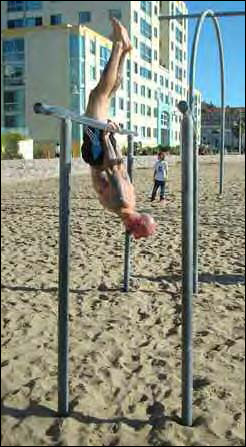
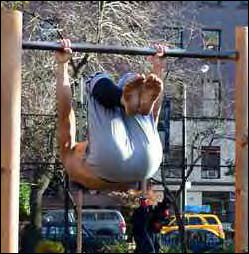
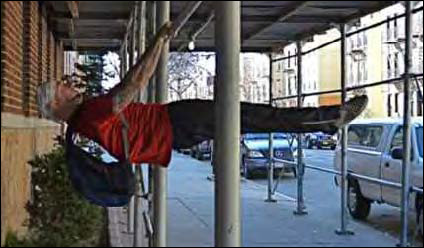
Man has yet to fly without airplanes or helicopters, but performing a back lever feels pretty close! Practicing this exercise can help you build total body strength while giving you the sensation of being suspended in mid-air. Back levers are fun and functional, plus they look bad-ass!
The way I learned to do a back lever begins by bringing your legs around the bar from a pull-up position, just like skinning the cat. Once your legs are on the other side of the bar, straighten out your entire body so you’re hanging almost completely upside down. Your legs will wind up above the bar and your torso will be below.
From here, the objective is to get your body parallel to the ground with your hips directly under the bar, so pitch your chest forward as you lower your legs down. In addition to keeping your abs tight and extending your back, think about actively pulling your hands down towards your hips, engaging your lats, triceps and chest muscles.
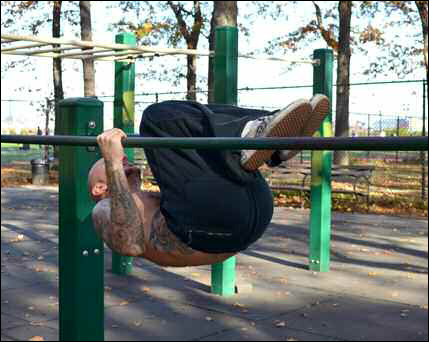
Back levers can be performed with a pronated or supinated grip, though I prefer to use an overhand position. It’s actually the only way I can do it! Keeping a relatively narrow grip is also a good idea as it allows you to leverage some of your weight against your arms. Think about squeezing your lats and your triceps together to keep yourself up as you suck in your abs, contract your glutes and squeeze your hamstrings.
It’s helpful to have someone watch you or videotape you while you are doing this as you’ll likely have a hard time feeling when you are in position. (That’s actually true for every single exercise in this book.) As always, total body tension is key. Remember to contract your abs, lower back, hamstrings and glutes while performing a back lever. Your arms are only one part of the equation.
Back levers can be performed with a pronated or supinated grip.
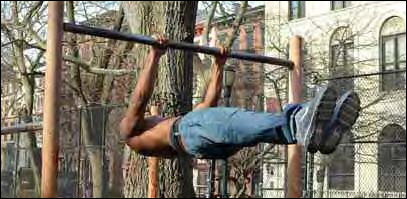
Practicing your back lever with your knees bent will make the move a bit easier, so it’s a great way for newcomers to get a feel for the exercise. Other than the knees being bent, everything else is pretty much the same.
Practicing your back lever with your knees bent will make the move a bit easier.
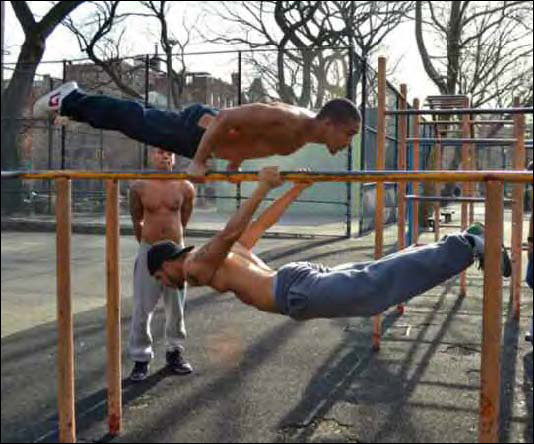
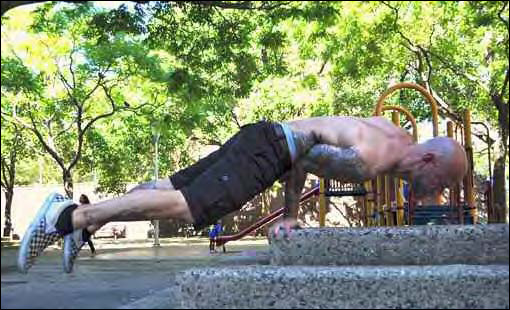
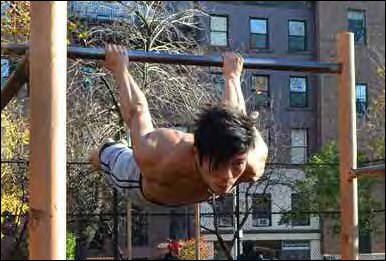
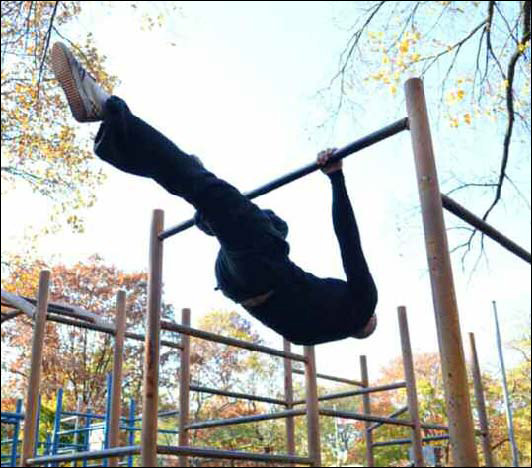
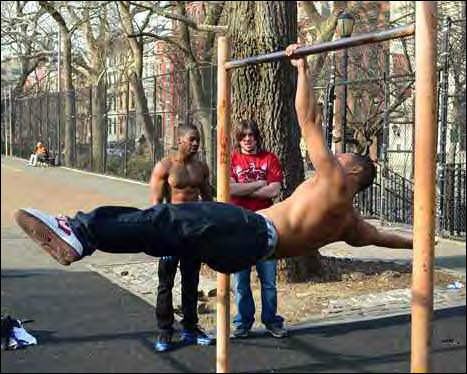
The front lever is one of the most difficult (and coolest looking) calisthenics exercises out there. Performed either as a static hold or for reps from a hanging position, the front lever involves pulling your whole body up til it’s parallel to the floor, almost like you are laying down...on air!
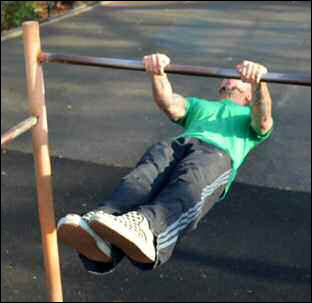
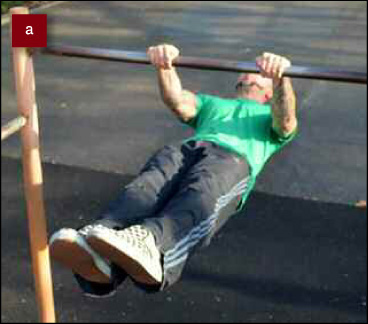
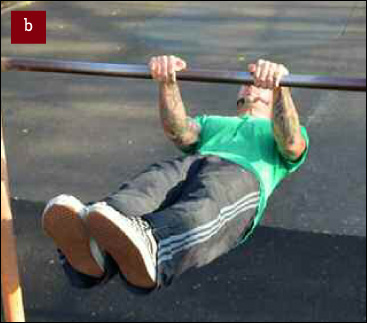
The easiest variation on the front lever is the tuck front lever. Hang from a pull-up bar and squeeze your legs into your chest while rolling your hips back until your torso is parallel to the ground. Try to stay up and hold this position for as long as you can.
The easiest variation on the front lever is the tuck front lever.
Once you can perform the tuck front lever for ten seconds or more, you can attempt the tuck front lever pull-up. It’s best to do these while hanging beneath a pair of parallel bars like you would use for a dip. With your body hanging below the bars, pull your knees into your chest and raise your hips into the tucked front lever position. Make sure you keep your hips up as you pull yourself up between the bars. You can think of this as an advanced version of an Australian pull-up.
It’s best to do these while hanging beneath a pair of parallel bars like you would use for a dip.
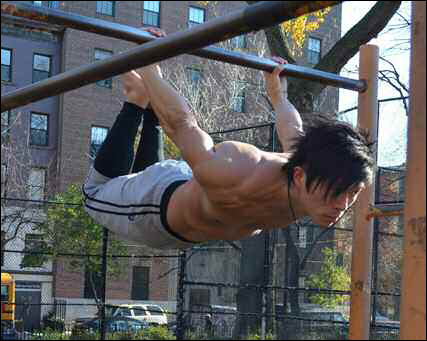
The next step after the tuck front lever is to extend one leg straight. Everything else is more or less the same. You can try pull-ups like this as well once you can get 10 clean tuck front lever pull-ups.
The next step after the tuck front lever is to extend one leg straight.
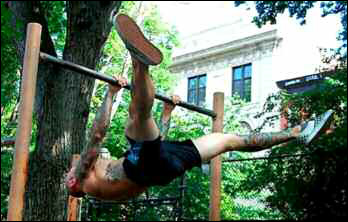
By opening your legs during a front lever, you’re not only changing the balance, you’re also shortening the lever, both of which make this move slightly easier than a full front lever (though still more difficult than the tuck or half-tuck lever). You’ll need better than average hip mobility to pull off a decent straddle front lever, so make sure you’re stretching regularly.
As you get stronger, a common way to make most exercises more challenging is to add weight. The front lever is one of those rare exercises that can actually be made a bit easier by adding weight. Wearing a light backpack (around 5-10% of your bodyweight), can actually help you balance in this position. It also looks really cool!
When building up to a front lever hold, performing front levers for reps from a hanging position can be a very useful tool. Keep your whole body tight as you use your lats to pull your body into the lever position, then lower back down to a dead hang and repeat.
When your form breaks down, switch to hanging leg raises. This can make for a very difficult super-set.
Keep your whole body tight as you use your lats to pull your body into the lever position
...then lower back down to a dead hang and repeat.
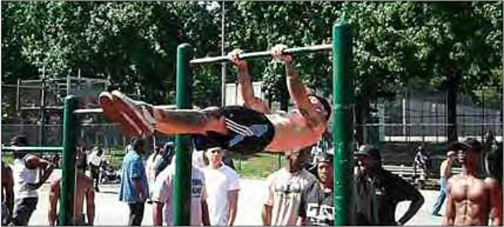
The front lever to muscle-up is a great way to work towards improving your front lever hold, as well as a bad-ass move in its own right. It’s easier to do the muscle-up first, then lower yourself into the lever, maintaining total body tension the whole time. Hold the lever position, then pull yourself back over the bar and repeat. Try using a false grip for this maneuver.
The front lever to muscle-up is a great way to work towards improving your front lever hold.

Though rarely seen, a one arm front lever is a very advanced variation that is within the spectrum of possibility for someone who is willing to work for it. Likewise, I have seen the back lever performed with just one arm as well. When attempting these variations, keep in mind that the body will need to rotate a bit in order to find balance. I’d give you more advice, but I’m still working on it myself!
Though rarely seen, a one arm front lever is a very advanced variation that is within the spectrum of possibility for someone who is willing to work for it.
While some people will get the elbow lever quickly, working your way up to a front lever hold can take a very long time. Be patient and gradually build to several seconds on each step before moving onto the next one. If you find yourself getting stagnant in your progress, take a break from lever training while you continue to work the basics then come back to it after a few weeks. In the big picture, a little time off from challenging skills like these can sometimes give you renewed focus.