Stenciling
Cutouts and Colors To Brighten the Home
The art of stenciling—reproducing a design by painting over a cutout pattern—flourished in America during the 18th and 19th centuries, primarily in rural New England and among the Pennsylvania Dutch. Although “fancy painting,” as stenciling was called, went into a decline in the late 1800s, it is becoming popular again. Stencils provide the means by which everybody— even someone with little artistic talent or sophistication—can create imaginative, attractive decorations for walls, floors, and furniture.

Wall stenciling can be as simple or ornate as you like. To create a “weathered” look like this, use a sponge to dab paint over the stencil, being careful not to fill it in entirely. To avoid drips, squeeze the sponge to get rid of excess paint before using. Remember when cutting a stencil to leave “bridges” between parts—uncut sections that will hold the stencil together (once you remove the stencil you can fill in these sections with a paint brush). Use masking tape or drafting tape to secure the stencil to the wall.
To see beautiful examples of traditionally stenciled walls, visit the so- called Stencil House in Shelburne Museum in Vermont. The walls in the cottage, which was moved from its original location in Columbus, New York, convey the charm and innocence of a quieter, more gracious age. Such stenciling was usually the work of itinerant artists who traveled from town to town with their paints and stencils. Most of these artists had distinctive styles, and the territories they covered can sometimes be traced from samples of their work that are still in existence.

Stenciling was in vogue in New England during the early 1800s; motifs shown above are typical of the period. By repeating individual designs, the effect of wallpaper can be achieved.
Tradition and Technique in Stencil Design
Early American wall stenciling usually took the form of vertical and horizontal borders arranged to give the effect of paneling. Later, as wallpaper from France became popular among the well-to-do, stencils were applied in broad area designs in imitation of the new and costly product. Fruit, stars, American eagles, and delicate semiabstract flowers were among the most popular motifs. Many traditional patterns can be seen at historic sites and museums in New England. Most of these designs have been reproduced in books on stenciling.
When designing your own stencils, remember that the outline is the most important element. It should be strong and attractive as an abstract shape and easy to recognize if it represents an object. Also bear in mind that details inside the outline must either be supported by ties (strips of stenciling material that hold the stencil together) or else applied with a second stencil.
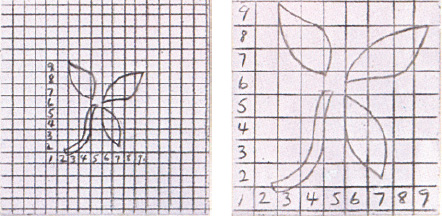
To enlarge a design draw an evenly spaced grid over it. Then make a second, larger grid on a separate piece of paper, and use it to sketch in the same design by following the pattern in each square of the smaller grid. The size of the new design will be larger than the original in proportion to the increase in grid size. Designs can also be enlarged by photocopying methods.
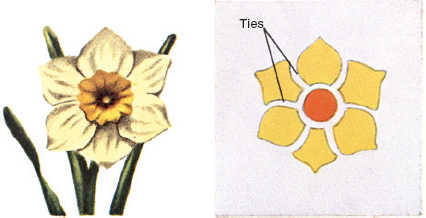
To convert a line drawing into a stencil, determine the outline and expand the major structural lines to a width of 1/8 in. Make sure that each line, or tie, connects to the outline to hold the stencil together. Intricate outlines and long, thin shapes, such as flower stems, should be broken up by ties into smaller areas so that the stencil does not warp when painted.
Stenciling Materials and How to Cut Them
Stencil board (oaktag) and waxed stencil paper are the standard stenciling mediums, but any stiff plastic, paper, or board resistant to water can be used. Stencil paper is best for intricate designs that will only be used a few times. Stencil board is more difficult to cut but much more durable; use it for simple repetitive designs. Architect's linen, a strong, flexible substance, makes a durable stencil. For floor stenciling and simple designs, .005-gauge acetate can be used.
Except in the case of architect's linen, use a craft or utility knife for all stencil cutting. It is important to keep the blade keen either by sharpening it frequently or replacing the blade as soon as it fails to cut smoothly.
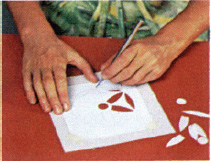
To cut stencils, hold a craft knife so that it is almost perpendicular and apply enough downward pressure to make a clean cut. Use your free hand to keep the stencil and design flat and prevent them from moving.
Architect's linen can be cut into very intricate designs with fine manicure scissors.
To cut a stencil from a transparent or semitransparent medium, lay the design on a piece of heavy cardboard and tape the stencil material over it. Allow at least a 2-inch margin around the design. Cut toward yourself, shifting the cardboard and design as needed to maintain a comfortable cutting direction. If you are working with stencil board, you will have to transfer the design by retracing the outline over carbon paper before cutting it. After the design is cut, trim any ragged lines so that they are perfectly smooth. Pay particular attention to corners: scraps or uncut paper often cling there.
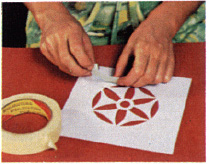
Broken or cut ties can be repaired with a strip of masking tape. Apply the tape to the top surface of the stencil, then turn the stencil over and carefully trim the excess tape from the backside with a craft knife. (Do not bend the extra tape over.)
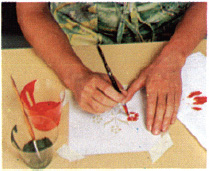
When painting the outline of a design, apply only a little paint and brush from the outside toward the center of each cutout area. Press down on the surrounding stencil to give a crisp, clear outline. Then fill in the center of the design. Brush gently across small cutout areas.
Paints, Brushes, and Brushwork
Homemade milk paint (see Household Recipes, p.343) gives a soft, authentic touch to traditional wall and furniture stenciling. Japan colors, used by sign painters, are available in many of the traditional muted stenciling shades. These paints are fast drying, an advantage since the risk of smudging is lessened; however, they should not be used with stencils made of architect's linen. Acrylic paints come in a wide range of colors, dry quickly, and are easy to use. They make bold, sharp images that are suited to modern designs. Latex and oil paints dry slowly and tend to smudge.
Whenever possible, stenciling paint should have the consistency of thick pea soup. For a faded effect add a little white pigment. To soften a color, mix in raw umber. The best brushes for most stencil work are stencil brushes or glue brushes; they have thick bundles of soft squared-off bristles. You can also wrap a piece of velour or other soft material around your finger and use it as a brush to produce lighter variegated effects.
Before you try stenciling walls, floors, or furniture, first experiment with different color combinations on scrap paper. Once the colors are chosen, position the first cutout on the surface to be stenciled and tape it firmly in place with masking tape. You can now brush on the paint. Use very small quantities to prevent running and to obtain clear outlines and an even texture. Each time you dip the brush, dab it on newspaper afterward to remove excess paint. Clean the stencils regularly during use so that paint does not build up around the edges, spoiling the outline.
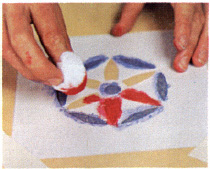
Antique effects and delicate shading can be created by wrapping a piece of velour or similar soft fabric around your index finger. Dip the material in the paint, dab dry, then wipe gently across the cutout areas. Alternatively, use a 1- by 1- by 6-in. strip of sponge as a paintbrush.
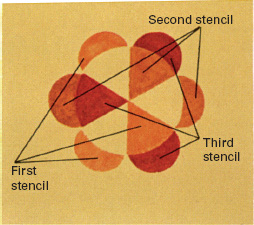
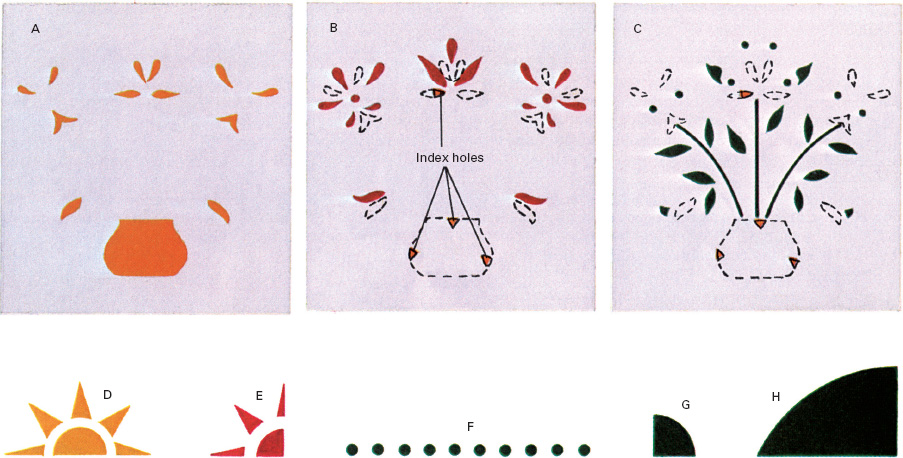
For complex motifs in which colors overlap or meet, make a different stencil for each overlapping or abutting color. If designed carefully, this method will eliminate the need for stencil ties.
Applying Multicolored Designs
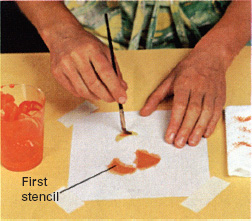
When cutting stencils for multicolor work, allow a 1/8-in. overlap between colors that meet in order to get a neater join. Paint in light-colored areas first; overlapping dark colors will mask them out.
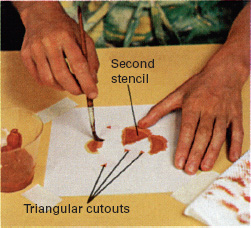
Small cutouts allow alignment of stencils when opaque stenciling material is used. To make cutouts, trace outline of first stencil on second. Snip out triangles along outline just inside it. Points of triangles should face inward.
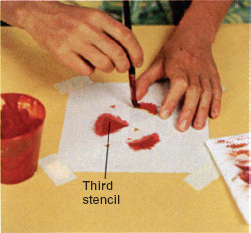
Several stencils can be applied, one after the other, each in a different color. Quick drying paints, such as japan colors, are useful for this work, since the previous coloring must be dry before a new stencil is applied.
Decorating Your Home Floor to Ceiling
Start by measuring the piece of furniture carefully so you can draw full-scale patterns of the parts to be stenciled. This will allow you to plan the border stencils and to experiment with arrangements and colors. Plan the entire border before cutting any stencils, since border stencils should be designed and spaced so that the pattern either ends or turns neatly at each corner. One attractive way to turn a corner is to design a special corner motif or arrangement. If your border patterns are large and detached, space them evenly between corners by measuring with a ruler.
A Chest of Drawers, Yankee Style
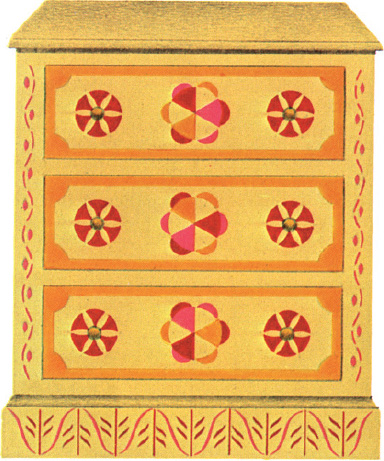
Before stenciling, make sure the surface is clean and dry. If the surface is smooth and shiny, use japan colors, since most other paints will not adhere to slick surfaces. After stenciling, you can either apply a transparent finish, such as shellac to seal and preserve the stenciled colors, or you can allow the paintwork and stenciling to age naturally to create a more antique look.
Pennsylvania Dutch Dower Chest
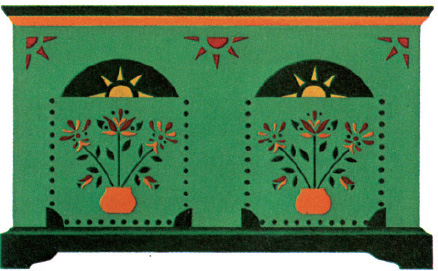
Any low chest or blanket box can be decorated. After the chest is measured, stencils cut, and colors selected, you should stencil the borders. Start by applying stencil G in the two lower corners of each panel, followed by the border stencil (F) and panel head (H). Next apply the sunburst designs (D and E) with several coats in a contrasting light color on the panel head and a contrasting dark color along the top of the panel. Now apply stencils A, B, and C in sequence in the middle of each panel. Be sure to let the paint dry before applying an overlapping stencil.
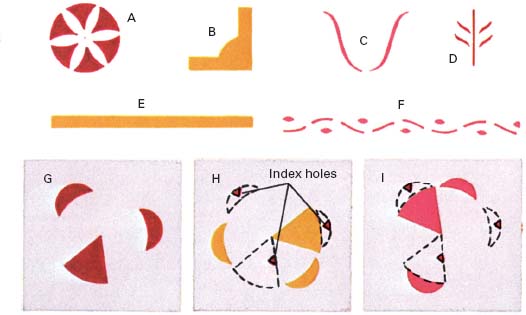
Paint the chest with two coats of dull yellow paint. Apply stencil F down each side of the chest front. Measure and mark the front and sides of the base to ensure that stencils will form a complete motif at each corner, then apply stencil C. When the paint is dry, apply stencil D. Remove the drawers and apply corner stencil (B) and border stencil (E) to each edge. Use stencil A around each handle, then apply stencils G, H, and I in sequence. Finish by painting the knobs.
Stenciling Walls and Floors
When planning wall or floor stenciling, start by studying the room to decide which features you want to emphasize and what atmosphere you wish to create. If the room has a number of windows and doors, a simple border around each opening will help create a sense of unity. If there are large blank wall areas, an interestingly patterned design will help relieve the monotony of the open spaces. High points and special features in a room, such as a fireplace or sloping wall, can be set off by one or two large designs; for example, a vase of flowers over a mantelpiece or a geometric canopy design for a sloping ceiling over a bed.
Repetitive patterns with a strong geometric theme are often used for floor stenciling, but almost any design that is suitable for walls will also work on the floor. Broad, open patterns or simple repetitive designs, like those shown below, were popular in post-revolutionary homes. Many motifs suggest tiling or carpeting.
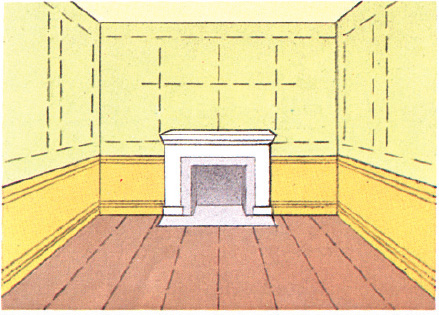
To position stencils accurately, establish verticals and horizontals with a weighted plumb line and mark with chalk or else measure carefully using room corners as reference. An easy way to make a chalk line is to tack a chalked string so it is taut, then pluck it.
For wall stenciling, select designs that balance each other—one strong and heavy against another that is light and delicate. Bold designs, when repeated, stand out and attract attention; delicate designs, spaced to form an open lattice, retreat and create a passive, restful atmosphere. Designs applied on white walls tend to stand out strongly. The effect can be moderated by mixing a few drops of one of the main colors in the design into the white background paint. If you are mixing your own colors, make plenty of each in individual jars or plastic containers so that you do not have to remix and match the colors later on.
Once you have developed a scale plan of your design, mark out vertical and horizontal guidelines with chalk to help you keep the stencils in alignment. For a full traditional design apply the frieze border (top design) first, followed by the vertical designs, and then the surbase (lower horizontal motif) or base along the foot of the wall. The final step is to measure out the spacing and apply the separate panel designs.
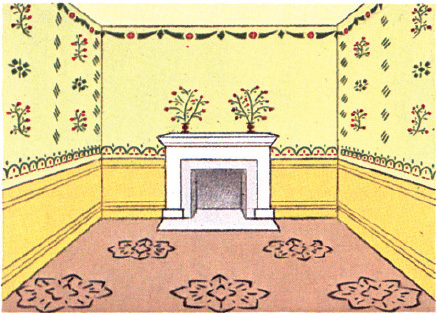
Traditional wall designs often included frieze and surbase borders that ran around the top and middle of the walls. Vertical lines of design broke the walls into separate panels in which large, individually stenciled designs were applied.
For floor stenciling, simple patterns applied in black oil or japan paint over a varnished floor will produce a subtle hand-painted effect. Usually, floor stencils are applied on a base coat of off-white deck or patio paint. Both these paints wear well but are slow drying. If you use them, remember that you will not be able to walk on the floor for two to three days. One way around this problem is to apply the design in two sections so that one can be used while the other is drying. Apply one to two coats of paint, then when the floor is dry, mark it with chalked guidelines. You can stencil your designs with a paint roller or glue brush. Acetate is a good material for floor stencils, since it stands up well under repeated use; stencil board can also be used. Transparent varnish, either natural or synthetic, is often applied over a stenciled floor to preserve it.
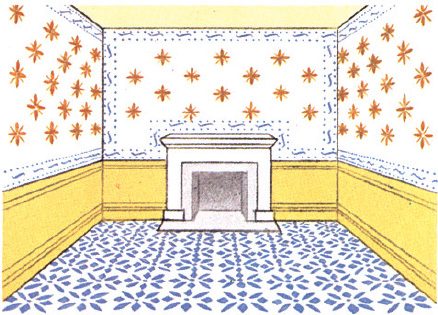
Another popular technique was to apply stencils as simple borders outlining the features of a room with or without a field pattern of larger stencils. For the floor a pattern of many interlocking stencils suggested a tile or carpet design.
Getting around corners
Borders are the trickiest part of wall stenciling. Use one motif as a guide for the next. Either stop pattern before corner or make a duplicate stencil and cut it to fit the corner exactly. The stencil can be taped together and used again.
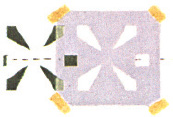
1. Use previously stenciled unit as a guide to align the stencil as you proceed around the border

2. Corner of border can be turned by interrupting pattern before corner is reached, resuming it on other side of corner at an equal distance away. Spacing variations from one corner of room to another may result
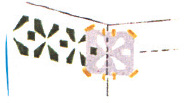
3. Best way to turn corner is by continuing pattern without interruption. When corner is reached, simply cut stencil to fit corner exactly
Sources and resources
Books
Grafton, Carol, ed. Authentic Victorian Stencil Designs. New York: Dover, 1982.
Hall, Katrina, and Llewelyn-Bwen, Lawrence. Decorative Workshop: Stencilling. New York: M. Friedman Publishing Group, 1995. St. George, Amelia, and David, Penny. The Stencil Book. New York: NAL-Dutton, 1989.
Stencil It! Book and Kit. New York: Sterling Publishing, 1993. Waring, Janet. Early American Stencils on Walls and Furniture. New York: Dover, 1968.