5: iTunes and iTunes Match
The Skim
Getting Your Music into iTunes • iTunes Match
Playing Music on Your iPad • Getting Your Movies into iTunes
HandBrake • Free eBooks
Everything changed when Apple released the first iPod along with the iTunes software. Back then, iTunes was all about music, but now it’s about so much more. Today you can use your iPad to play all sorts of media content, including music, movies, TV shows, and eBooks—and Apple would love for you to buy all your content through iTunes.
As you will see in Chapter 6, you can access the content that you purchase from Apple at any time using the iCloud service. This includes music, TV shows, movies, and eBooks. The content that you add yourself (that is, content that you do not buy in the iTunes Store), however, can only be transferred over to your iPad using iTunes and cannot be downloaded from the iCloud service. The one exception to this is music. With the iTunes Match service, Apple uploads the music in your iTunes library to the iCloud service so that it is always accessible, no matter where that music came from.
First, let’s get your music into iTunes.
GETTING YOUR MUSIC INTO iTUNES
I have a lot of CDs and still buy them from time to time since I like the physical packaging and CD booklets. Actually, I love the old vinyl albums with the large album cover artwork, but I digress. I purchase most of my new music right through the iTunes Store, but I still want to get the music from my CDs into iTunes and then onto my iPad.

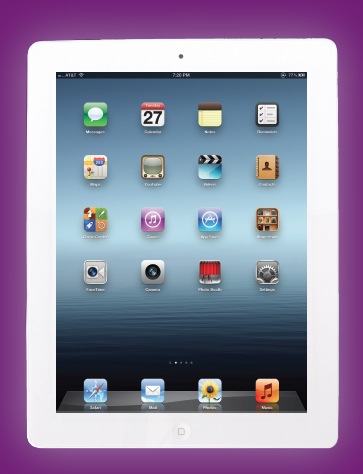
Figure 5-1
I have a lot of CDs that I want to be able to listen to on all of my devices, including my iPad. That means ripping them all into iTunes.
Ripping the Music into iTunes
Transferring the music you have on CDs onto the computer is easy and takes place right in iTunes, as long as the computer has a CD drive. Basically, you’re going to take, or rip, the music off the CD and make it part of your iTunes library.
The basic process is pretty simple and boring. Just insert a CD into the computer’s CD drive. Answer Yes when the iTunes asks if you want to import the CD. The music is then imported into iTunes. Eject the CD. Repeat with a new CD as many times as you want … or can stand. As I said, it’s a pretty boring process.
Now let’s do a through walk-through and look at the things that can make this go smoothly. The first and most important thing to do is set your Preferences in iTunes. Here’s how you do that:
1. Open iTunes on your computer.
2. If you’re working on a Mac: Open the iTunes Preferences, and then click on iTunes > Preferences.
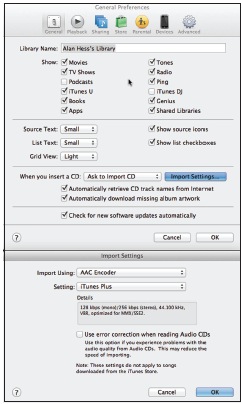
Figure 5-2
The Preferences for CD ripping in iTunes 10.6.
If you’re working on a PC: Choose Edit > Preferences from the drop-down menus.
3. In the General tab, there are some choices in the drop-down menus to the right of where it says, “When you insert a CD”:
• Checking Show CD includes your CD in the Devices list on the left side of the screen.
• Select Begin Playing if you use your computer as a stereo and just want the CD to play when inserted.
• Ask to Import CD is the default setting and prompts the program (when you insert a new CD) to ask if you want to import the music to your iTunes library.
• Import CD triggers an automatic import of the music from an inserted CD into the computer without a separate directive from you.
• Import CD and Eject is the setting to use if you are going to rip a bunch of CDs. It will automatically import the music from an inserted CD, eject it when done, and wait for the next.
4. The next box is very important: the Import Settings menu. Settings include what encoder to use and how it should function. The menu also offers an error correction feature when reading CDs that are giving you problems. The settings attempt to balance out file size vs. quality. Available encoders include:
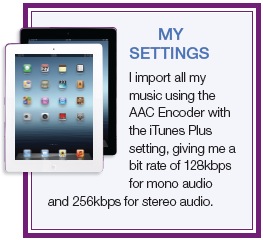
• AAC Encoder: Advanced Audio Coding is the latest and greatest audio conversion process that gives up a little quality for a big savings in space. This format does a great job of getting the best quality with the least space used and is the encoder I use on a regular basis. But if you want the best possible audio quality in the music files you’re ripping, then look closely at the next two options.
• AIFF Encoder: Both the AIFF and the Apple Lossless Encoder copy the CD as a perfect duplicate. This gives you the best quality available, but these files also take up the most space.
• Apple Lossless Encoder: For all intents and purposes, this option is the same as the AIFF Encoder. It produces a perfect copy, but you pay for that in its large file size.
• MP3 Encoder: This encoder imports a music file as an MP3. Don’t use this encoder—MP3 is old and tired. There are better options, like the AAC Encoder described previously.
• Wave Encoder: These files are huge, and I recommend skipping this one as well.
5. After you pick an encoder, you can select the quality setting for your audio files from the list. If you pick the AAC Encoder, you can choose between iTunes Plus (the highest quality), High Quality (the medium choice), and Spoken Podcast (best for non-music recordings). If you choose the AIFF Encoder, Apple Lossless Encoder, or Wave Encoder, you can only set the quality to Automatic. If you do pick the MP3 Encoder, you can also choose between Good Quality, High Quality, and Higher Quality.
6. Use error correction when reading CDs that are scratched or damaged. This slows down the import process, but it’s better to spend a little extra time to make sure your audio is imported correctly.
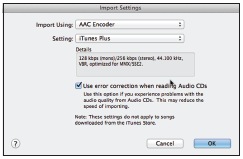
Figure 5-3
My Settings in the Import Settings.
Now you are ready to insert a disc and import some music into iTunes.
1. Open iTunes.
2. Insert a CD into your computer’s CD drive.
3. Depending on the settings you created, the CD will wait to import or import automatically.
4. If you are asked, go ahead and import the CD.
5. When the CD is done importing, it automatically ejects or you can eject it manually … again, depending on the settings you entered earlier.
If everything went well, you should now have a new album in your iTunes library with the right track listings and the album cover art automatically inserted. Life isn’t always perfect though, so here is the best way to get that new music looking and acting the way you want.
Since I usually import one CD at a time, it’s easiest for me to find the new content I just downloaded by sorting the music in my iTunes library by Albums. Just click on the Music tab on the left, and then click on the Albums tab across the top. Over to the left are the four view options that control how the data is displayed. The first is a song list, the second is an album list, the third is a grid of the album covers, and the fourth is called Cover Flow, which shows the album cover on the top half of the screen with the data on the bottom half. In all the view modes other than the list mode, the album artwork is shown. The albums that don’t have any artwork are just generic squares with big music notes in them.
Finding Album Cover Artwork
To get the album artwork if it’s not inserted automatically, set the view to grid mode, right-click on the album, and click “Get Album Artwork.” This works … sometimes. When it doesn’t, there are other options.

Figure 5-4
The four view options in iTunes change the way the album covers are shown.
The most useful of these options is the CoverHunt website, located at www.coverhunt.com. Once you are there, type the album name in the SEARCH box. There’s a good chance you will find the artwork you need. If that fails, use any of the music sites on the Internet or try the band’s official website. What you’re looking for is an album cover image of the music that you just imported into iTunes.
Once you have the artwork on the screen, you need to:
1. Copy the image file to your computer’s clipboard. To do this, right click on the artwork and select Copy.
2. Back in iTunes, with the albums being shown in the grid mode, right click on the album and select Get info.
3. After Apple warns you that you are about to edit multiple tracks, click Yes and then click on the Info tab.
4. You’ll see a box on the right called Artwork. Highlight the box and press ctrl-z on a PC or command-z on a Mac to paste the image into the box.
5. Click OK.
If all went well, the album now has the right artwork when it appears in your iTunes library.
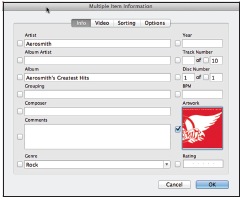
Figure 5-5
The art work for the Album is now entered.
Adding Album Titles and Track Names
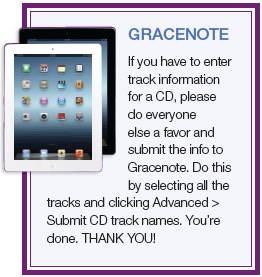
The other problem with music files that can occur is that the album and tracks don’t have the right names … or any names, for that matter. Usually, iTunes knows the name of every album you import as well as every track on that album. It does this by looking up the information in a big Internet database called Gracenote. If the computer you are using isn’t connected to the Internet or the album is one of the really rare ones that isn’t in the Gracenote database, then you have a little work to do to get the information into iTunes. Here’s what you’re facing:
1. Select the first track on the album.
2. Choose File > Get info.
3. Click the Info tab.
4. Enter all the information for the track and for the CD.
5. For live albums, click on the Options tab and check the box for a gapless album. (This option removes any break between songs, giving you seamless playback.)
6. Click the Next button to get to the next track and enter that track’s information, and so on.
Now you should have an album with artwork and title information showing in iTunes. When you sync your iPad and computer, all this info will be in both places.
iTUNES MATCH
iTunes Match is a new service offered by Apple that stores all of your music on the Internet and gives you access to it anyplace and anytime as long as you have an Internet connection.
The way this works is that Apple looks at your iTunes music library and determines which of the songs are available in the iTunes Store. Any songs that match are automatically added to your iCloud. For example, if you ripped your Beatles Abbey Road CD into iTunes, Apple looks at that and sees that the Abbey Road album is available in iTunes and automatically adds those songs to your iCloud even though you didn’t actually buy the album in iTunes.
Apple is betting that since it has more than 20 million songs in the iTunes library that most of your music is going to be there already, but what if you have music that is not available in the iTunes Store? For example, I have a quite a few live recordings that were never released commercially and are therefore not in the iTunes Store. Apple actually uploads these songs to the iCloud to make them available on all your devices. This allows me to access my Grateful Dead live concert recordings on my iPhone and iPad everywhere.
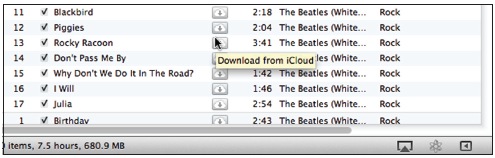
Figure 5-6
The little clouds next to the track names show that they are part of my iCloud.
Now for the downsides—there is a limit to the number of songs that you can have in iTunes Match and the service is not free. The maximum number of songs that you can upload is 25,000, which does not include any music purchased from the iTunes Store. The iTunes Match service costs $24.99 a year, and I think it is a great deal. I no longer have to worry about syncing songs to my iPad before traveling since I can access all of my music all of the time, as long as I am connected to the Internet.
Before we get started you need to make sure that you have iTunes 10.6 or later on your Mac or PC, along with an Apple ID. The music must be in a format that iTunes can play, which includes AAC, MP3, WAV, AIFF, and Apple Lossless. You can use the same iTunes Match account on up to 10 devices, including iPhones, iPod Touches (third generation or later), iPads, and Apple TVs.
To turn on iTunes Match, follow these directions:
1. Open iTunes on your computer.
2. Click iTunes Match on the left side of the screen.
3. Enter your Apple ID and password.
4. Click on the Subscribe button, and then iTunes will start scanning and matching your music and uploading it to your iCloud account.
5. When the scanning, matching, and uploading are complete a cloud icon appears next to the songs stored in the cloud.
Now you need to turn on the service on your iPad:
1. Turn on your iPad.
2. Tap on the Settings app.
3. Tap on Music in the list on the left.
4. Turn on iTunes Match.
5. Turn on Show All Music to see the music stored in the iTunes Match.
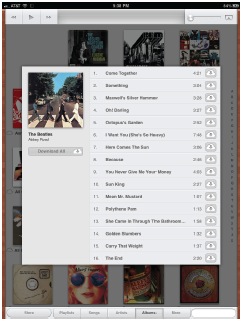
Figure 5-7
I can listen to the Abbey Road album in the Music app on my iPad.
PLAYING MUSIC ON YOUR iPAD
Now that all of your music is available on your iPad, let’s walk through accessing and playing your music.
To play your music on the iPad, all you need to do is tap on the Music app to open a menu bar at the bottom of the app:
• Store: This takes you right into the iTunes Store.
• Playlists: This lets you access playlists you have created on your computer, and it also lets you create playlists right on the iPad. Tap on New, give the playlist a name, add songs from the list, and then tap Done when you’re finished. You can then download the songs from the iCloud and start to play your newly created playlist.
• Songs: This shows the music on your iPad or in the iTunes Match service sorted by song title.
• Artists: This shows the songs available on your iPad or in the iTunes Match service sorted by Artist name.
• Albums: This shows the songs available on your iPad or in the iTunes Match service sorted by album name.
• More: Tap this to access music on a Home Share network, or sort by Genres or Composers.
• Search bar: Start to type in this area and the results begin to appear on the screen.
Now that you have the song or album you want to play, it is time to look at the top of the screen. This is where the controls are for the music player. From the left to the right are the Back button, Play/Pause button, Next button, Playback Viewer, Volume control, and AirPlay button. The AirPlay button is present only when an AirPlay-enabled device is on the same network.

Figure 5-8
The Menu bar at the bottom of the Music app screen.

Figure 5-9
The Menu bar at the top of the Music app screen showing the play controls.
The rest of the controls are simple—tap Play to play, slide to control the volume, tap Next to go to the next track, tap Back to go to the previous track. You can also use your finger to control the playback by swiping left and right in the Playback Viewer.
The Music Player app is different from the other apps as it doesn’t stop when you tap the Home button. This allows you to play music while you do other things on the iPad. For example, you can play music while reading an iBook or while browsing the Internet. To access the music controls, tap the Home button twice in quick succession to open the multi-tasking bar, then swipe from left to right to bring up the music controls. This gives you access to your music player at all the times.
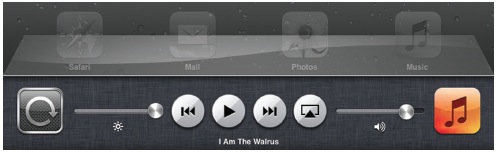
Figure 5-10
Access the music controls by double tapping the Home button and swiping left to right on the multi-tasking bar at the bottom of the screen.
GETTING YOUR MOVIES INTO iTUNES
Buying movies is one thing, but what about the DVDs that you already own? To get your movies onto your iPad, you need to get them into iTunes first. There is no way to directly get your movies from a DVD onto the iPad without a computer.
With music, it’s easy—just insert the CD into the computer’s CD drive and the iTunes application rips the music right off the CD and imports it into iTunes, allowing you to transfer it to your iPad easily. This basic process does not work when it comes to DVDs. You have to rely on an external, third-party program to do it.
Just to be clear: I am not telling you to rent a movie and rip it to the computer nor am I telling you to go to a friend’s house and help yourself to his movie collection. What I am telling you is that there is a way to transfer the DVDs you have bought to a computer, and then to your iPad.
I am not a lawyer and I am not offering legal advice, but all that I have read about copy-protected content states that it is legal to copy your DVDs in “fair use” scenarios such as this. If you own a legal copy of a CD or DVD, then you have the right to make a version of that content to play on your iPad. That’s according to U.S. copyright law, so you should be good to go.
The confusion comes with another section of the law that states that if there is some type of copy protection on the media, you are not allowed to break it. This means that part of the law says you are permitted to copy the material to a different device, but other parts of the law state that you cannot do it if you break a special encryption on the CD or DVD. If you have concerns, then please don’t copy any of your movies—Apple will gladly sell you new copies in the iTunes Store.
I believe that you should be allowed to make a copy of your legally purchased material as long as you don’t turn around and sell the copies or even lend them out. Just think of the copies as being part of the original. And just as it is impossible to read the same physical copy of a book in two places at the same time, it’s not a good idea to have the same movie playing in two places at the same time.
Getting your movies onto your iPad is a three-step process:
1. Get the movie off the DVD and onto your computer.
2. Get the movie into iTunes in a form that the iPad can use.
3. Transfer the movie to the iPad.
To get the movie off the DVD you need a specialized software application. The best program for this is HandBrake, which describes itself as “an open source, GPL-licensed, multiplatform, multithreaded video transcoder, available for Mac OS X, Linux and Windows.” Let’s look at what that means and how this program, which seems to do something that the movie studios frown upon, manages to stay around.

Figure 5-11
HandBrake will let you know if you need to download the program it needs to rip a copy-protected DVD.
HandBrake is open source and thus free, meaning that no one actually owns it and no one profits from it. It’s updated and maintained by a worldwide group of developers that gives the movie industry no real target for a lawsuit.
Although HandBrake can rip DVDs, it cannot rip copy-protected DVDs all by itself. For that, it looks for a separate helper program, and—here is the cool part—the HandBrake application points you to that program on the Internet. This allows you to download the second application and with the two programs working together you can rip a movie file from the DVD, load the content onto your computer, move it into iTunes, and sync it onto your iPad.
DVD Ripping on a Mac
When working on a Mac, the key to making a copy of media from a copy-protected disc is a program called libdvdcss, which HandBrake looks for on the computer and if it doesn’t find it will help you download it.
DVD Ripping on a PC
When you want to copy a protected DVD on a PC that’s running Microsoft Windows, you’ll need a little extra help. The process is nearly as easy for PC users as it is for those on a Mac, but it’s a little more expensive.
While Mac users get DVD-ripping tools for free, PC users must pay about $52. This is because the best program for the PC to get around copy protection is the AnyDVD application from www.slysoft.com.
The AnyDVD program runs automatically in the background. It makes a copy-protected DVD look like a regular disc that can be copied to your computer. When AnyDVD is running, HandBrake can rip any DVD that you put into your computer.
Using HandBrake
At this point, let’s assume that your Mac is equipped with libdvdcss in the Applications folder or your PC is running AnyDVD. It’s time to run HandBrake and rip your DVD.
1. Start HandBrake.
2. Insert the movie you want to rip into the computer’s DVD player. If the DVD starts to play, click Stop and quit the DVD player application.
3. In HandBrake, set the source by clicking the Source button and selecting the DVD.
4. Click on the Toggle presets button and then click on the little arrow next to the Device menu choice.
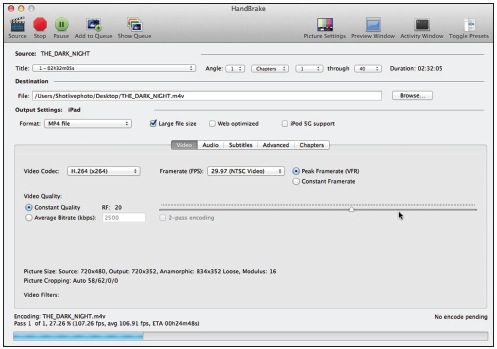
Figure 5-12
The HandBrake screen showing that I have about 25 minutes left in the ripping process. I use an older computer to rip my movies, which takes longer but I set it to work overnight so it doesn’t tie up my working machine.
5. Tell HandBrake what type of Movie Settings to use to create a copy from your DVD by choosing the iPad preset. This sets the optimal settings for movies that will be played on an iPad.
6. You can now adjust what you want HandBrake to rip. The Video Settings are selected for you but you can adjust the audio track, the subtitles, and the advanced settings (I leave these alone), and even add chapter names to movies if you want them.
7. Choose a destination for your movie files. I usually pick the desktop—because the movie will end up inside of iTunes, this is just a temporary holding spot.
8. Click on Start and be prepared to wait … for a long time.
The speed and power of your computer system determines how long it takes to rip a movie from the DVD to the computer. For example, my older Macbook Pro takes a few hours to rip a movie, but a newer machine with a faster chip and a lot of memory cuts that time down to about 15 minutes. Regardless of the computer, the best plan is to think ahead and set up the computer to rip the movie at night so that it’s all done in the morning and you didn’t waste any time waiting for it to complete.
Here are some things to know about HandBrake to help you get the best results:
• Pick the right audio track. Many movies have multiple audio tracks, and few things are as disappointing as spending hours waiting for a movie to be ripped and then finding out you have the director’s comments instead of the movie’s soundtrack.
• Get the entire movie. If you’re converting a DVD that contains separate episodes or multiple versions of a movie, you can copy them all by adding chapters to the queue instead of just running the program. This way, when you run the HandBrake queue, all the chapters or episodes will be ripped.
The other types of movies that you might want to transfer over to the iPad are those that you have made yourself. It is so easy to create videos these days. From little Flip video cameras and cell phone video cameras, to regular cameras with video capability, and even the built-in video camera on the iPad … anyone can be a moviemaker. If you have home movies that you’ve made, it is easy to watch those on the iPad as well. Wouldn’t it be great to have the movie from your last vacation with you … or maybe your wedding video, so you can show family and friends?
The obstacle to loading home videos on an iPad is that some movies are not in the proper format to be recognized by the iPad or iTunes. As a result, when you try to sync the movie to your iPad, you get an error message that tells you the movie is in the wrong format.
No worries! HandBrake can help by converting a movie from one format to another. Just follow the directions from the previous section. But instead of picking a DVD as the source, navigate instead to your movie file.
Now that the movie is in the iTunes application on your computer, you can transfer it over to the iPad by syncing with a USB cable. It is important to know that the movies that you rip will not be available on the iCloud service. These movies cannot be uploaded to or downloaded from the iCloud.
FREE eBOOKS
The iBooks app turns your iPad into a great digital book reader and because it supports both PDF and the popular ePub file format, you can get a lot of free content for your iPad—and all you need is a web browser on your computer.
First let’s look at where to find these books; then we will cover getting the books onto the iPad; and finally we will talk about getting covers on the books, since a good-looking bookshelf is just better than a plain-looking one.
There are a great may places on the web were free electronic books are readily available. Two of the best places to get free books are Project Gutenberg and ePub Books.
Project Gutenberg (www.gutenberg.org) is home to more than 38,000 books, all of which you can download and read on your iPad for free. The thing to remember with Project Gutenberg is that it stores the book files in many different formats—just make sure you download the ePub file format.
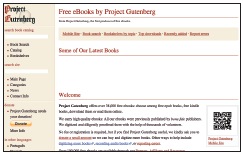
Figure 5-13
The Project Gutenberg website.
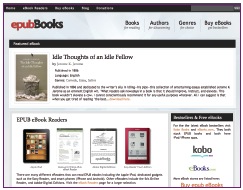
Figure 5-14
The ePubBooks website.
ePubBooks (www.epubbooks.com) is a great resource for free electronic books that are published in the ePub format. Because the iPad and iBooks use the ePub format, the books from this site work great. Many of the books here are also available from Project Gutenberg, but if you download them from ePubBooks you don’t have to worry about making sure you have the right format since they are all in the ePub format.
After you have downloaded the electronic book to your computer, you need to add the book to iTunes. Open iTunes, click on File, and then click on Add to Library. Navigate to where the electronic books are stored on the computer and click Continue.
The book will automatically be added to your Books section in your iTunes. The problem is that they won’t look really nice—just a gray box with image of a book. Click on the book, click on File, and then select Get Info to bring up the information for the book file. You can then add the artwork for the book cover—all you need to do is to find an image file of the cover that you want and copy it into the artwork section of the File info window. This is the same basic process as getting album cover artwork, which we covered earlier in this chapter.
All that’s left to do is to sync the iPad with the iTunes and your free ePub books will be available in the iBooks app. Because you didn’t purchase these eBooks from Apple, they will not be available from the iCloud. If you delete the book from your iPad, the only way to get it back is to re-sync from the computer.