
8: Your Portable Office
The Skim
iWork • Office on the iPad • CloudOn • Dropbox • All About PDFs iAnnotate PDF • PDF Expert • AirPrint and Alternatives
I’ll let you in on a little secret: I do all my writing on an Apple MacBook Pro using the Pages application. One of my favorite features is that the Pages program on my computer works a lot like the Pages app on my iPad. I never have to think about saving my files because it is done all the time automatically. I can’t tell you how much comfort that brings me when I’m working.
I have also started to do a lot more work directly on the iPad now, and the best part is that I didn’t even realize that I was doing it. Instead of going to my office and turning on the laptop, I just tapped the Home key on my iPad, tapped on Dropbox, picked the file I was working on, and tapped it to open it. When I was working on the last book, I did all the PDF markups in iAnnotate on my iPad. It was easy and convenient. Then there are the iWork applications (Pages, Numbers, and Keynote) that Apple adapted into iPad apps.
iWORK
Apple created three apps that together to make up the iWork suite:
• Pages: a word processor app
• Numbers: a spreadsheet app
• Keynote: a presentation app

Figure 8-1
The iCloud Settings showing that Documents & Data is turned on.
Each of the iWork apps runs on the iPad and retails for $9.99. That’s just under $30 for three apps that turn your iPad into a viable business tool. Now there is no reason to buy all three apps if you don’t need them. Not everyone needs presentation software, so buying Keynote might not be worth it to some. You don’t need to have all three apps at the same time for them to work, and you can always start with one app and buy the others as you need them.
All three of the iWork apps use the iCloud service to keep your documents available to all your devices and your computer. When the files created with the iWork apps are saved to the iCloud, it allows you to access the files using any web browser and any other iPad or iPhone as long as the device is signed into the same iCloud account. For example, I can create a letter on my iPad and access it on my iPhone. For this to work, you have to make sure that the Documents & Data settings are turned on in the iCloud settings.
To turn on the iCloud Documents & Data settings, just do the following:
1. Turn on the iPad.
2. Tap on the Settings app.
3. Tap on iCloud in the list on the left.
4. Make sure that the Documents & Data setting is turned on.
This now allows the iWork apps to access the iCloud and save the documents you create on the iPad. It also gives the apps access to your other files stored on the iCloud.

Figure 8-2
When opening Keynote for the first time, you are asked if you want to use iCloud.
With the iCloud service enabled, the first time you run any of the iWork apps you get a pop-up window that lets you know that the iCloud service is available and asks if you want to use it to “Automatically store your documents in the cloud to keep them up-to-date across all your devices and the web.” You can either tap on Later or Use iCloud.
If you tap Use iCloud, every document you create from then on will be saved in the iCloud. Now what this doesn’t say is that it will automatically sync with the iWork programs on your computer, but I believe that Apple is working on that functionality and by the time this book is out I hope that the desktop versions will automatically sync with the iCloud and the iPad apps. Ok, that might just be a dream but I envision a future where I will be able to access a document and edit it without having to worry where the document is or what I am using to edit it. Seriously, how great would it be to work on a paper at work on your computer, and then access it from your iPad later at home without having to create multiple copies across all the devices? I can wish, can’t I?!
Since the basic file handling and iCloud access for all three iWork apps work the same, let’s look at the basics for all three, and then we will get into the details for each app.
After you open an iWork app for the first time and are asked if you want to use iCloud, you then get the option of viewing a basic tutorial. The good news is that these tutorials include some good basic information and they are available for viewing and reviewing anytime.
Each of the apps has a great set of templates that are available when you create a new document. First, open a new document, and then you can pick from the templates. In the Documents view, tap the + on the top left corner and pick Create Document (in Pages, see Figure 8-3), Spreadsheet (in Numbers, see Figure 8-4), or Presentation (in Keynote, see Figure 8-5).
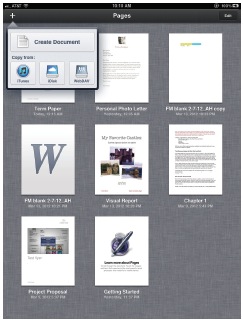
Figure 8-3
Tapping on the + in Pages brings up the new document menu where you can either import a document from iTunes, iDisk, or WebDAV, or Create Document in Pages (as shown).
After you tap on the new document in the individual apps, the templates open. In the Pages app you can choose from the following templates:
• Blank
• Modern Photo Letter
• Classic Letter
• Formal Letter
• Personal Photo Letter
• Modern Photo Letter
• Classic Resume
• Project Proposal
• Term Paper
• Visual Report
• Poster
• Syllabus
• Party Invite
• Thank You Card
• Recipe
• Flyer
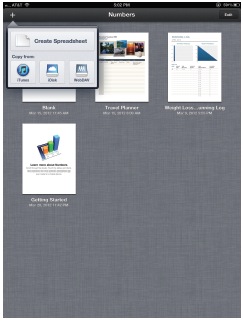
Figure 8-4
Tapping on the + in Numbers opens the Create Spreadsheet menu.
In the Numbers app you can choose from the following templates:
• Blank
• Checklist
• Loan Comparison
• Budget
• Mortgage Calculator
• Personal Savings
• Auto Log
• Weight Loss & Running Log
• Travel Planner
• Expense Report
• Invoice
• Employee Schedule
• Team Organization
• GPA
• Stats Lab
• Attendance

Figure 8-5
Tapping on the + in Keynote opens the Create Presentation menu.
In the Keynote app, you can pick themes instead of templates:
• White
• Black
• Gradient
• Photo Portfolio
• Renaissance
• Cerulean
• Showroom
• Chalkboard
• Modern Portfolio
• Harmony
• Parchment
• Craft
In the Document view of the apps, you will see an Edit button on the top right corner of the page. Tap the Edit button and the documents start to wiggle and you see three options on the top left corner—a share icon, a duplicate icon, and a trash can icon. When you tap on one or more of the wiggling documents you can then tap on the duplicate icon to make copies of the selected documents, or you can tap on the trash can to delete the selected documents. If you select a single document, you can tap the Share button, which brings up the Share options. Currently there are five Share options, but the iWork.com and iDisk options are no longer viable since Apple has discontinued those services and I expect that a future update to the app will not include these options. The other three Share options are:
• E-mail: This attaches the selected document to an e-mail and allows you to send it to someone. When you tap E-mail, you get to pick the file format to use. You can send the file as either an iWork version (Pages, Numbers, or Keynote), a Microsoft Office equivalent (Word, Excel, or PowerPoint), or as a PDF.
• iTunes: This allows you to transfer the file to the computer through iTunes. When you tap iTunes, you then get to pick the file format to use. You can send the file out as either an iWork version (Pages, Numbers, or Keynote), a Microsoft Office equivalent (Word, Excel, or PowerPoint), or as a PDF.
• WebDAV: This allows you to sign into a WebDAV server. You will need the Server address, User Name, and Password. If this is something you need, you will have the information from your workplace. You will then be able to upload the documents to the WebDAV server
Before taking a closer look at the individual iWork apps there is something really important that you need to know. The apps save constantly, so any change you make to a file is immediately saved when you make it, not later when you go to save the file. There is no Save command in these apps at all. This is really important since it can impact the way you work on your files.
Now for those of us (the few, the proud) who use the iWork applications on the Mac, we are already used to this cool feature and no longer worry about constantly saving files since the programs do it for us. However, if you are a person who sometimes creates new documents based on already-created documents and then uses the Save As feature to create a new document at the end of the editing process, this can be a real change in thinking. There is a way around this, and that is to duplicate the document before you start to edit. For example, if you want to make changes to a letter but you also want to keep the original, you need to first duplicate the file, and then edit it.
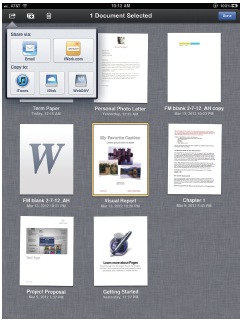
Figure 8-6
Tap Edit, and then select the document you want to export and tap the Share button to bring up the Share options.
All three of the iWork apps work in the same way, so this process works for Numbers and Keynote as well, but I am using Pages for this example.
1. Tap on the Pages app.
2. Make sure you are in the Documents view, which shows thumbnails of all the documents available to edit. If you are in the document editing window, tap on the Documents button on the top left corner.
3. Tap on the Edit button on the top right corner and the apps will start to wiggle.
4. Tap on the document you want to duplicate to select it (it will be outlined in yellow).
5. Tap on the Duplicate button, it is the second from the left on the top of the screen and looks like two squares over each other with a + in the middle.
6. You now have a duplicate document that you can rename by tapping on the name under the document and entering a new name.
7. Tap on Done after entering the new name, then tap on the document to edit it.
Now let’s look at the apps in a little more detail:
The Pages App
The Pages app is a word processor, but you can also use it to make some pretty cool page layouts and reports. As listed earlier, the app comes with a cool list of templates that cover everything from letters to resumes, and term papers to recipes. When you first create a new document in Pages, you get to choose one of the templates, or just use a blank template.
Once you open the document you can start editing it.
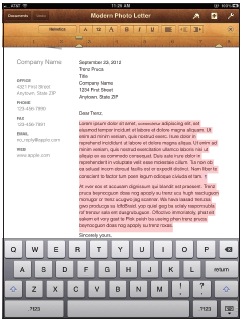
Figure 8-7
The Pages layout changes depending on what is selected on the screen. Here the text is highlighted, so the Text menu is shown at the top of the screen.
The screen layout of the Pages app adapts to what you are doing to take advantage of the iPad screen. The app tries to show only the tools needed for what you are doing at the moment, keeping open as much of the screen real estate as possible for viewing your document. For example, tap on Text and the Text menu appears on the top of the screen giving you access to the fonts, text size, and other text editing options. If there is an image in your document and you tap on it, then the Text menu disappears, the keyboard goes away, and the Image Editing menu appears. This keeps the interface clutter free.

Figure 8-8
The Settings menu in Pages.
Across the top of the screen there are five buttons that are always there. The five buttons are the following:
• Documents: This button takes you out of the editing mode and back into the Documents view. Here you can see the files that are on your iPad or in the iCloud service, if you are signed in.
• Undo/Redo: This button allows you to undo or redo the last commands. Tap it to undo, hold your finger on it to bring up redo.
• Formatting: This button looks like a little paintbrush. Tap this button to change the style of the text, change the fonts, and adjust the layout.
• Media: Next to the paintbrush is the Media button; it is a + on a square background that when tapped allows you to insert media, tables, charts, and shapes.
• Tools Menu: The final icon looks like a small wrench. Tap this button to share or print your document; search inside the document; set up a document; access the Pages setup; access the help menu; and access the Settings menu, where you can turn the spell check on and off, get a word count, and turn on or off the guides.
Typing on the iPad can be a little awkward—especially if you are holding the device in two hands—but there is a neat trick that splits the keyboard in two. You can tap and hold on the Hide Keyboard button until the Split Keyboard menu pops up. (The Hide Keyboard button is in the bottom right corner and looks like a keyboard with an arrow under it.) Tap on Split Keyboard, and the keyboard comes apart with half on one side of the screen and the half on the other side, making it easier to type with your thumbs when you hold the device in two hands.
But there is a much cooler way to do the same thing, or at least I think it is. When the keyboard is together, just place a finger on each side of the keyboard and swipe out to the edges—and the keyboard comes apart! When the keyboard is apart, just place a finger on each edge and push the two halves together to make the keyboard whole again.
The Numbers App
I have said it before and will say it again—I am not a number-crunching type of guy and never did use a lot of spreadsheets. But while this Spreadsheet app can do a lot of the calculations of a standard spreadsheet, it is really designed for the rest of us.
When you’re in the app and you tap on the + and then Create Spreadsheet, the templates that appear for you to pick from include options such as Budget, Mortgage Calculator, Personal Savings, and Weight Loss/Running Log. It has an Attendance Sheet, a GPA Calculator, and even a Travel Planner. Of course, there is also a Blank spreadsheet that allows you to enter anything yourself.

Figure 8-9
The Blank spreadsheet showing the table formatting available.
The Numbers app screen layout is very similar to the Pages app, where most of the screen is taken up with the actual spreadsheet instead of unneeded menus and palettes. Across the top of the screen are the Formatting, Media, and Tools Menu buttons. If you want to select a cell to edit, just tap on it. If you want to change the formatting of a cell or table, tap the Formatting menu button (it looks like a little paintbrush) and you can change how each cell is formatted.
For a spreadsheet to be useful to me, I need to be able to access it whenever I need it. That’s why the Numbers app and iCloud service are so useful together. I can create a spreadsheet on my iPad and, since it is kept in the iCloud, I can access it on my iPhone. For example, if I create a Travel Planner spreadsheet with a packing list, I can access and update the spreadsheet from my iPhone, and then when I’m back on my iPad the new info is automatically there.

Figure 8-10
Need to edit a cell? Just tap on the cell, tap on the Formatting button, and then tap on Cells to choose the type of formatting.
The Keynote App
The first thing that you will notice when you launch Keynote is that the app runs only in landscape mode. This is because Keynote is a presentation software that is meant to be shown on a monitor or television, or using a projector and screen setup. Since the orientation of all of those displays is landscape, there is no reason for Keynote to work in portrait mode.
The Keynote app offers 12 different templates that range from simple single colors like Black and White to more complex views like Showroom and Modern Portfolio. Tap on the template to open a new Presentation, and the first slide is shown. Tap on the + at the bottom of the thumbnail view to add a new slide from the available template. Building a presentation here is really easy. Tap on any element to change it by either using the menus that appear or tapping on the Formatting tool (the paintbrush icon).
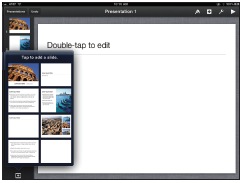
Figure 8-11
Adding a slide to your presentation is easy. Tap on the + at the bottom of the thumbnail view and then pick the type of slide you want to add.
Where Keynote really shines is when connected to an external display and used to give presentations. The output on the big screen is controlled by swiping on the iPad and there is even a built-in pointer. When on any slide, hold your finger on the screen and a bright red dot appears on the screen. Without picking your finger up, you can now slide it around just like you would if you were using a laser pointer.
If you have an Apple TV, then you can take the Keynote app to the next level by wirelessly using the iPad to give presentations. You need to have an Apple TV that is second generation or later, and it needs to be running iOS 5.1 or later. Both the Apple TV and the iPad need to be on the same Wi-Fi network. To make this work, double-click the iPad’s Home button to open the multi-task bar, and then swipe from right to left where the volume and play controls are located. An AirPlay button will appear. This will give you the presenter screen on your iPad so you can see your notes and the full presentation that is playing on the television connected to the Apple TV.

Figure 8-12
Tap on the Tools button to bring up the Tools menu.
OFFICE ON THE iPAD
Start talking about doing work on the iPad and the first question that often comes up is, “What about Microsoft Office?” I am surprised that Microsoft hasn’t created a version of its best-selling business applications for the iPad yet. In February 2012, a rumor surfaced along with photos showing a Microsoft Office iPad app. As I write this, there is no sign of the app in the App Store but I believe that sooner or later Microsoft will realize that there are a huge number of people with iPads and most of them would love an Office app. Until that happens, there are other options.
You can export all of the iWork apps files into their Microsoft equivalents. You can also use the iWork applications to edit Office documents on the iPad using the iCloud. Just follow along:
1. Open a web browser on your computer.
2. Navigate to iCloud.com.
3. Sign in to your iCloud account.
4. Click on the iWork logo.
5. Click on the gear symbol in the top right corner.
6. Click Upload Document and a pop-up window opens allowing you to navigate your computer.
7. Find the file you want to upload and click on it, and then click Choose and the file will be uploaded.
The next part is to open the file on the iPad:
1. Turn on the iPad.
2. Open the iWork app for the file you want to open (Pages for Word docs, Numbers for Excel spreadsheets, or Keynote for PowerPoint presentations).
3. In the Documents view, tap on the new Office document to open it.
4. The app will now convert the file but gives you the option to open as a copy, preserving the original.
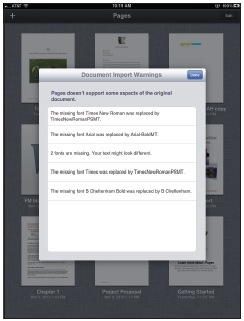
Figure 8-13
When you open a Word document in Pages on the iPad, a message shows what had to be changed or converted in the file.
5. Any changes that are made to the document are then shown. These changes are mostly formatting changes, since the iPad has a limited number of fonts and so substitutions often have to be made. Also, because Pages doesn’t run the same exact way that Microsoft Word does, there might be problems with any custom templates or specialized formatting.
6. The document opens in the app.
The Office file is now transferred to and editable on the iPad, and the copy is automatically saved on the iCloud service. That means you can download the edited copy onto your computer from iCloud anytime, and because you can pick the file type when you download files from the iCloud.com site you can open the edited file in Office on your computer.
CloudOn
There is a new free service available for the iPad that promises to bring together a web-based version of Microsoft Office and your Dropbox account, which allows you to get Office files on your iPad and updates them automatically. The only downside is that you have to be connected to the Internet. This service is the real deal and I suggest that anyone looking for Microsoft Office on the iPad give this a serious look.
Download the CloudOn app from the App Store and launch it. You can sign up for an account right on the iPad. Transferring files in and out of the app is done by Dropbox, so you will want to sign up for a Dropbox account. (Dropbox is covered in the next section.)

Figure 8-14
Using the CloudOn app you can access the Office apps and open and edit your files in Microsoft Office on the iPad, as long as you are connected to the Internet.
One very cool feature of the CloudOn service is that it automatically saves your documents when you exit the program, in the same way that the iWork apps do. This means that the edited version is in Dropbox automatically.
Dropbox
If there is one app or service that makes the iPad really useful as a portable office solution, it is Dropbox. Dropbox is basically a cloud-based folder that holds your files and automatically syncs between the computer, iPad, Internet, and any other app that accesses it so that the files are always up-to-date on all of your devices.
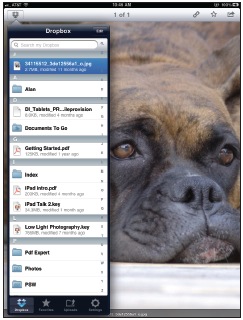
Figure 8-15
Dropbox allows you to access your files from anywhere you have Internet connectivity. It supports multiple file types and you can view all of them right in the app.
The beauty of Dropbox is that it is easy to set up, easy to use, and free. That’s right, the basic service is free. There are four steps to using Dropbox on your iPad and your computer:
1. Download the Dropbox app to your iPad.
2. Sign up for a Dropbox account.
3. Download the Dropbox program to your computer.
4. Sign in to link the iPad to the Internet and to any computers you have Dropbox installed on. The Dropbox shared folder is now available for use
Getting the Dropbox app is easy, just go to the App Store and search for Dropbox, and then install it. Tap on the app to launch it and sign up for an account right on the front page of the app. All you need to do is enter your first name, last name, e-mail, and a password, and then tap on Create Free Account.
Once you are signed into Dropbox, any file you put in the Dropbox folder is accessible from the computer, the Dropbox website, and the iPad. In Dropbox you can share folders with others so that multiple people can access the same folder. You can also upload photos stored on your iPad into Dropbox, which enables you to send images to others automatically. To upload your images directly into the Dropbox folder, just do the following:
1. Tap on the Dropbox app on your iPad.
2. Log into your account.
3. Tap on the Dropbox menu on the top right corner.
4. Tap on the Uploads button on the bottom of the menu.
5. Tap on the + on the top right corner of the menu.
6. Tap on the photos you want to upload.
7. Tap on the Dropbox button on the bottom of the list to pick a location to save the image.
8. Tap on Choose to pick the folder or tap on Create Folder to make a new folder. If you make a new folder, type in the name and tap create, and then click on Choose with the new folder highlighted.
9. When the view showing the selected images is back on the screen. Tap on the Upload button located on the top of the menu to transfer the files to Dropbox.
Hopefully this is a sign of things to come, and soon we will have the ability to upload any type of file from the iPad to Dropbox. Right now the only files that can be added from the iPad to Dropbox are photo files. That is, you can’t create documents in the iWork apps and then load them into Dropbox.
ALL ABOUT PDFs
PDF files are everywhere and the iPad is no different; even the iBooks app will read PDF files. There are some great PDF apps for the iPad, but to me two stand above the rest. The first is iAnnotate, which is great for marking up documents, and the second is PDF Export, which enables you to fill out PDF forms among other things.
One of the most common ways I get a PDF onto my iPad is by e-mail. When you get an e-mail with an embedded PDF and you want to open it on your iPad, hold your finger on the PDF icon in the e-mail. A menu opens with options; tap on Open In ... and then tap the PDF app you want to use. This opens the file right in the chosen app.
To e-mail a PDF out of the app, just tap on the Export button at the top of the app when the document you want to export is shown. This will give you the option to Mail Document, Print, or Open In .... Tapping on Mail Document will save the file and embed it into an e-mail.
iAnnotate PDF ($9.99)
The iAnnotate PDF app is one of the most powerful PDF editor apps that I have come across. It allows you to fully annotate PDF files so that they can be read in standard PDF readers like Adobe Acrobat and Preview. This allows you to receive PDFs by e-mail, Dropbox, or through iTunes sync, and then mark them up and return them from the iPad. You can also customize the tool bars so that you see only the tools you use.
iAnnotate has a lot of annotating tools on the right side of the screen that you can hide at any time just by sliding the tab closed:
• Note: Just tap on the location where you want to leave a note.
• Pencil: You can use this to draw freehand on your document.
• Highlight: This tool enables you to highlight any text. Start by moving your finger over the text you want to select, and then remove your finger. You will see trim handles that allow you to adjust the selection. (This is great for those of us with fat fingers.)
• Freehand Highlight: You can highlight anything in any color using this tool.
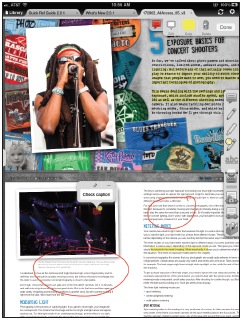
Figure 8-16
I used iAnnotate to edit the PDF files from my last book right on the iPad. I loaded the files into Dropbox, and then accessed and marked them up on my iPad.
• Underline: You can underline the text on the page. The controls are the same as the highlight tool.
• Typewriter: This tool allows you to type notes directly onto the PDF. Tap the location where you want to type a note and the built-in keyboard appears.
• Toolbox: This is where the rest of the tools are hiding, and there are a lot of them. Fifty-six different tools to be exact, as you can see in figure 8-17 (which shows 35 of the possible 56 choices), and you can show any of them in the toolbar.

Figure 8-17
The full set of tools available in the app.
To access and edit the different toolbars, do the following:
1. Tap on a toolbar to select it.
2. Tap on the gear icon at the top of the toolbar to edit it or delete it.
3. In the Edit window, tap and drag a tool to the toolbar you want.
4. Tap on the + on the bottom of the menu to add more toolbars.
5. To access the toolbars, swipe over them to open.
You can set the toolbar to your liking and this can save a ton of time if you are a big PDF annotator. I know of no other PDF app that has this many tools and gives you this much control over where they are.
PDF Expert ($9.99)
The PDF Expert app allows you to not only read and annotate PDF documents, it also lets you actually fill out PDF forms. If filling out forms is important then this is the app for you, and since you can use it to annotate as well, it might just be the only PDF app you need on your iPad.
When you open the PDF Expert app you have four choices on the left:
• Documents
• Recents
• Network
• Settings
Tap on Documents and you will see two preloaded PDF files—a PDF Expert Guide and a What’s New file. The Recents tab shows you the files you opened recently, which is very useful when you have a ton of files loaded. The Network tab allows you to transfer files over to the app without having to connect it by USB cable or by sending yourself an e-mail. When you tap on the Navigate button, you are presented with two options—the first is the address of the iPad on the network, the second is a button that tells the app to look for nearby servers including WebDAV servers. On the top left of the Network menu is the Add button. Tap this button to access your cloud-based storage, including MobileMe and Google Docs, but the solution that I use is Dropbox.
To set up the PDF Expert app to use Dropbox, just tap on the Dropbox button. Now enter your name and password for the Dropbox account. The Dropbox account will now be listed under the favorite servers in the Network list.
Tap on the Settings tab on the left and you get the following options:
• Passkey Lock: You can passcode lock the app so it requires a passkey to open it. This is great if you use the iPad for business and also let the kids play with it. It means they can’t get into and delete the important stuff, but be careful you don’t lose the passkey because there is no way to recover it.
• Wi-Fi Drive: This app allows you to share its data with computers on the network using WebDav protocol. There are detailed instructions to set this up right here.
• PDF Viewer: The Settings here allow you to turn Highlight lnks on and off and Highlight Form Fields. It is also where you can scroll pages either horizontally or vertically, and you can adjust the lowest page zoom to either page width or the whole page.
• Auto-open: Turn this option on and the documents will automatically open after being downloaded.
• Support: You can send feedback to the PDF Expert app team right here.
• Legal Notes: This includes all the legal stuff that no one ever reads.
To show the power of the app, here is a quick walk-through with a real-life example of getting, filling out, and retuning a PDF. I downloaded the 1040 form onto my computer since as I write this it is tax time here, but you can do this with any PDF form.
1. Open Dropbox on your computer.
2. Create a new folder in Dropbox called PDF Expert.
3. Put the 1040 PDF file into the PDF Expert folder in my Dropbox.
4. Open PDF Expert.
5. Tap on Network.
6. If you haven’t added your Dropbox account, do so now (you can find instructions for this earlier in the chapter).
7. Open your Dropbox and tap on the PDF Expert Folder.
8. Tap Sync, which enables two-way synchronization. The folder is added to the Documents list and the Sync button will appear on the bottom left corner.
9. Tap Sync This Folder.
10. Tap on the file you want to edit (in this case it’s the 1040 tax file).
11. All the fields that can be entered are highlighted.
12. Start entering the information into the form.
13. When you are done tap the Back button on the top left corner of the screen.
14. You will see a list of your documents.
15. Tap the Sync button on the bottom left corner.
16. Tap either Push Changes or Full Sync.
17. This syncs the PDF Expert folder with Dropbox so that the same file is now updated back on the computer.
If you are filling out PDF forms, then this app is the one to use. You can even add a signature. This really appealed to the geek in me, since you get to sign on the screen with your finger.
If you need to sign a PDF, just hold your finger on the screen until the Note | Text | Signature button appears, and then tap on Signature. This opens the Signature panel. You can change the color and size of the “pen” by tapping on the controls on the top of the page. Then just sign your name on the dotted line. It might take a try or two. To start over tap on the New button on the top of the page—it looks like a blank page. Once you have the signature done, tap Save. Your signature will now appear in the PDF and you can position it and resize it as needed. If you need to change the signature or just want to experiment with using your finger to sign stuff, tap on the Pen tool on the top of the screen to open the Signature panel.
AIRPRINT AND ALTERNATIVES
We have covered getting the files on and off the iPad using iCloud and Dropbox, but what if you actually need to get a hard copy of your documents (or e-mails or anything else)? Apple has got you covered here with the AirPrint capability built right into the iPad. The only downside is that the printer needs to support the AirPrint protocol and the list of compatible printers, while growing, is not that long.
To see the complete and current list of AirPrint-compatible printers, visit support.apple.com/kb/HT4356.
There is no need to set up any drivers or special software. All you do is tap the Print command and pick an available printer and you are good to go. But if you don’t have an AirPrint-enabled printer, there is a nifty computer application called Printopia that allows you to print to any printer connected to your computer as long as you are using a Mac. Sorry Windows users, this one isn’t for you.
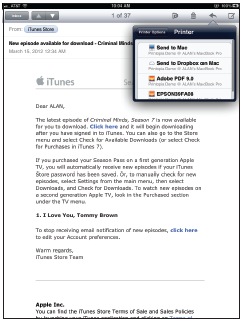
Figure 8-18
The Printopia service allows me to print my e-mails (or anything else) to any printer attached to my Mac, even if the printer doesn’t have AirPrint functionality.
What you do is run the Printopia application on your Mac, which allows you to share the printer connected to your computer with the iPad. You can also print to virtual printers to save any printouts to your Mac as PDFs. On the downside, Printopia costs $19.95, but there is a free demo. Go to www.ecamm.com/mac/printopia to check out this cool program.
There is no need to install anything on the iPad because it “sees” the Printopia printers as AirPrint printers. I’m sure that when I buy my next printer, it will have AirPrint built in, but for $19.99 I can use my current printer with the iPad and it works great.
