
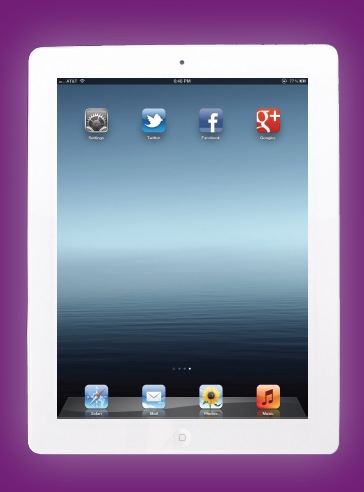
12: Social Media
The Skim
Twitter • Facebook • Google+
Social media has changed the way we interact and keep in contact with each other. Facebook now has over 800 million active users, with more than 50% of them (that’s 400 million users!) logging on every day. Facebook is available in more than 70 different languages and there are now more users outside the United States than in the United States. The statistics for Facebook users on mobile devices are also quite impressive, with more than 350 million users actively accessing Facebook through their mobile devices, including iPads.
The Twitter numbers, while not quite as high as Facebook, are also really impressive, with more than 300 million Twitter users generating more than 300 million Tweets and 1.6 billion searches a day.
A new player in the game is Google+, bursting on the scene in 2011 and gaining more than 62 million users in just the first few months. It looks to be on track to have over 400 million users by the end of 2012, according to analyst Paul Allen.
Many companies believe that the future of interacting with their clients is tied to social media and many now have both a Facebook page and a Twitter account. This method of interaction can make the company seem more personable and it does seem to be working. For example, a few weeks ago I was trying to find out if my computer backup system could use the new software a company released. Instead of going though a long e-mail contact form, I just sent the company a Tweet and got an answer within 30 minutes. It was great customer service and it made my interaction with the company feel way more personal.
The iPad is a great device for keeping up with the social networks, and with the new iPad, Apple has built Twitter integration right into the operating system. Facebook has an official Facebook app and Google+ is trying to catch up.
Twitter allows you to send out short messages that can be read by anyone following you. These 140 character–long messages, or “Tweets,” are like text messages sent out on the Internet. You get to read the messages, or Tweets, of the people you follow.
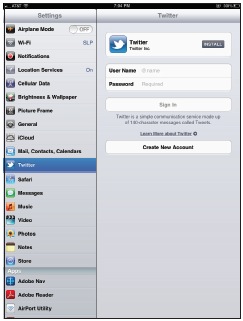
Figure 12-1
The Twitter options in the Settings app on the iPad.
When Twitter first started, the messages were just plain text, but now you can Tweet out images, videos, and web links. Twitter also has a built-in messaging system called Direct Message, which works like e-mail between two people who follow each other. Twitter also uses the #, or hashtag, to facilitate searching of topics, but more on that in little later on. There are quite a few good Twitter apps for the iPad including a pretty good official Twitter app.
Built-in Twitter Functions
The reason I discuss Twitter first in this chapter is because it is integrated right into the iPad operating system, which allows you to use it without an actual app. Let me clarify that—you need to have a Twitter account but you don’t need to have the official Twitter app or any of the third-party Twitter apps installed to send out some Tweets. You can simply use the Share menus in built-in apps—you can Tweet images directly from the Photos app and web links directly from the Safari apps. You cannot, however, create regular Tweets (those not generated inside of the Photos or Safari app) without the official Titter app or one of the third-party apps.
The first step is to go to the Settings app and tap on Twitter in the list on the left. You are now faced with four options:
• Download the official Twitter app if you haven’t done so yet
• Sign in with your Twitter username and password
• Click on a link to get more info on Twitter
• Click on link to Create New Account
If you don’t have a Twitter account, you need to sign up for one and you can do this right on the iPad. Once you have signed up for Twitter you can sign into your Twitter account in the Twitter settings, and then you get the option to Tweet from the Share menu (without running any Twitter apps). For example, you can Tweet links directly from Safari, photos from the Photos or Camera apps, movies from the YouTube app, or maps from the Maps app—and you can add the location information right to the Tweets.
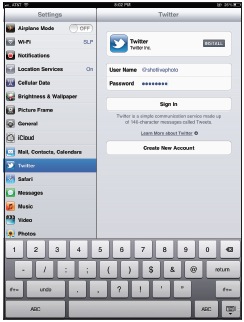
Figure 12-2
The User Name and Password entered, but no Twitter app installed.

Figure 12-3
The Tweet option when you want to export a photo.
If you want to Tweet a photo from your iPad, just go into the Camera app, take a photo, tap on the Export button (also called the Share button), and you will see a list of options that includes Tweet. Tap on Tweet and a message window opens allowing you to add text and/or a location to your Tweet. Press send and the Tweet is Tweeted out to the world.
Even though you can Tweet from different built-in apps, to unleash the real power of Twitter you need to have a Twitter app so that you can see the Tweets of the people you follow.

Figure 12-4
Once you tap Tweet you can add text, and the photo is attached to your Tweet.
The Twitter App
The official Twitter app is free and you can download it from the App Store or right from the Twitter settings in the Settings app. Once you’ve installed it on your iPad, tap on the Settings app and then on Twitter on the left. A list of apps appears on the right—choose the ones that you want to allow to use your Twitter account information.
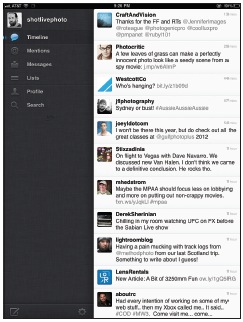
Figure 12-5
The Twitter app showing the timeline.
Launch the Twitter app and you will see that the layout is a simple two-column affair. The left column allows you to pick what information is displayed on the right column. There are six choices:
• Timeline: This is where you see the Tweets from the people you follow. You can tap on a single post and everything slides neatly to the left. If the Tweet that you click on has a photo, link, or any attached info you will see it here.
• Mentions: This is where you see Tweets that mention your username. They can be Tweets that are directed to you or Tweets that you wrote that have been reTweeted by others.
• Messages: These are where you find the direct, private messages from other people on Twitter. You can send messages only to people who follow you.
• Lists: You can create different lists of people, making it easier to sort the incoming Tweets. This is especially useful if you follow a lot of people.
• Profile: This is how the other people on Twitter see you.
• Search: You can search Twitter here and can access saved searches when needed.
On the bottom of the left column there are two buttons: the first, which looks like a pen and paper, is used to create a new Tweet, and the second, which looks like a gear, is a Settings button. The new Tweet button allows you to write a Tweet and send it out, and the Settings button allows you to set the notifications and add additional Twitter accounts if you have more than one. (Some folks like to have both a business and a personal Twitter account, for example.) It is here that you can set which services deal with images and videos; what app (if any) you want to use to read tweets that you save for later; and image quality and sound effects.
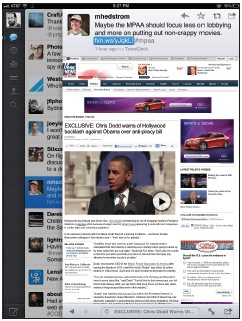
Figure 12-6
Tap on a Tweet in the timeline to see the details of the Tweet, including any attachments.
Other Twitter Apps
If you search for Twitter in the App Store you will find a good selection of apps with names like Echofon for Twitter, Tweetcaster for Twitter, and HootSuite for Twitter—and they are free. All of these apps give you the same information but in different ways. I like these apps and the different ways they look, but there is a hidden cost at times. For example, the very slick Tweetcaster plays advertisements across the bottom of the app. For these apps to work, you have to allow then access to your Twitter account.
Many of the Twitter apps allow you to post to multiple accounts at the same time and even allow you to post to your different social networks at the same time. This means that you can post to Twitter and Facebook from the same app.
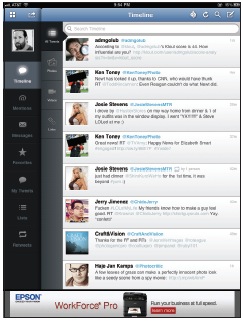
Figure 12-7
The Tweetcaster app plays ads on the bottom of the screen, but the interface is so well done that it has become one of my favorite apps.
Facebook is the largest social media network on the planet and is probably going to keep growing. Facebook finally released an official Facebook app for the iPad in 2011, and although it has a nice look and feel, you might just find it easier (and faster) to check your Facebook account using Safari. If you don’t have a Facebook account and want to set one up, go to www.facebook.com on a computer or on Safari on the iPad and follow the directions for setting up an account.

Figure 12-8
The Facebook Log In screen.
The Facebook App
Once you have loaded the official Facebook app on your iPad, tap it to open and you will see the Log In screen where you can enter your e-mail and password to access your Facebook account. There is also a Sign Up for Facebook button on the bottom of the screen if you don’t have a Facebook account yet. If you tap on the Sign Up button, the app opens Safari and sends you to www.facebook.com, where you can sign up for an account.
After you have entered your information and tapped the Log In button you will see your Facebook stream. Well, you will after a while. Here is one of the main problems with the Facebook app and one of the reasons that I still use Safari more than the app to check Facebook: The Facebook app is slow. In my unofficial time trials, my Facebook stream took about 12 seconds to load with the app, but took about half that time when I opened it with Safari. Now, I know that a 6 second difference is not a whole lot of time, but when you are staring at the iPad waiting for it to do something, 6 seconds can seem like forever.
The real advantage to the Facebook app is that the interface looks a little better than the website and each post is easier to see, especially when it comes to videos. If you look at Figures 12-9 and 12-10 you can see the same post on the Facebook app and the Website, and it’s clear that the video on the app is much easier to see.

Figure 12-9
Video post on the Facebook app.

Figure 12-10
Video post on the Facebook website on Safari.
The layout of the Facebook app is very clean, with the main controls located across the top of the screen. The first button is the Menu button, and tapping it brings up the list of items that can be displayed on the main part of the app. This includes your News Feed, Messages, Friends, and Photos. Just a single tap on any of them and the main window changes to show the selected data. The iPad is a great device to show off your photos and Facebook knows this, so it has worked hard to make photo viewing on the iPad app really slick.
Tap on the Menu button, then tap on Photos and the screen shows you all the galleries you have on Facebook. Tap on a gallery and then on one of the photos to view it full size. Swipe across the screen to get to the next image, or tap to bring up the controls.
As I mentioned before, although the Facebook app is well done it does tend to be a little slow, especially when first starting up. Thankfully, it runs faster on the new iPad compared to the older iPads, but that is to be expected since the new iPad has a faster processor and more memory. Also, the new iPad can download the data faster when on a 4G network compared to the older generations of iPads.
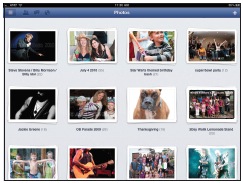
Figure 12-11
The photo galleries on my Facebook account.
Using Facebook in Safari
There is another way to use Facebook on the iPad that is really easy, especially for those of us who use Facebook on a computer regularly. You can use the built-in web browser Safari to access your Facebook account as if you were on a computer. There are a few tiny layout glitches, but on the whole it works great. Here’s how to do it:
1. Open the Safari app.
2. Navigate to www.facebook.com.
3. Either log in to Facebook if you have an account or sign up for an account.
Checking the Keep me logged in box will show your Facebook page every time you navigate to Facebook.com on your iPad. Once you have logged in, you’ll see that the Facebook page doesn’t quite fit the screen properly. This is the one drawback to using the Facebook website over the Facebook app—some things just don’t look right. If that bothers you then the app is a better way to go.

Figure 12-12
The Facebook Log In page in Safari.
One cool thing that you can do is create a link to the Facebook website that is accessible from the Home Screen, making it a one-tap job to get into Facebook. All you have to do is the following:
1. Open the Safari app.
2. Navigate to www.facebook.com.
3. Log in if you need to.
4. Tap the Export button at the top of the screen.
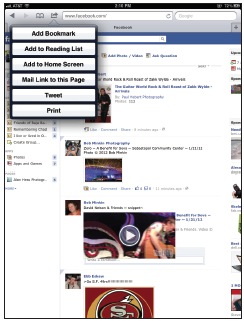
Figure 12-13
The Export menu showing the Add to Home Screen menu choice.
5. Pick Add to Home Screen.
6. Name the link (Facebook, or anything else you want).
7. Tap Add.
That’s it! You now have a link that looks just like an app icon and will take you right into your Facebook account in Safari.
GOOGLE+
It seems that Google is everywhere. Many people use Google not only for their Internet searches, but also for their e-mail (Gmail) and now Google+ for their social network. Google+ went public in the middle of 2011 and has grown quickly. Google continues to try to make the service better and has added features not found on the other social networks, including the ability to have a video “hangout” with a group of friends and really easy photo sharing. There is also a unique and easy way of sorting the people you follow into circles. What Google+ doesn’t have is an iPad app, and there is a problem using it on the built-in Safari web browser. So why did I include it here? I believe that the service will continue to grow, and grow quickly.
There are two ways to access a Google+ account on the iPad. Neither is great, so I hope that Google puts out an iPad app soon. Now I know that Google is the force behind the Android mobile device operating system that competes with Apple, but they also see the large number of people using the iPad. There is an iPhone version of the Google+ app, and since it can be used on the iPad that is the first and best choice right now for accessing your Google+ account on the iPad.
Google+ iPhone App
When you install the Google+ app on the iPad and first run it, you are asked to sign in or create a new Google Account. If you tap on Create a New Google account, you are taken to Safari and the Google account page opens. If you have any type of Google account, including a Gmail account, you can instantly sign up for Google+. After you have signed up for a Google account, you can now sign in and start to use Google+ on your iPad.
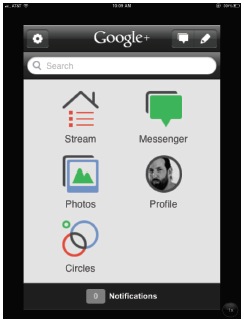
Figure 12-14
The Google+ app home screen.
On the sign in screen, you can check the box that allows the app to remember the account so that you don’t have to sign in each time. The Google+ app main screen has four sections:
• Top menu bar: This bar across the top of the app has three buttons: Settings, Messenger, and New Post.
- Settings: The Settings menu allows you to sign out of your Google+ account, set up the push notifications that show up on the bottom of the main screen, choose the stream views, set up who can message with you, and provide feedback to Google. There are also the Google Privacy Policy and the Terms of Service agreements.
- Messenger: This part of the app allows you to start a conversation with up to 50 people. Just type the name, e-mail, or circle to get started. Then just type the message and the recipients will be notified that you have started a conversation with them.
- New Post: To create a post, tap on the New Post icon on the top right of the screen. This allows you to create a post and pick which circles you want to share it with, add a location, and even add photos.
• Search bar: This allows you to quickly search for posts or people. Just tap the search bar and the screen changes, bringing up the option to search for posts or people with a search bar across the top. Tap Cancel to go back to the main screen.
• Main Menu: The main part of the screen has five menu choices: Stream, Messenger, Photos, Profile, and Circles. Each of these is covered in more detail a little later on in the chapter.
• Notifications: The notifications count across the bottom of the screen allows you to quickly see how many unread notifications you have. This includes comments that have been made on your posts and who has added you on Google+.
The main section of the Google+ app is broken down into the following five sections:
• Stream: This is where you go to see people’s posts (including your own). The stream is updated in real time, so it shows the most current first and then the older posts. Use your finger to scroll up and down through the posts and if you see one that you want to comment on, just tap it. The post will open up and you can comment or let the author know you like the post by tapping on the +1 in the upper right corner.
• Messenger: Tapping on Messenger opens up all the conversations you have going. You can also start a new conversation by tapping on the New Conversation button on the top right of the screen.
• Photos: One of the really great parts of Google+ is how it deals with photos, and that is evident here. Tap on the Photos button and you get a list of photos from different sources. The photos start with those from your circles, then photos of you, photos from your phone, followed by profile photos, and then photos from any of the photo galleries that you have created.

Figure 12-15
The Photos tab in the Google+ app.
• Profile: This is where you can enter the information that people who follow you get to see, including a profile photo and website address.
• Circles: Circles are the way that Google+ organizes the people that you follow. You can set up as many circles as you want and people can be in multiple circles. For example, I follow a lot of photographers and have them all in a circle called “Photographers;” some of them are also close friends and so are also in the “Friends” circle. If you tap on a circle to see all the people in it, look across the bottom of the screen—you can look at the circle by the People, the Posts, or the Photos.
Google+ on Safari
You can also access Google+ on your iPad using Safari. Tap on Safari and enter plus.google.com into the address bar to load the mobile browser version of Google+. That’s right. Even though most websites treat the iPad Safari browser as a desktop version, Google+ doesn’t.
The first thing that you have to do is sign in, but then the mobile web browser version works very much like the app, with a menu divided by stream, photos, circles, profile, and notifications. Tap on any of them and you get the same options as with the app.
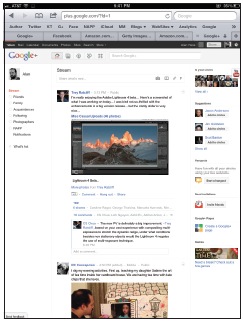
Figure 12-16
Google+ on Safari using the desktop view settings.
Now you might be tempted to change the view to the desktop version from the mobile version, since the iPad has a lot more screen space than the smart phones that the mobile version of the browser was meant for. You can do that—just scroll to the bottom of the page and where it says view in: Mobile | Desktop, just tap on Desktop.
A word of warning: This view doesn’t seem to be all that stable and can cause the screen to freeze and Safari to crash. I’m not saying that it does that for everyone, but it has done it to me so many times that I find using the app, even though it was designed for the iPhone and not the iPad, to be a better experience than using Safari and the desktop view.
A word in general about social networks and the iPad: It’s a good idea to keep the iPad locked with a password if you plan on making any social media posts with the iPad. Just think of the sheer amounts of information about you that you would not want others to have. Tap on the Settings app, then tap on the General tab, then turn the Passcode on. You’re protected!