
Riding Figures
Correctly ridden figures are the hallmarks of good riding. Dressage tests consist of one figure after the next, such as a turn across the diagonal followed by a ten-meter circle. And courses are really no more than school figure patterns with jumps. Figures not only test your skills as a rider—understanding geometry, timing and correct use of the aids, and keeping your horse under control as you turn—but also test your horse’s basic training. Think about it: if you can’t get your horse to go from point A to point B in some sort of organized fashion, you’re missing vital rudiments. Properly ridden, figures also diagnose problems in your horse’s training. Let’s say you can’t get your horse to make a change of rein out of a circle. The problem could be balance or bend or even submission. Figures give you somewhere to start to evaluate your training. One of the best side effects of school figures is greater flexibility because figures require a horse to use her body properly. But to benefit from figures, you first have to ride them correctly. Let’s review the aids.
The Mechanics of Turning
Your horse is built long and narrow, just like a bicycle. We all know that it takes very little effort to turn a bike or push it off balance. You don’t turn a bike by wrenching on the handlebars; wherever you look, along with a gentle touch on the handlebars, is where you’ll go. This happens because when you turn your head and the direction of your eyes, your weight follows. That shift in equilibrium affects the bike’s direction. This same shift influences your horse because she feels most balanced with her long and narrow body centered beneath her cargo. And if a horse can feel the tiniest fly land on her coat, she’ll certainly feel your stability change.
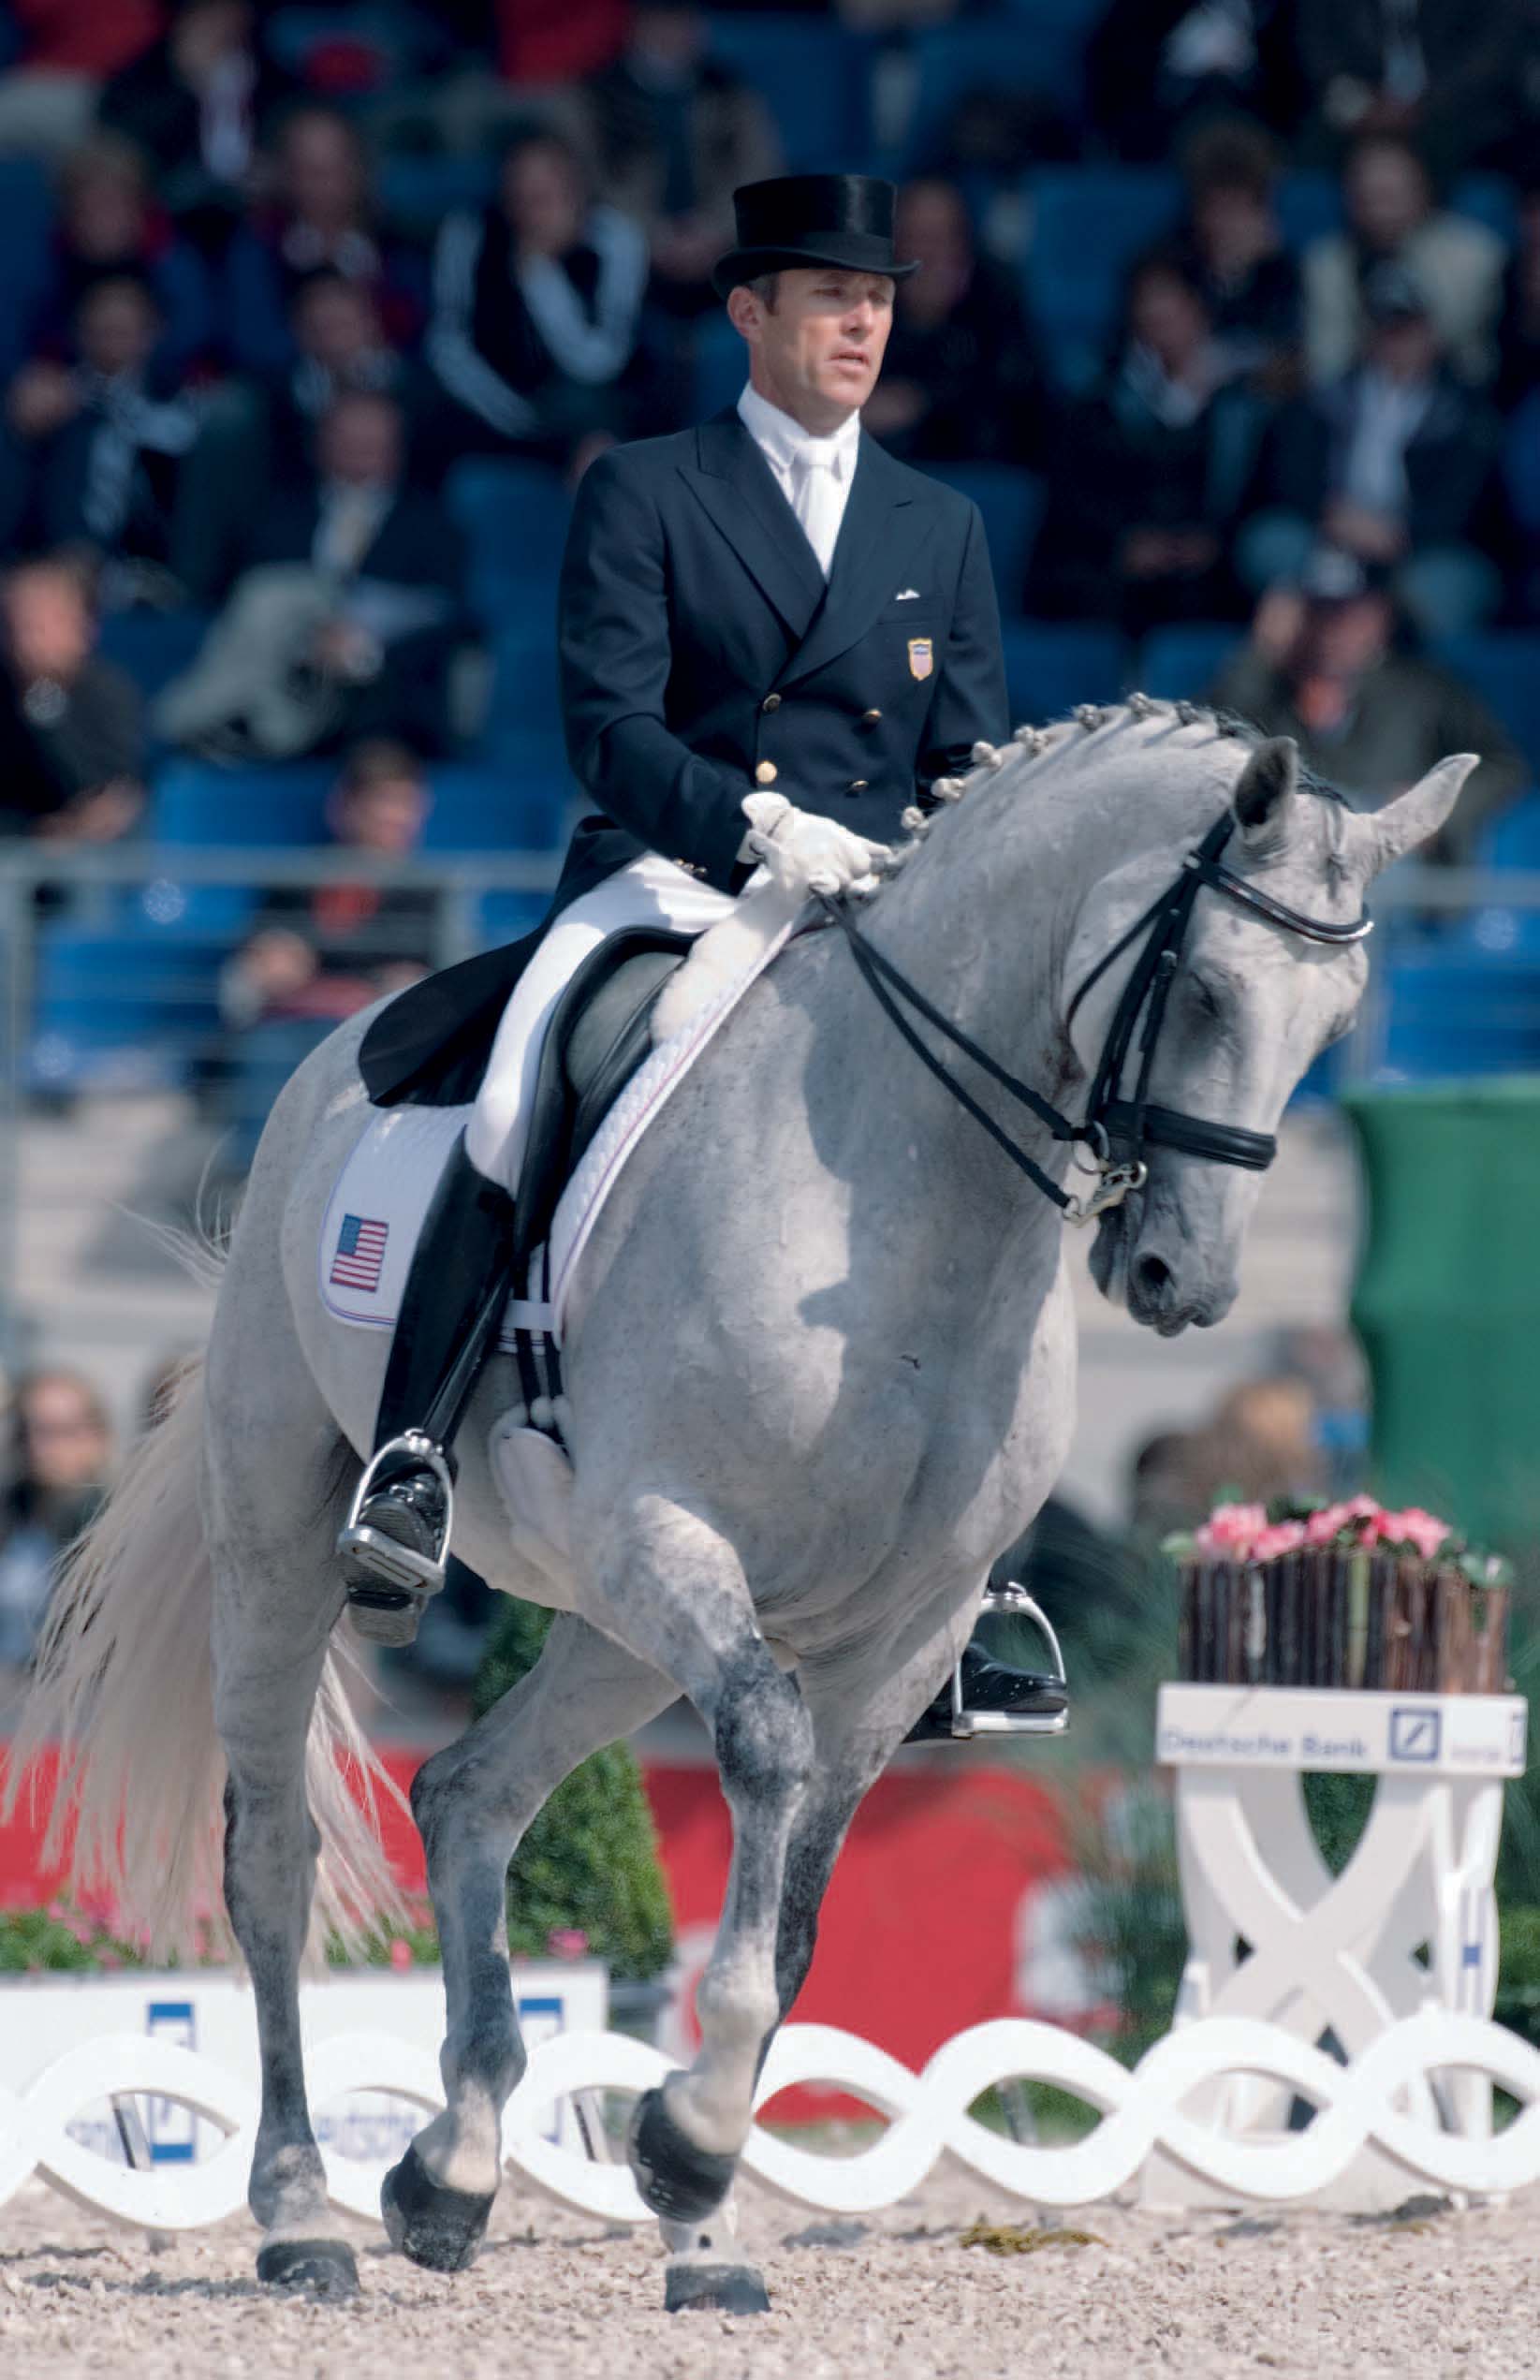
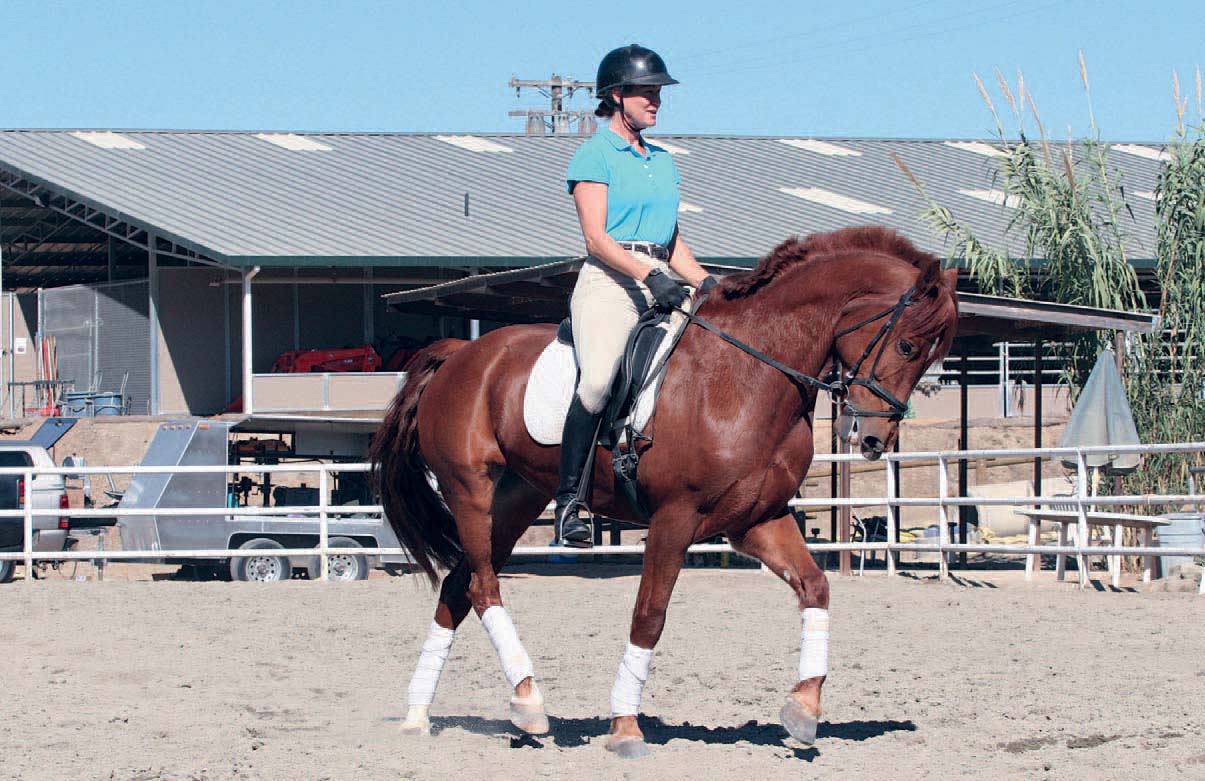
This balanced dressage rider demonstrates the correct use of aids as she and her horse turn.
The horse’s narrow build also means that she has to use her neck as a balancing pole. If you interfere with that balancing pole, say, by pulling the horse’s neck in the direction of your turn, you’ll actually force her to balance in other ways, such as leaning on one shoulder or falling in or out. If you’ve ever ridden a young horse, you’ve probably noticed that she feels very “wiggly” and looks unsettled in her outline. That’s because she’s using her neck, along with leaning on her shoulders, to help figure out how to balance the weight of the rider. To train that young horse, you help her learn to balance by keeping her neck straight and pushing her forward while using a leading rein to turn. If you grab the inside rein to turn that young horse, you’ll find that you’ve made the problem worse and that you’re suddenly riding an overbent horse going in the wrong direction.

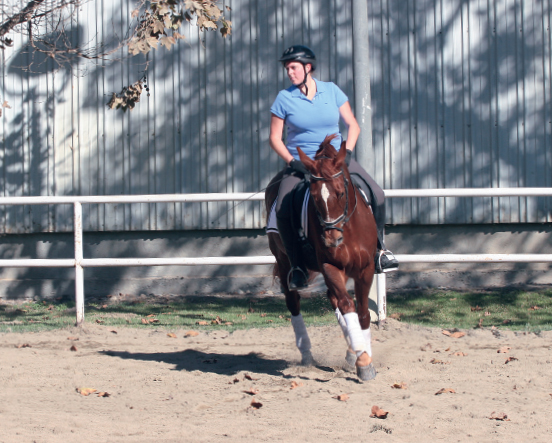
Here a rider demonstrates how pulling her horse’s head causes the horse to lean on a shoulder for balance.
So it’s your responsibility to keep the horse’s balance in mind through the turn. Forget about turning her head—her legs, not her nose, are on the ground, and the legs are what you’ve got to turn while keeping her balancing pole (her neck) straight.
Dance partners have to follow each other; otherwise, they look as though they are each doing their own thing. The same cooperation is required of you and your horse if you want to achieve that flowing communication and partnership. Here’s the rule: your shoulders must parallel your horse’s shoulders, and your hips must parallel your horse’s hips. This means inside shoulder back, outside shoulder forward, outside hip back (which also causes the outside leg to move behind the girth and helps keep the haunches from swinging out), and inside hip forward (which also causes your inside leg to come a bit forward, which helps with inside leg to outside rein). This is a nice concept on paper, but putting it in practice is another matter. Instead, think of pointing your inside hip and the buttons on your shirt in the direction you want to go. You’ll end up with the required parallels.
Here are the steps to turning your horse properly:
• Look up and find your target out of the corner of your eye (don’t turn your head or shoulders until you are ready to turn).
• Alert your horse to the turn by flexing her head in the new direction with gentle squeezes on the inside rein. Half halt the outside rein so she understands that the turn isn’t happening yet.
• A few steps before the turn (the number of steps will be determined by how large or small or nimble your horse is), begin to bring your outside leg back and your inside leg forward (think of pointing the inside hip).
• A step or two before the mark, turn your head and shoulders (think buttons turning), apply your inside leg to outside rein aid, and turn. Because turns bleed off energy, you may also want to add your driving aid to encourage your horse to push through with forward motion.
• Finish the turn by equaling the pressure in both reins, straightening the horse’s head, sitting forward, and bringing both legs back to the girth.
Diagonal Aids
The incorrect or lack of use of the diagonal aids, often called riding with your inside leg to outside hand aid, is a common issue for many riders. This aid is extremely important when riding figures, for many reasons. The aid helps balance or rebalance a horse and is used while bending and while straightening. It’s also examined in some of the dressage tests, when the rider is asked to give the inside rein on the circle. The judge wants to see that the horse can maintain her balance on the figure without her rider holding her there with the inside rein; she remains bent because of the rider’s correct use of the inside leg to the outside rein aid.
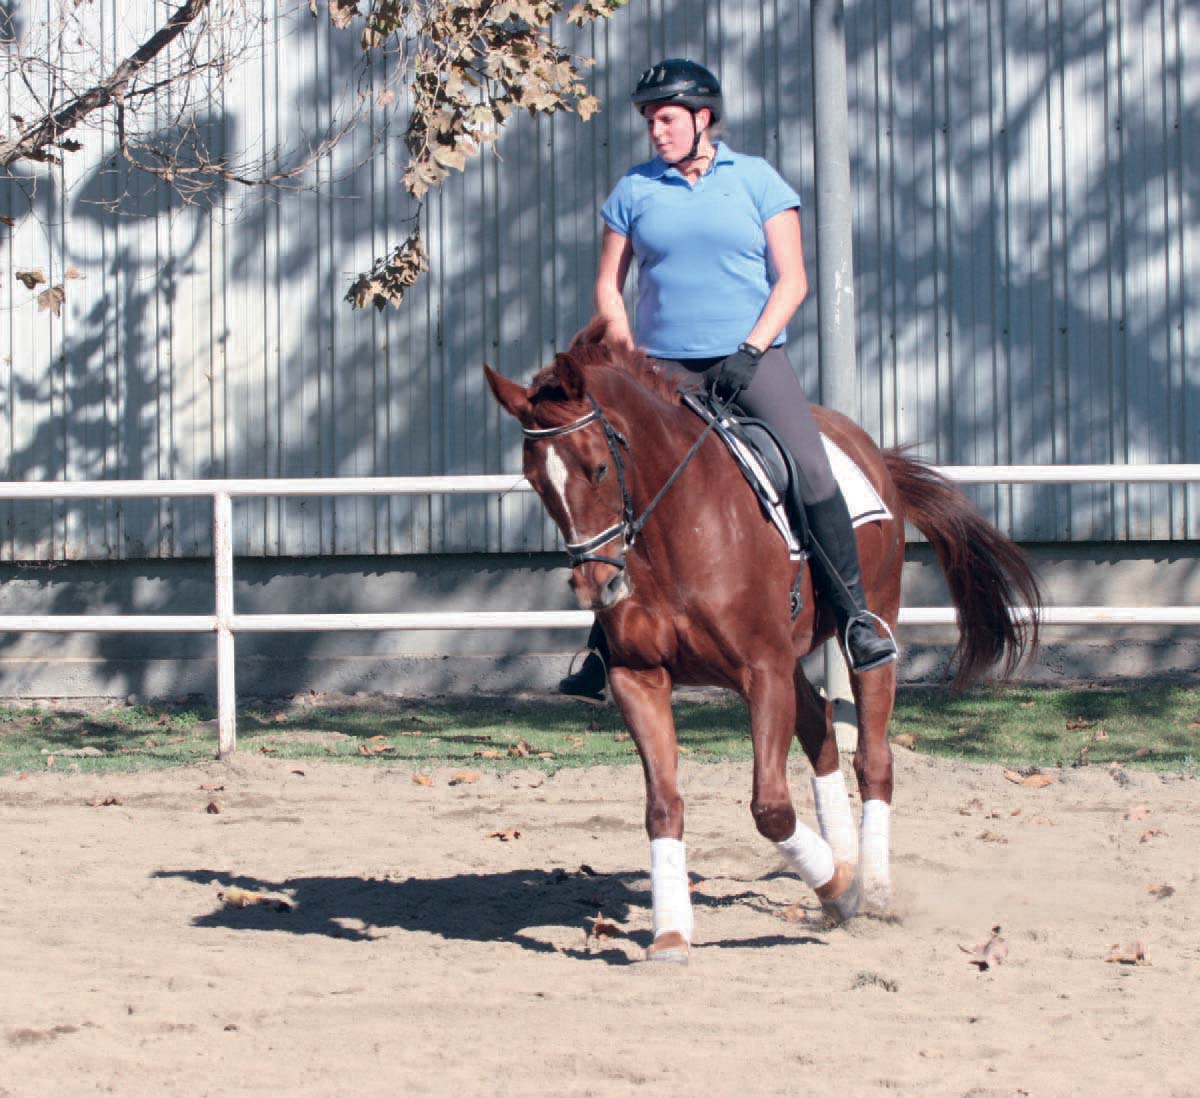
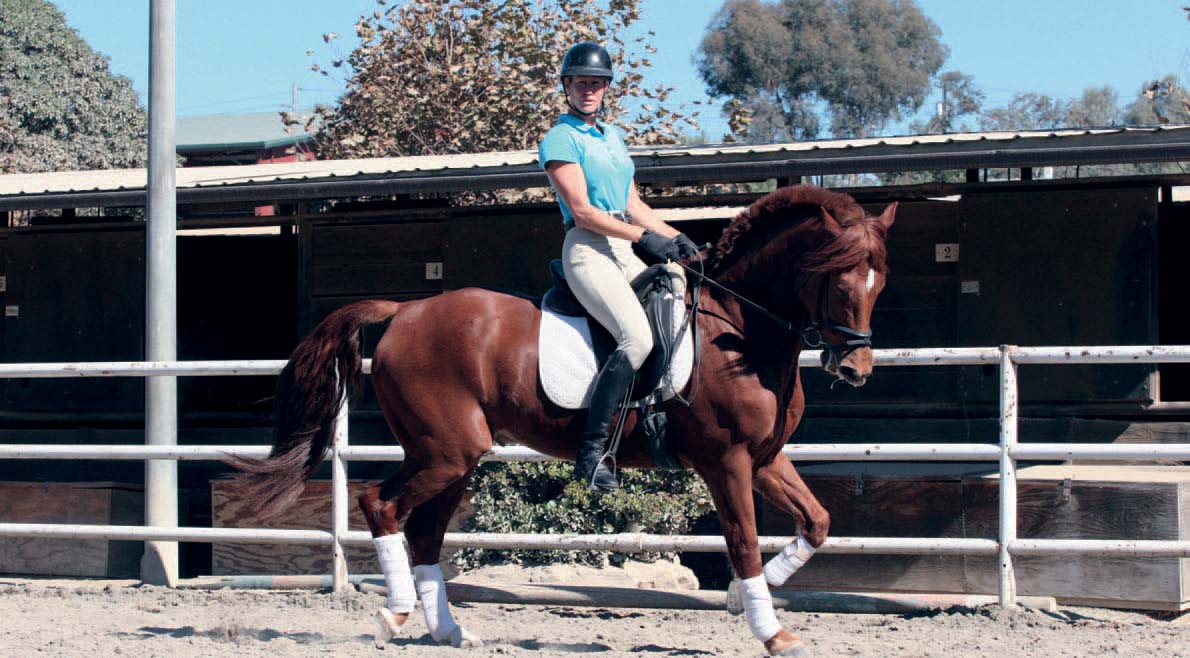
This rider keeps her horse balanced with the proper use of the inside leg to outside rein aid.
It doesn’t really matter which comes first, the leg aid or the rein aid, but suffice it to say that one always immediately follows the other: a light squeeze of the inside leg and then a slight squeeze on the outside rein (or vice versa). The aid lasts momentarily (long enough to say elephant) and is repeated if needed. Riders go wrong when they forget to use one or the other. If you use only your leg, the horse will think you want her to go forward and will respond with speed; if you use only your rein, your horse will think you want to slow down and will respond in kind. The two work together to use the horse’s energy, generated by your leg and directed by your hand, to balance the horse. In simpler terms, the outside rein prevents the horse from falling out, and the inside leg prevents her from falling in.
Here is a quick review of the use of diagonal aids:
• inside leg just at the girth
• outside leg just behind the girth
• shoulders turned toward the inside of the figure
• slight flexion (turning the horse’s head only; you should just see her eye) with the inside rein and a steady contact on the outside rein.
With smaller figures, increase the turn of your shoulders to the inside. If you have trouble turning your shoulders, look at your horse’s inside hip. That’s how much you should bring your shoulder back.
Many riders often assume a horse is bent because her neck is bent. Remember that the neck is the horse’s balancing pole and for the most part must remain straight through the bend. The horse should bend through her body and not her neck—this is where your diagonal aids come into use. She should flex at the poll only. Watch a horse scratch her barrel, and you’ll see that she can easily bend her neck without bending her body.
School Figure Tips
There are many school figures; however, the serpentine, circles, and interlinking circles are the three most commonly chosen. The serpentine is a very valuable pattern. It shows your ability to balance and bend your horse—and your horse’s ability to bend and balance—and your readiness to move on to greater skills such as counter canter, flying changes, and lateral work. To ride a serpentine well, all the loops have to be equal and must have an appropriate bend in each direction with no loss of rhythm (correct pattern of footfalls for that gait) or tempo (speed) when changing from one direction to the next. Your horse has to cross the centerline parallel to the short side and perpendicular to the centerline. The whole pattern must appear to flow.
The standard three-loop serpentine consists of three linked twenty-meter circles. Know where each twenty-meter circle starts and ends, and you can visualize how the serpentine falls. Begin your serpentine at either A or C. Keep in mind that you will ride into the corner on the approach to the serpentine and after you finish it, but you will arc out on the second and third corners because they will be incorporated in your loops. To change the direction toward the next loop, you must ride across the centerline straight for at least three strides before turning into the new direction, during which time you change the flexion and the bend of your horse. Touch the wall for one stride only (do not ride along the wall) and arc off to finish the loop.
Fifteen-meter circles and ten-meter circles are used to determine many things from both rider and horse. These are used to test balance and responsiveness and to determine if the horse responds to the rider’s aids, rather than just ricocheting off the sides of the arena, as can happen in a twenty-meter circle. The circles demand turnability, which means mobility of the forehand. In practice, the smaller circles are useful in evaluating the rider’s accuracy and ability to turn the horse properly and not just drag her around by the mouth.
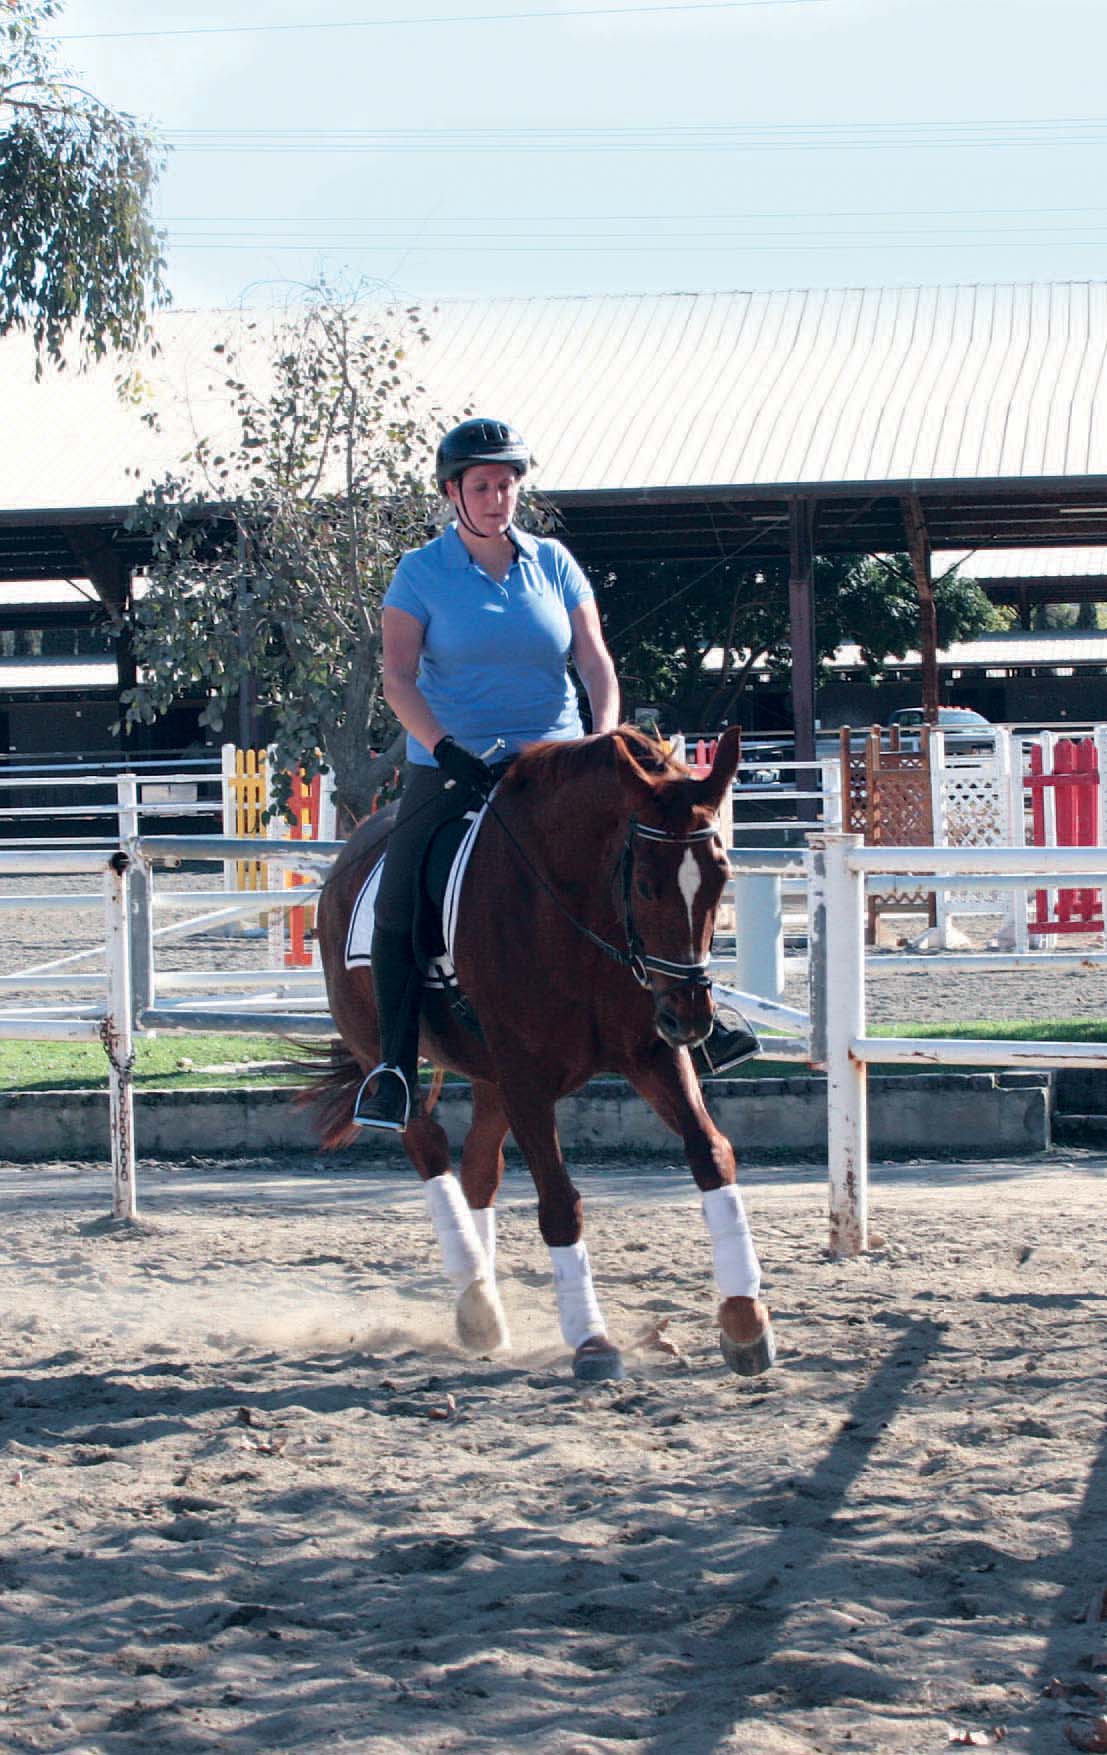
When riding a serpentine, this pair creates the loops while avoiding riding into the corners.
When making turns and circles, it is important to remember that, mechanically if not visually, the horse makes a circle as a polygon. Cultivate the simple turn responses before trying to demonstrate the final version of a smooth circle. Turn sharply enough from the track to start the circle, ride a step or two straight, turn again when you’ve made a quarter of the circle, go straight for a step or two, turn when you’ve made half of the circle, and repeat. During this exercise, check for self-carriage frequently. Self-carriage means that your horse is not relying on your reins to prop herself up. To test for this, loosen the reins for several strides. Your horse should remain balanced and move at the same tempo.
Practice ten-meter circles by starting with eight-meter circles and leg yielding out (see chapter six) to create the ten-meter circle. This will improve bend, balance, and fluency. It also gives you hedging room at the show in case your horse doesn’t turn as well or drifts out. You have two meters to turn as well as you’d like.
The two interlinking half ten-meter circles ridden across the school from E to X and from X to B (that occur in First Level dressage tests) demonstrate the quality of bend and balance on a circle and the change of bend in balance. The most common fault is loss of balance and carriage at the moment of change of direction at X. For the horse to change both bend and direction requires some major changes and retooling of her equilibration system and of the locomotor system. The difficulty for the rider is to change the bend before changing the direction.
Because this movement requires specific preparation and response, there is a lot a rider can do to make it work. On the first circle—let’s say going to the left from E—well before reaching the centerline, the rider should begin to ask for flexion in the throatlatch to the new direction (right), and leg yield to the left. The turn to the right should not be effected until the horse leg yields left with right flexion. In the teaching stage, this should be done in an obvious way. In the performance stage, the horse will have the general idea, and the rider can ask more subtly.
A horse and rider are showing a good bend in the first circle of the interlocking half ten-meter circles pattern.

The horse is balanced as the circle continues, and the rider looks forward to the next circle.
All flatwork sessions should finish off with the twenty-meter stretching circle to check that the horse’s balance, contact, and connection during the workout were good and genuine and to stretch and relax the horse’s back.
The rider has created the new bend and flexion for the next turn in the pattern.

The good bend and balance continue throughout the second circle.