
STEP 1 Sketch a Rectangle In Perspective
Establish the horizon line, then the vanishing points (which are far off to the left and right). Sketch a rectangle in perspective. This will become the walls that support the roof.
Circles are not the only curved objects you must draw in perspective. Arches are also quite common and need to follow the rules of perspective to look accurate. The peak of an arch is centered over the space between its supporting walls. The same is true of most roofs. To draw a roof in proper perspective, you will need to know how to find its the center point. Measuring with a ruler will not give you the correct center point as far as perspective is concerned, which is why knowing how to find the center point is important. Try this little exercise to learn how to find the center point for a roof.
STEP 1 Sketch a Rectangle In Perspective
Establish the horizon line, then the vanishing points (which are far off to the left and right). Sketch a rectangle in perspective. This will become the walls that support the roof.

STEP 2 Connect Opposite Corners of the Rectangle
Sketch lines connecting the opposite corners of the sides of the rectangle, making two Xs. The intersection of these lines are the center points for the sides.
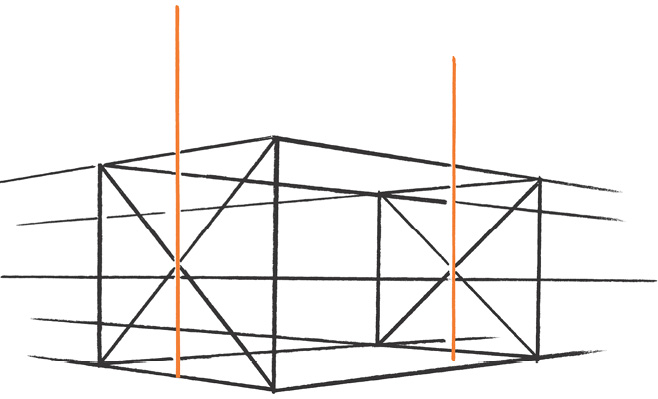
STEP 3 Add Vertical Lines
Sketch vertical lines up through the center of the Xs. These lines designate the center of the box’s side walls.
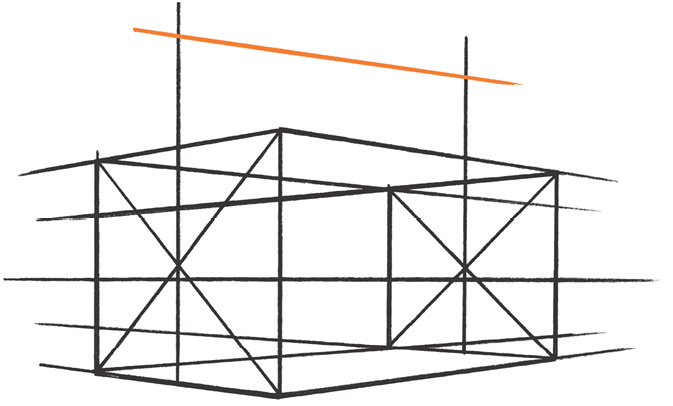
STEP 4 Sketch the Top of the Roof
Sketch a line for the top of the roof. If completely drawn, this line would converge with the other lines on the right side of the box at the vanishing point far off to the right.

STEP 5 Connect the Points to Finish the Roof
Connect the lines from the top of the roof to the side points. These lines will make the roof ends.

Drawing Arches
Drawing the arch of a doorway or the bottom curve of a suspension bridge is similar to drawing the roof of a building. For the doorway, find the center point of the rectangle by connecting the opposite corners of the rectangle. Make a vertical line straight up to establish the peak of the arch. The curve of a suspension bridge can be thought of as an arch with the curve at the bottom instead of at the top, so apply the same principles.