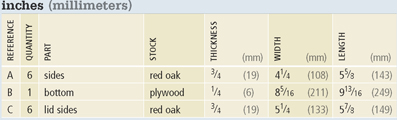
11
top big
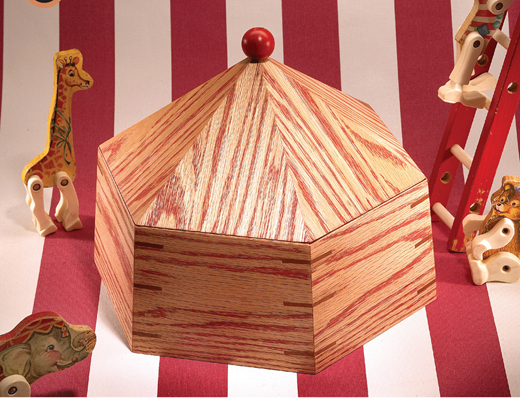
HERE'S A PROJECT that will give you practice in laying out and cutting compound miters (gasp!). Before you panic and turn pages to the next project, give this one a chance. Yes, it looks like a circus tent, but that's because it's supposed to be a fun box.
You can use compound miters when installing mouldings or to impress people with your ability to think of two things (angles) at once. Just so you know, this project may not go together perfectly the first time you cut the parts. Depending on your saw's gauges, your settings might not match mine exactly, and also, don't forget to account for wind velocity and relative humidity (just kidding).
When you make adjustments to make things fit better, make small changes because each change doubles when you cut a miter-to-miter joint.
You could keep your pet circus animals or pictures of clowns in this box. Or, fill it with peanuts.
Tools needed
table saw
power miter saw
jointer
2″-wide (51mm) masking tape
drill or screw gun
sliding T-bevel
combination square
tape ruler
120-, 150-, and 220-grit sandpapers or sanding discs
random-orbit sander
sanding block
Hardware & Supplies
1 1″ diameter (25mm) wooden ball knob
1 pint oil base paint (your choice of color)
sanding sealer
finishing lacquer
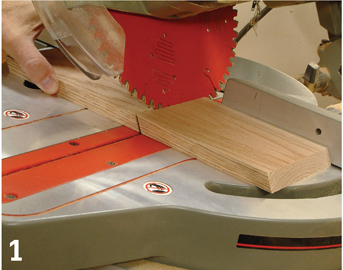
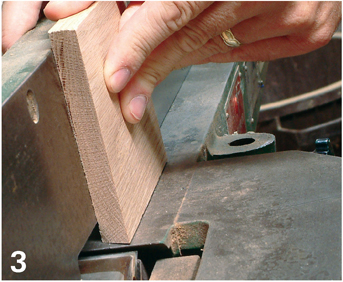
Rip a strip of oak long enough to yield six sides. Set your miter saw to a 3° miter and a 29° bevel. OK, here we go: Lay the oak strip on the saw bed, outside face down. Cut six pieces about ½″ (13mm) longer than the finished dimensions. Put an X on each piece's top and inside edges as you cut them. I usually cut a couple of extra pieces just in case I mess up.

Don't change the saw's settings. Flip one of the side pieces and rotate it 180°. You don't want to see either of the X's you made. If you do see an X, orient the piece until you don't. Cut the piece to the final length. Don't move the part yet. Mark the location of its outer end and clamp a stop block at the mark. Now you can cut the rest of the parts accurately.
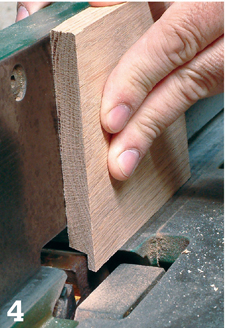
Set the fence on your jointer to 3° and cut a bevel on the bottoms of all sides. You should see the X on the top edge of the side; the other X should be against the fence.
Slide the fence toward the outside end of the cutter. Leave 3/8″ (10mm) of cutter exposed. Lower the infeed table so you can make a ¼″-deep (6mm) cut. Now cut rabbets in all the bottom edges of the sides.
Cut a 20° bevel on the top edge of the sides. You'll cut off the X on the edge. The other X should be down on the saw's table. I used the table saw to cut this bevel but you could use the jointer. Also note that if you don't own or have access to a jointer, you can use the table saw to cut the bevels and rabbets on the bottoms of the sides.
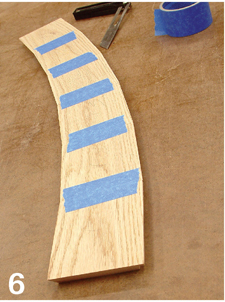
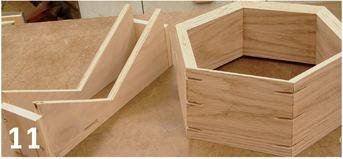
Lay the sides, outside up, with the sharp edges of the miters touching each other. Apply tape at each of these joints. Fold the assembly together and see how well it all fits together — or not. You may need to fine-tune your miter cuts a bit to get things to come together correctly, but my directions and dimensions should bring you very close to acceptable.
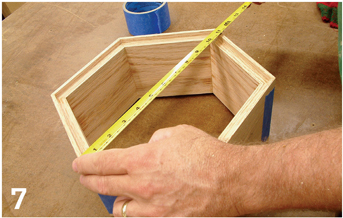
If everything is good to go, flip over the taped assembly and add glue to the miter joints. Fold it together and tape the last joint. Measure the distance to opposing joints: they should be equal. If not, tweak the assembly so they are. Then let the glue dry.

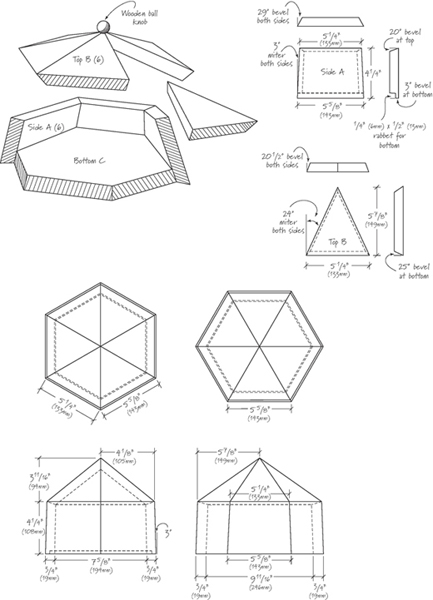
I've given the dimensions for the box bottom, but check the measurements of your box, which may not be exactly the same size as mine. Err on the side of slightly generous when you cut the bottom, then final fit it using a block plane.
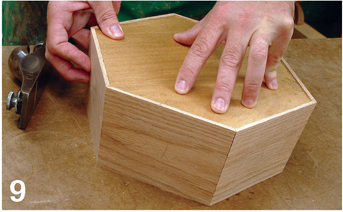
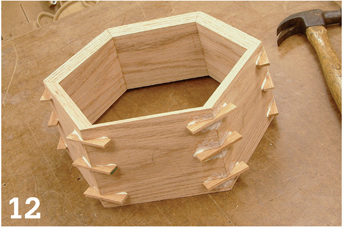
Make this a nice fit and your family will marvel at your joint-making skills. If not, at least you know you've done your best. Don't glue the bottom into place just yet. First you'll add keys to strengthen the end-grain miter joints.
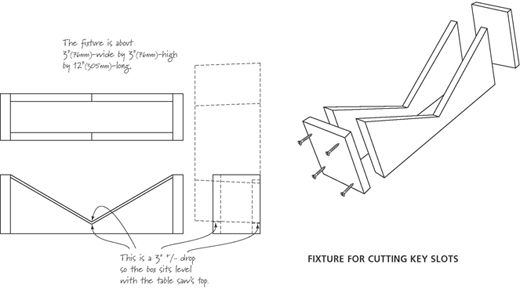
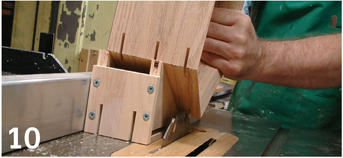
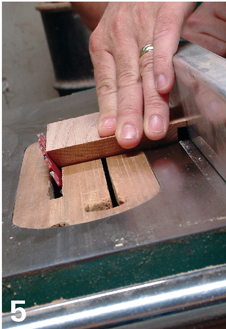
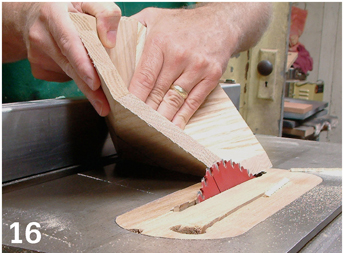
Make yourself a fixture like the one in the illustration above and use it to guide your box on the table saw. I know what you're thinking — Jim, don't you take chances using the table saw? No, I don't. This setup is stable, accurate and safe because the box covers the saw blade and the fence guides the fixture. If you don't feel comfortable using this method, make a similar setup using a router table. Do what feels and works best for you.
This is what you should have when the slots are cut. Notice that the top and bottom slots are equal distance from the top and bottom edges. The middle slot is located slightly above center. I thought it enhanced the look of the flared bottom of the box.
Cut some keys and glue them into the slots. Let the glue dry and trim the keys flush to the box. Get messy with the glue. It'll help fill in small gaps.
Make the lid parts a little larger than indicated in the cutting list. After the lid is assembled, it will need to be fitted to the box.
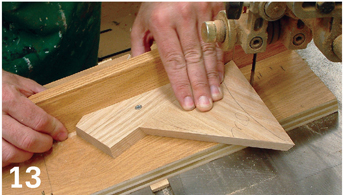
There's a couple of ways to cut compound miters. One is to make both the bevel and miter cuts at the same time. The other is to make the miter cut first, then cut the bevel. This is what I did for the lid parts because the miters come to a point at the top. This creates a problem if you try to make both cuts (the miter and bevel) at the same time on the miter saw. The first cut is OK but the second cut requires you to rotate and flip the piece (as you did with the box parts). Making this cut on the lid part will leave nothing on the part but a point at the fence. This leaves nothing to prevent the part from being jammed into the fence by the force of the rotating blade. I didn't like that scenario, so I cut the miters (no bevel) on each lid part using the two opposite miter settings on my miter saw. I kept the base of the lid part against the saw's fence and all was safe and sound. Then I used the band saw to cut the bevel on the lid parts. Tilt the saw's table to 20½°. Make a small sled and attach an angled stop block to it. Use this to guide the lid's parts past the band saw blade for one cut. Add another angled block to make the other bevel cut. If you make the sled wide enough, you can make one bevel cut on one side of the blade and the other bevel cut on the other side of the blade. It's up to you.
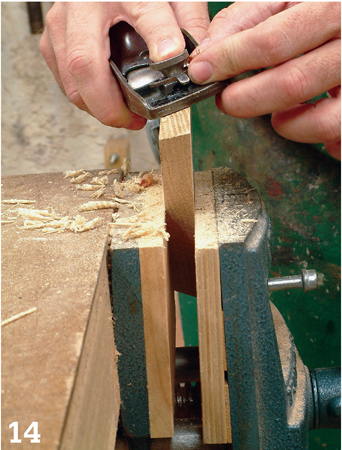
If necessary, smooth the band saw blade marks with a block plane. I found this made the joints fit almost watertight.

Lay out the parts, add tape and check the fit. Glue it up when you like what you see.
Cut the bevels on the bottom edges of the lid to fit into the bevel on the box. This may require a trial fit or two. After you finish the box, drill a hole in the center of the lid and use a 1¼″ flat-head sheet metal screw to attach the wooden ball knob.