15
watch out for the curves
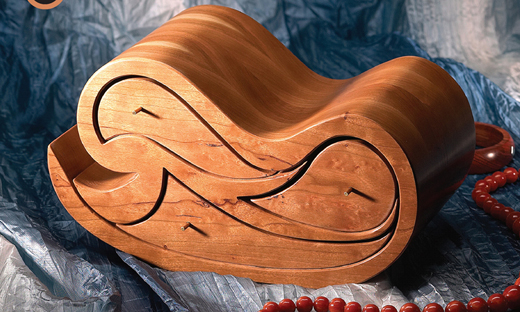
A FRENCH-CURVE drawing template inspired this project. The French curve is a fixed shape that has been used for years as a basic starting point for designs using complex curves. The shape is smooth, pleasing to look at and has a natural flow. However, I don't have a clue as to why it's called a French curve, as opposed to, say, a Nebraska or Walla Walla curve. The techniques for making the box are borrowed from Building Beautiful Boxes with Your Band Saw by Lois Keener Ventura, published by F+W Publications.
As the name of this project suggests, it is advisable to slow down when making tight, curved cuts on the band saw. It's a nice way of using a power tool. Relax, let the tool do the work and you'll be amazed at the results.
You'll learn about the band saw and what it can do. Also, you'll learn how to finish-sand. Shaping and sanding this project is more complicated than sanding a flat panel. A medium-cut wood rasp and a smooth-cut file will help with the general shaping of edges and getting into tight spots. You'll also use a sharp chisel. The box requires that you finish-sand to a final grit of 220. This takes some patience on your part but the results are worth it. It's a treat to watch the grain of the wood appear before your eyes as you remove the sanding scratches from grit to finer grit. Remember, take it slow on the curves.
Tools needed
drill (“egg beater” style or handheld electric)
3/16″ (5mm) twist drill
60-, 100-, 120-, 150- and 220-grit sandpapers
No. 0000 steel wool
sanding block
random-orbit electric sander
band saw
spindle sander
Hardware & Supplies
3 3/16″ × ½″ (5mm × 13mm) brass rods
spray or rub-on lacquer
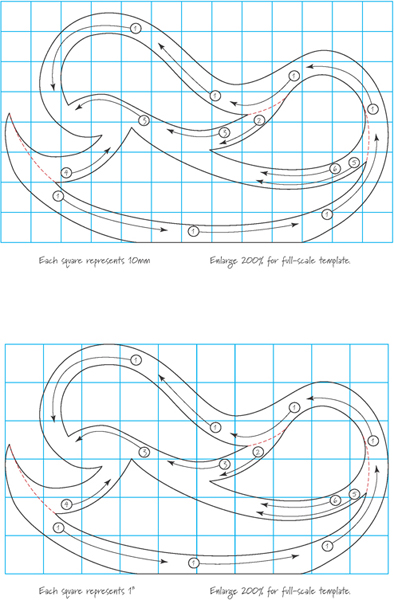

After you clamp up your box blank, let the glue dry at least 24 hours. I used one board of 12-year-old cherry for this box. I had forgotten I even had the board — maybe I need to clean out my wood rack. Make a copy of the box pattern (or make up your own pattern) and, using spray adhesive, stick it to your glued up box blank.
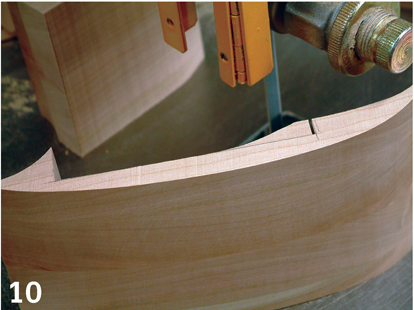
Note the order of making the cuts using numbers and arrows. If you used the supplied pattern, the arrows are already drawn and numbered for you. Make the first cut and take your time doing it. Then stop at the end of the cut and shut off the saw. Move the box into position for the next cut. You'll have to maneuver the box so the stopped saw blade can back up in the saw kerf. Start the saw, make the second cut, then stop, shut off the saw and remaneuver for the next cut, etc. This takes some time, so don't hurry. Enjoy the moment.
My band saw blade is 3/8″ (10mm) wide, so I couldn't make the cuts as tight as the pattern that I drew. I went with the flow and cut what the saw told me to cut. No worries. I simply drew a different outside cutting line to match the inside curves that I cut. I would recommend a 3/16″- or ¼″-wide (5mm or 6mm) saw blade to make these boxes. Whatever size blade you use, be sure it's sharp!
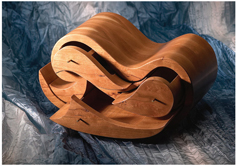
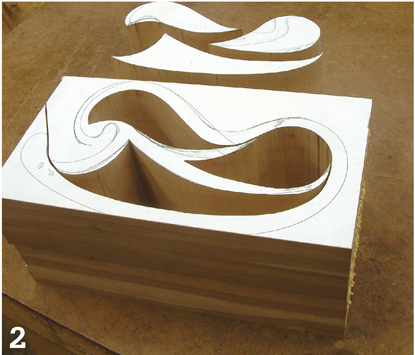
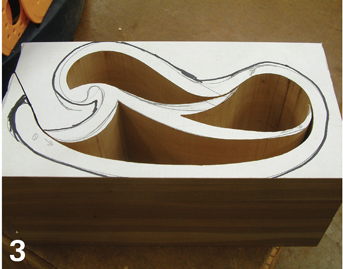
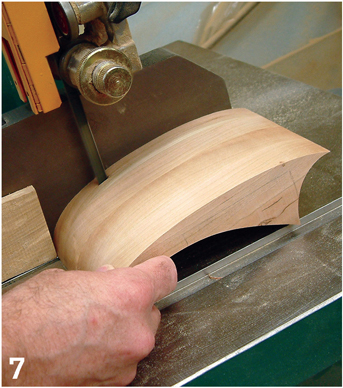
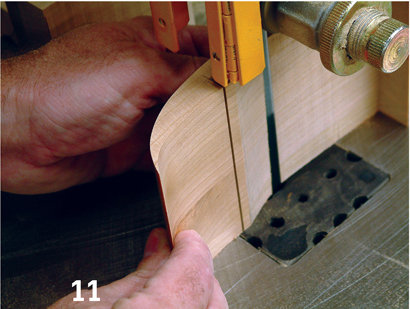
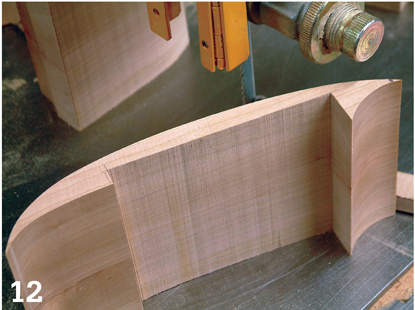
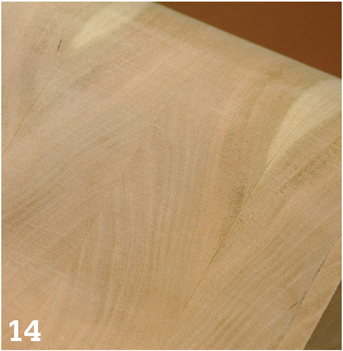
Here's the final rough shape of the box.

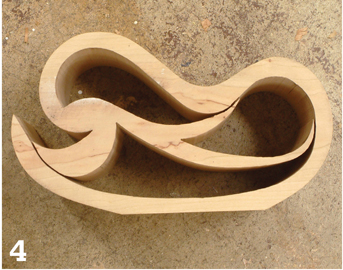
I'm not telling you to go out and buy a new sander but a stationary disc or belt sander comes in handy here. Smooth the outside curves.
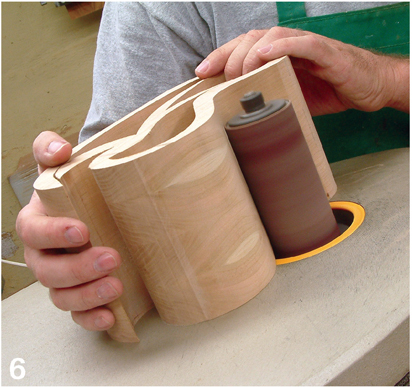
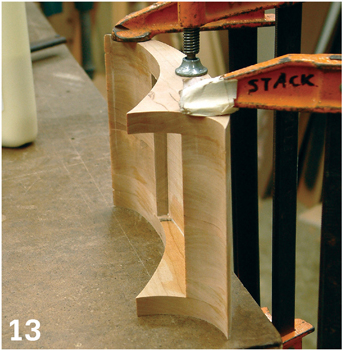
You'll need an oscillating-spindle sander to smooth the inside curves. In this case, I recommend you buy one of these really cool sanders.
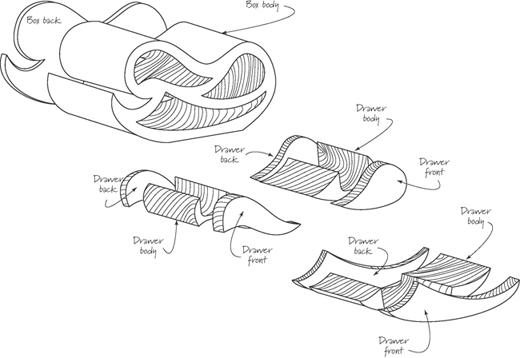
Cut the backs and fronts off the drawer blanks.
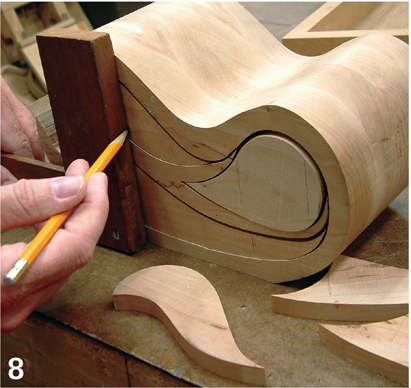
Insert the remaining drawer blanks inside the box. Use a square to help you make the vertical cutout marks for the drawers.
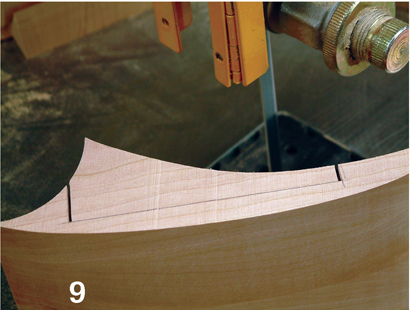
Connect the vertical cutout lines with horizontal lines. Make the vertical cuts first.
Make half of the horizontal cut, connecting it to one of the vertical cuts.
Make the second half of the horizontal cut to connect the vertical cuts.
Ta da! Now you have a drawer with a bottom and sides.
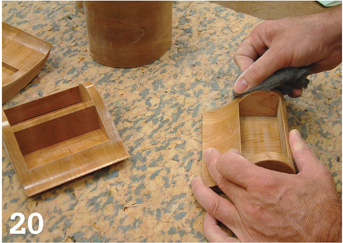
Sand the insides of the drawer backs and fronts to remove any marks the band saw made. Then reattach the drawer fronts and backs with glue.
Now comes the part that determines whether this project will turn out just so-so or top of the line. Yes, I'm talking about sanding. Though the spindle and disc sanders sanded things pretty smoothly, if you look closely, you can see scratch marks. Time to break out the sandpaper and some sanding blocks.
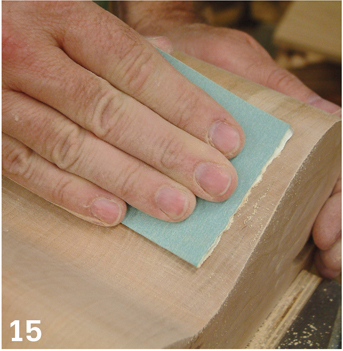
I used 220-grit sandpaper and sanded across the grain to speed up the scratch removal process. If you're using a finer-grit sandpaper like this, you can get away with sanding across the grain to get things leveled out. But we're not done yet.
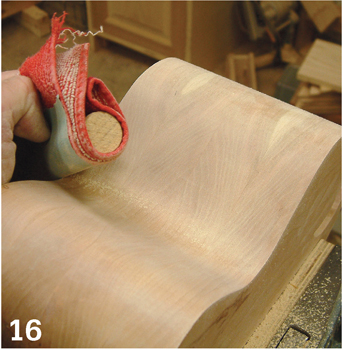
I cut off an 8″ (203mm) section of a broom handle and wrapped it with part of an old cotton towel. Then I wrapped some fresh 220 grit sandpaper around it. The hardwood broom handle isn't perfectly flat and chances are the box isn't either. The towel backer lets the sandpaper conform to the imperfections. I'm not talking about large imperfections — I'm talking about a few thousands of an inch here and there.
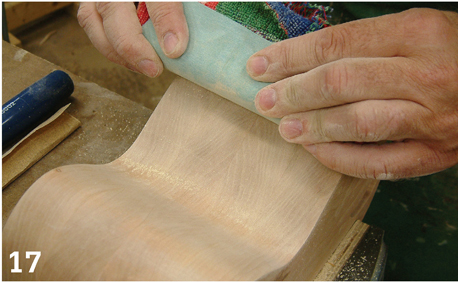
Sand with the grain of the wood. This can take some time but it will be worth it. As you sand, frequently brush the dust away and check your progress. You should begin to see the grain of the wood. You're polishing the surface of the wood and those coarse scratches are being replaced by finer ones.

Use a chisel or knife to smooth the sharp edges in tight spots. It goes without saying that these tools should be sharp.
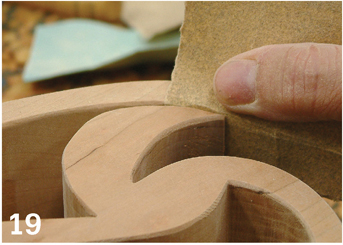
Fit sandpaper between tight spaces and blend the roundover of the edges into the rest of the box.
I finish-sanded using 220-grit sandpaper and applied a lacquer finish. After the lacquer cured, I rubbed the parts with #0000 steel wool. This smoothed things quite nicely. If you want, you can line the drawers with flocking. I chose to let the wood show.
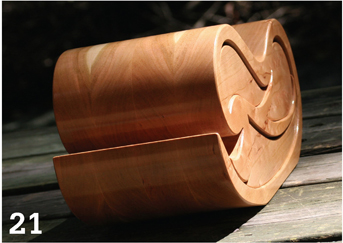
Some woods change color quickly as they are exposed to sunlight. I sat the box in the sun for an afternoon and it gave the wood a quick-aged patina — not a lot, but it was noticeably darker. It looked good for the photo shoot.