It's now time to configure our application account. In it, we need to create some new roles and then set up a trust relationship between those new roles and the roles we created in our Auth Account:
- Start by going to the IAM console in the Auth Account and creating a new role. This role will be PowerUserRole:

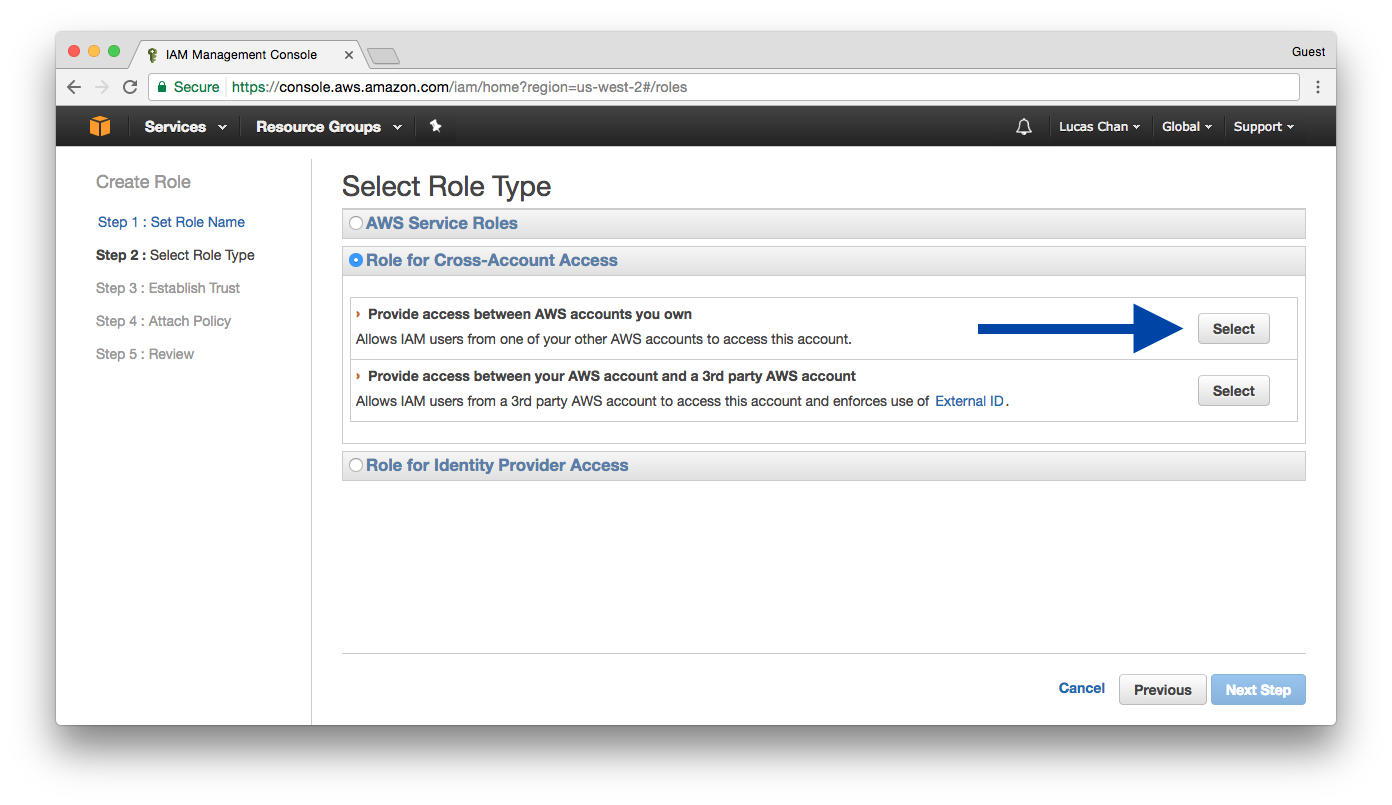
- This role will be of the Role for Cross-Account Access kind. Make sure to select this type:

- You'll be prompted to enter an AWS Account ID. This is the account ID of the Auth Account:

- For this role, we are going to use the AWS Managed Policy for PowerUserAccess, so go ahead and attach this policy now:

- Click Create Role on the confirmation page and we're ready for the next step:

- AWS will automatically create a trust relationship on our behalf. Unfortunately, it's not quite right, so we need to edit it:

- We want anyone who has the CanAssumePowerUser role in our Auth Account to be able to assume PowerUserRole in our App Account. So we need to make a small change to the trust relationship like so (remember to replace the account IDs with your own):
      {
        "Version": "2012-10-17",
        "Statement": [
            {
              "Effect": "Allow",
              "Principal": {
                 "AWS": "arn:aws:iam::<auth-account-number>:
                    role/CanAssumePowerUser"
              },
              "Action": "sts:AssumeRole"
            }
        ]
      }

- Repeat these steps by creating a role called ReadOnlyRole and attach the AWS Managed ReadOnlyAccess policy to it:

- Again, we want to update the trust policy. Here we're going to allow both CanAssumePowerUser and CanAssumeReadOnly to switch to the ReadOnlyRole. This will be useful for administrators who would want to avoid accidents while clicking around the console:
      {
        "Version": "2012-10-17",
        "Statement": [
            {
              "Effect": "Allow",
              "Principal": {
                  "AWS": "arn:aws:iam::<auth-account-number>:
                     role/CanAssumeReadOnly"
              },
              "Action": "sts:AssumeRole"
            },
            {
              "Effect": "Allow",
              "Principal": {
                  "AWS": "arn:aws:iam::<auth-account-number>:
                    role/CanAssumePowerUser"
              },
              "Action": "sts:AssumeRole"
            }
        ]
      }

App Account role config
That was our final step. It's now time to test it out.