Before we start, we should create a new Orchestration Job for each use case and then we can insert Matillion variables and create Shared Jobs.
- Create new Orchestration Job with bash component and name it Refresh Extract, as follows

Bash component has the timeout parameter. By default, it is 1,000 seconds. For extract, we might increase this in order to wait while your biggest extract refresh.
- Then paste the code that we tested already and replace Tableau objects with the Matillion parameters, as follows:
#go to tabcmd location
cd /opt/tableau/tabcmd/bin
#login tableau server
./tabcmd  login -u Admin -p '${password}' -s ${tableau_host} --no-certcheck  --accepteula
#refresh extract
./tabcmd refreshextracts --datasource "${data_source_name}" --project "${project_name}" --no-certcheck –-synchronous
As a result, this component will refresh Tableau Extract based on value for variable.
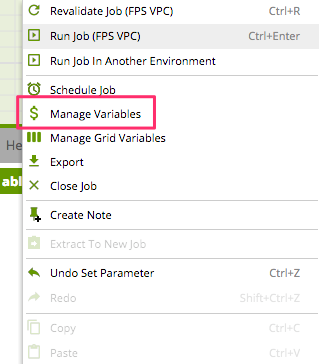
- In addition, we should create Matillion variable for our parameter. Click on the right button on canvas and choose Manage Variables as shown in the following screenshot:
- Then add three new variables that have to be public, as follows:

- Create one more job or duplicate an existing one and name it Tableau Export PDF. Enter the following code with the Matillion parameters:
#go to tabcmd location
cd /opt/tableau/tabcmd/bin
#login tableau server
./tabcmd  login -u Admin -p 'p@ssword' -s ${tableau_host} --no-certcheck  --accepteula
#export pdf from Tabelau Server
./tabcmd export "${tableau_view_name}" --pdf --pagelayout landscape -f "/tmp/$(date +%Y%m%d)_${tableau_report_name}.pdf" --no-certcheck
#upload pdf to the S3
aws s3 cp /tmp/$(date +%Y%m%d)_${tableau_report_name}.pdf s3://${bucket_name}/$(date +%Y%m%d)/$(date +%Y%m%d)_${tableau_report_name}.pdf
#clean out
rm /tmp/$(date +%Y%m%d)_${tableau_report_name}.pdf
This script will export Tableau View into the /tmp location on our EC2 and then will upload to the Reporting Bucket via AWS CLI. Moreover, it will automatically create a folder in bucket with date. In addition, we specify the file name according with our naming convention.
- Moreover, you should create the following variables in the same way as in step #1:
- tableau_report_name
- tableau_view_name
- tableau_host
- bucket_name
You can see how this solution is flexible and you can achieve many different use cases.
- Now, we can create the Shared Jobs and wrap our Orchestration Jobs. Click on the right button on job name and choose Generate Shared Job, as follows:

- Then, we should fill in the form and choose the following mentioned options:
|
Package |
Packt.tableau.refreshextract |
|
Name |
Refresh Tableau Extract |
|
Description |
This component refresh Tableau Extract |
- Click on Next and you will see the Parameter Configuration step. Then, click on OK.
- Then, do the same for the second job Tableau Export to PDF, as follows:
|
Package |
Packt.tableau.exporttopdf |
|
Name |
Tableau Export to PDF |
|
Description |
This component will export PDF report to S3 Bucket |
- Click on Next, fill in the Parameter Configuration page and click on OK. These parameters will be used for the data entry later.
- Let's check out the jobs. Navigate to Shared Jobs Pane | User Defined | Packt, as follows:

As a result, you'll see our new jobs.
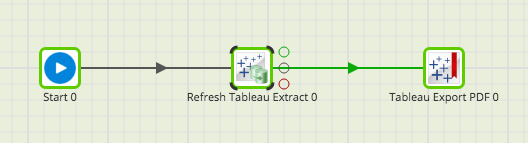
- Let's put it all together. Create a new Orchestration Job and drag and drop our new shared components, as follows:
Usually, one extract can source many different workbooks. As a result, we can use another powerful feature of Matillion—Fixed Iterator. More information can be found here: https://redshiftsupport.matillion.com/customer/en/portal/articles/2235536-fixed-iterator.
- Let's add a fixed iterator on top of the job as it will allow us to specify multiple reports at once, as follows:

As a result, we have created new custom components that look very friendly and familiar for our end users. Using this approach, we can leverage any Tabcmd command and create a custom component for it.