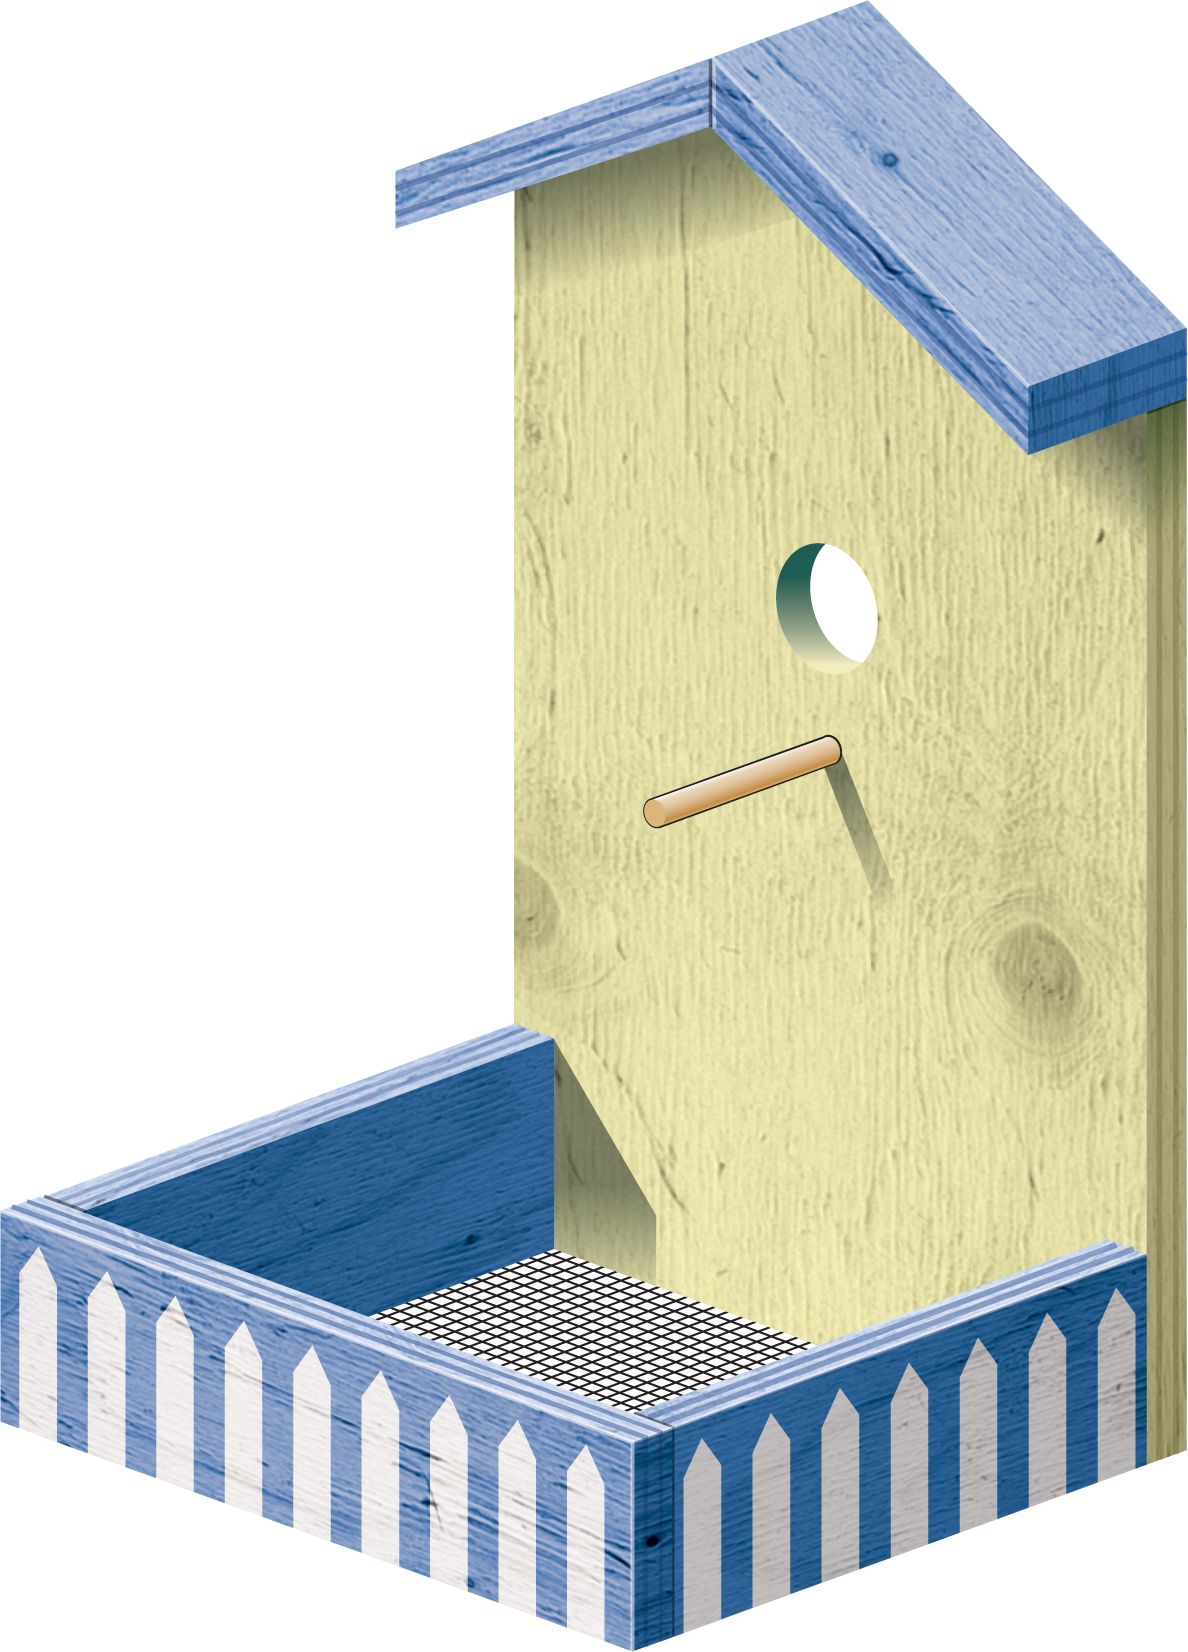
This is a very basic but attractive bird feeder. Once you’ve got it constructed, fill ’er up with different varieties of seeds from week to week to see which species enjoy which seeds.
Materials
1/2" × 12" × 12" exterior grade plywood
1" × 2" × 2' cedar or pine
1/4" × 2-1/2" dowel
8" × 7-1/2" piece of window screen
1" × 2" × 5' post
Rust-resistant screws and finishing nails
Staples
Water-resistant wood glue
 From the plywood cut the following pieces:
Back: 8" × 12"
Roof: Two 2" × 5-1/2" lengths
 From the 1" × 2" cedar or pine cut the following pieces:
Sides: Two 6" lengths
Front: One 8" length
 Measure and mark the center of the top edge of the back panel at 4". Measure and mark a point on one edge of the back 2" from the top. With a pencil and ruler lightly trace a line from the center point to the mark on the edge.
 Repeat your measurement with the other edge as in step 3.
 Cut along the pencil lines to create a peaked roof.
 Measure and mark a point 5" from the top and centered left and right. Drill a 1-1/4" diameter hole with the mark at the center of the hole.
 3/4" below the hole above, drill a 1/4" hole, centered.
 Position a side piece in front of the back, with the bottom edges flush and even. Drill a pilot hole in the back panel and attach the side piece with a screw.
 Attach the second side piece as in step 8.
 Position the front panel in front of the two side pieces. Secure it with finishing nails.
 Position the 8" × 7-1/2" screen on the underside of the feeding tray. Use a staple gun to attach the screen to the bottom of the tray and the back of the panel. Trim to fit.
 Using wood glue, secure the dowel in the 1/4" hole.
 The ends of the roof pieces that meet at the peak will need to be cut at an angle so that they meet evenly. (See the diagram for the Prairie Feeder.) Bevel-cut one end of both sections at a 30-degree angle.
 Position the roof sections on top of the back panel with the beveled ends held together. Mark a line on the outer end of each roof section that makes the edge parallel to the sides of the back panel. Cut the edges off .
 Set one side of the roof in place with the overhang extending over the feeder tray. Secure it to the back with finishing nails.
 Set the second side of the roof in place and secure it as in step 15.
 Paint a fence around the feeder tray and decorate your Down Home Bird Feeder to suit your taste.
 Taper the end of the post into a point so that it can be driven into the ground.
 Drill two pilot holes into one of the faces of the post near the top. Attach the back of the feeder to the post with screws.