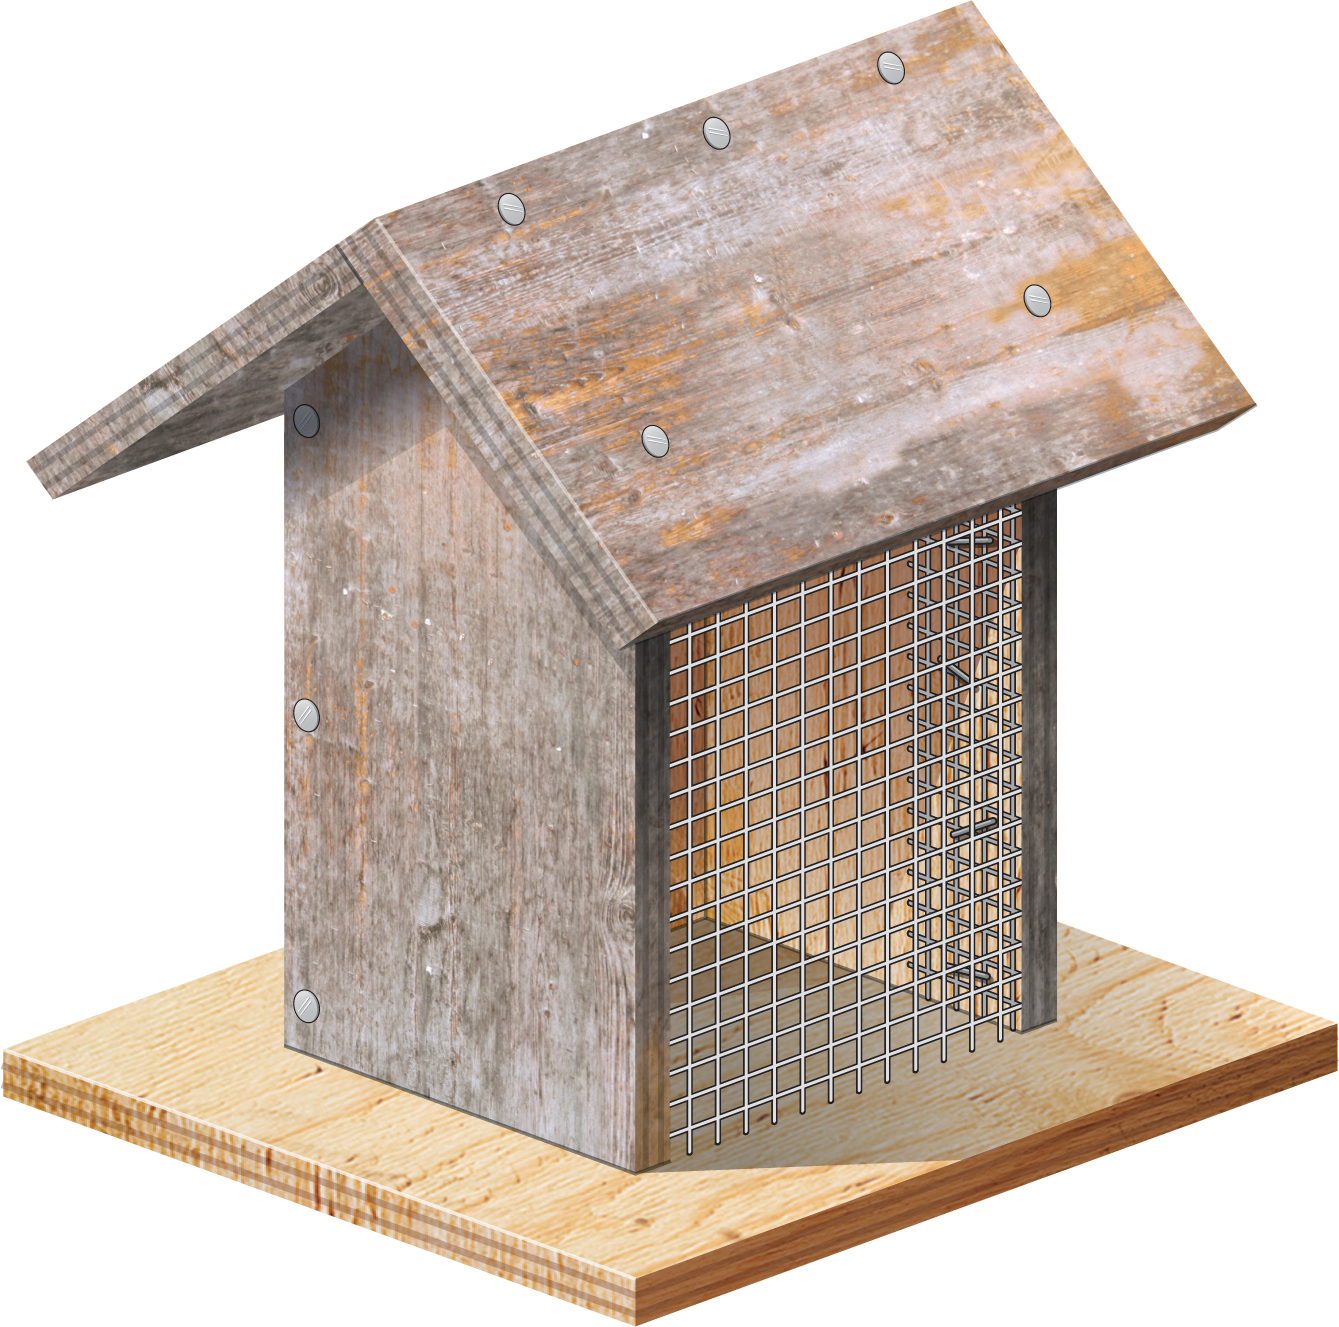
A touch of gray paint and a bit of sandpaper give this plywood feeder a nostalgic effect, but for the birds it will serve as a brand-new restaurant.
Materials
1/2" × 2' × 2' exterior grade plywood
8" × 7" piece of 1/4"or 1/2" galvanized or plastic hardware cloth
Exterior-coated nails
Staples
Two 3/4" × 3/4" rust-resistant hinges with screws
Gray paint
Sandpaper
Instructions
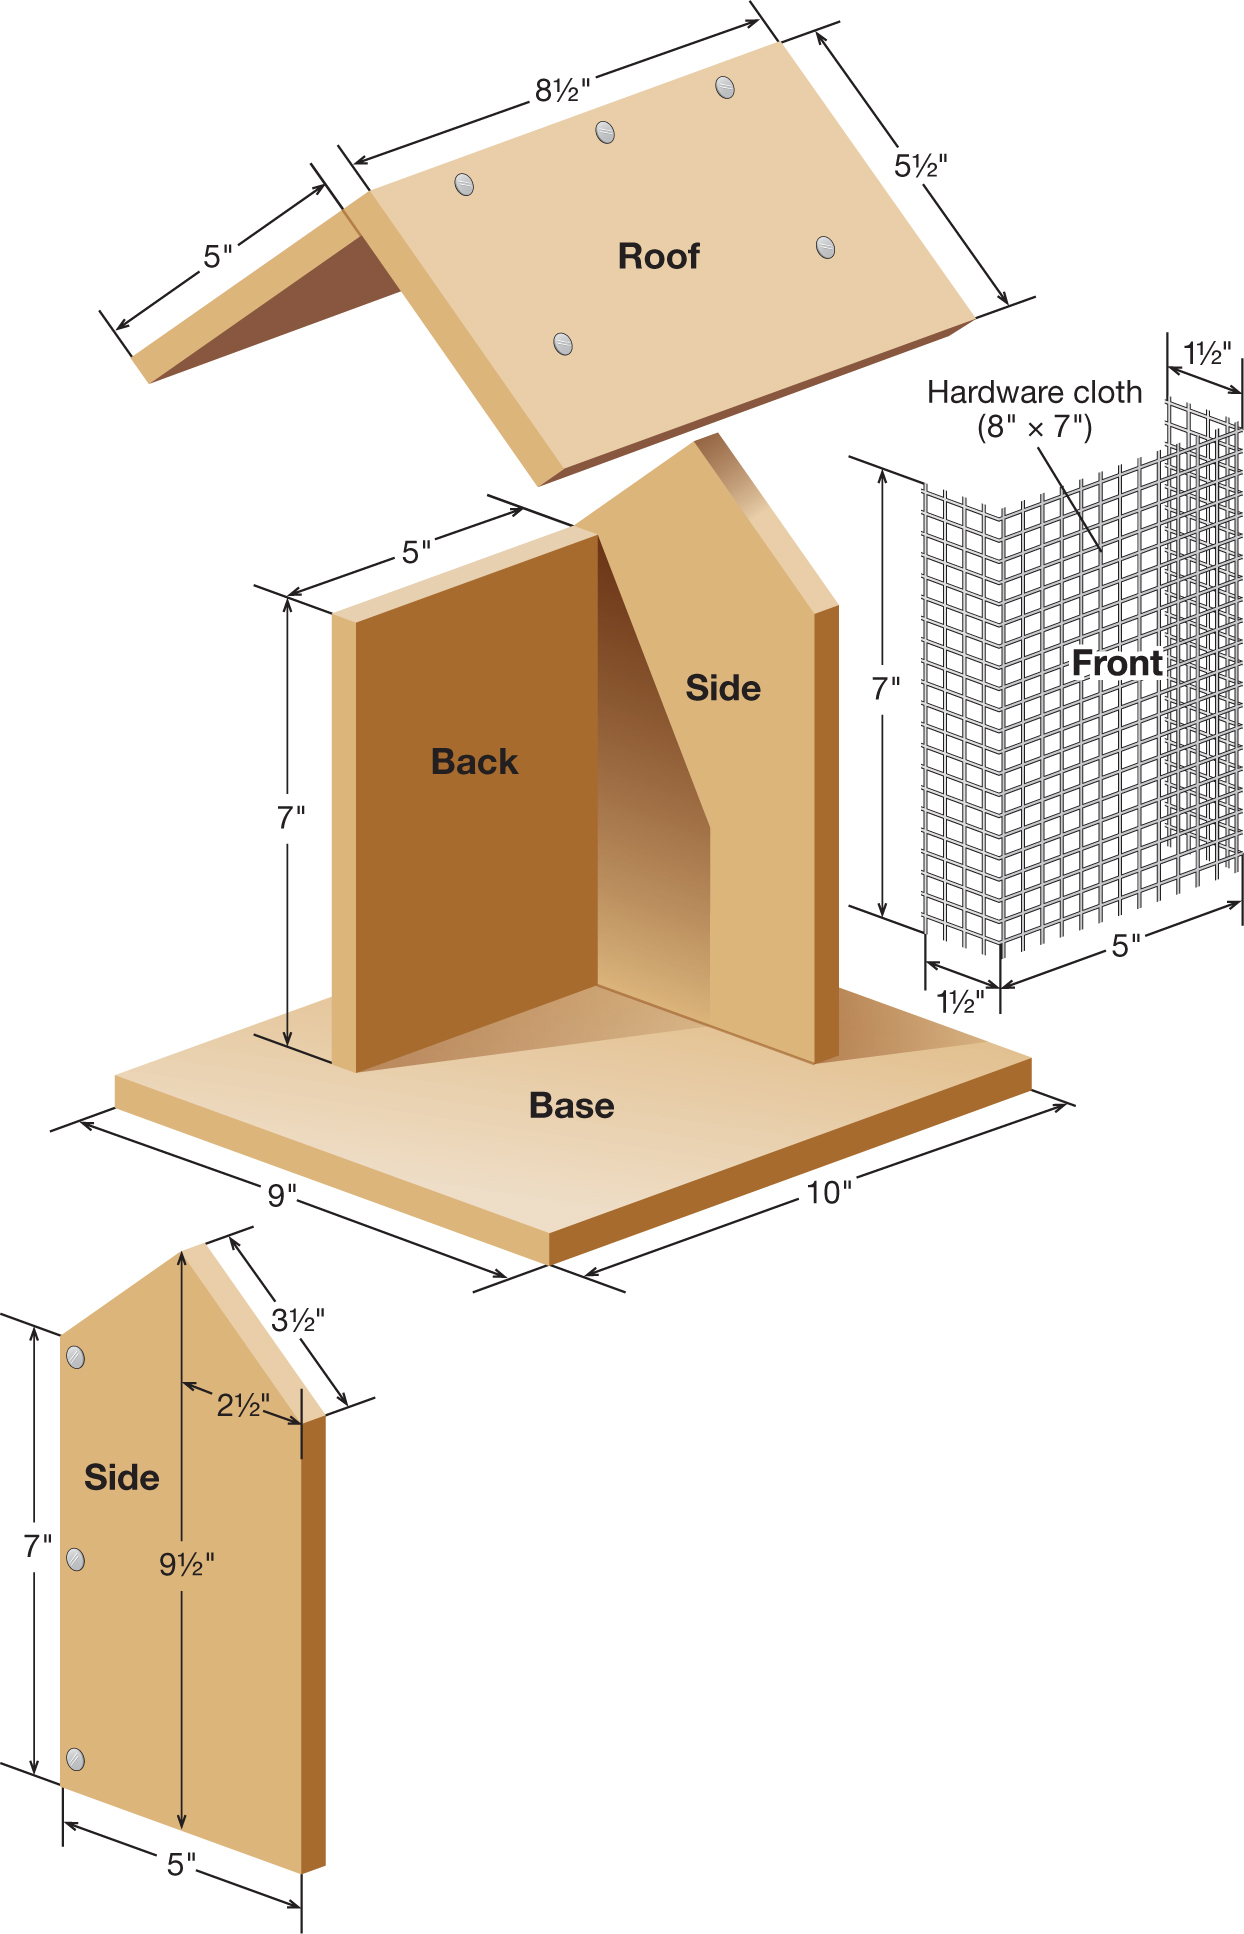
 Measure and cut the following from 1/2" plywood:
Base: 10" × 9"
Back: 5" × 7"
2 sides: 5" × 9-1/2"
Roof piece: 8-1/2" × 5"
Roof piece: 8-1/2" × 5-1/2"
 On one of the two sides, measure and mark a point on one edge 7" from the bottom. Repeat with the other edge. On the top end, locate and mark the panel’s centerpoint. Draw a straight line that connects the 7" mark on the edge to the top center mark. Repeat with the other edge to the top center mark. Cut on both lines to create the peak on the side of the feeder.
 Repeat step 2 to measure and cut the other side piece like the first one.
 Position the left side panel so its back edge is flush with the back face of the back panel. Nail the side to the edge of the back panel.
 Hold the hardware cloth so that you are working with the 7" high edges. Bend 1-1/2" of both edges of the hardware cloth at 90-degree angles. Make sure the edges are facing the same direction. You should have a 5" section of netting between the two bends. Position one edge at the front of the left side on the inside. Staple the netting in place as close as possible to the front edge.
 Position the unattached edge of the netting on the inside of the right side with 1-1/2" overlapping the inside face. Staple the hardware cloth on the inside as close to the front as possible. There should be a 5" section of unattached netting that will serve as the front of the feeder.
 Position the right side of the feeder in place beside the back. Nail the side to the edge of the back panel.
 Position the 5-1/2" × 8-1/2" roof panel over the front section with 1/2" extending past the peak, as shown in the diagram. Center it over the sides with an overhang on either side and extending over the front netting. Nail it in place to the sides.
 Position the other roof panel in place under the 1/2" overhang at the peak so that it is flush with the ends of the first roof section already installed.
 Set one side of the hinges in place at the top of the 5" roof panel. Mark where to drill pilot holes. Secure the hinge with screws.
 Repeat step 10 to install the other side of the hinge to the other roof section.
 Paint the feeder and allow it to dry.
 Sand the feeder lightly with the sandpaper to give it an aged, weathered effect.
 Center the feeder on the 10" wide by 9" deep base with 2" of edge showing all around. Measure in 2-1/4" from each edge of the base on the underside and drive nails through the base into the back and side panels.