INTO THE WILD
NATURE IS A DYNAMIC EQUILIBRIUM, VIOLENTLY SWINGING FROM ONE EXTREME TO THE OTHER. THERE IS NO ROOM FOR SENTIMENTALITY, INTROSPECTION OR SELF - DOUBT. IT’S YOU OR THE BEAR.
Maybe you’ve succeeded in clearing the Wasteland Level (are there bonus lives for that?) and, having made your way through the abandoned and decaying detritus of human civilization, need to move on to greener pastures. Or maybe you’re one of those brash, I mean brave, survivor types and the whole quaint bugging-in thing was never for you anyway—you want to throw yourself into the wild and woolly mix of out there. Either way, you will find yourself in a place quite unfamiliar to most of us—the wilderness.
Being in the wild offers some definite advantages over the wasteland. If you find yourself with access to freshwater, you can fish, and the wilderness will offer a much better selection of wild edibles—better game, more abundant forageables. But don’t be fooled! While Mother Nature shakes her tail feather in our faces, cooing promises of subsistence and perhaps even reliable food sources, she’s a tough nut to crack. Surviving in the wilderness is not easy (why do you think there are over a dozen reality shows on the topic pre-zpoc?).
The skills you have acquired and practiced thus far will be of paramount importance—finding water, building a fire, some basic hunting and foraging—and this section builds on the foundations laid down in Essential Skills for the Hungry Survivor (page 11), offering more advanced techniques. You will need to hone those hunting and trapping skills and come to appreciate The Offal Truth about the Zpoc (page 264). Some introductory bushcraft will come in handy (see Bushcraft & Improvised Cooking Implements, page 272) in fashioning basic tools and shelter, and you will also need to master basic food preservation techniques sans canning and fermenting (see Food Preservation in the Wild, page 280).
In the end, your foray into the great outdoors should give you an appreciation for that dynamic equilibrium Martinez mentions on the previous page, albeit in a new post-apocalyptic circle of life where we humans have been knocked down a peg.
Wild Game Hunting during an Undead Uprising
Aside from potentially having to compete with zeds for animal flesh (see Zeds Eating Animals, page 281), hunting during the zpoc is much like hunting pre-zpoc. If it is something you have never done, there is a stomach-gnawingly painful learning curve. But don’t sweat it; refer back to Tracking, Hunting, & Trapping (page 25) for a refresher, and with a little practice and a few practical tips, you should be able to bag yourself something.
There is, quite literally, a world of opportunity for wild game hunting and fishing, not to mention foraging (see Foraging at the End of the World, page 102). Below is a quick-and-dirty survivor’s guide to North American hunting and angling:
NOCTURNAL TREE DWELLERS: OPOSSUM & RACCOON
CHANCES OF BAGGING: Good
WHERE THEY LIVE:
Opossum: Eastern half of the United States and Mexico along with pockets on the western coast in Washington, Oregon, and California; in Canada, southern Ontario and the southeast coast of British Columbia
Raccoon: Across most of North America
WHERE TO LOOK: Varied habitat in both urban/suburban settings and the great wilderness
WHAT THEY EAT: Almost anything that is edible. They especially enjoy meat in the form of frogs, fish, small mammals, snakes, and carrion (dead animals).
HUNTING TIPS: Both animals have similar and distinctive hand-like footprints that will indicate their presence. Since hunting for raccoon and opossum is a nighttime activity, it is often done with dogs, who flush the animals out for the hunter to dispatch once they have taken shelter in a tree. Traps and snares can also be used. Both animals den up in very cold weather but are active to some degree throughout the winter.
EATING TIPS: Urban and suburban specimens have a less than savory diet (see You Are What You Eat, page 132), making their total-wilderness-dwelling brethren the better dinner. Because both raccoons and opossums are carrion eaters, trap when possible then feed a diet of vegetation for a few days to clean out their system.

OPOSSUM
(DIDELPHIS VIRGINIANA)
RABBIT
CHANCES OF BAGGING: Good
WHERE THEY LIVE: Virtually everywhere in the United States and southern Canada
WHERE TO LOOK: Brush, open woodlots, stream courses, and other edge habitats (areas of ecological and environmental change; for example, where forest meets swamp, field, road, or other human development)
WHAT THEY EAT: Almost purely vegetation. In summer, grasses, buds, and forbs—they are not finicky vegetarians and will eat almost any plant matter. In winter they subsist on twigs, bark, and young saplings.
HUNTING TIPS: Look for sinkholes, overgrown patches, brush piles, and other edge habitats offering dense cover near water. “Walking them up” is an effective way to hunt rabbit with a firearm—walking slowly around a suspected or known habitat, pausing every few steps for 5–10 seconds. This will play on their anxiety, and if they are nearby, it will cause them to think they have been spotted and bolt, bringing them out into the open to shoot. Snares and traps are other effective methods.
EATING TIPS: Rabbits have been known to carry the disease tularemia, which can be transmitted to humans through handling and dressing the carcass. Wear gloves when butchering these animals, if possible, and cook the meat well-done as another precautionary measure. Rabbit is not very nutritious in that it is extremely lean and lacking in fat—a diet consisting of mostly rabbit meat will lead to a condition of fat starvation known as “rabbit starvation.”
CLAMS, MUSSELS, & PERIWINKLES
CHANCES OF BAGGING: Very good
WHERE THEY LIVE: Saltwater, northeast and northwest coastal locales in North America
WHERE TO LOOK:
Clams: under sand or mixtures of sand and mud in calm backwaters
Mussels and periwinkles: attached to rocks within a few feet of the shoreline
WHAT THEY EAT: Nutrients and microscopic morsels obtained from the water they filter or rocks they live on. They require no bait.
HUNTING TIPS:
Clams: Dig clams during cooler seasons; clams from warm summer waters have a very short shelf life and tend to be tougher. Look for small holes in the sand—often evidence of clam activity. To dig, use a spade or some other tool to dig deeply into the sand directly beside the hole, bringing up about a foot of sand.
PERIWINKLE
(LITTORINA LITTOREA)
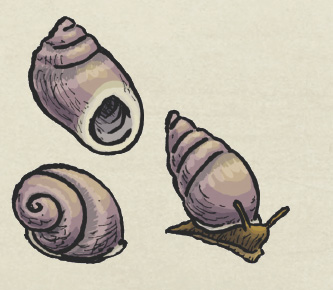
Mussels: Mussels can be found in clusters clinging to rocks out in the surf, close to shore. They can be directly removed from the rocks but should only be harvested in cold weather, as they can accumulate toxins during warm spring and summer months.
Periwinkles: These tiny little snails also live on beach rocks and can be plucked right off and cooked.
EATING TIPS: All do well with gentle steaming or simmering as the cooking method. Remove the fingernail-like sheath on periwinkle meat before eating.
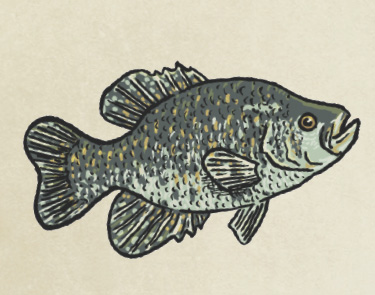
CRAPPIE
(GENUS POMOXIS)
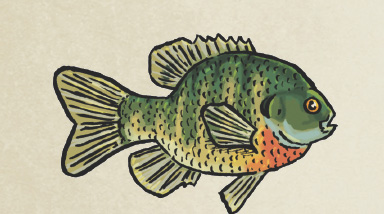
BLUEGILL
(LEPOMIS MACROCHIRUS)
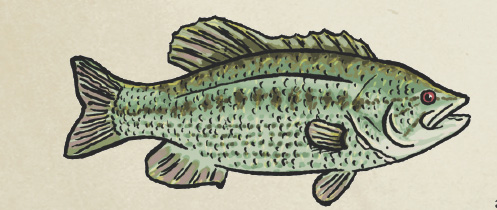
SPOTTED BASS
(MICROPTERUS PUNCTULATUS)

YELLOW PERCH
(PERCA FLAVESCENS)
PANFISH: BLUEGILLS, CRAPPIES, SPOTTED & WHITE BASS, & YELLOW PERCH
CHANCES OF BAGGING: Very good
WHERE THEY LIVE: Freshwater across the United States and southern Canada: rivers, lakes, ponds, streams, reservoirs
WHERE TO LOOK: Near structures—sunken logs, boulders, boats—and in shade; coves are also excellent places, as they are quiet and away from the main body of water
WHAT THEY EAT: A variety of plant and insect life; also:
Bluegills: Crickets or worms
Crappies and yellow perch: Live minnows
Spotted and white bass: Night crawlers
HUNTING TIPS: Use small hooks that aren’t shiny. These fish can be hunted through the winter by ice fishing.
EATING TIPS: They are called panfish for a reason—because they are generally small enough that they fit right in the pan and are often fried whole. Seasoning is a must, as often they are quite bland.
WHITETAIL DEER
CHANCES OF BAGGING: Fair, will be difficult without a gun
WHERE THEY LIVE: Throughout most of the United States, except California, Nevada, and Utah (where you could alternatively hunt the mule deer); most of southern Canada, except British Columbia (where you could alternatively hunt the blacktail deer)
WHERE TO LOOK: Dependent on climate and geography—what is perfect deer country in New England is unfit for the deer of Texas. However, the deer is by personality an animal that likes to have many hiding places, and in general they are considered edge habitat animals.
WHAT THEY EAT: Vegetation, varies greatly by region. Deers become very accustomed to the foods of their region and will be wary of any food they do not know.
HUNTING TIPS: Whitetails are extremely agile and wary. They can run at speeds of 30 miles per hour, zigzagging through the forest to evade predators. They can jump extremely high; there are reports of some deer clearing 8-foot fences. Deer are also homebodies in that they will not leave their home range, which typically covers about a half square mile. They are intimately familiar with their environs—anything that looks, smells, or sounds unfamiliar is suspect. The keen sense of smell in deer is legendary, so it is crucial to remain downwind from them. Their hearing is also acute. Tracks are a good way to identify deer territory, as are droppings. During the winter, head-level tree bark and branch nibbling is a good indication of their presence.
EATING TIPS: Deer provide a whole lotta eating. Store meat in cool shaded rivers or stream beds where it can be kept for long periods, or dry meat out for jerky (see Food Preservation in the Wild, page 280). The tongue and heart also make for excellent offal (see The Offal Truth about the Zpoc, page 264).
WOODLAND GAME BIRDS: GROUSE, PHEASANT, & PIGEON
CHANCES OF BAGGING: Reasonable with firearm, traps, and snares
WHERE THEY LIVE:
Grouse: Virtually every northern North American habitat, from the old pastures to open plains and coniferous forests
Pheasant: Much of the United States, with excellent populations in the Dakotas, Kansas, Nebraska, and Iowa; most of southern Canada
Pigeon: Much of North America (rock pigeons are typical in urban and suburban settings, while the band-tailed pigeon are common in rural and backwood locales)
WHERE TO LOOK: On the ground, typically in some form of cover
Grouse: Varied edge habitats offering dense cover
Pheasant: Woodlands close to human centers, especially near grain farmland
PHEASANT, MALE AND FEMALE
(SUBFAMILY PHASIANINAE)

GROUSE, MALE AND FEMALE
(SUBFAMILY TETRAONINAE)
Pigeon: Dark, secluded, and elevated spots in urban/suburban settings, like in the steel framework under bridges or behind air conditioning units; forests and other woodlands
WHAT THEY EAT: Seeds, vegetation, and insects
HUNTING TIPS: While locating game birds like pheasant and grouse without hunting dogs can be difficult, if you have access to firearms you can find and flush them yourself. Alternatively, because these are ground-dwelling birds, snares or traps can be quite effective. Be sure to learn what kinds of local foods they enjoy eating that can be used for bait.
EATING TIPS: The texture and flavor of most game birds do well with aging—hanging the unplucked eviscerated carcass for 3–10 days in (at highest) 50°F–60°F temperatures. Aged birds must be dry plucked (see Basic Field Dressing & Butchery, page 37). They are excellent roasted skin on.
RECOMMENDED READING: For more on hunting in wild and not-so-wild places, check out Hunt, Gather, Cook: Finding the Forgotten Feast by Hank Shaw; The Small-Game and Varmint Hunter’s Bible by H. Lea Lawrence; and North American Game Animals by Byron W. Dalrymple.
SPIT-ROASTED PHEASANT
Pheasant is probably the best known game bird in North America. A woodland bird (along with others like grouse and pigeon), pheasants are ground dwelling, meaning they spend most of their time scratching around in the brush and under cover for food—making snares and traps an effective (and quiet!) way of catching them. Pheasants subsist primarily on seeds, grain, and berries, making these attractive as bait. When hunting pheasant with a gun, be sure to watch carefully where they drop—they will blend into their environment almost perfectly, which can make it hard to retrieve them. See Wild Game Hunting during an Undead Uprising (page 255) for additional tips on hunting pheasant.
As Hank Shaw, author of Hunt, Gather, Cook, says, “when life gives you a beautiful pheasant . . . you should roast it whole like a chicken.” Hank also points out that many lean game birds often dry out quickly during cooking, so this wilderness-appropriate adapted recipe employs a short brining before roasting. If brining ingredients like salt and sugar are not accessible, consider braising your bird instead, along with some foraged root vegetables and wild garlic. See Foraging at the End of the World (page 102) for more information on finding the wild bayberry and juniper berries called for in this recipe.
If you don’t have access to a large vessel for wet plucking, you can improvise a substitute. Add several rocks (see Cooking with Rocks, page 269) to a large fire and let the fire burn down completely. In the meantime, dig a large hole (at least 3 feet wide by 3 feet deep) and then line the hole heavily with nonpoisonous vegetation. Add the rocks to form a similar lining, then fill the hole with water. Add additional hot stones to increase the temperature further and replenish the water as needed.
This recipe is adapted from Hank Shaw’s “Simple Roast Pheasant” recipe on the Hunter, Angler, Gardener, Cook blog (honest-food.net).
YIELDS:
1 Hungry Survivor serving, 2 Regular Joe servings
REQUIRES:
Chef’s or survival knife and flexible plastic cutting board
1 wooden frame for spit roasting (instructions on page 273)
1 mess kit pot
1 large pot, large resealable plastic bag, or other food-safe container
HEAT SOURCE:
Direct, open flame
TIME:
30 minutes prep
2–8 hours inactive brining time
45 minutes roasting time
INGREDIENTS:
4 c. potable water
¼ c. salt
1 tbsp. sugar
5 foraged bayberry leaves
1 tbsp. foraged and crushed juniper berries
1 pheasant, freshly killed
METHOD:
 Make sure a knife or knives are sharpened and ready. Gather materials for a cooking fire and spit (see Bushcraft & Improvised Cooking Implements, page 272).
 Start the fire. In a mess kit pot, bring the water, salt, sugar, bay leaves, and juniper berries to a boil. Remove from heat and let cool to ambient temperature.
 In the meantime, wet-pluck and dress the bird (see Basic Field Dressing & Butchery, page 37), leaving the skin on. Once eviscerated, separate out the gizzard, heart, and liver. Inspect for any obvious illness or disease and retain all healthy-looking tidbits for stock or other eating (see The Offal Truth about the Zpoc, page 264). Being very careful, cut out the little green gallbladder from the liver—do not pierce it! It contains bitter and unpleasant liquid that is difficult to rinse away and will taint the meat. Chop off the feet and head. Remove any remaining neck bone, which can be used in stock. The bird should now be open on either end and ready for spitting.
 By now the brine should have cooled sufficiently. Put the cleaned bird into a large pot, resealable plastic bag, or other food-safe container and cover with the brine. If needed, cover the vessel to keep out bugs and other debris. Brine the bird for about 2 hours, or up to 8 if you have cool (below 40°F) temperatures. Flip the bird halfway through brining if it is not fully submerged.
 Construct the spit over the cooking fire, being sure to set it to a height that will enable high-heat 500°F roasting (see Judging Temperature, page 47).
 Remove the pheasant from the brine and pat dry with a clean piece of material. Put the bird onto the spit, adjusting it as needed so it catches the sharp points in the middle.
 Cook the bird over high 500°F heat for 15 minutes, rotating constantly. Remove the support sticks and reset them for cooler cooking (350°F). Continue roasting the bird for another 30 minutes, still rotating constantly. The pheasant is cooked through when you pierce the thick flesh of the thigh down to the bone the juices run clear. If you are a super survivor and have a meat thermometer, you are going for an internal temperature of 155°F.
 Let the bird rest for 15 minutes before carving up and eating. Serve with Get Your Undead Pawpaws Off Me Compote, below, if you have access to the fruit.
GET YOUR UNDEAD PAWPAWS OFF ME COMPOTE
Pawpaws are speckled mango-shaped fruits with a lovely buttery texture and a mango-meets-banana flavor. It’s hard to believe this tropical-like fruit grows here in North America, and most of them wild at that.
Pawpaw trees are native to eastern North America, were enjoyed through the years by Mr. Thomas Jefferson, and relied on by Lewis and Clark when expedition supplies ran low in 1806. Today you can find them in sun and part shade throughout eastern and midwestern North America, but they are most common in the southeast. The fruits, which start off bright green and mature to yellow, ripen in the fall. So do the lovely bright red berries of the spicebush, also featured in this recipe, whose flavor is a spicy combination of clove and orange that compliments game beautifully. See Foraging at the End of the World (page 102) for more on finding these wild foods.
You will probably eat most of these fleeting fresh fall foods raw, but if you care to cook them down, this excellent compote goes well alongside the Ah Nuts-Crusted Rabbit (page 278) or Spit-Roasted Pheasant (page 261). If you are having trouble bagging game, you can also spoon it over some plain rice from your BOB for breakfast.
This recipe is adapted from “Cinnamon-Spiced Pawpaw Compote with Pecans” in Foraged Flavor: Finding Fabulous Ingredients in Your Backyard or Farmer’s Market by Tama Matsuoka Wong with Eddy Leroux.
YIELDS:
About 1½ c. compote
REQUIRES:
Chef’s or survival knife and flexible plastic cutting board
Mess kit pan or pot
Wooden spoon or other tool for stirring
HEAT SOURCE:
Direct, open flame or other Stovetop Hack (page 42)
TIME:
5 minutes prep time
10 minutes cook time
INGREDIENTS:
3 ripe foraged pawpaws, about 1½ c. flesh
2 tbsp. foraged spicebush berries, roughly chopped
1 tbsp. granulated sugar (if available from BOB) or burgled honey (optional)
METHOD:
 Set up a cooking fire or other Stovetop Hack. Peel the pawpaw and remove the seeds. Roughly chop into smaller chunks and add to mess kit pan or pot. Rinse the berries with potable water and rough chop; add to the pawpaws along with the sugar or honey, if available.
 Cook, stirring frequently, over medium-low heat until the fruit breaks down and thickens, about 10 minutes.
The Offal Truth about the Zpoc
The term “offal,” or “variety meats,” refers to the edible organ meats and extremities of animals, including the liver, heart, and lungs (collectively referred to as the “pluck”) as well as the head, feet, tail, testicles, brains, and tongue, among other tasty items.
Come the ZA, you can be sure that eating nose-to-tail will be on the menu. If you are clever and successful enough to bag game, you had better damn well make use of every last bit of that animal, right down to its tooter (“imitation calamari” anyone? Go ahead, Google it). Besides, these meats offer up a variety of good stuff: vitamins A, C, and D; B vitamins; zinc; iron; phosphorus; and niacin, to name just a few.
The type and age of an animal will affect how tasty its offal is—younger animals tend to have the yummiest innards. Offal typically doesn’t keep all that long, much less so than muscular meat, so be sure it is one of the first things you cook up after butchering an animal.
See How to Spot a Dud (page 257) to learn when to avoid organ meats.
BRAAAAIIIINNNNSSSS
Yes, brains. They aren’t just for zombies! Most people think brains are gross, or they are scared that, by eating them, they might turn into a spongiform zombie themselves. The truth is, most brains (ahem, bovine aside) are safe to eat. But they spoil very quickly and should be poached gently (in milk if you’ve got it) before cooking. They take very well to breading and frying.
HEART
Heart meat is dense and fibrous but in exchange offers up the intensified flavor of whatever animal it came from, making it an excellent option for stock making. Hearts contain several ventricles along with a tough outer membrane that need to be removed before cooking, but leave as much fat on there as possible to help keep it moist! Any cooking method you’d use for tough cuts is suitable here, braising being a great option. But don’t rule out other methods like grilling or roasting—see The Venison Heart of the Matter (page 266).
KIDNEY
Kidney is chock-full of nutrition and is an excellent source of protein and B vitamins. Generally kidneys benefit from either a quick and very hot panfry or a low and slow braise; they tend to become quite tough with any cooking in the center of the time/heat spectrum. Healthy kidneys are smooth and deep red.
LIVER
Being a workhorse organ, liver tends to have a big, meaty, and slightly metallic flavor. When cooked whole or in chunks, its texture will likely be heavy and dense, which is why it is often thinly sliced for cooking. It can be baked, broiled, boiled, fried, or sautéed. Make sure the liver is smooth, deep red, and free of spots or ulcerations.
MARROW
Marrow is the soft and succulent tissue that lives inside bones. White marrow is the fatty stuff prized by gastronomes, full of protein and monounsaturated fats. Of course, you need to be bagging game that is big enough to make extracting marrow worthwhile; pre-zpoc it is most often harvested from beef bones. Marrow is best roasted or used to add body to stocks.
PRIVATE PARTS (AKA PIZZLES & TESTES)
The average North American would balk at the thought of eating an animal’s privates, but reproductive organs are enjoyed and even prized by many Asian cultures. According to Fuchsia Dunlop, chef and food-writer specializing in Chinese cuisine, in Chinese medicine a soup of penis is believed to strengthen the forceful, masculine yang energy of the body and is often prescribed to improve low sperm counts.
Forceful masculine energy and a potent sperm bank are two things worth investing in come the end times, wouldn’t you say, fellas? So moral of the story? If you bag a stag, eat its pizzle. If you bag any other large male game animal, eat its pizzle. (Just first be sure to blanch them repeatedly to remove its naturally musky flavor and then slow simmer for at least 5 or 6 hours to tenderize.)
To prepare testicles, blanch them for a couple of minutes then remove the outer membrane. From here you can poach, sauté, grill, roast, or braise—but the most popular preparation is breaded and fried. When castrating your kill, the marks of healthy testes are a pleasant pink hue and nice, firm texture.
TONGUE
Tongue is more popular than you might think. It is the star ingredient in the hot tongue sandwich, a fixture in many a kosher deli. Delicious little fried cod tongues are well loved in Norway and eastern Canada, and spicy duck tongue sandwiches are a staple of Szechuan cuisine. Mammalian tongues need a gentle preparatory simmer for a couple of hours to tenderize them before final preparation, and a brine before that if you can swing it. Also remove the tough outer membrane before final cooking. Fowl tongue can be cooked at high heat without simmering or braising, but remember to remove the bone inside first.
THE VENISON HEART OF THE MATTER
If you are a zpoc survivor who never hunted pre-undead rising, it will be a major accomplishment to bag your first deer (or elk, moose, or caribou). Depending on the size of your group, bagging a deer will leave you with a lot of leftover muscle meat, and so really is best done when you can afford to spend a few days in one place smoking and otherwise preserving it.
But don’t forget the offal in the middle of all that excess! While small-game animals like squirrel or pheasant leave you with just a few tasty offal morsels to fry up and enjoy as a snack, larger game will provide enough meat from the heart, liver, kidneys, and other organs to provide a significant meal. These should never be wasted, unless they are sick or diseased (see How to Spot a Dud, page 257), and because they tend to spoil quickly should be the first thing you eat after dressing your game.
Hearts, being the workhorses they are, take well to braising, though a nice healthy (and reasonably young) heart can be marinated with oil, herbs, wild garlic, and spices then cooked until just warmed through and still pink in the middle, as in the recipe here. This recipe also makes use of another fall wild edible, smooth sumac berries, in place of a more traditional acid like lemon juice or wine to tenderize the meat. The flavor of the sumac berries, along with that of crushed juniper berries, makes this a very wild and woodsy preparation. See Foraging at the End of the World (page 102) for more on foraging these wild ingredients.
YIELDS:
1–2 Hungry Survivor servings, 2–4 Regular Joe servings (depending on animal and size of heart)
REQUIRES:
Chef’s or survival knife and flexible plastic cutting board
1 wooden frame for spit roasting (instructions on page 273)
Resealable plastic food bag
Spit with adjustable pegs for roasting the heart
HEAT SOURCE:
Direct, open flame or other Stovetop Hack (page 42)
TIME:
8 hours prep (mostly inactive)
10 minutes cook time
INGREDIENTS:
1 venison (deer, elk, moose, caribou) heart
¼ c. olive oil
3 tbsp. juice from foraged smooth sumac berries
2–3 small bulbs foraged wild garlic, minced
2–4 foraged juniper berries, minced
Salt & pepper, to taste
METHOD:
 Make sure a knife or knives are sharpened and ready. Gather materials for a cooking fire and spit (see Bushcraft & Improvised Cooking Implements on page 272).
 Trim the heart: Using a nice sharp knife, remove excess fat from the top and around the heart, leaving a small amount intact to help keep the heart moist during cooking. Using the natural openings on the top of the heart as a guide, cut it into 3 or 4 pieces. Remove all the veins and other tissue from the surfaces of these pieces, then add the heart to a resealable plastic bag along with the oil, sumac berry juice, wild garlic, juniper berries, and black pepper to taste. Rub the pieces of heart lightly with the oil and seasonings, wash your hands thoroughly, then push out the excess air from the back and seal tightly.
 Find a nice cool stream and submerge your bag in a shady spot. Weigh it down with stones and try to camouflage with leafy branches to hide it from wild predators like bear or raccoon. Let the heart marinate for 2 or up to 8 hours (in cold temperatures of 40°F or cooler).
 Start the cooking fire and construct the spit, being sure to set it to a height that will enable high-heat 500°F roasting (see Judging Temperature, page 47).
 To cook, slide each of the 3 pieces of the heart onto the middle of the spit, using the sharp points to anchor the meat. Salt liberally, then cook until heated through, rotating constantly, about 10–15 minutes. If you have a meat thermometer, you are going for an internal temperature of 135°F. Let the heart rest about 10 minutes before slicing up. Sprinkle the slices with additional salt and pepper if desired. Enjoy.
Earth Oven
More primitive than the Mud Oven [page 320], the earth oven (also known as a pit oven) is an equally useful means of cooking that is simple to set up, far less permanent, and made completely with available natural resources, making it a great option for survivors who are transient or have not yet settled into their Long-Haul Bug-Out Location [page 306]. Like the mud oven, an earth oven makes use of the immense insulating ability of dirt. Food is wrapped in lush nonpoisonous vegetation and buried along with hot stones for a steam-like cooking process. When well executed, the oven’s internal temperature can stay stable for upward of 24 hours.
The temperatures the oven achieves will depend on the size of your pit, the rocks you use, and the temperature of the rocks before you cover the pit, but generally cooking takes much longer than in a pre-zpoc conventional oven. It is a gentle, low, and slow way of cooking, making it a great option for steaming fish or foraged edibles and braising tough cuts of meat or offal (if you have the appropriate cooking vessel available).
WHAT YOU WILL NEED:
 Tinder, kindling, and fuel for a large fire
 10–20 hard, dry rocks (see Cooking with Rocks below), roughly 4” × 6”
 Nonpoisonous lush vegetation or tinfoil (if available)
 Dig a hole at least 2 feet wide and 2 feet deep, keeping the dug-out earth beside the pit for later use. Add rocks to line the bottom and halfway up the sides of the pit. Use any remaining rocks to create a thicker bed at the bottom of the pit.
 Construct a fire over the bed of rocks, with enough fuel to overfill the pit by a foot or two. Do not worry about a particular pattern for laying out the wood, but leave sufficient space to light the fire from underneath.
 Light the fire. Keep the fire burning fiercely for at least an hour, preferably 2, then let it burn down to ash. Once it has burned down, the rocks should be glowing and sufficiently hot for cooking.
 Place whatever food you would like to cook, well wrapped in nonpoisonous green vegetation (or tinfoil), onto the stones. Add another thick layer of vegetation, then fill in the remaining space with the earth previously set aside in step 1. The high heat from the rocks will disperse to the surrounding earth, creating a temperature much lower than the hot rocks’ initial one, but because of earth’s excellent ability to insulate, it will stabilize and remain fairly constant for at least 24 hours.
 Cuts from small game and fish should take roughly 1–2 hours to cook, while other delicate forageables should take about an hour, foraged roots and tubers roughly 2½–3½ hours.
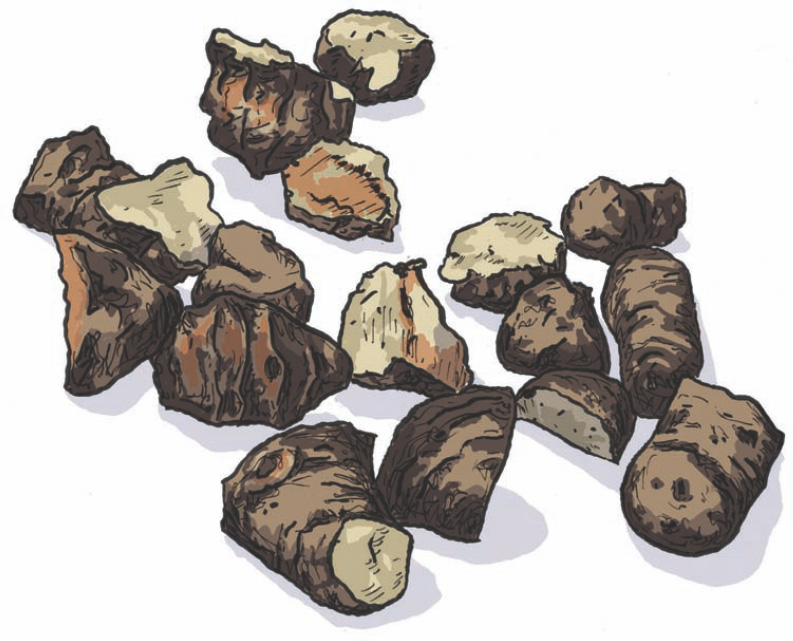
HOLY ARTICHOKES!
Jerusalem artichokes, also known as sunchokes, are the tubers of a native sunflower (Helianthus tuberosus) that grows widely across North America. The plants reach 6–12 feet tall, with long slender toothed leaves that reach about 10 inches in length, yellow petals, and a brown disk like most sunflowers, though the petals are more spread apart. They can be found in fields and thickets, near streams and other bodies of water, and along roadsides.
The tubers have a mild artichoke-like flavor (thus the name) and can be dug up and enjoyed much like potatoes. Sunchokes have, perhaps deservedly, picked up the nickname “fartichokes” because of their propensity to cause some people (though not all) to experience intestinal distress—not fun when undead monsters are trying to eat said intestines, so give them a small trial before gorging yourself.
In this simple preparation, the earthy flavor of these tubers is enhanced by the spicy complex flavor of Queen Anne’s lace, a fall seedpod that has a lovely flavor combining carrot, celery, and parsley. As the flower goes into seed production, it curls into what looks like a bird’s nest and will produce many tiny green seedpods. Harvest the flower heads when these green seeds are visible then pick them out to add to the chokes. See Foraging at the End of the World [page 102] for more on foraging the wild ingredients featured here.
YIELDS:
2 Hungry Survivor servings, 4 Regular Joe servings
REQUIRES:
Chef’s or survival knife and flexible plastic cutting board
Mess kit pan or pot
HEAT SOURCE:
Indirect, Earth Oven [page 269] or other Oven Hack [page 44]
TIME:
5 minutes prep time
2½–3½ hours cook time in Earth Oven, 30–40 minutes in other Oven Hack or in fire embers
INGREDIENTS:
1 lb. foraged Jerusalem artichokes
3–5 foraged Queen Anne’s lace flower heads
Oil or other animal fat, if available
Salt & pepper, to taste
METHOD:
 Set up an Earth Oven or other Oven Hack for 400°F roasting (see Judging Temperature, page 47).
 Thoroughly clean the earth-covered tubers. If you can get most of the dirt off, leave the skin on; otherwise peel with a paring knife. Roughly dice into bite-sized chunks.
 Remove the green pods from the clusters of Queen Anne’s lace. Toss the seeds and tubers with the fat, salt, and pepper.
 Cover the mess kit pan and heat until cooked through and tender—about 30 minutes. Serve with Ah Nuts-Crusted Rabbit [page 278] or The Venison Heart of the Matter [page 266].
Bushcraft & Improvised Cooking Implements
Broadly speaking, the term “bushcraft” applies to the knowledge and skill of wilderness survival—finding water, hunting, fishing, fire building, and so forth. It also applies to the woodwork often associated with these survival skills.
When you’re cooking out in the wild, these skills can go a long way. Here are a few of the essentials for setting up a functional wilderness kitchen:
BIRCH BARK CONTAINERS
Birch bark can be used to fashion several different kinds of containers—cups, bowls, boxes—and when freshly harvested from the tree it is flexible and easy to work with. Birch trees are easily recognized by the peeling surface of their white bark and grow through most of the northern states, as far south as the Carolinas. The spring is the best time to harvest birch bark, when it should come off the tree easily. As the summer and fall wear on, it becomes harder to remove the bark and doing so will cause damage to the tree, preventing it from growing back.
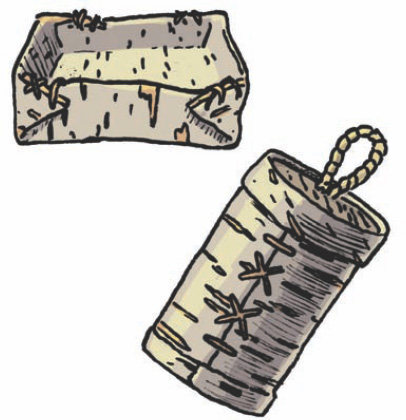
BIRCH BARK CONTAINERS
As thickness and quality of bark varies from tree to tree, try to find bark that is at least ¼-inch thick. To harvest, make a vertical cut as long as needed for your intended purposes. Cut deep enough to penetrate the removable outer bark but not so deep as to penetrate the inner bark. From here you should be able to peel it off easily from the incision point. Fold or roll the bark to your desired shape, then poke small holes at the seams to sew and secure your container.
SIMPLE POT ROD
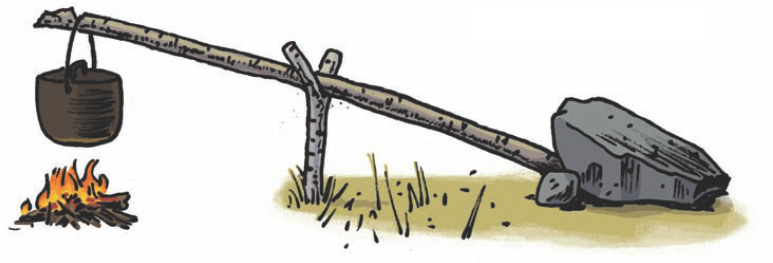
POT RODS
Pot rods collectively refer to a variety of wooden structures and tools used to hang and otherwise support pots over a fire. With a basic spit structure, you can use snare wire or another fireproof material to hang pots, or alternatively, you can whittle notched pot holders from sticks to hang handles from (see image of spit). An even simpler structure could be made from a forked stick supporting a second stick wedged on one end between 2 large rocks (pictured).
SMOKE TEEPEE
A smoke teepee (pictured) is useful for preserving meats. Fashion the outer structure with 3 forked sticks, securing by tying them together at the top. Create levels within this structure with additional sticks for hanging or laying out the strips of meat you want to smoke. Remember, do not use resinous woods like pine or spruce (any coniferous tree) as the smoke will make the meat taste rancid.
SPIT
A spit (pictured on the next page) is a simple and easily constructed wooden structure that can be used to roast meats or to suspend pots above the fire (see Pot Rods). To construct a spit for roasting, you will need 2 sturdy and forked support sticks about 5 feet long and at least 2 inches thick, and 1 slender branch that is at least 5 feet long and 1–2 inches thick. The slender branch will act as the spit and should be harvested from a living tree so that the wood is “green” and still reasonably moist (to avoid burning while cooking). The spit should also have numerous smaller branches coming off it, particularly in the center, which can be whittled down to small, sharp points and used to anchor the meat. You can also whittle the single ends of the forked support sticks to sharp points in order to help stake them into the ground on either side of the fire.

SMOKE TEEPEE
SPIT WITH NOTCHED POT HOLDER
TONGS
Tongs (pictured) are useful for flipping, extracting, and generally doing things that your bare hands otherwise could not. In a world where fire is our main mode of cooking, tongs are a must for the BOB but can also be constructed from natural materials if needed. Find 2 sticks that will naturally fork when bound together, then make use of the resulting tension.

TONGS
RECOMMENDED READING: For more on bushcraft and building a functional camp kitchen, check out Bushcraft: Outdoor Skills and Wilderness Survival by Mors Kochanski and Bushcraft: A Serious Guide to Survival and Camping by Richard Graves.
It’s Autumn, Go Nuts!
During a zedpocalypse you better become a nutter (the term for those who forage nuts) pronto. Nuts will prove to be an invaluable source of food come autumn—they’re calorie rich and full of fat. With over 60 species of oak tree in North America (all of which produce nuts), you should, at the very least, be able to find a few measly acorns in a local park or green space. Because of their high fat content, nuts will eventually spoil (go rancid); the edible shelf life varies from nut to nut. Dry roasting over low heat or storing nuts in cold/freezing temperatures will help extend their shelf lives.
Here’s the skinny on what nuts you should be able to find out in the wild:
ACORNS
The familiar acorn is quite plentiful; as mentioned, there are over 60 species of acorn-producing oaks to be found throughout North America. Humans have been eating acorns for (nearly) forever—evidence of their consumption has been found amid the debris in Paleolithic cave dwellings.
Oak trees (genus Quercus) are broadly divided into 2 categories: red (aka black) and white. Generally nuts from red oaks have a high tannin content and therefore are quite bitter. The white group produces considerably less bitter nuts; however, some people still find them too bitter to eat without treating. You can pick out a red from a white oak by its leaves: red oaks have leaves with pointed lobes whereas white oaks have rounded lobes (pictured). Luckily, blanching the nuts repeatedly or soaking for several days/weeks at ambient temperatures will remove the tannins and make the flavor more palatable. Remove the caps and shells before blanching or soaking.
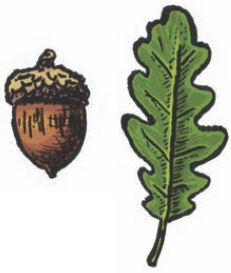
ACORN
(GENUS QUERCUS)
BEECHNUTS
Beechnuts come from beech trees (genus Fagus) and are found in both western (the European beech) and eastern (the American beech) parts of the United States and Canada. In the fall, they produce prickly burs that eventually split and release the nuts, which have no additional shell. The nuts are highly prized by four-legged creatures, so try to get them before the burs burst open.

BEECHNUT
(GENUS FAGUS)
Beechnuts have a thin tough layer that can be removed by hand, yielding a delicious sweet flesh and high protein content (20%).
BLACK WALNUTS
Black walnut trees (Juglans nigra) are prized for their wood, but they also produce damn tasty nuts. Unfortunately, their numbers today are much lower than in the past, having been felled en masse to produce guns during both world wars. Still, they can be found throughout most of the eastern part of the United States, except the far north. There are also 4 species with limited geographical ranges in the West.
The nuts are easily recognized, housed within nearly impenetrable shells inside bright green globes (husks). Grab them before the squirrels do and then get them out of the green husks before they rot and ruin the nuts. Gloves and a knife are the best tools for this task—the husks give off a nearly permanent black dye. Once removed from their husks, rinse the nuts off and dry them in their shells, either in the sun for a couple of days (in a place protected from critters and looters, of course) or over low heat. The nuts keep best in their shells.

BLACK WALNUT
(JUGLANS NIGRA)
The shells are a major pain to break, needing the use of excessive force. This often leads to fragmented nuts that need to be picked out of busted-up shells—but trust me, it’s totally worth it.

BUTTERNUT
(JUGLANS CINEREA)
BUTTERNUTS
A close relative to the black walnut is the butternut (Juglans cinerea), a tree that ranges further north than the black walnut and covers most of eastern North America save for Florida and Louisiana. The butternut (often called the “white walnut”) has the highest nutritional value of all edible nuts; it’s 28% protein and 60% fat. Butternuts are housed in a thin, green, egg-shaped outer husk with brown bristly hairs. The outside of the husk gives off a killer brown dye, and the inside contains bright orange dye—meaning gloves are good if you care about the color of your hands.
Like walnuts, they should be rinsed after being removed from their husks and then dried. They are sweet and tasty right out of the shell.
HICKORY NUTS
There are 20 species of hickory tree (genus Carya) widespread throughout eastern and central North America. Their wood is generally excellent for smoking foods (squirrel jerky anyone?), but not all species produce enjoyable nuts. Many produce tiny and/or extremely bitter nuts that can’t really be treated to remove tannins (as with acorns). The shellbark hickory (Carya laciniosa), shagbark hickory (Carya ovata), and pignut hickory (Carya glabra) are your best bets for decent-tasting nuts.
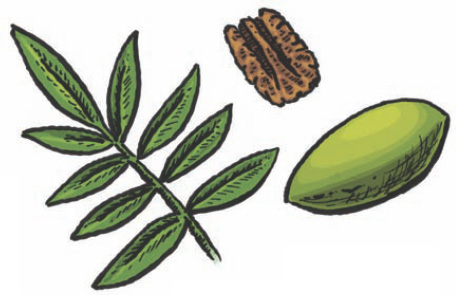
PECAN
(CARYA ILLINOINENSIS)
PECANS
Pecans actually come from a type of hickory tree (Carya illinoinensis), and pre-zpoc they are used extensively in baking and cooking. The nuts are housed in oval green husks that hang in small clusters on the trees. By mid-fall the husks split and the ripe nuts fall to the ground. The pecan is awesome: it is easy to harvest, thin-shelled, and very tasty. Gather all you can get! You can find them in Arkansas, Georgia, Illinois, Indiana, Iowa, Kansas, Kentucky, Louisiana, Mississippi, Missouri, Oklahoma, Tennessee, and Texas.

SHAGBARK HICKORY
(CARYA OVATA)
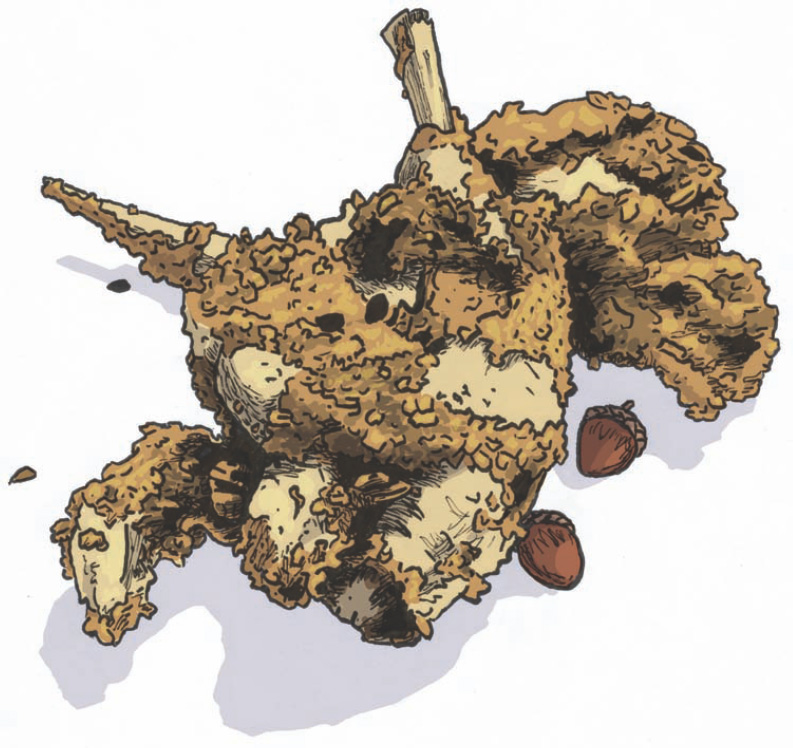
AH NUTS-CRUSTED RABBIT
This is an excellent recipe for survivors who find themselves in the wild during the fall: The rabbits are fattened up after a summer of eating well, they are less stressed and less prone to parasites in the cool weather, Poor Man’s Pepper seedpods will be ready for harvesting (see Foraging at the End of the World, page 102), and nuts will be plentiful.
I have used acorns in this recipe, but any tree nut that you have access to—beech, hickory, or even pecan if you are lucky—can be used in its place. See Wild Game Hunting during an Undead Uprising [page 255] for tips on hunting and trapping rabbits and It’s Autumn, Go Nuts! [page 275] for tips on collecting and processing wild nuts.
YIELDS:
1 Hungry Survivor serving, 2 Regular Joe servings
REQUIRES:
Chef’s or survival knife and flexible plastic cutting board
1 small birch container or mess kit bowl
1 large birch container or mess kit bowl
Blunt pestle-like tool for crushing nuts and seedpods
1 fork
HEAT SOURCE:
Indirect, Ammo Can Oven or other Oven Hack [page 44]
TIME:
10 minutes prep
20 minutes bake time
INGREDIENTS:
½ c. foraged Poor Man’s Pepper seedpods
Dash of oil from BOB or other animal fat
1 c. seasonal tree nuts
½ c. breadcrumbs from BOB or use day-old Bannock [page 244]
1 tbsp. mixed spices from Savory Survival Tin or BOB, such as: cayenne, garlic powder, salt, pepper, thyme, and oregano
Salt, to taste
1 dressed and quartered rabbit (see Basic Field Dressing & Butchery, page 37)
METHOD:
 In a small container mash the Poor Man’s Pepper seedpods with a small amount of oil until a thick paste forms. In a second, larger container, crush the processed nuts until uniformly and finely broken down. Add the breadcrumbs to the nuts, along with the spices and salt, to taste. Toss well then set aside.
 Set up an Ammo Can Oven or other Oven Hack for about 350°F roasting (see Judging Temperature, page 47).
 Using a fork or other tool, prick several holes into each of the pieces of rabbit. Sprinkle each piece liberally with salt, being sure to keep one hand clean (i.e., away from the meat) for touching the salt; the other hand can rub in the seasonings and flip the meat. With your rabbity hand, smear the mashed seeds all over pieces of meat until evenly covered, then using the same hand dip each piece of meat into the crushed nut mixture and turn until well coated. If skewering the meat, do so now.
 Wash up, then roast the meat in the Oven Hack, being careful to cook slowly and not burn the nuts. At 350°F the rabbit should take about 15–20 minutes to cook through (reaching an internal temperature of 160°F if using a meat thermometer). Let rest and cool slightly before eating.
Tip: Rabbits tend to have full intestinal tracts, and the organs will start to turn rather quickly, meaning they should be skinned and eviscerated within about an hour of killing.
Food Preservation in the Wild
As you become more proficient at hunting (or perhaps you already are!), you might start to bag bigger game, or you might come across an abundant game population and decide it’s smart to spend a few days of dedicated hunting and preserving to stockpile food for a few weeks. Either way, you’ll benefit from knowing some basic food preservation techniques for the wild. For a more stable and long-term way of preserving food, consider Building a Root Cellar [page 190].
DRYING & SMOKING
Drying and smoking is one of the simplest methods for preserving virtually any meat, fruit, or vegetable. You can dry foods simply with the power of the sun—though this method should only be used in cool and dry climates or seasons. Otherwise you can make use of a low and smoky fire, called a smudge fire, to help dry the food out while also keeping insects away (see Squirrel Jerky, page 199).
Slice the food you wish to dry as thinly as possible. When drying meats or vegetables, if you have access to salt, sprinkle the pieces to help draw out moisture and enhance flavor. Scavenged window screens are great for drying as they allow for free air flow; just be sure to elevate the screens so the food is dried, and not cooked, by the heat of the smudge fire.
The food is sufficiently dried when it is brittle, leathery, and hard to chew. Dried in this way, meat can keep for several weeks without refrigeration, while fruits and vegetables will keep for longer. When stored in cool, dry, and dark environments, dried foods can keep for several months.
WATER IMMERSION
An excellent way to keep foods fresh for at least a few days is by immersing them in a cold stream, lake, spring, or creek. Make use of the resealable bags in your BOB and seal food within several layers of bags if possible, giving it extra protection and dampening its scent to predators. Try to submerge your food in a shady area and create some kind of cover with branches. Weigh foods down with rocks to keep them in place.
If the water is cold enough (30°F–40°F or so), you can follow the same basic food safety practices as you would with refrigeration. If the water is warmer, that time will be decreased.
CACHE PITS
A cache pit is a lower-tech version of a root cellar, a way of temporarily storing and protecting food by burying it. The preservation power of your cache pit will depend on ground temperature and how deep the pit is, but generally it is a method that offers hours, as opposed to days, of preservation.
Look for burial sites that are well away from water sources to avoid seepage that could possibly ruin your food. An elevated burial site is ideal, as water drains downhill. Dig a hole several feet deep, then dry it out by covering the inside with hot stones. When the stones have cooled completely, line the hole with dry grass and leaves (make sure they are completely dry). For added protection, wrap your foods in nonpoisonous dried leaves and grass as well before placing inside. Fill in the hole with dried leaves, grass, and bark, then cover with soil and rocks. Make sure to cover a wide area with rocks to dissuade creatures from trying to dig into your cache from the sides.
Recommended Reading: For more low-tech methods of preserving food, check out Preserving Food without Freezing or Canning: Traditional Techniques Using Salt, Oil, Sugar, Alcohol, Vinegar, Drying, Cold Storage, and Lactic Fermentation by The Gardeners and Farmers of Centre Terre Vivante.

 Do the hair, coat, feathers, skin, or other body coverings look healthy?
