To complete this recipe, please perform the following steps:
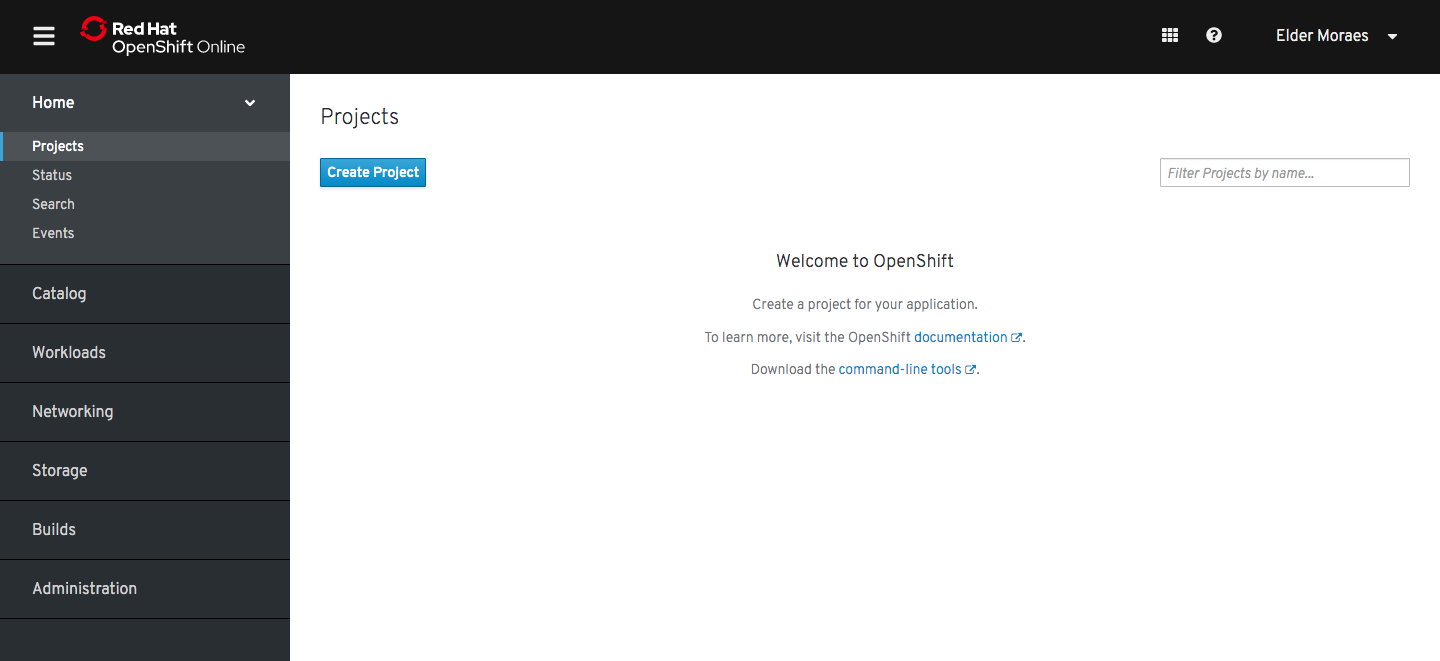
- After logging in, you will see the main page of OpenShift, as shown in the following screenshot:

- Click on the Create Project button and fill in the fields provided. Then, click on Create:

- Once your project has been created, it will be automatically loaded onto the screen:

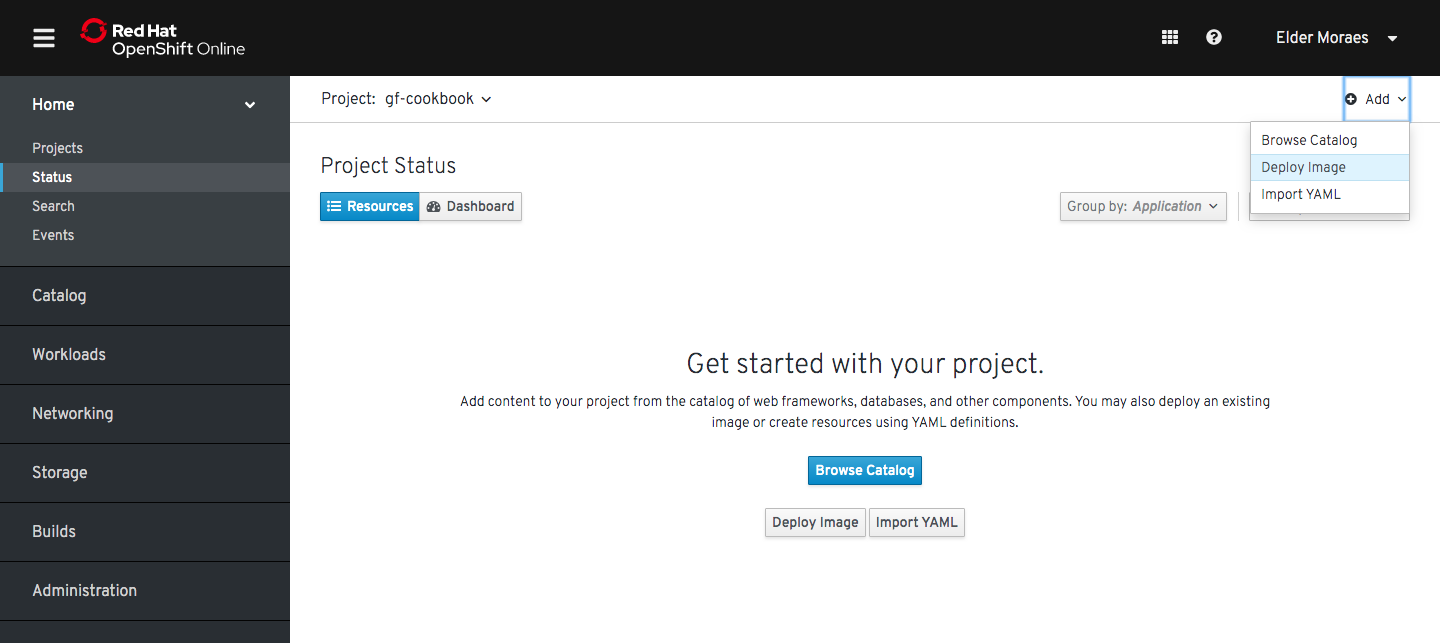
- On the open page, click on Add (top right) and then Deploy Image:

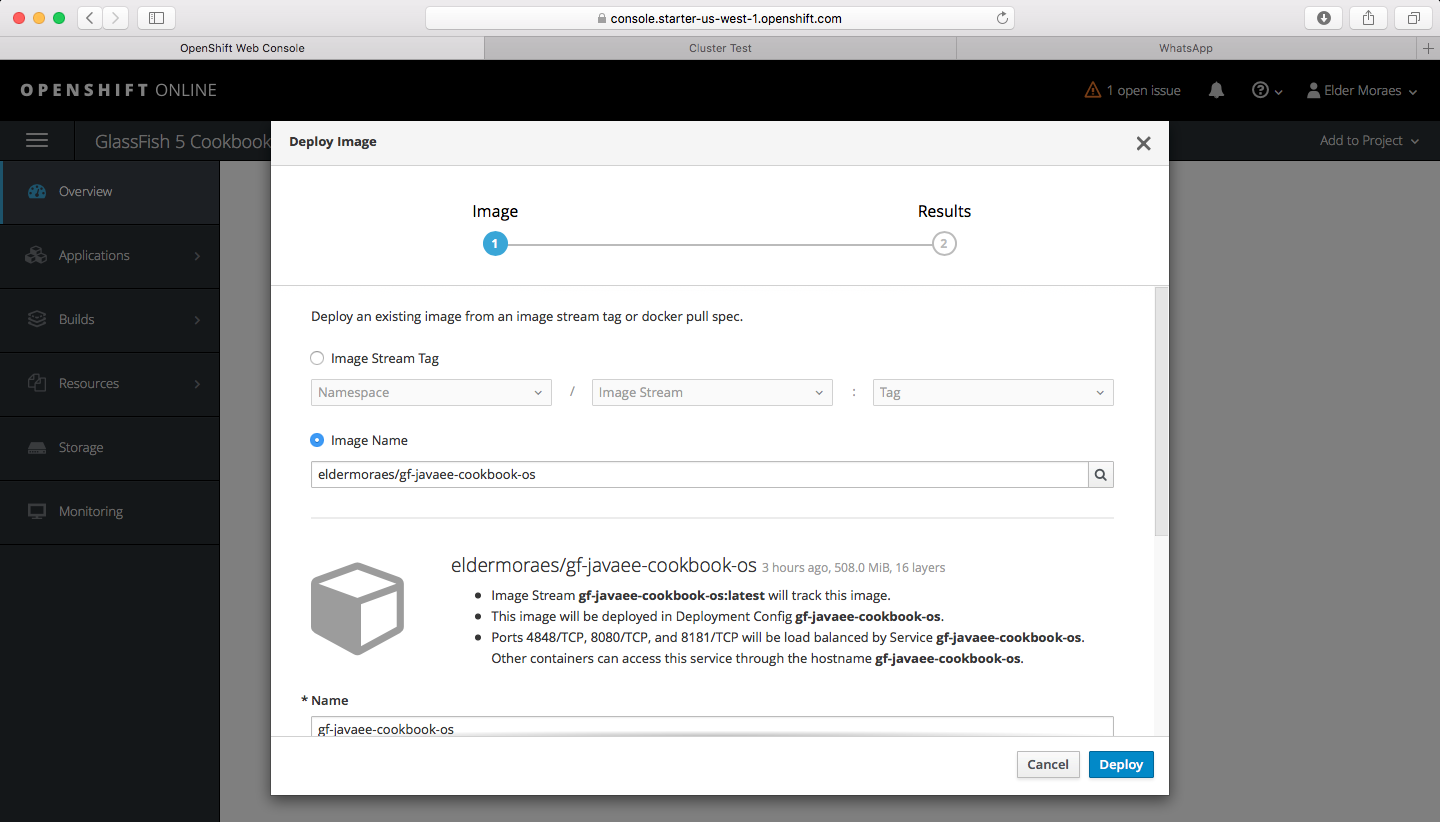
- From the pop-up, select Image Name, fill in the form with our pre-built image (eldermoraes/gf-jakartaee-cookbook), and click on the Search icon. The following screenshot shows the Image deployment page:

- Scroll down to the bottom of the page and click on Deploy:

- Watch the following page until the pod count is 1 of 1 pods. The following screenshot shows us monitoring the pod's creation:

- Navigate through the left-hand menu until you find the Networking | Routes option. Click on it:

- Then, click on the Create Route button.
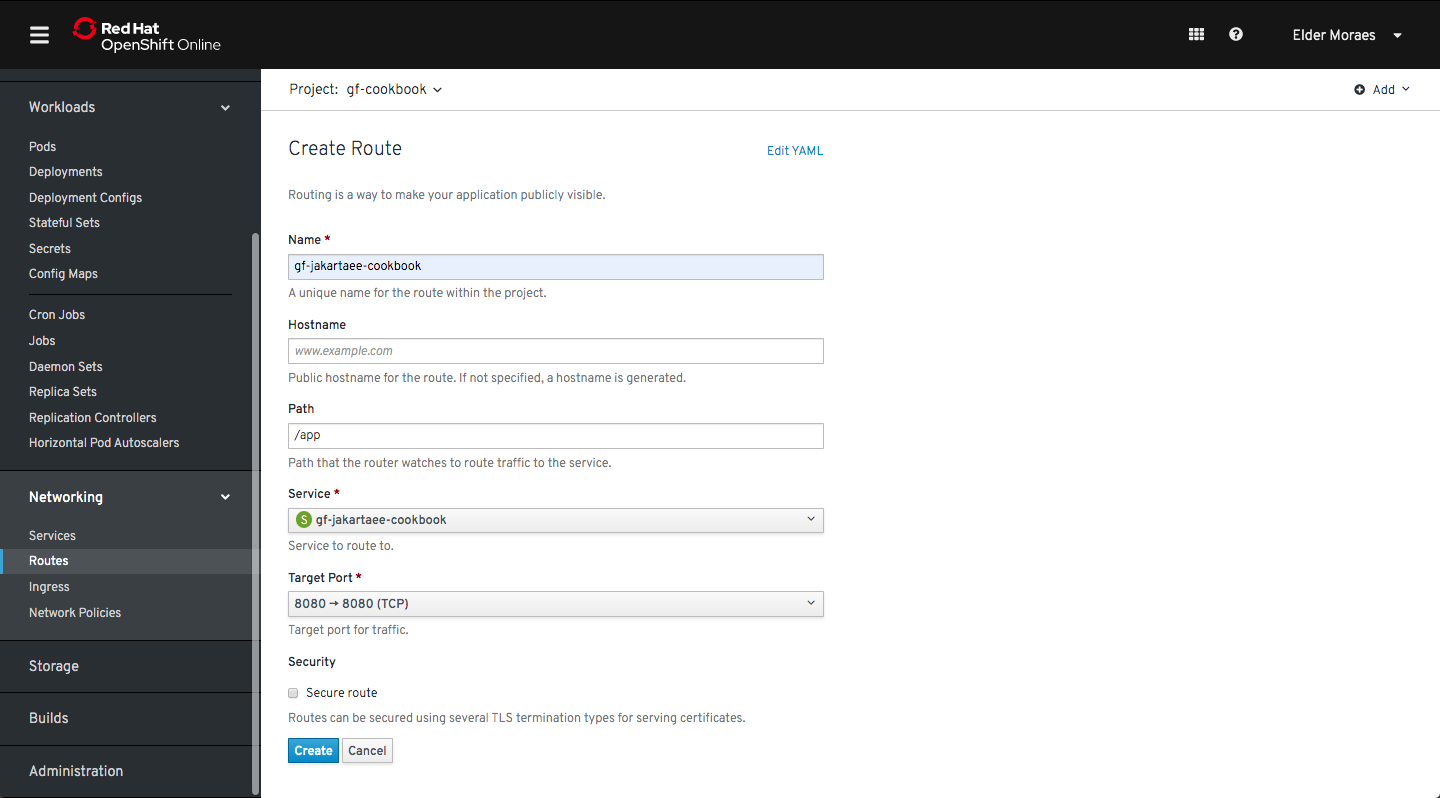
- On the new page that appears, fill in the provided fields, as shown in the following screenshot:

- Click on the Create button.
- This will open the following page. Under the Location label, you can find the route to your application. Click on it:

The preceding screenshot shows the route being confirmed.
- After running it, we will see the following test page for our application:

If you can see this page, then congratulations! You are now orchestrating your container in OpenShift.