Chapter 9. Adding Location Info to the Selfies
While we have our selfie app’s basic functionality working like a charm, it isn’t exactly very featureful. As our selfies are each meant to represent a single moment in time, it would be nice to not only know when we took them but also where we took them. So with that in mind, in this chapter we are going to be adding in location support for the selfies, allowing us to save the locations where they were taken.
Visually, we are going to make it so that the map is a small square off to the side of the selfie detail view controller, and when we tap it, it will launch the main Maps application. By the end of this chapter we will have a new feature in our app that will show a small map on each selfie that when tapped will take us to the exact place where the selfie was taken.
To do this we are going to have to add support for locations to our model, add new tests for the updated model, update the UI to support showing a location, and finally configure our project to be able to access the device’s location hardware so we can generate locations.
Updating the Model
The first step is to add location support to the Selfie class and associated methods in the manager, SelfieStore:
-
Open SelfieStore.swift.
-
Import the
CLLocationclass from the Core Location module:importCoreLocation.CLLocationNote
Core Location is a large and powerful framework that provides various services for generating and manipulating location-related data. A
CLLocationobject represents a single location on Earth and has amongst other parts a latitude and longitude. We’ll be using more of Core Location a bit later, especially when it comes time to get a location from the device’s location hardware, but from the model’s perspective all we need is the representation of a location. -
Create the
Coordinatestruct inside theSelfieclass:structCoordinate:Codable,Equatable{varlatitude:Doublevarlongitude:Double// required equality method to conform to the Equatable protocolpublicstaticfunc==(lhs:Selfie.Coordinate,rhs:Selfie.Coordinate)->Bool{returnlhs.latitude==rhs.latitude&&lhs.longitude==rhs.longitude}varlocation:CLLocation{get{returnCLLocation(latitude:self.latitude,longitude:self.longitude)}set{self.latitude=newValue.coordinate.latitudeself.longitude=newValue.coordinate.longitude}}init(location:CLLocation){self.latitude=location.coordinate.latitudeself.longitude=location.coordinate.longitude}}This is a simple struct that will represent a single location for the selfie. There are two properties inside the struct,
longitudeandlatitude; both are doubles and they will represent the precise position on the Earth that the selfie was taken. We are using doubles as this type maps (pun intended) to how the Core Location framework represents location, with the Equator representing 0 degrees latitude and the Prime Meridian (running through Greenwich in the UK) representing 0 degrees longitude. Rarely will you ever be looking directly at the coordinates; instead, we will be using the various methods inside of Core Location to turn the numbers into something a bit more user friendly and understandable.The
Coordinatetype conforms to two different protocols,Codable(which we spoke about in Chapter 5) andEquatable.Equatableis one of the most common protocols you will encounter in Swift and iOS development. By conforming toEquatable, you promise to implement an==(lhs: rhs:)method. This allows you to use the!=and==operators in your types. You only need to implement the==method, as Swift can work out the!=automatically by returning the negation of the equality method. This method needs to take in twoCoordinates and returns aBool. Notice that the method isstatic—this is because we need it to be available to the entire type and not just on an instance of that type. All of this means we are able to use theCoordinatestruct in assertions and expressions no differently than we can use aDouble, which is why we are conforming to that protocol in the first place.Tip
Swift 4 is adding in support for the autosynthesis of protocol conformance where possible.
Codablewas the first protocol to get support for this functionality, butEquatableis likely to soon also be autosynthesized. This means in the future you won’t have to implement the==method yourself, but until we reach that future we have to do the work ourselves. If you are already in the future, feel free to skip writing that method while you enjoy flying around on your jetpack.The struct has one computed property,
location; this will be the main way that the location will be extracted from our struct. The reason we are doing it this way is because aCLLocationis really what we need—it’s what all the various frameworks out there will expect—but unfortunatelyCLLocationis quite a large class and doesn’t conform to theCodableprotocol. So, we are instead making a lightweight struct that will be used for saving, loading, and presenting aCLLocationfrom it.Finally, the initializer takes in a
CLLocation, which is what we’ll be getting from the device’s hardware, and extracts the coordinate information from within that.Note
There is already a very similar type inside Core Location called
CLLocationCoordinate2D, which looks remarkably similar but doesn’t conform to theCodableprotocol. We could have extendedCLLocationCoordinate2Dto make it conform toCodableinstead, and this might be something you might want to consider for your own apps. For Selfiegram, though, we felt it best to create a new type to demonstrate building up all the required functionality as a learning exercise. -
Add a new optional
Coordinateproperty to theSelfieclass:// the location where the selfie was takenvarposition:Coordinate?
This is where we will save our locations once we start getting some from the location hardware.
Testing Our New Model
Now that we’ve added support for locations into the model, we need to write a test to make sure it can correctly store and load a selfie that has a location as part of it. This test will create a new selfie, give it a location, save the selfie, and finally load it back from the store and see if the location persisted:
-
Open SelfieStoreTests.swift.
-
Import the Core Location framework:
importCoreLocation -
Implement
testLocationSelfie:functestLocationSelfie(){// a location for Hobartletlocation=CLLocation(latitude:-42.8819,longitude:147.3238)// a new selfie with an imageletnewSelfie=Selfie(title:"Location Selfie")letnewImage=createImage(text:"ߐᢩnewSelfie.image = newImage// storing a location into the selfienewSelfie.position = Selfie.Coordinate(location: location)// saving the selfie with a locationdo{try SelfieStore.shared.save(selfie: newSelfie)}catch{XCTFail("failedtosavethelocationselfie")}// loading the selfie back from the storelet loadedSelfie = SelfieStore.shared.load(id: newSelfie.id)XCTAssertNotNil(loadedSelfie?.position)XCTAssertEqual(newSelfie.position, loadedSelfie?.position)}The first thing we do in this test is create a new location. We are manually creating a location that maps to Hobart, Australia (which is where we are from, and as the authors we get to pick the test locations). We then create a new selfie with an image and then create a new
Coordinatefrom theCLLocationobject. In the normal operation of our app we will be gettingCLLocationobjects from the location hardware, but for now a fake location will suffice.Warning
We are creating a location manually here because we want to test our model’s ability to save and load locations, not test how our app handles interfacing with the location hardware libraries. This means we will later have to handle dealing with the location hardware and its quirks. Essentially we are testing the model, not the app, here, but in your apps you will have to do more than just test if the model works.
Next we try to save the selfie, and if that succeeds we load it back and check if it has changed after being reloaded.
Now we can run this test, and it will pass—our model has been updated and tested to work with locations!
Showing a Selfie’s Location
Much like back in Chapter 6, when we had all those selfies saved but no way to view them, we currently have a new feature being supported in our model but we have no way to show it. Now it is time to modify the UI of the selfie detail view controller to show the location:
-
Open Main.storyboard and select the selfie detail view controller.
-
Select the constraint that pins the text field to the right side of the view controller.
-
Delete this constraint.
-
Select the constraint that pins the label to the right side of the view controller.
-
Delete this constraint.
-
Select the constraint that pins the image view below the label.
-
Delete this constraint.
After you do this you might see some warnings that things aren’t alright with the constraint solver—don’t worry, we will fix that soon.
Now we are going to be adding a map view (of type MKMapView) into the view controller. This will be used to show the location attached to this selfie. Follow these steps:
-
Search for a map view in the object library, and drag it into the view.
-
Resize the map view so that it is 67 points high and wide.
-
Place the map view near the top-right corner of the view controller.
-
Use the Add New Constraints menu to position the map view as follows:
-
16 points away from the right edge of the view
-
16 points away from the top edge of navigation bar
-
8 points away from the top edge of the image view
-
Width: 67 points
-
Height: 67 points
Note
67 points is an arbitrary choice. It’s the same as the distance between the top of the text field and the top of the image view, but was just what we felt looked about the right size for the UI.
-
Our map view and image view are both constrained correctly, but our label and text field are not. Let’s fix this now:
-
Select the text field.
-
Use the Add New Constraints menu to position the text field 8 points away from the left edge of the map view.
-
Select the label.
-
Use the Add New Constraints menu to position the label 8 points away from the left edge of the map view.
All of our UI elements are correctly constrained now, and we can start to use them:
-
Select the map view and open the Attributes inspector.
-
Change the map view type to Muted Standard.
This is a low-color but otherwise normal-looking street map. We are using this type simply because we don’t want a highly colored map detracting from our lovely selfies!
-
Untick all the Allows toggles on the map.
-
Untick all the Shows toggles on the map.
This means our map will be just that, a map. There won’t be any clutter overlaid on top of it.
-
Under the View section of the Attributes inspector, tick the Hidden property.
This means our map view will be hidden from the view by default—it will still be there for the purposes of the constraints system, and we can talk to it in the code, it just won’t be visible on the screen. We are working on the assumption that most people won’t be willing to save their location, so turning this off by default makes the most sense.
Now it is time to hook up the UI to our code so we can start configuring it:
-
Select the map view.
-
Open the assistant editor and ensure the SelfieDetailViewController.swift file is open.
-
Control-drag from the map view into the
SelfieDetailViewControllerclass. -
Release the drag and make a new outlet for the map view called
mapview.
We are now finished with the UI. You can close the assistant and open the SelfieDetailViewController.swift file in the main editor.
There will be an error on the new outlet we just created, because even though we correctly created the outlet we haven’t included the library that includes the MKMapView class. Let’s fix that now:
-
Import the
MapKitlibrary:importMapKitTip
MapKitis the library for showing, controlling, and manipulating maps. It is designed to work well with Core Location and has imported that framework internally, meaning we don’t have to bother doing so in this class (although we could if we so desired). The importer in Swift is quite clever and automatically knows whether animportstatement is redundant or not. Depending on your programming experience, you might be used to writing header guards to prevent including already imported files and modules; this is unnecessary in Swift. -
Add the following to the end of the
configureViewmethod:ifletposition=selfie.position{self.mapview.setCenter(position.location.coordinate,animated:false)mapview.isHidden=false}All we are doing here is a quick check to see if our selfie has a location. If it does, we set the center of the map to be the selfie’s location and set it to be visible.
With that done we can run the app once again, and if we select the selfie we created as part of our location testing we’ll see the map (Figure 9-1).

Figure 9-1. Our location test selfie, showing the map
Expanding the Map
While our map looks very nice up there in the corner, its lack of functionality doesn’t really make it worth leaving in the app—it’s time to make it do a bit more than just sit there. We are going to modify our map so that when the user taps it, it will launch the main Maps app of the device and put a pin on the map where the selfie was taken:
-
Open Main.storyboard and select the selfie detail view controller scene.
-
Inside the object library, search for a tap gesture recognizer.
-
Drag the recognizer from the library onto the map view.
Warning
It is very important that you don’t drag the recognizer onto anything other than the map view. Otherwise, the recognizer will respond to taps on whatever you added it to instead of the map.
A tap gesture recognizer is a special subclass of the more generic gesture recognizer class
UIGestureRecognizer. It is configured to respond to a single tap on aUIView, and we will be using it to determine when the user taps the map.Tip
The gesture recognizer class is highly configurable: it can be made to respond to different numbers of taps, swipes, multiple fingers, panning, and so on. If you need a complex interaction pattern and aren’t sure how to do it, take a look at the
UIGestureRecognizerclass. We are only scratching the surface of what it can do. -
Open the
SelfieDetailViewControllerinside the assistant editor. -
Control-drag from the tap gesture recognizer into the assistant.
-
Using the Connections inspector, create a new action called
expandMap.Tip
The easiest way to select the recognizer (or most UI elements) so you can drag from it to make a connection is via the document outline sidebar.
Now whenever the user taps on the map, the
expandMapfunction will be run, and in here we can write our code to open up the main Maps app. -
Implement the
expandMapfunction:@IBActionfuncexpandMap(_sender:Any){ifletcoordinate=self.selfie?.position?.location{letoptions=[MKLaunchOptionsMapCenterKey:NSValue(mkCoordinate:coordinate.coordinate),MKLaunchOptionsMapTypeKey:NSNumber(value:MKMapType.mutedStandard.rawValue)]letplacemark=MKPlacemark(coordinate:coordinate.coordinate,addressDictionary:nil)letitem=MKMapItem(placemark:placemark)item.name=selfie?.titleitem.openInMaps(launchOptions:options)}}Inside this method we are creating a dictionary of
[String:NSValue]with some configurations for how we want the map to launch. We give it a center and a type, much like what we did with our smaller map. The reason we need to wrap everything up as anNSValueis because the communication toMapKitand the Maps app is all handled by Objective-C, and it doesn’t understand some of the newer Swift features like enumerations; so, we bundle them all up asNSValues before passing them on.Tip
Unlike Swift, where types like
IntandBoolare valid objects, Objective-C draws a clear distinction between objects and scalar types. AnNSValueis sort of a catch-all container class for holding different types when a call expects only objects. The Cocoa developers needed a way for these nonobject types to be bundled so they can be treated as if they are objects, andNSValueis how they did it. This is a holdover from Objective-C, and as the APIs are modernized it will very likely go away.
Then we create a new placemark. This is a user-friendly description of a point on a map and is designed to be shown on a map as a pin. Finally, we create an item, which will be what is sent to the map. The item is configured to hold our placemark; we name it after our selfie, and then we tell the item to open itself in the Maps application.
If we run the app once more, select the test selfie that had a location, and tap the map, we will be taken out of Selfiegram and into the Maps app, where we now have a pin showing the location of our selfie as well as the selfie’s name! You can see this in action in Figure 9-2.

Figure 9-2. Our location test selfie, showing the map
Determining Locations
While it is good to know our code will handle locations correctly, it isn’t exactly very exciting without some actual locations to show. All we’ve been doing so far is using the location we generated manually as part of our tests. It is time to change that now. We are going to be adding in support for determining locations from the location hardware on the device, using the Core Location framework.
Configuring the App to Support Location
Before we can begin we need to make sure our app supports accessing the location hardware of the device. As the users’ location often will be something they want to keep private, Apple has made it so that we need to get explicit permission before we can access the location hardware. We’ll set up our project so that it has support for location in the app’s info.plist file:
-
Open info.plist and add a new row into the list of entries. You can do this in a variety of ways, but the easiest is to right-click in the empty space below the already existing entries and select Add Row from the menu that pops up.
-
In the Key column, enter “Privacy - Location When In Use Usage Description”.
-
Set the Type to String, if it isn’t already.
-
Set the Value to “We’ll use your location to add location info to your selfies”.
What this is doing is telling the app that we will be wanting to use the location hardware at some point. In particular, we are saying we want to use the location capabilities only when the app is in use. This is different than if we wanted to use the location in the background—there is a different key for that, as well as a key for when you need both. Now when we go to use the location capabilities of the device the message we put in the Value column will appear in an alert view requesting the user’s permission. As we chose to use the “when in use” key our app will only support generating locations when the app is currently being used; there is no way to make our app access locations when it’s put in the background.
Tip
It is a good general practice to only ask for the capabilities you truly need. It doesn’t make sense for a selfie app to know about the users’ location when they aren’t taking a selfie. We could have asked for permission to access locations in the background, but we don’t need that functionality. You should always treat your users with respect; they know when they want to take a selfie and as the developer that is the only time you should ask for their location.
This is all we need to do to tell our project that we want to use the location hardware—we still need to write a bunch of code to actually access it, but we are set up from a privacy and capability point of view. We are now ready to start writing some code.
Warning
If you are ever discovered to not be respecting users’ privacy, Apple may well pull your application from the App Store. Location is just one of many different areas that is considered private; others include the Contacts database, health data, and the microphone. You will have to ask the user’s permission before you can access any private areas. If you ever find yourself thinking “Hmm, how can I get around asking the user for this data?” stop and ask for permission—your app is never more important than your user’s right to privacy.
Talking to the Location Hardware
When it comes time to get a location from the location hardware on a device, there are a variety of different ways this can be done: you can do cellular tower triangulation, use a geo-table of WiFi hotspots, listen in to GPS satellites, wait for beacons to transmit, or a combination of all of these. Luckily for us as developers we don’t have to worry about the exact technique being used, as we will be using Core Location to handle all this for us. Core Location will handle the actual communication with the various location hardware and does so very cleverly. The framework will independently merge data sources and techniques together to return the best possible location match based on how you’ve configured it to do so.
To use Core Location you create a location manager to control how the framework works, such as how accurate it should be, and once it’s configured and told to start looking for locations the manager will handle it from there. Whenever the manager determines a new location, or encounters an error, it will tell its delegate about this happening, and the delegate will be responsible for dealing with this. In our case our SelfieListViewController will be the location manager delegate and we will be doing all our work inside there. We will create a manager, configure it to determine the location with a high degree of accuracy, and store this into a new optional property that will then be used when it comes time to create a new selfie. So, let’s do that now:
-
Open SelfieListViewController.swift.
-
Import the Core Location framework:
importCoreLocation -
Add a new optional property of type
CLLocationcalledlastLocation:// stores the last location that Core Location was able to determinevarlastLocation:CLLocation?This is the property where we will save the most recent location that Core Location has determined for us.
-
Add a new property to be the manager for Core Location:
letlocationManager=CLLocationManager() -
At the end of the
viewDidLoadmethod, setselfto be the delegate for the new location manager property and configure the desired accuracy:self.locationManager.delegate=selflocationManager.desiredAccuracy=kCLLocationAccuracyNearestTenMetersWe have chosen an accuracy of within 10 meters as our setting. We don’t need better accuracy for selfies—after all, people won’t be navigating using them—but it will be good enough that it won’t be confusing looking on a map. At this point you might get Xcode showing an error about how the class doesn’t conform correctly to the protocol—we’ll fix that next.
-
Create a new extension for the
SelfieListViewControllerto make it conform to theCLLocationManagerDelegateprotocol:extensionSelfieListViewController:CLLocationManagerDelegate{}To conform correctly to the protocol there are two methods we need to implement,
locationManager(didUpdateLocations locations:)andlocationManager(didFailWithError error:). The first will be called should the location manager determine a location, the second will be called if there is an error doing so. -
Implement the
locationManager(didUpdateLocations locations:)method:funclocationManager(_manager:CLLocationManager,didUpdateLocationslocations:[CLLocation]){self.lastLocation=locations.last}This is very straightforward. The method returns an array of locations, which may contain one or several items. We want the last location in the array, because the locations are sorted oldest to newest and we want our selfies to have only the freshest location.
Note
You might be wondering why you would get multiple locations back from the manager. This is because determining location is not an instantaneous event. There are a great number of different pieces that have to fall into place, and because of this the hardware might work out several locations almost all at once. Therefore, it makes sense to return all of these to you as the developer in case you might need them.
-
Implement the
locationManager(didFailWithError error:)method:funclocationManager(_manager:CLLocationManager,didFailWithErrorerror:Error){showError(message:error.localizedDescription)}Whenever we encounter an error, we are going to tell the user about that error. As location isn’t a core component of a selfie we don’t have to worry too much about doing anything advanced with our error handling; just throwing out an error message will be enough. If location is a bigger part of your app you might need to examine what went wrong and tell your location manager to try again.
Now that we are correctly conforming to the delegate protocol, we need to tell our location manager to start determining a location:
-
At the top of the
createNewSelfiemethod add the following:// Clear the last location, so that this next image doesn't// end up with an out-of-date locationlastLocation=nil// Handle our authorization statusswitchCLLocationManager.authorizationStatus(){case.denied,.restricted:// We either don't have permission, or the user is// not permitted to use location services at all.// Give up at this point.returncase.notDetermined:// We don't know if we have permission or not. Ask for it.locationManager.requestWhenInUseAuthorization()default:// We have permission; nothing to do herebreak}// Request a one-time location updatelocationManager.requestLocation()There is a fair bit going on here, so let’s break it down. First we are setting the
lastLocationproperty tonil—this is to prevent a new selfie being created with the location of an old one. Then we have aswitchstatement, switching overCLLocationManager.authorizationStatus, which will return an enum with the current authorization status of our app (indicating whether or not it can use the location hardware).The first two cases are for if the user has denied us access or if access is restricted for a different reason, such as the device being in parental mode. In either of these cases, we just give up. If the status is indeterminate, we ask for permission to access the location hardware. On the first launch this will cause an alert to pop up asking the user if he wishes to allow access. If neither of these cases are true, it means we have permission to use the location hardware.
Warning
If you fail to check for authorization and just try and use the location manager to get locations, it will not work. Always ask for the authorization status first!
Then we tell our location manager that we would like it to determine a single location by calling the
requestLocationmethod. This method will instantly return, but the delegate callback to say the manager has determined a location could take several seconds. We set this up now, before the image picker has been presented to the user, so that hopefully by the time the user has finished taking their selfie the location manager will have determined a location.Note
If you need more than just a single location there are method calls to make the location manager begin determining location (
startUpdatingLocation), and continue determining location until told to stop (stopUpdatingLocation). In our case a single location is good enough, so that is what we are using. -
Finally, add the following to the
newSelfieTakenmethod, after the creation of the selfie but before thedo-catchblock that attempts to save the selfie:ifletlocation=self.lastLocation{newSelfie.position=Selfie.Coordinate(location:location)}
In here we first check if we have a location, and if we do we turn it into a Coordinate and attach that to our new selfie. This will mean the location will be saved with our selfie and can be retrieved later by the code we wrote earlier.
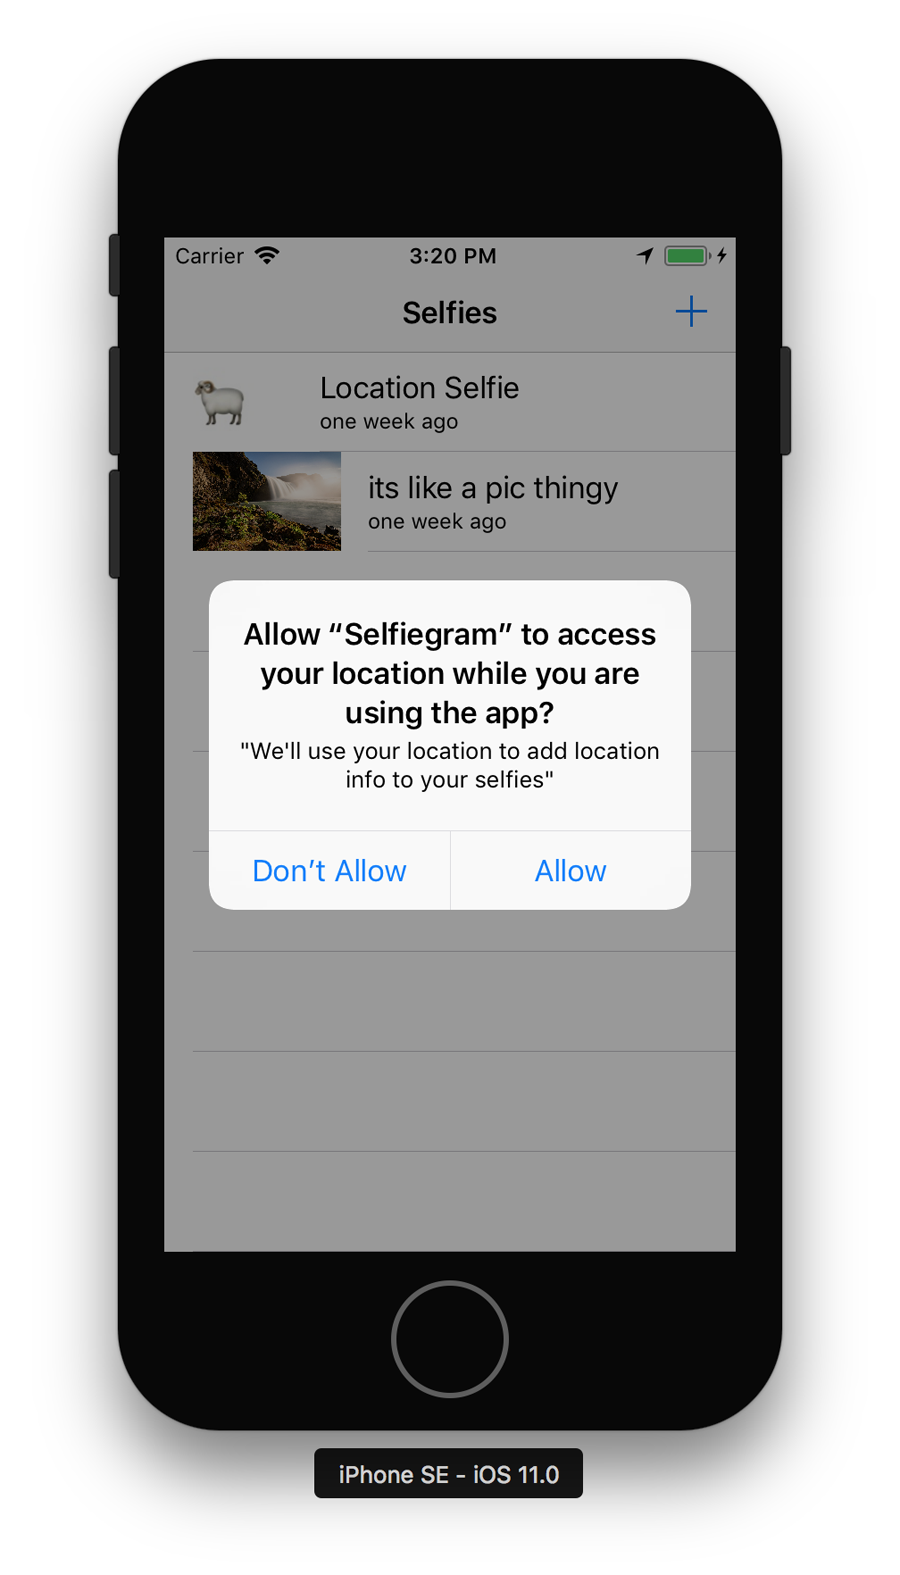
With that done we can run the app once again, and when we go to create a new selfie we will be asked if we want to allow location access (Figure 9-3). If we do allow it, that selfie will have a location stored with it that we can then view.