Chapter 13. Exploring JavaScript
JavaScript brings a dynamic functionality to your websites. Every time you see something pop up when you mouse over an item in the browser, or see new text, colors, or images appear on the page in front of your eyes, or grab an object on the page and drag it to a new location—all those things are done through JavaScript. It offers effects that are not otherwise possible, because it runs inside the browser and has direct access to all the elements in a web document.
JavaScript first appeared in the Netscape Navigator browser in 1995, coinciding with the addition of support for Java technology in the browser. Because of the initial incorrect impression that JavaScript was a spin-off of Java, there has been some long-term confusion over their relationship. However, the naming was just a marketing ploy to help the new scripting language benefit from the popularity of the Java programming language.
JavaScript gained new power when the HTML elements of the web page got a more formal, structured definition in what is called the Document Object Model, or DOM. The DOM makes it relatively easy to add a new paragraph or focus on a piece of text and change it.
Because both JavaScript and PHP support much of the structured programming syntax used by the C programming language, they look very similar to each other. They are both fairly high-level languages, too; for instance, they are weakly typed, so it’s easy to change a variable to a new type just by using it in a new context.
Now that you have learned PHP, you should find JavaScript even easier. And you’ll be glad you did, because it’s at the heart of the Web 2.0 Ajax technology that provides the fluid web frontends that (along with HTML5 features) savvy web users expect these days.
JavaScript and HTML Text
JavaScript is a client-side scripting language that runs entirely inside the web browser. To call it up, you place it between opening <script> and closing </script> HTML tags. A typical HTML 4.01 “Hello World” document using JavaScript might look like Example 13-1.
Example 13-1. “Hello World” displayed using JavaScript
<html>
  <head><title>Hello World</title></head>
  <body>
    <script type="text/javascript">
      document.write("Hello World")
    </script>
    <noscript>
      Your browser doesn't support or has disabled JavaScript
    </noscript>
  </body>
</html>
Note
You may have seen web pages that use the HTML tag <script language="javascript">, but that usage has now been deprecated. This example uses the more recent and preferred <script type="text/javascript">, or you can just use <script> on its own if you like.
Within the <script> tags is a single line of JavaScript code that uses its equivalent of the PHP echo or print commands, document.write. As you’d expect, it simply outputs the supplied string to the current document, where it is displayed.
You may also have noticed that, unlike with PHP, there is no trailing semicolon (;). This is because a newline serves the same purpose as a semicolon in JavaScript. However, if you wish to have more than one statement on a single line, you do need to place a semicolon after each command except the last one. Of course, if you wish, you can add a semicolon to the end of every statement, and your JavaScript will work fine.
The other thing to note in this example is the <noscript> and </noscript> pair of tags. These are used when you wish to offer alternative HTML to users whose browser does not support JavaScript or who have it disabled. Using these tags is up to you, as they are not required, but you really ought to use them because it’s usually not that difficult to provide static HTML alternatives to the operations you provide using JavaScript. However, the remaining examples in this book will omit <noscript> tags, because we’re focusing on what you can do with JavaScript, not what you can do without it.
When Example 13-1 is loaded, a web browser with JavaScript enabled will output the following (see Figure 13-1):
Hello World
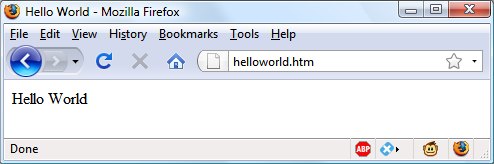
Figure 13-1. JavaScript, enabled and working
A browser with JavaScript disabled will display this message (see Figure 13-2):
Your browser doesn't support or has disabled JavaScript.
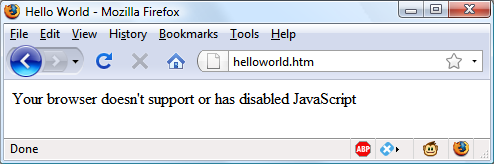
Figure 13-2. JavaScript has been disabled
Using Scripts Within a Document Head
In addition to placing a script within the body of a document, you can put it in the <head> section, which is the ideal place if you wish to execute a script when a page loads. If you place critical code and functions there, you can also ensure that they are ready to use immediately by any other script sections in the document that rely on them.
Another reason for placing a script in the document head is to enable JavaScript to write things such as meta tags into the <head> section, because the location of your script is the part of the document it writes to by default.
Older and Nonstandard Browsers
If you need to support browsers that do not offer scripting, you will need to use the HTML comment tags (<!-- and -->) to prevent them from encountering script code that they should not see. Example 13-2 shows how you add them to your script code.
Example 13-2. The “Hello World” example modified for non-JavaScript browsers
<html>
  <head><title>Hello World</title></head>
  <body>
    <script type="text/javascript"><!--
      document.write("Hello World")
    // --></script>
  </body>
</html>
Here an opening HTML comment tag (<!--) has been added directly after the opening <script> statement and a closing comment tag (// -->) directly before the script is closed with </script>.
The double forward slash (//) is used by JavaScript to indicate that the rest of the line is a comment. It is there so that browsers that do support JavaScript will ignore the following -->, but non-JavaScript browsers will ignore the preceding //, and act on the --> by closing the HTML comment.
Although the solution is a little convoluted, all you really need to remember is to use the two following lines to enclose your JavaScript when you wish to support very old or nonstandard browsers:
<script type="text/javascript"><!—
  (Your JavaScript goes here...)
// --></script>
However, the use of these comments is unnecessary for any browser released over the past several years.
Note
There are a couple of other scripting languages you should know about. These include Microsoft’s VBScript, which is based on the Visual Basic programming language, and Tcl, a rapid prototyping language. They are called up in a similar way to JavaScript, except they use types of text/vbscript and text/tcl, respectively. VBScript works only in Internet Explorer; use of it in other browsers requires a plug-in. Tcl always needs a plug-in. So both should be considered nonstandard, and neither is covered in this book.
Including JavaScript Files
In addition to writing JavaScript code directly in HTML documents, you can include files of JavaScript code either from your website or from anywhere on the Internet. The syntax for this is as follows:
<script type="text/javascript" src="script.js"></script>
Or, to pull a file in from the Internet, use this:
<script type="text/javascript" src="http://someserver.com/script.js">
</script>
As for the script files themselves, they must not include any <script> or </script> tags, because they are unnecessary: the browser already knows that a JavaScript file is being loaded. Putting them in the JavaScript files will cause an error.
Including script files is the preferred way for you to use third-party JavaScript files on your website.
Note
It is possible to leave out the type="text/javascript" parameters; all modern browsers default to assuming that the script contains JavaScript.
Debugging JavaScript Errors
When you’re learning JavaScript, it’s important to be able to track typing or other coding errors. Unlike PHP, which displays error messages in the browser, JavaScript handles error messages in a way that changes according to the browser used. Table 13-1 lists how to access JavaScript error messages in each of the five most commonly used browsers.
| Browser | How to access JavaScript error messages |
|---|---|
| Apple Safari | Safari does not have an Error Console enabled by default, but you can turn it on by selecting Safari→Preferences→Advanced→“Show Develop menu in menu bar.” However, you may prefer to use the Firebug Lite JavaScript module, which many people find easier to use. |
| Google Chrome | Click the menu icon that looks like a page with a corner turned; then select Developer→JavaScript Console. You can also use the shortcut Ctrl-Shift-J on a PC, or Command-Shift-J on a Mac. |
| Microsoft Internet Explorer | Select Tools→Internet Options→Advanced; then uncheck the Disable Script Debugging box and check the “Display a Notification about Every Script Error” box. |
| Mozilla Firefox | Select Tools→Error Console or use the shortcut Ctrl-Shift-J on a PC, or Command-Shift-J on a Mac. |
| Opera | Select Tools→Advanced→Error Console. |
Note
OS X users: Although I have shown you how to create an Error Console for JavaScript, you may prefer to use Google Chrome (for Intel OS X 10.5 or higher).
To try out whichever Error Console you are using, let’s create a script with a minor error. Example 13-3 is much the same as Example 13-1, but the final double quotation mark has been left off the end of the string "Hello World"—a common syntax error.
Example 13-3. A JavaScript “Hello World” script with an error
<html>
  <head><title>Hello World</title></head>
  <body>
    <script type="text/javascript">
      document.write("Hello World)
    </script>
  </body>
</html>
Type the example and save it as test.html; then call it up in your browser. It should succeed only in displaying the title, not anything in the main browser window. Now call up the Error Console in your browser, and you should see a message such as the one in Example 13-4. To the right there will be a link to the source, which, when clicked, shows the error line highlighted (but does not indicate the position at which the error was encountered).
Example 13-4. A Mozilla Firefox Error Console message
SyntaxError: unterminated string literal
In Microsoft Internet Explorer, the error message will look like Example 13-5, and there’s no helpful arrow, but you are given the line and position.
Example 13-5. A Microsoft Internet Explorer Error Console message
unterminated string constant
Google Chrome and Opera will give the message in Example 13-6. Again, you’ll be given the line error number but not the exact location.
Example 13-6. A Google Chrome/Opera Error Console message
Uncaught SyntaxError: Unexpected token ILLEGAL
And Apple Safari provides the message in Example 13-7, with a link to the source on the right stating the line number of the error. You can click the link to highlight the line, but it will not show where on the line the error occurred.
Example 13-7. An Opera Error Console message
SyntaxError: Unexpected EOF
If you find this support a little underwhelming, the Firebug plug-in for Firefox (and now Chrome too) at http://getfirebug.com is very popular among JavaScript developers and is definitely worth a look.
Note
If you will be typing the following code snippets to try them out, don’t forget to surround them with <script> and </script> tags.
Using Comments
Because of their shared inheritance from the C programming language, PHP and JavaScript have many similarities, one of which is commenting. First, there’s the single-line comment, like this:
// This is a comment
This style uses a pair of forward slash characters (//) to inform JavaScript that everything following is to be ignored. You also have multiline comments, like this:
/* This is a section
   of multiline comments
   that will not be
   interpreted */
Here you start a multiline comment with the sequence /* and end it with */. Just remember that you cannot nest multiline comments, so make sure that you don’t comment out large sections of code that already contain multiline comments.
Semicolons
Unlike PHP, JavaScript generally does not require semicolons if you have only one statement on a line. Therefore, the following is valid:
x += 10
However, when you wish to place more than one statement on a line, you must separate them with semicolons, like this:
x += 10; y -= 5; z = 0
You can normally leave the final semicolon off, because the newline terminates the final statement.
Warning
There are exceptions to the semicolon rule. If you write JavaScript bookmarklets, or end a statement with a variable or function reference, and the first character of the line below is a left parenthesis or bracket, you must remember to append a semicolon or the JavaScript will fail. So, when in doubt, use a semicolon.
Variables
No particular character identifies a variable in JavaScript as the dollar sign does in PHP. Instead, variables use the following naming rules:
-
A variable may include only the letters
a-z,A-Z,0-9, the$symbol, and the underscore (_). -
No other characters, such as spaces or punctuation, are allowed in a variable name.
-
The first character of a variable name can be only
a-z,A-Z,$, or_(no numbers). -
Names are case-sensitive.
Count,count, andCOUNTare all different variables. -
There is no set limit on variable name lengths.
And yes, you’re right that is a $ there in that list. It is allowed by JavaScript and may be the first character of a variable or function name. Although I don’t recommend keeping the $ symbols, it means that you can port a lot of PHP code more quickly to JavaScript that way.
String Variables
JavaScript string variables should be enclosed in either single or double quotation marks, like this:
greeting = "Hello there"
warning  = 'Be careful'
You may include a single quote within a double-quoted string or a double quote within a single-quoted string. But you must escape a quote of the same type by using the backslash character, like this:
greeting = "\"Hello there\" is a greeting"
warning  = '\'Be careful\' is a warning'
To read from a string variable, you can assign it to another one, like this:
newstring = oldstring
or you can use it in a function, like this:
status = "All systems are working"
document.write(status)
Arrays
JavaScript arrays are also very similar to those in PHP, in that an array can contain string or numeric data, as well as other arrays. To assign values to an array, use the following syntax (which in this case creates an array of strings):
toys = ['bat', 'ball', 'whistle', 'puzzle', 'doll']
To create a multidimensional array, nest smaller arrays within a larger one. So, to create a two-dimensional array containing the colors of a single face of a scrambled Rubik’s Cube (where the colors red, green, orange, yellow, blue, and white are represented by their capitalized initial letters), you could use the following code:
face =
[
  ['R', 'G', 'Y'],
  ['W', 'R', 'O'],
  ['Y', 'W', 'G']
]
The previous example has been formatted to make it obvious what is going on, but it could also be written like this:
face = [['R', 'G', 'Y'], ['W', 'R', 'O'], ['Y', 'W', 'G']]
or even like this:
top = ['R', 'G', 'Y']
mid = ['W', 'R', 'O']
bot = ['Y', 'W', 'G']

face = [top, mid, bot]
To access the element two down and three along in this matrix, you would use the following (because array elements start at position 0):
document.write(face[1][2])
This statement will output the letter O for orange.
Note
JavaScript arrays are powerful storage structures, so Chapter 15 discusses them in much greater depth.
Operators
Operators in JavaScript, as in PHP, can involve mathematics, changes to strings, and comparison and logical operations (and, or, etc.). JavaScript mathematical operators look a lot like plain arithmetic; for instance, the following statement outputs 15:
document.write(13 + 2)
The following sections teach you about the various operators.
Arithmetic Operators
Arithmetic operators are used to perform mathematics. You can use them for the main four operations (addition, subtraction, multiplication, and division) as well as to find the modulus (the remainder after a division) and to increment or decrement a value (see Table 13-2).
| Operator | Description | Example |
|---|---|---|
+ |
Addition | |
- |
Subtraction | |
* |
Multiplication | |
/ |
Division | |
% |
Modulus (division remainder) | |
++ |
Increment | |
-- |
Decrement | |
Assignment Operators
The assignment operators are used to assign values to variables. They start with the very simple =, and move on to +=, -=, and so on. The operator += adds the value on the right side to the variable on the left, instead of totally replacing the value on the left. Thus, if count starts with the value 6, the statement
count += 1
sets count to 7, just like the more familiar assignment statement:
count = count + 1
Table 13-3 lists the various assignment operators available.
| Operator | Example | Equivalent to |
|---|---|---|
= |
j |
j = 99 |
+= |
j |
j = j + 2 |
+= |
j += 'string' |
j = j + 'string' |
-= |
j |
j = j - 12 |
*= |
j |
j = j * 2 |
/= |
j |
j = j / 6 |
%= |
j |
j = j % 7 |
Comparison Operators
Comparison operators are generally used inside a construct such as an if statement, where you need to compare two items. For example, you may wish to know whether a variable you have been incrementing has reached a specific value, or whether another variable is less than a set value, and so on (see Table 13-4).
| Operator | Description | Example |
|---|---|---|
== |
Is equal to | j == 42 |
!= |
Is not equal to | j |
> |
Is greater than | j |
< |
Is less than | j |
>= |
Is greater than or equal to | j |
<= |
Is less than or equal to | j |
=== |
Is equal to (and of the same type) | j === 56 |
!== |
Is not equal to (and of the same type) | j |
Logical Operators
Unlike PHP, JavaScript’s logical operators do not include and and or equivalents to && and ||, and there is no xor operator (see Table 13-5).
| Operator | Description | Example |
|---|---|---|
&& |
And | j == 1 && k == 2 |
|| |
Or | j < 100 || j > 0 |
! |
Not | |
String Concatenation
JavaScript handles string concatenation slightly differently from PHP. Instead of the . (period) operator, it uses the plus sign (+), like this:
document.write("You have " + messages + " messages.")
Assuming that the variable messages is set to the value 3, the output from this line of code will be as follows:
You have 3 messages.
Just as you can add a value to a numeric variable with the += operator, you can also append one string to another the same way:
name =  "James"
name += " Dean"
Escaping Characters
Escape characters, which you’ve seen used to insert quotation marks in strings, can also insert various special characters such as tabs, newlines, and carriage returns. Here is an example using tabs to lay out a heading; it is included here merely to illustrate escapes, because in web pages, there are better ways to do layout:
heading = "Name\tAge\tLocation"
Table 13-6 details the escape characters available.
| Character | Meaning |
|---|---|
\b |
Backspace |
\f |
Form feed |
\n |
New line |
\r |
Carriage return |
\t |
Tab |
\' |
Single quote (or apostrophe) |
\" |
Double quote |
\\ |
Backslash |
\ |
An octal number between 000 and 377 that represents the Latin-1 character equivalent (such as \251 for the © symbol) |
\x |
A hexadecimal number between 00 and FF that represents the Latin-1 character equivalent (such as \xA9 for the © symbol) |
\u |
A hexadecimal number between 0000 and FFFF that represents the Unicode character equivalent (such as \u00A9 for the © symbol) |
Variable Typing
Like PHP, JavaScript is a very loosely typed language; the type of a variable is determined only when a value is assigned and can change as the variable appears in different contexts. Usually, you don’t have to worry about the type; JavaScript figures out what you want and just does it.
Take a look at Example 13-8, in which:
-
The variable
nis assigned the string value838102050, the next line prints out its value, and thetypeofoperator is used to look up the type. -
nis given the value returned when the numbers 12345 and 67890 are multiplied together. This value is also838102050, but it is a number, not a string. The type of variable is then looked up and displayed. -
Some text is appended to the number
nand the result is displayed.
Example 13-8. Setting a variable’s type by assignment
<script>
  n = '838102050'        // Set 'n' to a string
  document.write('n = ' + n + ', and is a ' + typeof n + '<br>')

  n = 12345 * 67890;     // Set 'n' to a number
  document.write('n = ' + n + ', and is a ' + typeof n + '<br>')

  n += ' plus some text' // Change 'n' from a number to a string
  document.write('n = ' + n + ', and is a ' + typeof n + '<br>')
</script>
The output from this script looks like this:
n = 838102050, and is a string
n = 838102050, and is a number
n = 838102050 plus some text, and is a string
If there is ever any doubt about the type of a variable, or you need to ensure that a variable has a particular type, you can force it to that type by using statements such as the following (which respectively turn a string into a number and a number into a string):
n = "123"
n *= 1    // Convert 'n' into a number

n = 123
n += ""   // Convert 'n' into a string
Or, of course, you can always look up a variable’s type by using the typeof operator.
Functions
As with PHP, JavaScript functions are used to separate out sections of code that perform a particular task. To create a function, declare it in the manner shown in Example 13-9.
Example 13-9. A simple function declaration
<script>
  function product(a, b)
  {
    return a*b
  }
</script>
This function takes the two parameters passed, multiplies them together, and returns the product.
Global Variables
Global variables are ones defined outside of any functions (or within functions, but defined without the var keyword). They can be defined in the following ways:
    a = 123               // Global scope
var b = 456               // Global scope
if (a == 123) var c = 789 // Global scope
Regardless of whether you are using the var keyword, as long as a variable is defined outside of a function, it is global in scope. This means that every part of a script can have access to it.
Local Variables
Parameters passed to a function automatically have local scope; that is, they can be referenced only from within that function. However, there is one exception. Arrays are passed to a function by reference, so if you modify any elements in an array parameter, the elements of the original array will be modified.
To define a local variable that has scope only within the current function, and has not been passed as a parameter, use the var keyword. Example 13-10 shows a function that creates one variable with global scope and two with local scope.
Example 13-10. A function creating variables with global and local scope
<script>
  function test()
  {
        a = 123               // Global scope
    var b = 456               // Local scope
    if (a == 123) var c = 789 // Local scope
  }
</script>
To test whether scope setting has worked in PHP, we can use the isset function. But in JavaScript there isn’t one, so Example 13-11 makes use of the typeof operator, which returns the string undefined when a variable is not defined.
Example 13-11. Checking the scope of the variables defined in function test
<script>
  test()

  if (typeof a != 'undefined') document.write('a = "' + a + '"<br>')
  if (typeof b != 'undefined') document.write('b = "' + b + '"<br>')
  if (typeof c != 'undefined') document.write('c = "' + c + '"<br>')

  function test()
  {
    a     = 123
    var b = 456

    if (a == 123) var c = 789
  }
</script>
The output from this script is the following single line:
a = "123"
This shows that only the variable a was given global scope, which is exactly what we would expect, since the variables b and c were given local scope by being prefaced with the var keyword.
If your browser issues a warning about b being undefined, the warning is correct but can be ignored.
The Document Object Model
The designers of JavaScript were very smart. Rather than just creating yet another scripting language (which would have still been a pretty good improvement at the time), they had the vision to build it around the Document Object Model, or DOM. This breaks down the parts of an HTML document into discrete objects, each with its own properties and methods and each subject to JavaScript’s control.
JavaScript separates objects, properties, and methods by using a period (one good reason why + is the string concatenation operator in JavaScript, rather than the period). For example, let’s consider a business card as an object we’ll call card. This object contains properties such as a name, address, phone number, and so on. In the syntax of JavaScript, these properties would look like this:
card.name
card.phone
card.address
Its methods are functions that retrieve, change, and otherwise act on the properties. For instance, to invoke a method that displays the properties of object card, you might use syntax such as this:
card.display()
Have a look at some of the earlier examples in this chapter and look at where the statement document.write is used. Now that you understand how JavaScript is based around objects, you will see that write is actually a method of the document object.
Within JavaScript, there is a hierarchy of parent and child objects, which is what is known as the Document Object Model (see Figure 13-3).
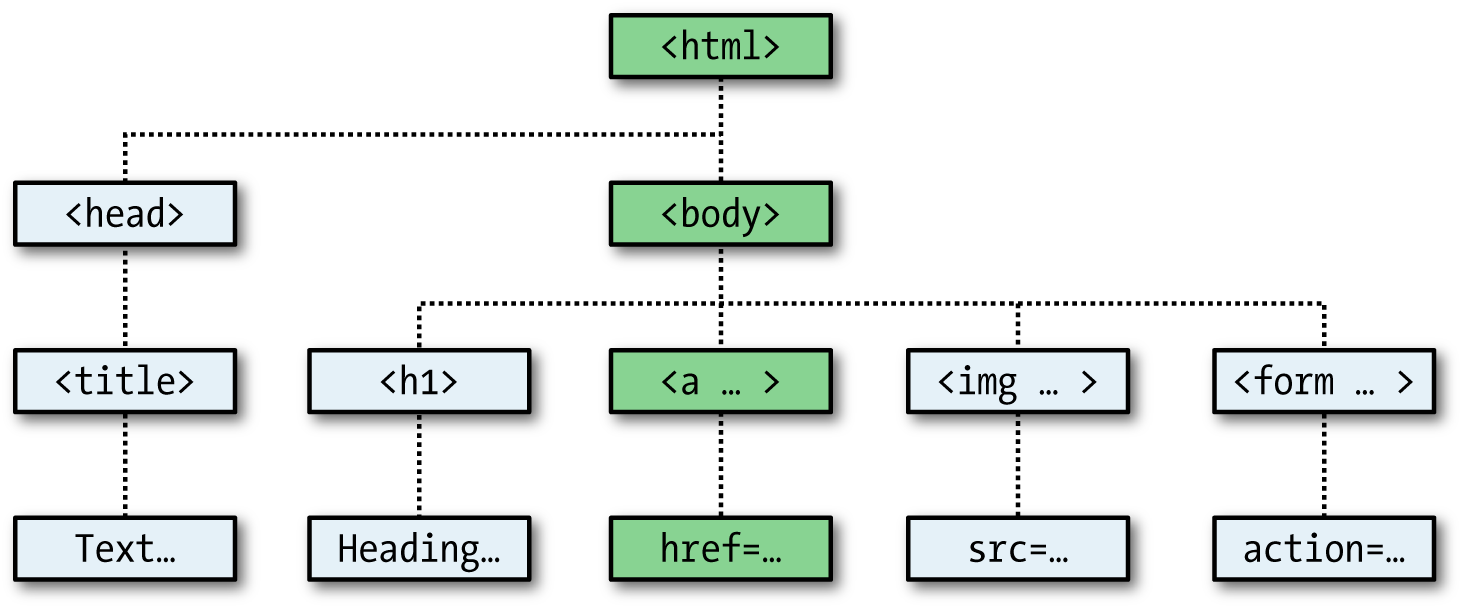
Figure 13-3. Example of DOM object hierarchy
The figure uses HTML tags that you are already familiar with to illustrate the parent/child relationship between the various objects in a document. For example, a URL within a link is part of the body of an HTML document. In JavaScript, it is referenced like this:
url = document.links.linkname.href
Notice how this follows the central column down. The first part, document, refers to the <html> and <body> tags; links.linkname to the <a> tag; and href to the href attribute.
Let’s turn this into some HTML and a script to read a link’s properties. Type Example 13-12 and save it as linktest.html; then call it up in your browser.
Note
If you are using Microsoft Internet Explorer as your main development browser, please just read through this section, then read the section entitled “But It’s Not That Simple”, and finally come back here and try the example with the getElementById modification discussed there. Without it, this example will not work for you.
Example 13-12. Reading a link URL with JavaScript
<html>
  <head>
    <title>Link Test</title>
  </head>
  <body>
    <a id="mylink" href="http://mysite.com">Click me</a><br>
    <script>
      url = document.links.mylink.href
      document.write('The URL is ' + url)
    </script>
  </body>
</html>
Note the short form of the <script> tags where I have omitted the parameter type="text/JavaScript" to save you some typing. If you wish, just for the purposes of testing this (and other examples), you could also omit everything outside of the <script> and </script> tags. The output from this example is as follows:
Click me
The URL is http://mysite.com
The second line of output comes from the document.write method. Notice how the code follows the document tree down from document to links to mylink (the id given to the link) to href (the URL destination value).
There is also a short form that works equally well, which starts with the value in the id attribute: mylink.href. So you can replace this:
url = document.links.mylink.href
with the following:
url = mylink.href
But It’s Not That Simple
If you tried Example 13-12 in Safari, Firefox, Opera, or Chrome, it will have worked just great. But in Internet Explorer it will fail, because Microsoft’s implementation of JavaScript, called JScript, has many subtle differences from the recognized standards. Welcome to the world of advanced web development!
So what can we do about this? Well, in this case, instead of using the links child object of the parent document object, which Internet Explorer balks at, you have to replace it with a method to fetch the element by its id. Therefore, the following line:
url = document.links.mylink.href
can be replaced with this one:
url = document.getElementById('mylink').href
And now the script will work in all major browsers. Incidentally, when you don’t have to look up the element by id, the short form that follows will still work in Internet Explorer, as well as the other browsers:
url = mylink.href
Another use for the $ symbol
As mentioned earlier, the $ symbol is allowed in JavaScript variable and function names. Because of this, you may sometimes encounter strange-looking code like this:
url = $('mylink').href
Some enterprising programmers have decided that the getElementById function is so prevalent in JavaScript that they have written a function to replace it called $, as with jQuery (although it uses the $ for much more than that—see Chapter 21), and shown in Example 13-13.
Example 13-13. A replacement function for the getElementById method
<script>
  function $(id)
  {
    return document.getElementById(id)
  }
</script>
Therefore, as long as you have included the $ function in your code, syntax such as this:
$('mylink').href
can replace code such as this:
document.getElementById('mylink').href
Using the DOM
The links object is actually an array of URLs, so the mylink URL in Example 13-12 can also be safely referred to on all browsers in the following way (because it’s the first, and only, link):
url = document.links[0].href
If you want to know how many links there are in an entire document, you can query the length property of the links object like this:
numlinks = document.links.length
You can therefore extract and display all links in a document like this:
for (j=0 ; j < document.links.length ; ++j)
  document.write(document.links[j].href + '<br>')
The length of something is a property of every array, and many objects as well. For example, the number of items in your browser’s web history can be queried like this:
document.write(history.length)
However, to stop websites from snooping on your browsing history, the history object stores only the number of sites in the array: you cannot read from or write to these values. But you can replace the current page with one from the history, if you know what position it has within the history. This can be very useful in cases in which you know that certain pages in the history came from your site, or you simply wish to send the browser back one or more pages, which you do with the go method of the history object. For example, to send the browser back three pages, issue the following command:
history.go(-3)
You can also use the following methods to move back or forward a page at a time:
history.back()
history.forward()
In a similar manner, you can replace the currently loaded URL with one of your choosing, like this:
document.location.href = 'http://google.com'
Of course, there’s a whole lot more to the DOM than reading and modifying links. As you progress through the following chapters on JavaScript, you’ll become quite familiar with the DOM and how to access it.
About document.write
When teaching programming it’s necessary to have a quick and easy way to display the results of expressions. In PHP (for example) there are the echo and print statements, which simply send text to the browser, so that’s easy. In JavaScript, though, there are the following alternatives.
Using console.log
The console.log function will output the result of any value or expression passed to it in the console of the current browser. This is a special mode with a frame or window separate to the browser window, and in which errors and other messages can be made to display. While great for experienced programmers, it is not ideal for beginners because calling up the console is different in all browsers, it works differently in all browsers, and the output is not near the web content in the browser.
Writing into Elements
It is possible to write directly into the text of an HTML element, which is a fairly elegant solution (and the best one for production websites), except that for this book every example would require such an element to be created, and some lines of JavaScript code to access it. This gets in the way of teaching the core of an example and would make the code look overly cumbersome and confusing.
Using document.write
The document.write function writes a value or expression at the current browser location, and is therefore the perfect choice for quickly displaying results, because it keeps all the examples short and sweet, by placing the output right there in the browser next to the web content and code.
You may, however, have have heard that this function is regarded as unsafe by some developers, because when you call it after a web page is fully loaded, it will overwrite the current document. While this is correct, it doesn’t apply to any of the examples in this book, because they all use document.write the way it was originally intended; as part of the page creation process, calling it only before the page has completed loading and displaying.
However, although I use document.write in this way for simple examples, I never use it in production code (except in the very rarest of circumstances, where it actually is necessary). Instead I almost always use the preceding option of writing directly into a specially prepared element, as per the more complex examples in Chapter 17 onward (which access the innerHTML property of elements for program output).
So please remember that where you see document.write being called in this book, it is there only to simplify an example, and I recommend that you also only use the function in the same way—for obtaining quick test results.
With that caveat explained, in the following chapter we’ll continue our exploration of JavaScript by looking at how to control program flow and write expressions.
Questions
- Which tags do you use to enclose JavaScript code?
- By default, to which part of a document will JavaScript code output?
- How can you include JavaScript code from another source in your documents?
- Which JavaScript function is the equivalent of
echoorprintin PHP? - How can you create a comment in JavaScript?
- What is the JavaScript string concatenation operator?
- Which keyword can you use within a JavaScript function to define a variable that has local scope?
- Give two cross-browser methods to display the URL assigned to the link with an
idofthislink. - Which two JavaScript commands will make the browser load the previous page in its history array?
- What JavaScript command would you use to replace the current document with the main page at the oreilly.com website?
See Chapter 13 Answers in Appendix A for the answers to these questions.