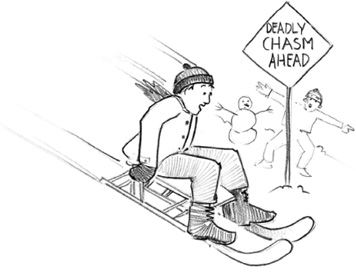

Luge is French for “bone-breaking device that scares the piste out of you.” Theoretically, it’s intended for the serpentine downhill courses you see in the Olympics. I can’t help you out with the spandex outfits, but this sled looks like those sleds if you squint.
The traditional way to build a wooden luge involves steaming the runner pieces to a beautiful curve. This is certainly doable and makes a beautiful form. But let’s just call this “the road not taken.” A hockey stick with the blade still attached works just fine, with one small adjustment. Most sticks have a slight corner at the heel that must be sawn or sanded off, forming a smooth curve from shaft to blade. Two sticks of the same model and length, one right-handed and one left, are ideal.

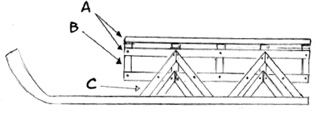
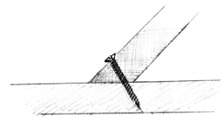
Ultimately, this luge will require a whole hockey team’s supply of busted sticks. Construction will be easiest if you begin with the sides. Cut two pieces (A) the length of the seat and five pieces (B) about 6" long for each side. (You will need 10 pieces the length of the seat, so you might as well cut them all at once.) Attach these (A and B) at the ends, the centre, and at 2/5 and 4/5 the length of the long piece. Pre-drill your holes using a bit for recessed screw heads so that, when the screws are fully screwed in, they are flush with the wood. Screw and glue the parts together, one screw per joint. Cut 5 pieces the width of the sled — about 14" — and attach them to the five vertical pieces of the sides. Now you have the framework to support the seat. To increase stability, cut two braces and attach them from the bottom of the centre piece of each side to the centre point of the seat supports. Use the longest possible screw as these braces take a lot of stress. Space the other six sticks evenly along the top of the seat and glue and screw them in, recessing the screw heads.

There is a reason why this bench you have just made is not attached directly to the runners: the sled would be too stiff. Give it some flexibility by attaching the runners with diagonal braces (C). It is important to cut these braces so they fit tightly and cleanly together. You will need 8 longer and 8 shorter pieces. Cut all the longer and all the shorter sticks identically, the same length and at the same angle. Attach these braces to the seat with screws, making sure that the bottoms line up to fit cleanly on the runners. The longer braces should be attached to the top and lower side sticks of the seat. Next, attach the runners to the diagonal braces. Pre-drill the screw holes and use the longest possible screws. You are now the proud owner of a luge.

This luge will perform in direct proportion to the care you use in making it, although it is not capable of withstanding jumps and “whumps.” A heavy application of candle wax on the runners will give a faster ride. This is not a deep snow luge; it’s for those icy, crusty hills of late winter. It will also do well being pulled by someone on skates. If you need a pull cord, attach it to the front of the seat, not to the runner blades. Of course, you could just use this luge as a coffee table that trips people up with its curious projections.