20 MINUTES
At this point in your studies, you have already worked with virtual environments. You have configured virtual local area networks (VLANs) to organize groups of physical ports on a switch logically, placing the machines connected to those ports into separate networks. You have also worked with virtual private networks (VPNs) to tunnel safely through the Internet, as if you were directly connected to a remote machine.
Now you’re going to go from using virtual environments to creating virtual machines! A major trend in desktops and servers is to use one physical computer, install a host operating system, and then deploy multiple virtual machines on top of the hosting OS to meet the needs of the users. The ultimate example of virtualization would be the modern data center, where thousands of servers are now hosted on just a few hundred physical machines.
There are various implementations of virtual hardware (desktops, servers, switches, and PBXes) offered by multiple vendors (VMware, Citrix, Microsoft, Oracle, and Parallels, to name a few). These virtualization technologies set up the environment so that you may install and run various operating systems on the same hardware platform simultaneously! Not only does this promote efficient use of hardware and energy resources, but virtualization also enables you to create images of the virtual machine easily, providing excellent fault tolerance and disaster recovery options.
No need to don your 3D glasses here; just work through the lab exercises in this chapter to develop your “virtual” understanding!
Virtualization takes on many aspects of the physical devices used every day in the computing environment. Organizations may choose to install multiple virtual servers on one physical machine to handle Web services, e-mail services, file sharing, and print services, to name a few.
In the lab exercises for this chapter, you will have the opportunity to install one of the most popular virtual machine technologies available today, but this is only one component of virtualization. Before you work with the actual virtualization programs and before you take the CompTIA Network+ certification exam, you will want to explore all of the technologies associated with virtualization. This lab exercise covers many different components of virtualization.
Time to explore!
At the completion of this lab, you will be able to
 Distinguish between different types of hypervisors
Distinguish between host and guest machines
Detail the characteristics of virtual switches
Describe the function of a virtual PBX
Detail key components and features of cloud computing
The materials you’ll need for this lab are
Internet access
The Mike Meyers’ CompTIA Network+ Guide to Managing and Troubleshooting Networks textbook
Pencil or pen
Paper
Before you begin your hands-on exploration of virtualization, it is important that you understand the underlying solutions that virtualization technologies provide. Maggie collects a list of virtual technologies, and asks you to use your textbook and the Internet to develop a brief description and summary of the characteristics of each of the technologies.
Step 1 Start by researching hypervisors. What are hypervisors? How are Type I hypervisors different than Type II hypervisors? What is a host operating system? What is a guest operating system? What’s the relationship between hypervisors and host and guest operating systems?

Step 2 Sometimes the terms desktop virtualization and virtual desktop infrastructure are lumped together. Read the articles at www.zdnet.com/article/desktop-virtualization-vs-virtual-desktop-infrastructure/ and http://searchitchannel.techtarget.com/feature/FAQ-Desktop-virtualization-and-virtual-desktop-infrastructure (or other articles related to these topics, if these are not available), and explain the differences between these terms.
Step 3 What is server virtualization? What is server migration, as related to virtualization?
Step 4 What is vSphere? What are the components of vSphere?
Step 5 What are the three general modes for a host OS to communicate with its guest OSs?
Step 6 What is a virtual switch?
Step 7 A trend that looks as if it will continue to grow is the migration to virtual PBXes. What are some of the features of virtual PBXes?
Step 8 When researching the virtualization technologies mentioned, you may have seen some reference to onsite versus offsite implementations. Dig a little deeper and discuss onsite vs. offsite virtual solutions.
Step 9 When you start talking about offsite virtual solutions, inevitably discussions turn to cloud computing. Briefly explain the following concepts: IaaS, PaaS, SaaS, and NaaS.
45 MINUTES
VMware is arguably the leader in large-scale, enterprise-wide virtualization. With scalable products from vSphere and ESXi, which are fully featured solutions for data centers and cloud providers, to VMware Player, which is free to individuals exploring virtual solutions for their personal PC, VMware offers solutions at every level.
To introduce you to VMware, you will download VMware Player and install it on a Windows 7/8/8.1 machine, and then you will run Ubuntu Linux in the virtual machine. Many training organizations have adopted virtualization to enable swift reconfiguration of systems for specific demonstrations or to implement complex lab exercises.
In this lab exercise, you will use VMware Player virtualization software to install a virtual Ubuntu machine on a Windows 7/8/8.1 PC. You will then explore a few of the Ubuntu programs and commands. At the end of this lab exercise, you will be able to
a. Install and configure VMware Player on a Windows 7/8/8.1 host OS
b. Install and run Ubuntu 14.04.1 LTS as a guest OS in VMware Player
The materials you’ll need for this lab are
A Windows 7/8/8.1 system connected to the Internet
Pencil or pen
Paper
CJ and Maggie would like you to take advantage of the Network Lab yet again. This time they want you to explore virtualization! The Network Lab offers an excellent environment to work through the idiosyncrasies of virtualization, to see how it works before deploying it on production systems.
Step 1 At the time of this writing, Ubuntu 14.04.1 LTS seems like a good choice for the Linux systems as it will be supported for almost five years, from July 2014 to April 2019. That’s what the LTS stands for, long-term support. Plus it’s a free Linux distribution. You can download the operating system at www.ubuntu.com. Go to https://wiki.ubuntu.com/Releases to see the past, present, and future of Ubuntu releases. Next go to www.ubuntu.com/download, and click Ubuntu Desktop. With the 64-bit version of Ubuntu 14.04.1 LTS selected, click Download. On the next screen, unless you want to donate, change all dollar values to 0, and click Download at the bottom of the screen. The image, ubuntu-14.04.1-desktop-amd64.iso, should download to your Downloads folder. Leave it there for now.
Step 2 Launch your browser and navigate to https://my.vmware.com/web/vmware/downloads. Scroll down to the Desktop & End-User Computing section and click the Download Product link to the right of VMware Player. Click the Download button next to VMware Player for Windows 64-bit, as shown in Figure 16-1.
FIGURE 16-1 The VMware Player download page on the VMware Web site
Step 3 Copy the file VMware-player-7.0.0-2305329.exe (current at the time of this writing) to the Windows 7/8/8.1 system that will host the virtual Ubuntu system (if other than the system you just used to download the installation program) and follow the instructions in substeps 2a through 2f:
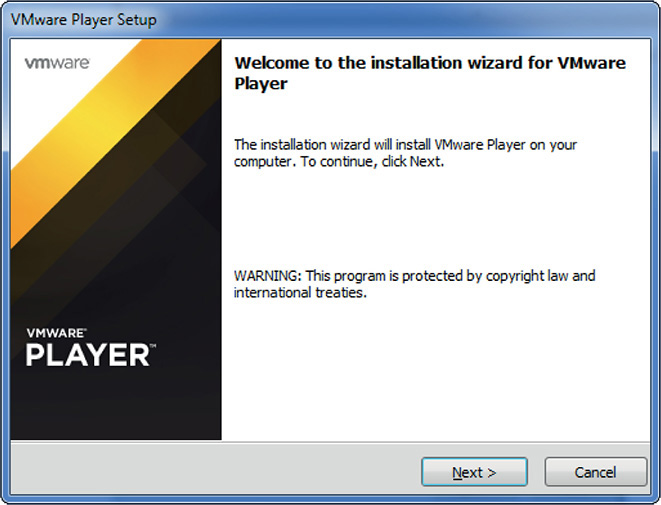
a. Double-click the file VMware-player-7.0.0-2305329.exe to launch the installation program. At the Welcome to the installation wizard for VMware Player screen, click Next (see Figure 16-2).
FIGURE 16-2 VMware Player welcome screen
b. Accept the VMWARE END USER LICENSE AGREEMENT, and click Next.
c. The next screen is the Destination Folder screen. Leave the default location, and click Next.
d. Leave the checks in the boxes on the Shortcuts screen, and click Next.
e. Now you will see the window Ready to Perform the Requested Operations. Click Continue to begin the process. VMware Player Setup will begin the installation.
f. Click Finish when the setup wizard completes.
Step 4 Perform the tasks in the following instructions to create a new virtual machine:
a. Double-click the VMware Player icon, enter a valid e-mail address, and then click Continue | Finish.
b. At the Welcome to VMware Player screen, click Create a New Virtual Machine. This will launch the New Virtual Machine Wizard (see Figure 16-3).
FIGURE 16-3 The VMware Player New Virtual Machine Wizard
c. Click Browse to locate and select the file you downloaded earlier. Click Next.
d. Next, set up a user name and password for the Ubuntu guest operating system. Enter the name Student in the dialog box. Then enter the user name student in lowercase and enter a password of your choosing. Click Next.
e. You will now name the virtual machine and choose the location for the virtual machine folder. You may use the defaults or change the name and location. Click Next.
f. Specify the disk capacity. The recommended size for Ubuntu is 20 GB; however, these systems will probably not go into production, so you may choose a smaller disk capacity. Leave the default setting for Split virtual disk into multiple files and click Next.
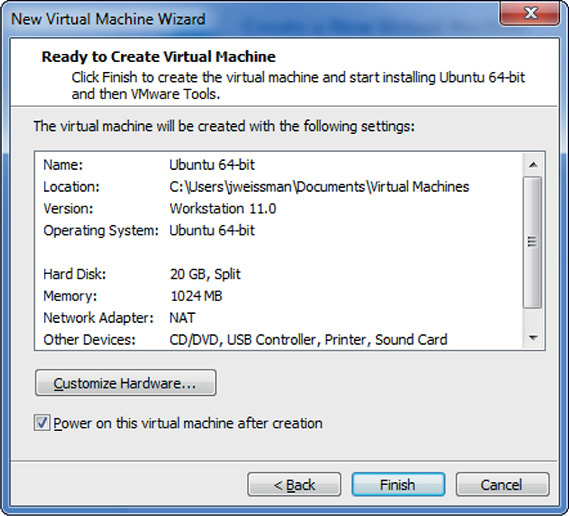
g. Now you are ready to create the virtual machine. Review the virtual machine settings as shown in Figure 16-4, keep the check in the box next to Power on this virtual machine after creation, and then click Finish to begin building the virtual machine.
FIGURE 16-4 VMware Player new virtual machine summary page
h. As the installation starts, click the Download and Install button in the Software Updates pop-up. VMware Tools for Linux – version 9.9.0 (current at the time of this writing) should install at the same time. VMware Tools is a suite of utilities that enhances the performance of the virtual machine’s guest operating system and improves management of the virtual machine. When the updates finish, click the Close button.
i. When the VMware Ubuntu virtual machine reboots, you will be prompted for your user name and password. After entering your information, you will have a fully functioning installation of Ubuntu as a guest operating system on top of the host operating system, Windows 7/8/8.1.
30 MINUTES
Thus far, you’ve heard a lot about terms like virtual switch and virtual adapter. You’ve heard about modes called host-only, NAT, and bridged. You’ve heard about different types of hypervisors.
Seeing is believing. Talking about host and guest machines is one thing. Sending traffic between them is something else! Understanding the traffic flow through Wireshark will make the function of hypervisors crystal clear.
Maggie is excited, because if you can understand and implement virtualization, ITCF can save lots of money in terms of hardware, power, and resources.
Let’s get started!
At the end of this lab, you will be able to
Understand the difference between a physical NIC and a virtual NIC
Understand the difference between bridged mode and NAT mode
Send traffic to and from the host and guest OSs
The materials you’ll need for this lab are
VMware running on the host machine, with Linux installed as the guest OS, from Lab Exercise 16.02
Pencil or pen
Paper
Open Network and Sharing Center and look at all of your interfaces. Besides your physical interfaces, you now have two new VMware Network Adapters. In Bridged mode (VMnet0), the host and guest OSs are on the same LAN, so no virtual adapter is needed on the host, since the physical NIC is on the same subnet as the guest OS. NAT mode (VMnet8) uses a virtual router between the host OS and the guest OS. However, your PC is already configured for a default gateway that doesn’t know about another virtual network behind VMware’s NAT router. Therefore, to allow the physical NIC on the host OS to communicate with the guest OS in NAT mode (VMnet8), a virtual NIC (Virtual Network Adapter VMnet8) is created for the host. This virtual adapter has an IP address on the subnet of the guest OS running in NAT mode, which allows the host OS to directly send traffic to the guest OS.
Host-Only mode (VMnet1), which allows the host and guest machines to talk with each other but not with other machines, uses the same concept of a virtual NIC on the host, Virtual Network Adapter VMnet1. If the host OS wants to communicate with the guest OS in Host-Only mode, the host machine uses the virtual NIC, because again, the default gateway of the host (on your router) does not know about the existence of this remote network (VMnet 1).
This lab helps you understand these differences, by observing traffic patterns in both Bridged and NAT modes.
Step 1 Log in to the guest OS, as explained at the end of Lab Exercise 16.02. From the VMware menu at the top, click Player | Manage | Virtual Machine Settings and make sure that the Network Adapter mode is set for NAT.
Step 2 Click the Search your computer and other sources button at the top left of the desktop, type Terminal in the Search your computer and other sources box, and then click the Terminal icon. Into the Linux BASH shell that opens, type ip a, and then press ENTER. You should see an IP address listed for the eth0 interface (see Figure 16-5).
FIGURE 16-5 Configuration for the eth0 interface
Step 3 Perform the following substeps:
a. Type sudo apt-get install wireshark.
b. Provide the password to the student account.
c. Type Y and press ENTER.
d. Type sudo wireshark and press ENTER.
e. Click OK and OK again in the boxes that pop up.
f. Start a capture on the eth0 interface.
g. In the filter box, enter the IP address of the Windows 7/8/8.1 host (Ethernet or wireless). If you’re not sure what it is, open a Windows command-line interface and type ipconfig.
Step 4 From the Linux box, ping your Windows Ethernet or wireless interface, by opening a second terminal (the first is inaccessible while Wireshark is running) and pinging the IP address of your Windows Ethernet or wireless interface. When the ping is successful, press CTRL-C to stop the pinging. Linux pings don’t stop automatically after the first four, like in Windows.
Notice the ICMP Echo Request and ICMP Echo Replies to and from the host and guest machines in your Wireshark capture.
Step 5 Now, from the Windows machine, open Wireshark and start a capture on your Ethernet or wireless interface (but not any of the virtual adapters). Ping the IP address of the Linux guest OS.
Why don’t you see anything related to the pings in Wireshark? What would you have to do to be able to sniff these pings?
Step 6 Change the Network Adapter settings from NAT mode to Bridged mode by clicking Player | Manage | Virtual Machine Settings | Network Adapter in VMware Player. Click the radio button next to Bridged, and check the box next to Replicate physical network connection state. Click the Configure Adapters button, and make sure that every check box is checked. Click OK | OK.
In a terminal, type ip a to see the new IP address assigned to the virtual machine.
From the Windows machine, start a capture, and filter by ICMP (icmp) or the new IP address of the virtual machine (ip.addr==VM’s IP address). Ping the IP address of the guest OS. Now you see the ICMPs! Why are they visible now?
1. Tamara is implementing VoIP for her company and plans on using a virtual PBX. What is a virtual PBX?
2. Charlie asks you if VMware has other products besides VMware Player. Using the Web site www.vmware.com, list all the different categories of products that VMware offers.
3. Oren is planning on upgrading one of his virtual installations of Ubuntu with a major, untested application suite. What steps would you recommend to minimize any problems if the application suite does not meet expectations?
Use the vocabulary terms from the list below to complete the sentences that follow.
ESXi
hypervisor
snapshot
virtual machine manager (VMM)
VirtualBox
VMware Player
1. The two terms typically used to describe virtualization software are _______________ and _______________.
2. VMware is one of the leaders in the virtualization software market. They offer a hypervisor, called _______________, that runs on top of the installed operating system.
3. VMware also offers a hypervisor, called _______________, that runs as a bare metal virtual machine.
4. When working with virtual machines, one of the convenient features is to be able to take a(n) _______________ to capture the current configuration of the machine.
5. _______________ is a full-featured, open-source virtualization software solution by Oracle.