You can open System Preferences in dozens of ways:
Jump directly to a System Preferences pane by pressing Option as you tap keys on the top row of your keyboard: Option-
 for Mission Control preferences, Option-volume key (
 ,
,  , or
, or  ) for Sound prefs, Option-brightness keys (
 or
or  ) or Option-keyboard-brightness key (
 or
or  ) for the Displays prefs. At that point, you can click Show All or press ⌘-L to see the full spread.
If you know the name of the System Preferences panel you want, it’s often quicker to use Spotlight. To open iCloud Photos, for example, hit ⌘-space, type iclo, and then press Return. See Chapter 3 for more on operating Spotlight from the keyboard.
If you put the System Preferences icon in your Dock (Chapter 4), you can open it and jump to a particular panel in one smooth move: Click-and-hold the System Preferences icon. You get a pop-up menu of every System Preferences panel.

Suppose, then, that by hook or by crook, you’ve figured out how to open System Preferences. At first, the rows of icons are grouped according to function, as shown in Figure 9-1, bottom. But you can also view them in tidy alphabetical order, as shown at top in Figure 9-1. That can spare you the ritual of hunting through various rows just to find a certain panel icon whose name you already know. (Quick, without looking: Which row is Date & Time in?) This chapter describes the various panels following this alphabetical arrangement.
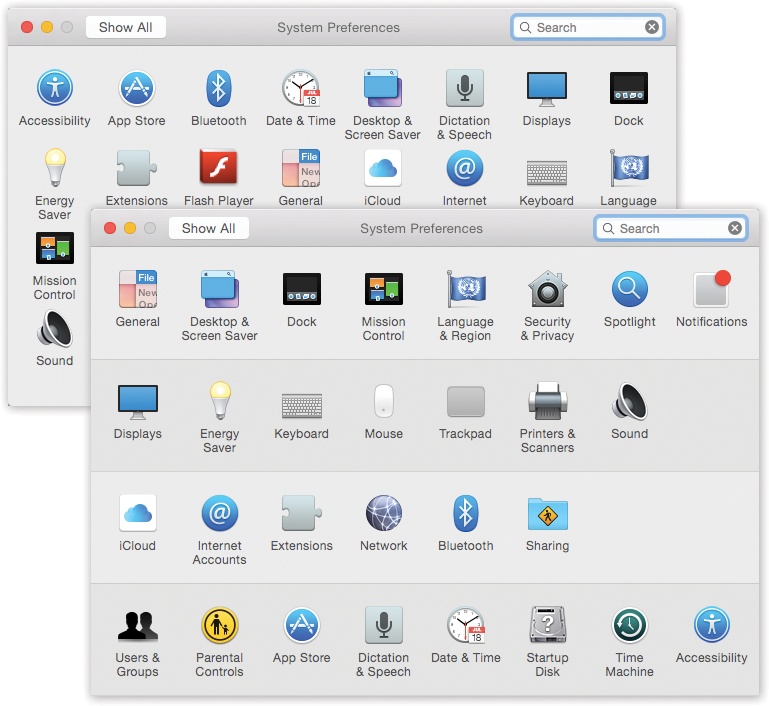
Figure 9-1. You can view System Preferences icons alphabetically (top), rather than in rows by function (bottom); just choose View→Organize Alphabetically. Non-Apple preference panes appear in a final row. Super-top-secret trick: If you choose Customize (from the View menu or, believe it or not, the Show All button), the icons here sprout checkboxes. You can turn off—and hide—the icons you never use. (You can still choose their names from the View menu.)
Either way, when you click one of the icons, the corresponding controls appear. To access a different preference pane, you have a number of options:
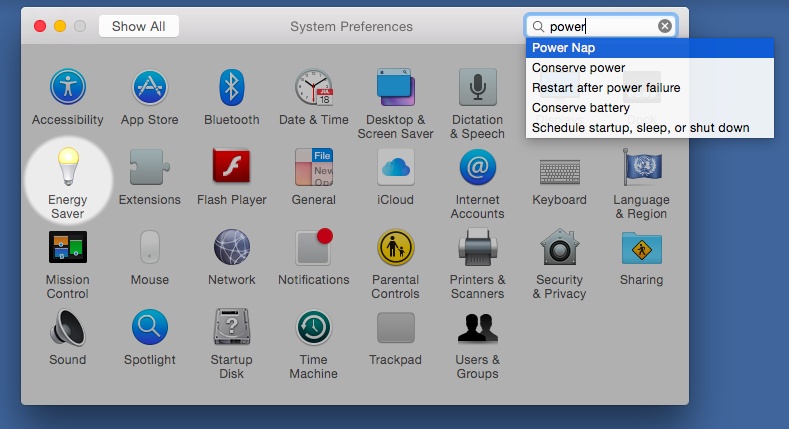
Fast: When System Preferences first opens, the insertion point is blinking in the System Preferences search box. (If the insertion point is not blinking there, then press ⌘-F.) Type a few letters of volume, resolution, wallpaper, wireless, or whatever feature you want to adjust. In a literal illustration of Spotlight’s name, the System Preferences window darkens except for the icons where you’ll find relevant controls (Figure 9-2). Click the name or icon of the one that looks the most promising.
Faster: Click the Show All icon in the upper-left corner of the window (or press ⌘-L, a shortcut worth learning). Then click the icon of the new panel you want.
Fastest: Choose any panel’s name from the View menu—or from the System Preferences Dock icon pop-up menu described above.
Here, then, is your grand tour of all 28 of the built-in System Preferences panes. (You may have a couple more if you’ve installed any non-Apple panes.)
Note
Don’t freak out: A few panels have been renamed in the last couple of versions of OS X and therefore appear in new alphabetical positions. The panel formerly called Appearance is now called General. The one formerly known as Accounts has been renamed Users & Groups. The panel once called Language & Text is now just Language & Region, and its functions (text shortcuts and keyboard layouts) have merged with Keyboard. Speech is now Dictation & Speech, and Universal Access is now Accessibility.