Chapter 4
Investigating Boost
IN THIS CHAPTER
 Considering what Boost can do for you
 Getting, installing, and building Boost
 Working with the various Boost tools
 Integrating and using the Boost documentation
 Creating your first application using Boost
As your skill with C++ improves, you find that you need additional functionality that doesn’t come with the Standard Library. For example, the simple act of checking a string for specific character sequences (such as a telephone number pattern) can prove difficult. You can do it, but most developers will think that someone else has certainly crossed this bridge before. The answer to the question of where to find the additional code you need is third-party libraries. One of the most popular C++ libraries is Boost, which is the topic of this chapter and the next.
Two book chapters can’t serve as a complete reference to an entire library — especially not a set of libraries the size of Boost. This particular chapter (Chapter 4) has a set of more limited goals. It introduces you to Boost and helps you understand why Boost may be helpful to your development efforts. It also shows you how to obtain and install Boost, demonstrates some Boost tools, and finally helps you create your first application using Boost. Chapter 5 picks up where this chapter leaves off and helps you use Boost to build some interesting applications. In short, these two chapters combined provide you with an overview of a library that you should consider spending more time discovering.
Considering the Standard Library Alternative
As a developer, you encounter a vast number of libraries designed to overcome C++ deficiencies or limitations. Boost is one of the most popular libraries, but you can find many others. Looking at the list found at https://en.cppreference.com/w/cpp/links/libs, you soon discover that you could easily find yourself buried in libraries. Some of these libraries provide resources for exotic programming needs, and you should peruse them before creating your own custom library, as discussed in the previous chapter of this minibook. However, this section essentially comes down to the question of whether to use the Boost library or to stick exclusively with the Standard Library, both of which support general needs.
Understanding why the Standard Library contains Boost features
Boost has maintained a high standard for using the latest C++ features over the years. You can find more than a few articles and discussions online covering Boost classes that moved to the Standard Library after testing. Unfortunately, it’s hard (or perhaps impossible) to find a complete listing. The discussion at https://stackoverflow.com/questions/8851670/which-boost-features-overlap-with-c11 is one of the most interesting because it shows that some Boost features are backported (an act of taking features from a newer version of a piece of software and adding them to an older version of the same software) from the Standard Library (rather than the other way around). Check out the site at https://caiorss.github.io/C-Cpp-Notes/boost-libraries.html as well, because it’s more complete than most sources. When thinking about these moves, C++ 11 uses these Boost features, among many others:
std::regexstd::tuplestd::function- Threading
- Smart pointers
- Vocabulary types:
std::variant,std::any, andstd::optional string_view- Searchers: Boyer Moore and Boyer Moore Horspool
std::filesystem- Special math functions
- Template enhancements
The main point here is that Boost is a proving ground, while the Standard Library tends to act as a repository for tested functionality. If your goal is to build stable applications that use tested techniques, Boost may not be the solution you’re looking for. However, when you need to implement the latest C++ features, you really need to use Boost.
Defining the trade-offs of using the Standard Library
As mentioned in the previous section, the Standard Library tends toward using stable techniques. You therefore don’t necessarily find the best solution to a problem in the Standard Library if C++ is deficient in an area at the outset. However, you need to consider the transitional phase of an application, where it can move from using Boost to the Standard Library. Consider these sites that provide insights from people who moved from using Boost to the Standard Library when the Standard Library received updates from Boost that made it a good solution:
- Bitcoin:
https://github.com/bitcoin/bitcoin/projects/3 - Tronic:
https://github.com/performous/performous/issues/39 - GoogleCodeExporter:
https://github.com/jbeder/yaml-cpp/issues/264
Many people also feel that Boost provides better productivity over the Standard Library. To a certain extent, this perception makes sense because Boost provides access to the latest C++ features in an easily used form. You don’t have to write new functions to use the latest C++ features; Boost provides them for you. Articles like the one at http://linuxcursor.com/open-source-gnu/01c-boost-libraries-can-increase-productivity supply additional reasons for the productivity boost, which include the use of strict code-writing guidelines.
You should consider the trade-offs no matter which library you choose to use. Despite the problems of using older functionality, potentially introducing errors into your code by transitioning, and a drop in productivity, the essential reasons to use the Standard Library in place of Boost are the following:
- The Standard Library is part of the compiler, so it’s easy to access and is guaranteed to work.
- The standards committee approves the Standard Library, so you can be sure that compatibility is stronger.
- The concepts and techniques in the Standard Library are time tested, so you know that what you’re using is less likely to break over time.
- Boost developers are part of the Standard Library effort as well, so you can be sure that they’ve had time to work out kinks in Boost that won’t appear in the Standard Library.
Understanding Boost
One of the best things about Boost is that the library itself is free. The Boost website, https://www.boost.org/, makes a point of letting developers know that they won’t pay anything for using Boost, even in a commercial setting. In addition, Boost doesn’t have any expenses, so you probably won’t ever need to pay for it. You need to download Boost 1.73 (the version used for this book) from the https://www.boost.org/users/history/version_1_73_0.html site before proceeding with the rest of this chapter (you see installation instructions later in the chapter after the explanation of Boost features). You should probably read the associated Getting Started guide (the index page is at https://www.boost.org/doc/libs/1_73_0/more/getting_started/index.html) so that you know how to perform the installation for your platform. A number of people and organizations contribute to Boost. You can check out their pictures at https://www.boost.org/users/people.html.
Boost features
You might think that Boost couldn’t really be all that complete if you can get it for free. Actually, Boost includes a significant number of features — far more features than the average developer will use in writing typical applications. It’s interesting to note that you probably have an application on your system that relies on Boost: Adobe Acrobat. That’s right; major applications do rely on Boost because it’s a feature-rich application development library. In fact, you can see entire lists of applications you know and use at https://www.boost.org/users/uses.html (simply choose one of the categories, such as Shrink Wrapped Boost, to see the applications in that category).
The current version of Boost contains in excess of a hundred libraries in categories that meet an incredible number of needs (new libraries are added all the time). You can see a list of these libraries at https://www.boost.org/doc/libs/1_73_0/. In some cases, you’ll need only Boost to meet all your development needs. Because these libraries meet specific conformity requirements, you never find yourself calling a function one way with one library and another way when using a different library.
Licensing
The Boost license is friendly to individual users, consultants, and organizations. Even if you work in an enterprise environment, you can use Boost for free. The developers behind Boost are concerned enough about legal matters that they continue working on the license so that usage requirements are easy to understand. You can find a copy of the current license at https://www.boost.org/users/license.html.
Paid support
When working with Boost, you gain access to the source code and community support. For some organizations, the lack of a formal support mechanism is a problem. Fortunately, you can also get paid support from BoostPro Computing (https://github.com/boostpro). Most important, BoostPro Computing offers formal training in using Boost, which means that your organization can get up to speed quickly. You can find additional companies that provide Boost support at https://www.boost.org/community/.
Obtaining and Installing Boost for Code::Blocks
Before you can use Boost, you need to download it. The examples in this chapter rely on version 1.73.0 of the library, which you can obtain at https://www.boost.org/users/history/version_1_73_0.html. You get the entire Boost library in a single 173MB download (when obtained in .zip format). There are downloads for Windows and Unix (which you can use for both Mac and Linux development).
The Boost documentation appears at https://www.boost.org/doc/libs/1_73_0/. You can download the documentation as a .pdf from https://sourceforge.net/projects/boost/files/boost-docs/, but this source is outdated with 1.56.0 as the latest version.
You can download binaries for Windows systems if you want the library prebuilt from https://sourceforge.net/projects/boost/files/boost-binaries/. Unfortunately, the 1.73.0 binaries work only with Microsoft Visual C++. Code::Blocks developers will need to compile their own version of the product, which is actually the best way to go for everyone because you avoid compatibility issues that way.
Unpacking Boost
The first step in gaining access to Boost is to unpack the Boost 1.73.0 library file (boost_1_73_0.zip) that you downloaded earlier. The unzipped files add up to around 613MB, so it can take a while for the library to unpack. When working with Code::Blocks, you want to unpack this library into the \CodeBlocks\boost_1_73_0\ folder for ease of access. The documentation often refers to the boost_1_73_0\ folder as the Boost root directory, or $BOOST_ROOT. When you unpack the Zip file, you see the following folders (some of the folders, such as lib\, will be empty):
- boost\: Contains all the Boost header files.
- doc\: Provides a subset of the Boost documentation. If you want complete documentation, you must either download the separate Boost Docs file or use the website directly.
- lib\: Contains all the Boost precompiled libraries after you build them. This folder won’t contain any files (or may not even exist) when you unpack the Boost library.
- libs\: Provides a root folder for all the Boost library headers. Here is a small sampling of a few of them:
- libs\accumulators\: Contains a library of incremental statistical computation functions. In addition, you use this library for general incremental calculations.
- libs\algorithm\: Contains algorithms that build on the string functionality found in the Standard Library. These algorithms provide functionality such as trimming, case conversion, predicates, and find/replace functions. You also find a min/max library that lets you determine the minimum and maximum of an expression in a single call (among other things).
- libs\any\: Contains a library that helps you interact with variables in a manner reminiscent of scripting languages. You don’t need this capability all the time, but it’s handy when you want to do things such as convert between an
intandstringusing a simplelexical_cast. - libs\array\: Provides an extension to basic
arrayfunctionality so that you get some of the advantages of using avectorwithout the performance hit that using avectorcan introduce. - libs\more libraries: Boost contains more than a hundred libraries. You’ll want to check them all out.
- more\: Holds policy and other important documents. The most important document at the outset is
getting_started.html, which provides essential information for getting started using Boost. Theindex.htmfile provides access to basic information about Boost, such as the licensing policy. - status\: Provides access to a Boost-wide test suite. Generally, you won’t need the contents of this folder unless you plan to augment the Boost libraries in some way.
- tools\: Contains a wealth of tools you use when working with Boost. Much of this chapter tells you about these tools. You must build the tools before you can use them. Each folder contains complete instructions, but you can also find an example of building the tools later in this section.
Using the header-only libraries
No matter which platform you work with, the header-only libraries are ready for use immediately after you unpack Boost. These libraries appear in the boost_1_73_0\boost\ directory. Each library is contained in a separate subdirectory, and you access the library through its header file. Boost 1.73.0 supports 146 different header-only libraries that address all sorts of issues, such as incremental statistical computation. (That particular area is covered by the accumulators library, which is found in the accumulators\ subdirectory.)
- doc: The documentation for understanding and using the library. Access the documentation for an individual library by opening the
index.htmfile in its subdirectory. Access the documentation for Boost as a whole by opening thelibraries.htm(orindex.html) file found in theboost_1_73_0\libs\directory. - example: A somewhat simple application that demonstrates how to use the library. (The example is designed to show both usage and functionality, so some complex libraries have larger examples to demonstrate them.) Some libraries include multiple examples to fully demonstrate the library’s functionality.
- test: A test suite that you can use to ensure that any changes you make to Boost won’t break the library or cause undesirable side effects.
Depending on the needs of the library, you may find additional subdirectories that contain other information or resources, such as tools. Some of the libraries require additional processing before you can use them. The next section of the chapter describes the building process so that you have a complete Boost installation. Make absolutely certain that you build the libraries before you proceed.
Building the libraries
The Boost library relies on code in headers. Using this approach means that if you include the header in your code, you already have everything you need to use the Boost library. However, these few Boost libraries, including these common libraries, require separate compilation:
- Boost.Chrono
- Boost.Context
- Boost.Filesystem
- Boost.GraphParallel
- Boost.IOStreams
- Boost.Locale
- Boost.MPI
- Boost.ProgramOptions
- Boost.Python (See the Boost.Python build documentation before building and installing it.)
- Boost.Regex
- Boost.Serialization
- Boost.Signals
- Boost.System
- Boost.Thread
- Boost.Timer
- Boost.Wave
The following steps help you build the libraries and create a centralized store of Boost information for your applications. These steps assume that you’re using Code::Blocks as your IDE and that you’ve installed it using the instructions in Book 1, Chapter 1. You may need to modify the steps if you used some other installation process, rely on a different IDE, or work with certain 64-bit systems.
-
Open a command prompt or terminal window using the technique appropriate for your platform.
For example, when working with Windows, you choose Start ⇒ Programs ⇒ Accessories ⇒ Command Prompt. (Depending on your version of Windows, you may need to press the Windows key, type cmd, press Enter, and then select Command Prompt App from the list presented.) When working with a Mac, you navigate to the /Applications/Utilities window and double-lick Terminal. The method of opening a terminal window in Linux varies with the distribution you use.
-
Type
CD /CodeBlocks/boost_1_73_0and press Enter.The command processor takes you to the Boost directory.
-
(Optional) If you haven’t already created a path to the Code::Blocks compiler at the command line or terminal, create one.
For example, when working with Windows, type path = C:\CodeBlocks\MinGW\bin;%path% and press Enter.
-
Type bootstrap gcc and press Enter.
You see a message, Building Boost.Build engine, at the command prompt or terminal window for a few seconds. After the Boost.Build Engine is complete, you see additional text telling you how to use the resulting B2 command.
-
Type b2 and press Enter.
Go get a cup of coffee. The installation process takes between 5 and 20 minutes depending on your system. This command prompt installs Boost using the default options and in the default directory. For example, you find Boost installed in the
C:\Boostdirectory on a Windows system. It appears in the/usr/local/Boostdirectory on Mac and most Linux systems. When the process is complete, you find the new Boost folder complete with header and library files appropriate for your system.
Testing the installation
At this point, you have the unpacked Boost files as a subdirectory under your Code::Blocks installation and a set of built libraries in the Boost directory (wherever it might appear on your system). You may initially think that you can get rid of one or the other set of files, but this isn’t the case. The files you unpacked include documentation and example code that isn’t part of the built libraries. The following steps help you test your installation by building the Boost.Timer library, which relies on both sets of files, so having both sets in place is important. (You can modify these instructions to build other libraries as well.)
- Locate the
C:\CodeBlocks\boost_1_73_0\libs\regex\example\timerfolder on your system. -
Double-click the
regex_timer.cppfile.Code::Blocks automatically opens the file for you. If you attempt to compile the file at this point, Code::Blocks displays a considerable number of errors. The errors aren’t due to problems with the code, but with issues in the configuration. You need to configure Code::Blocks to work with this example.
-
Choose Settings ⇒ Compiler.
You see the Compiler Settings dialog box, shown in Figure 4-1. You need to perform three configuration tasks to make the example usable:
- Tell Code::Blocks where to find the Boost include (header) files.
- Tell Code::Blocks where to find the Boost library files.
- Configure Code::Blocks to add the required libraries to the application.
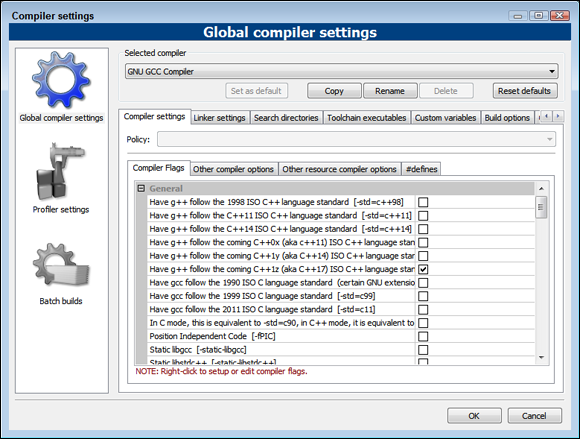
FIGURE 4-1: Use the Compiler Settings dialog box to configure Code::Blocks to use Boost.
-
Select the Search Directories tab.
You see three subtabs: Compiler, Linker, and Resource Compiler.
-
Click Add in the Compiler subtab.
You see an Add Directory dialog box like the one shown in Figure 4-2.
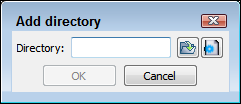
FIGURE 4-2: Add appropriate search directories for Boost header and library files.
-
Type the location of the Boost header files in the Directory field.
As an alternative, you can click the Browse button to use a Browse for Folder dialog box to find them. The files are normally located in the
C:\CodeBlocks\boost_1_73_0\boostfolder. -
Click OK.
You see the search folder added to the Compiler tab, as shown in Figure 4-3.
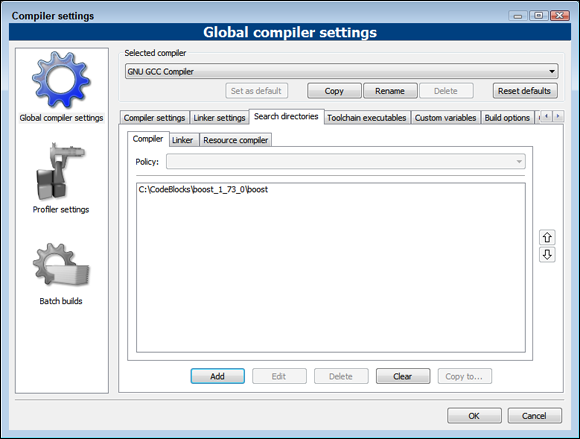
FIGURE 4-3: The Search Directories tab will display any compiler, linker, or resource compiler search locations.
-
Click Add in the Linker subtab.
You see the Add Directory dialog box (refer to Figure 4-2).
-
Type the location of the Boost library files in the Directory field and then click OK.
The Boost library files are typically located in the
C:\CodeBlocks\boost_1_73_0\libsdirectory. After you click OK, you see the directory added to the Linker tab. -
Select the Linker Settings tab.
This tab contains two lists — one for link libraries and another for linker options.
-
Click Add.
Code::Blocks displays the Add Library dialog box, shown in Figure 4-4. This example requires use of the
libboost_regex-mgw6-mt-d-x32-1_73.alibrary file.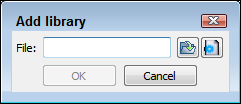
FIGURE 4-4: The example requires the use of a special library.
-
Click the Browse button, locate the library you need to use, and click Open.
The
libboost_regex-mgw6-mt-d-x32-1_73.alibrary is normally found in theC:\CodeBlocks\boost_1_73_0\bin.v2\libs\regex\build\gcc-6.2.0\debug\address-model-32\link-static\threading-multi\visibility-hidden\directory. -
Click OK.
You see the library file added to the Link Libraries list, as shown in Figure 4-5.
-
Click OK.
The Compiler Settings dialog box closes.
-
Build the application by choosing Build ⇒ Build.
The application should build without warnings or errors. If you see warnings or errors, ensure that you’ve added both header and library search paths, and the required library file.
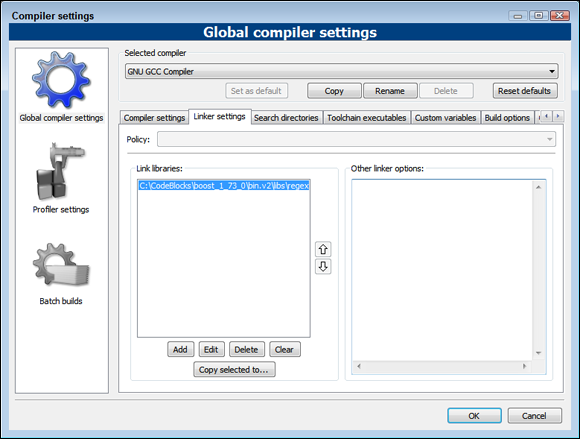
FIGURE 4-5: The needed file appears in the Link Libraries list.
At this point, you have a shiny new application to try. This is an example application that is provided as part of Boost that shows how to work with regular expressions. (It serves to test the development environment to ensure that everything works.) Now it’s time to see the application in action.
-
Click Run.
You see the example start. The example asks you to type an expression. A simple string works fine.
-
Type Hi when asked to enter an expression and press Enter.
The example asks you to provide a search string.
-
Type Hi there! and press Enter.
You see the results shown in Figure 4-6. The times may be different because they depend on the processing speed of your system and a number of other factors.
- Type quit and press Enter.
-
Type quit (a second time) and press Enter twice.
The application ends. At this point, you know you can create, build, and use Boost applications on your system. You can close Code::Blocks without saving anything.
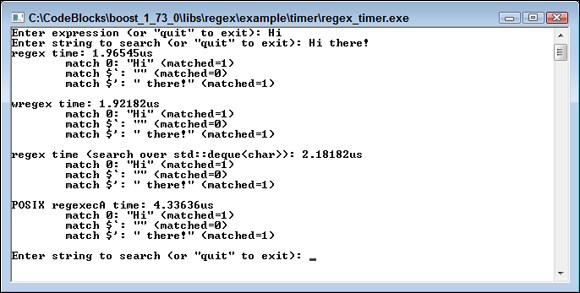
FIGURE 4-6: The example displays the result of the search.
Creating the Boost Tools
It’s always nice when a vendor provides tools for making it easier to work with a product, and Boost is no exception. You find these tools in the \boost_1_73_0\tools directory. The sections that follow this one describe a number of these tools in detail, but here is a quick list of the tools you get:
- Boost.Build: Helps you build applications that use Boost by automating some of the process from the command line. This product is actually an add-on for an updated version of Boost.Jam, which used to appear as a separate product.
- Inspect: Determines whether there are any errors in the Boost directory hierarchy. Errors in the directory hierarchy can cause the automatic Boost features to work incorrectly.
- BoostBook: Provides the developer with a fast and easy method for accessing the Boost documentation. It relies partially on DocBook (
https://docbook.org/), the eXtensible Stylesheet Language (XSL), and some Boost functionality. This tool is used by some Boost libraries. - bcp: Extracts subsets of Boost for use with your application. To perform this task, bcp also provides a method for determining which parts of Boost your code relies upon and it also makes it possible to print reports of Boost usage (including any required licensing information).
- QuickBook: Generates BoostBook XML files. This tool provides a WikiWiki (wiki) style documentation geared toward C++ documentation requirements. A wiki is a collection of hypertext documents. Wiki pages are collaborative and allow all users or registered users to change the content in these collections, which makes them different from a collection of static hypertext documents. It relies on simple rules and markup for providing output formatting.
- Wave: Preprocesses your C/C++ application code. You can use it with any compiler. The main purpose of the Wave preprocessor is to check the expansion of macros in your code as part of the debugging process. You can also use it as a preprocessor replacement if you don’t like how the preprocessor supplied with your compiler works.
- AutoIndex: Creates indexes for BoostBook and DocBook documents.
All these tools come in source code format as part of your Boost installation. They’re not ready for use when you unpack Boost. Of course, the lack of executable code makes sense considering the number of platforms that Boost supports. In order to use the tools, you must first build them.
The first task is to create a version of Boost.Build for your system. You use Boost.Build to build all the other tools. The following steps describe how to build Boost.Build:
-
Open a command prompt or terminal window using the technique appropriate for your platform.
For example, when working with Windows, you choose Start ⇒ Programs ⇒ Accessories ⇒ Command Prompt. When working with a Mac, you navigate to the /Applications/Utilities window and double-click Terminal. The method of opening a terminal window in Linux varies with the distribution you use.
-
Type CD \CodeBlocks\boost_1_73_0\tools\build and press Enter.
This is the Windows version of the command. For other platforms, you need to change directories to the directory that contains the Boost 1.73 tools. The command processor takes you to the Boost.Build directory.
-
(Optional) If you haven’t already created a path to the CodeBlocks compiler at the command line or terminal, create one.
For example, when working with Windows, type path = C:\CodeBlocks\MinGW\bin;%path% and press Enter.
-
Type bootstrap gcc and press Enter.
You see a message,
Building the B2 engine(along with a lot of other text), at the command prompt or terminal window for a few seconds. When the Boost.Build compilation is complete, you see additional text telling you how to use the resulting B2 command. -
Type b2 --prefix=DIR install and press Enter.
 You must replace the placeholder text DIR shown previously with the location you want to use to install Boost.Build. For example, if you have a Windows system and want to install Boost.Build in C:\Boost.Build, you type b2 --prefix=C:\Boost.Build install and press Enter.
 -
Add Boost.Build to the path using the command for your particular platform.
For example, when working with Windows, type path=C:\Boost.Build\bin;%path% and press Enter.
Now that you have an application to build the Boost tools, you can build the tools themselves. A number of the tools come with build directories or build files in their main directory. In those directories are the instructions required to create the tools. For example, look in the \CodeBlocks\boost_1_73_0\tools\auto_index\build directory and you see a Jamfile.v2 file. This is the file that contains the instructions for building the AutoIndex tool. Likewise, you find a Jamfile.v2 file in the \CodeBlocks\boost_1_73_0\tools\bcp folder. (The file is in the main directory, rather than a build directory in this case.). No matter where the Jamfile.v2 file is located, you use it to build the associated tool.
- Open a command prompt or terminal window using the technique appropriate for your platform.
-
Type
CD \CodeBlocks\boost_1_73_0\toolsand press Enter.The command processor takes you to the main tools directory.
-
(Optional) If you haven’t already created a path to the CodeBlocks compiler at the command line or terminal, create one.
For example, when working with Windows, type path = C:\CodeBlocks\MinGW\bin;%path% and press Enter.
-
(Optional) If you haven’t already created a path to Boost.Build at the command line or terminal, create one.
For example, when working with Windows, type path=C:\Boost.Build\bin;%path% and press Enter.
-
Type b2 and press Enter.
Be patient; the build process will take several minutes. The executable files for Inspect (
inspect.exe), bcp (bcp.exe), and QuickBook (quickbook.exe) will automatically appear in the\CodeBlocks\boost_1_73_0\dist\bindirectory on your system after the build process is complete. BoostBook content appears in the\CodeBlocks\boost_1_73_0\dist\share\boostbookdirectory.
Using Boost.Build
Boost.Build is a complex tool that helps you create fully functional applications that rely on Boost using your compiler, such as GCC. Boost.Build provides an automated command-line approach to performing tasks that some developers prefer, especially when performing repetitive tasks where the IDE simply gets in the way. You have already used Boost.Build several times in this chapter to build the Boost libraries, a specific version of Boost.Build for your compiler, as well as the Boost tools. The following sections provide some helpful hints and tips for working with Boost.Build.
Getting a successful build
Every time you use the b2 command at the command prompt or terminal window, you use Boost.Build. A few rules to remember when using Boost.Build are
- Ensure that you have a path set up to your compiler.
- Ensure that you have a path set up to Boost.Build.
- Use the --prefix option to place the output in a specific directory.
Creating your own example
It’s time to see Boost.Build at work. To do this, you create a folder on your system where you can place a .cpp file. The example for this section appears in the Hello folder of the downloadable source as hello.cpp. The code for this example is really simple. It outputs a message to the computer screen, as shown here:
#include <iostream>

using namespace std;

int main()
{
    cout << "Hello, I am your computer talking." << endl;
    return 0;
}
To use Boost.Build, you also need create a jamfile.v2 file, which is just another plain-text file that you can create using Notepad or another text editor. The resource at https://www.boost.org/doc/libs/1_33_1/doc/html/bbv2/advanced/jamfiles.html makes things look a bit complex, but for this example, it comes down to a single line of text:
exe Hello : hello.cpp ;
Notice the space between cpp and ;. You must include this space or the build process will fail. The error message isn’t very helpful either. It tells you that you’ve encountered an odd escape character and then the end of file. All that this file says is to create an executable named Hello from hello.cpp.
To perform the build, you open a command prompt in the folder you chose, type b2 --toolset=gcc, and press Enter. The output tells you what Boost.Build does:
…found 8 targets…
…updating 5 targets…
gcc.compile.c++ bin\gcc-6.2.0\debug\hello.o
gcc.link bin\gcc-6.2.0\debug\Hello.exe
…updated 5 targets…
The fourth line tells you the location of the file: bin\gcc-6.2.0\debug\. When you go to this directory, you can type Hello, press Enter, and see the expected output. You can do a lot more than this section tells you, but it provides you with a very basic idea of how Boost.Build works.
Using Inspect
Many organizations want to make changes to the Boost library to ensure that the library meets their needs or to augment the Boost library to meet a new requirement. Whenever you change something, there is a chance that the change will cause compatibility issues because it doesn’t meet the Boost library guidelines. In addition, a developer might introduce errors into the Boost library that others will find difficult to fix. The Inspect utility enables you to scan for potential Boost library errors after you make a change to it.
Start Inspect from the directory that you want to check. To make this process more efficient, make sure to set a path to the copy of Inspect that you built in the “Creating the Boost Tools” section of the chapter using the method appropriate for your platform. For example, when working with Windows, you type path = C:\CodeBlocks\boost_1_73_0\dist\bin;%path% and press Enter.
Inspect looks for errors in the current directory and all subdirectories. You can try it by checking the library files you find out how to build in the “Building the libraries” section, earlier in this chapter. These files usually appear in the \CodeBlocks\boost_1_73_0\boost directory. Normally, Inspect performs a complete check of the libraries. However, you can modify Inspect behavior using the following command-line switches to perform specific tests:
-license-copyright-crlf-end-link-path_name-tab-ascii-apple_macro-assert_macro-deprecated_macro-minmax-unnamed-version-stringversion_message
Inspect also provides a number of command-line switches that affect how it performs tests. The following list describes these command-line switches:
–cvs: Performs a check of only thecvsdirectory and ignores all other files.-
–text: Outputs the results in pure text format. This option is especially useful when you want to save the results to a text file for later analysis. Otherwise, Inspect formats the output as HTML. Figure 4-7 shows a typical report. Click the links to see details about a particular test, such as the licensed status of each file within a particular directory. Inspect outputs information to the default output device, which is normally the console (your display). Seeing HTML in text form on a display isn’t particularly helpful. Most platforms offer some type of redirection feature so that you can see the output to a file. For example, on a Windows system, you can type Inspect > MyReport.html and press Enter to output the results to a file named
 MyReport.html.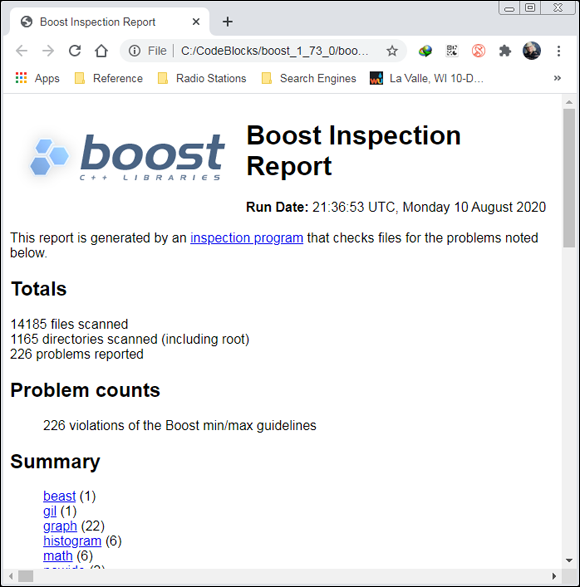
FIGURE 4-7: Inspect normally outputs its reports as HTML.
–brief: Reduces the amount of output text to the minimum required to indicate success or failure of the various tests.-version-stringversion_message: Reduces the amount of output text by locating entries with a specific version string (as defined byversion_message). What you’re normally looking for is the version string provided with the library, such as1_73_0for the 1.73.0 version.
Understanding BoostBook
The world abounds with documentation formats — everything from .docx files produced by Word to the seemingly ubiquitous .pdf file. Of all the documentation formats, the most universal and compatible is the lowly .txt file. However, .txt files lack formatting (except for control characters like tab, carriage return, and linefeed), which means that they limit you solely to words, which may not be enough to describe your documentation. Because you can choose from so many different file formats, and formatting code can prove especially difficult, the Boost library relies on a special document format called BoostBook.
If you have installed the Boost library using the instructions in the “Obtaining and Installing Boost for Code::Blocks” section of this chapter, you already have access to BoostBook. However, as with some other Boost utilities, you need to know a bit about Python to use this feature. In addition, you need an Apache server setup and must also download a number of other utilities. In short, even though BoostBook is accessible from a Boost library perspective, you still need to do some work to make this feature useful. The instructions at https://www.boost.org/doc/libs/1_73_0/doc/html/boostbook/getting/started.html describe the additional steps you need to perform.
BoostBook relies on XML to hold the content you want to place in the document. The use of XML is the reason you must install the DocBook eXtensible Stylesheet Language (XSL) (http://docbook.sourceforge.net/) and DocBook Document Type Definition (DTD) (http://www.oasis-open.org/docbook/xml/4.5/) support. You can see the XML used for BoostBook at https://www.boost.org/doc/libs/1_73_0/doc/html/boostbook/documenting.html. Check the main BoostBook page at https://www.boost.org/doc/libs/1_73_0/doc/html/boostbook.html for additional information.
If you performed the steps in the “Creating the Boost Tools” section of the chapter, you already have access to all the functionality needed to use BoostBook. The files you require appear in the CodeBlocks\boost_1_73_0\dist\share\boostbook directory of your system. These files help you perform the required formatting.
Using QuickBook
QuickBook is an add-on for BoostBook. This utility started as someone’s weekend project. Originally, QuickBook outputted simple HTML documents. However, now it outputs XML in BoostBook format so that you can quickly generate documentation that links with the rest of the documentation for your project. As described by the author at https://www.boost.org/doc/libs/1_73_0/doc/html/quickbook.html, QuickBook is a WikiWiki-style documentation tool. It’s important to note that some people simply call it a Wiki (https://en.wikipedia.org/wiki/Wiki) or Wiki-Wiki or even Wiki Wiki. All the terms mean the same thing.
Before you use QuickBook, you generate a documentation file. You can see an example of such a file at https://www.boost.org/doc/libs/1_73_0/tools/quickbook/doc/quickbook.qbk. For a complete syntax summary for QuickBook, look at https://www.boost.org/doc/libs/1_73_0/doc/html/quickbook/syntax.html.
At this point, you’re probably wondering why you should use QuickBook at all, because you have to generate a document file for it anyway. Here are the reasons why many developers use QuickBook instead of relying on BoostBook directly:
- The QuickBook syntax is easier to read and use than writing XML.
- You can use QuickBook to generate non-Boost documentation.
- It’s relatively easy to convert other documentation formats into QuickBook syntax.
QuickBook is a command-line utility. You find it in the \CodeBlocks\boost_1_73_0\dist\bin directory after generating the Boost tools. (See the “Creating the Boost Tools” section, earlier in this chapter, for details.) Here are the command-line switches you can access when working with QuickBook:
- --help: Displays a help message showing all the command-line switches, as well as the command-line syntax.
- --version: Displays version information about QuickBook.
- --no-pretty-print: Disables XML printing and uses plain text instead.
- --strict: Performs additional checks for issues such as sections that aren’t closed and square brackets that don’t match any tags or templates.
- --no-self-linked-headers: Generates plain headers, which makes creating the files easier but also prevents someone from right-clicking the header and copying a link to it.
- --indent arg: Defines the number of spaces to use for indents (as specified by arg).
- --linewidth arg: Defines the number of characters in a single line.
- --input-file arg: Specifies the name of the input file.
- --output-format arg: Allows the creation of boostbook, html, or onehtml output. The default is boostbook.
- --output-file arg: Specifies the name of the output file.
- --output-dir arg: Specifies the output directory path for html files.
- --no-output: Allows checking of the documentation syntax without outputting the boostbook, which saves time during debugging.
- --output-deps arg: Specifies the name of the output dependency file.
- --ms-errors: Specifies that QuickBook should use the Microsoft Visual Studio style of errors and warnings in the output message format. This option can make QuickBook easier for Microsoft Visual Studio developers to use and understand.
- --include-path arg: Adds the selected path to the include path. You may use this command-line switch multiple times to add multiple paths.
- --define arg: Defines a QuickBook macro. This feature is often used for conditional compilation.
- --image-location arg: Specifies the location of any image elements in order to read SVG details.
Using bcp
The bcp (Boost copy) utility helps you make Boost more manageable. You can use it to
- Copy one or more Boost modules to another location so that you can use a subset within an application.
- List all the elements within a module.
- Create an HTML report about module content that includes:
- License information
- Files without licensing information
- Files without copyright information
- Copyright information
- Dependency information for individual files
Theoretically, you can also use bcp to scan your application for a listing of elements needed to run the application. The output report includes all the information in a standard bcp report for a Boost module. You use one of four command-line syntaxes to work with bcp, as shown here:
bcp [options] module-list output-path
bcp --list [options] module-list
bcp --list-short [options] module-list
bcp --report [options] module-list html-file
Each of these command-line syntaxes performs a different task: copy, listing, short listing, and reporting. These command lines can accept a number of options, as described in the following list:
- --boost=path: Defines the path to the Boost library.
- --scan: Treats the modules as a non-Boost file for the purpose of scanning file dependencies. You always use this option with your own applications.
- --cvs: Copies only files under Concurrent Versions System (CVS) version control.
- --unix-lines: Uses Unix-style line endings for the output. You won’t ever use this command-line switch on a Windows system but may need it on Unix, Linux, and Macintosh systems.
- --namespace=name: Rename the Boost namespace and associated library names to the value specified by name.
- --namespace-alias: Makes the namespace
boostan alias of the namespace set with the--namespacecommand-line switch.
Using bcp is relatively straightforward. For example, if you want a listing of files for the regex library, change directories to \CodeBlocks\boost_1_73_0 and then use the following command line:
bcp --list regex > Out.txt
The bcp utility looks in the \CodeBlocks\boost_1_73_0 directory for Boost applications. In this case, the output appears in Out.txt. You should always use file redirection because the output is too large to read at the command prompt.
Say that you want a report about the regex module instead of a simple listing. In this case, you use the following command line:
bcp --report regex MyReport.html
Creating a report can take a while. Eventually, you see an HTML report like the one shown in Figure 4-8. You can discover more about bcp at https://www.boost.org/doc/libs/1_73_0/tools/bcp/doc/html/index.html.
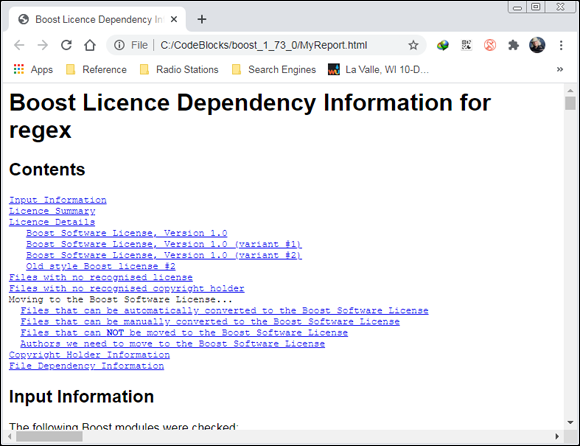
FIGURE 4-8: The bcp utility can output some nice-looking reports about Boost modules.
Using Wave
The Wave utility is a preprocessor for the Boost library. Using a preprocessor can significantly speed the compilation process because a preprocessor compiles the library portion of the application. After you compile it the first time, you need not compile the library again. Theoretically, you can use Wave with any C++ compiler; however, you probably won’t need it with compilers such as Code::Blocks and Microsoft Visual Studio because these products include their own preprocessor. You can find more information about the Wave utility at https://www.boost.org/doc/libs/1_73_0/libs/wave/doc/wave_driver.html.
There is more to the Wave utility than meets the eye, however. The Wave utility relies on the Wave library. This library ships as part of Boost, and you can use it in your applications as you do any other library. The website at https://www.boost.org/doc/libs/1_73_0/libs/wave/index.html tells you more about the Wave library.
Building Your First Boost Application Using Date Time
Enough information about licensing, content, and utilities — it’s time to use the Boost library for something interesting. This section shows a simple date/time example that you can’t easily build without using Boost. You also discover some interesting setup requirements that are good to know when you work with other third-party libraries.
As usual, this example begins with a console application. The example uses the name FirstBoost. After you create the new console application project following the steps you’ve used to create all the other console applications in the book, perform these setup steps:
-
Choose Project ⇒ Build Options and select the Search Directories tab.
You see the Project Build Options dialog box.
-
Highlight FirstBoost in the left pane. Click Add.
Code::Blocks displays the Add Directory dialog box, shown in Figure 4-9.
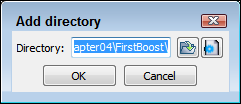
FIGURE 4-9: Select the Boost library directory.
-
Click the Browse button to display the Browse for Folder dialog box and highlight the
\CodeBlocks\boost_1_73_0folder on your hard drive. Click OK.A dialog box appears asking whether you want to maintain the entry as a relative path. Relative paths specify a location using the current location as a starting point. The alternative is an absolute path, which specifies a location based on the root directory of your hard drive. In most cases, absolute paths are less likely to get broken.
-
Click No.
Code::Blocks adds the folder you selected to the Add Directory dialog box.
-
Click OK.
You see the folder for the Boost library, as shown in Figure 4-10. (Your path could vary from the one shown in the screenshot, depending on the platform you use and how your copy of Boost was set up). Make sure you select the correct folder; otherwise, the compiler won’t be able to find the Boost library or the headers won’t compile correctly because they point to the wrong location on the hard drive.
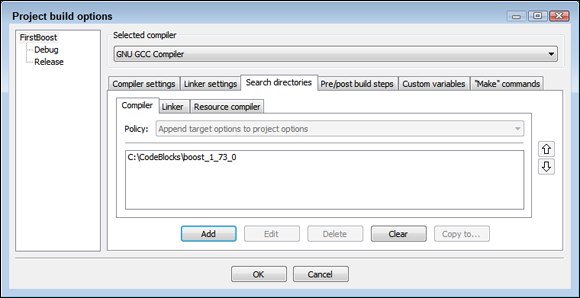
FIGURE 4-10: Make sure you set the environment to use Boost.
-
Click OK.
The application environment is ready to use with the Boost library.
Now that you have the environment configured, you can begin working with Boost. Listing 4-1 shows a date/time example that displays the current time and then a modified date/time.
LISTING 4-1: Using Boost to Create a Simple Date/Time Example
#include <iostream>
#include "boost/date_time/posix_time/posix_time.hpp"

using namespace std;
using namespace boost::posix_time;
using namespace boost::gregorian;

int main() {
  // Obtain the current date and time.
  ptime Now = second_clock::local_time();
  cout << Now << endl;

  // Get the date and adjust it for tomorrow.
  date TheDate = Now.date() + days(1);

  // Get the time and adjust for an hour from now.
  time_duration TheHour = Now.time_of_day() + hours(1);

  // Create a new date/time and output it.
  ptime NewDateTime = ptime(TheDate, TheHour);
  cout << NewDateTime << endl;
  return 0;
}
As with any other added capability, you must include the proper library files. Note that Boost headers use an .hpp extension, which makes it harder to confuse them with some other header type. To define what to include as the path to your library, simply look at the hierarchy in Windows Explorer. Locate the .hpp file you want to use and then copy that information from the Address bar.
The application code begins by creating a variable, Now, that contains the current time, which you obtain using the second_clock::local_time() method. It then displays the current time. The ptime class includes methods for interacting with every time element: years, months, days, hours, minutes, seconds, and so on. The example shows a few of the interactions you can perform. When you run this application, the second time you see is one day and one hour ahead of the current time.
 Older sites will tell you to build the Boost function using the